MIKET! I see you down there!
Howz the move going? :shrug:
Printable View
MIKET! I see you down there!
Howz the move going? :shrug:
Sorry, I should have noted that I was trying to get a better look at the scales raised surface to better see the images on it. Ended up with color changes/shifts trying to do that. I do it on Ebay stuff too. Just changing the contrast can make thing pop.Quote:
Originally Posted by jmercer
Oh No! Thanks for doing that! In actuality, the pics I posted have reflections from an overhead lamp which showed details.Quote:
Originally Posted by jmercer
Were it not for that, it would appear mostly black and would have not shared details of the molding.
You have helped me to decide where to go with it. It should be seen no matter the lighting!
I like things to look their best in person, JMO.
Very nice of you!
I think that was very cool of jmercer to help out with his Photoshop. :chapeau
Thanks...
'Molding' that's the word I was looking for. Har!
I do it with my wood handled brush make overs too. I don't see as well as I use too and use photos is PS to magnify and tweek.
Quote:
Originally Posted by jmercer
I've used photo's just for looking at almost worn away makers marks & such. A camera on a tripod & set for a time delay so it won't be shaking & take a few pics.
They come out a lot better than trying to see it at times. :shrug:
When I have to do this which is rarely, I will put it on my tripod & lean 2 of the legs against the table or countertop to get it to take a pic straight down at the tang or wherever the marks are.
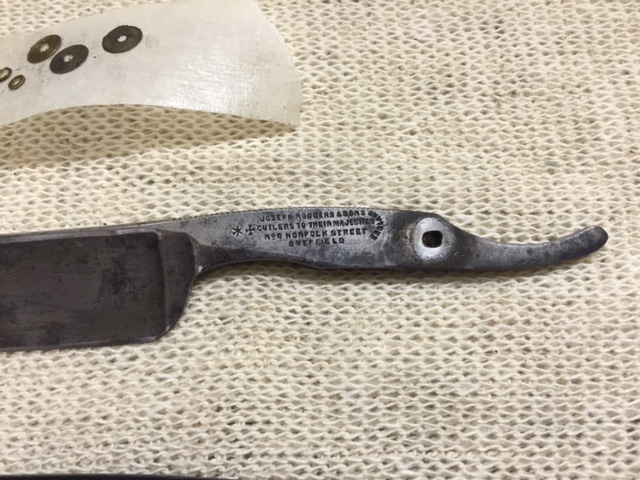
I've decided to re-pin the Joseph Rodgers with the original scales as opposed to making new scales.
Will be using some brass domed washers and hopefully will get the job done tonight.
Pictures will be forthcoming in due course.
Finally made the trip and it was the hardest move ever! The family is settlIng into house. I'm worn out, driving to the city tomorrow to fly to Texas and then ship out. No rest for the weary. LolQuote:
Originally Posted by sharptonn
Good thing is that I'll have internet on the ship and be able to view all the awesome posts you guys do, I'll be able to restore/customize vicariously through you guys until I get back in 7 weeks. Then I gotta go get the uhaul, load it up, drive it 2k miles, set up my workshop, and get back to the growing list of SR projects waiting for me. Easy. Lol
So... keep em coming! My sanity depends on it. :)
Well, hang in there, MikeT! :tu
You'll be okay MikeT. You've been down a rough road & made it back. We've all been down a rough road at some point but most of us make it back while others just give up. I know you will be back so don't fall off a rig & become a shark treat! We're counting on you...................
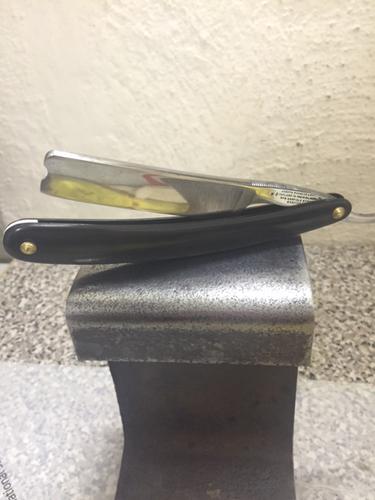
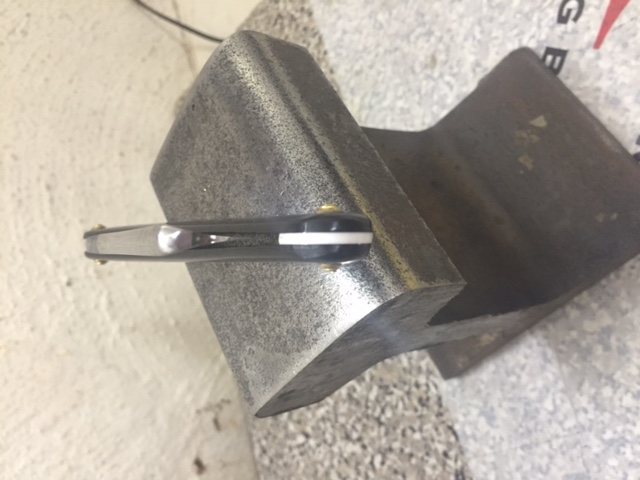
Re-pinned the JR earlier and it wasn't as hard as I thought it would be. I didn't rush things and managed to get the blade nice and tight and it centres perfectly in the scales. Now to get it honed.
So this is a before shot of the patina / tarnishing:
Attachment 241104
And this is the final pre-honing result:
Attachment 241107
Attachment 241108
Attachment 241109
Far from a 100% refurbishment as there are still a couple of darker patina/rust spots as well as some light sanding scratches but I'm happy with the result being a +- 100 year old razor.
Boy! That turned out nice, Tony! :nj
Darn tootin that's sharp lookin Tony.
Nice job.:tu
http://youtu.be/JxV1pqXUNsY
Mike T, be safe, Bon voyage, and remember, in about 6 weeks or so, Brokeback Mountain was not a love story, hehehe.
:tu
Thank you gentlemen!
Yep its gonna be nice to get out and work on the ocean again.
Mike B52 I haven't heard that song since I was a young sailor with a full head of hair and could sleep through the night without back pain and a trip to the head!
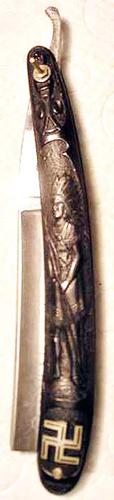
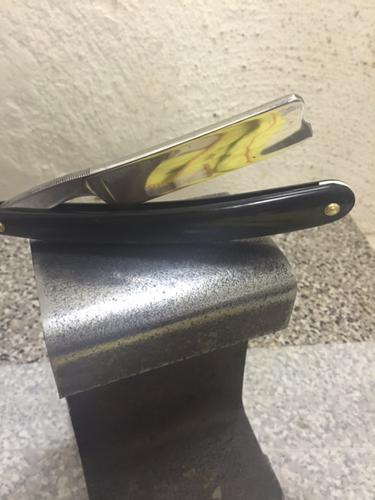
Finished-up my razor! Pretty fast for me, I suppose. I sorta feel badass.....Like outback! ;)
The blade cleaned-up nicely using gentle methods, some light, fine sanding on the tang and spine, a bit of light buffer.
Did the silver rubNbuff on the Indian and surrounding area and rubbed and polished it off 'til I liked it.
It got down in the details and seems to make them easier to see. I know someone had added the bottom pin as I am certain the bottom was glued as-made, so I stacked a few old silver collars on both sides on the pivot and pinned it up so it has a collarless look as the originals were. Added some thin brass spacers and, as-peening, it got nice and tight.
I never shaved with a Worcester before, but it seems a likely blade. Off to the hones!
Attachment 241131Attachment 241132Attachment 241133
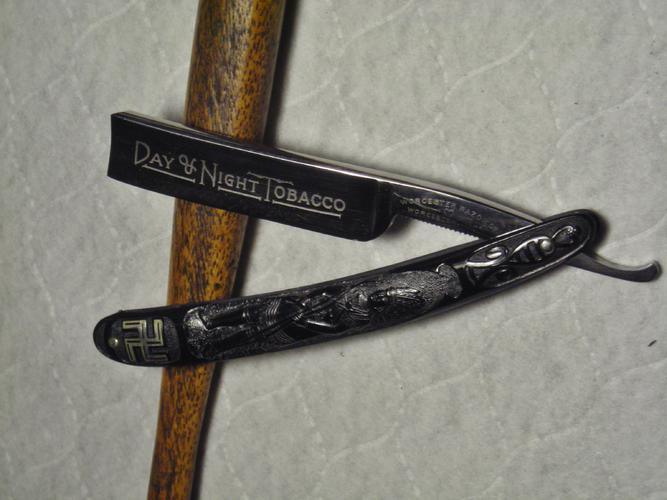
BTW, kept the blade etch nicely!
Attachment 241144
It will be cool to have this in my collection so I can explain to others about the 'good' swastika.
Lots do not know about it.
I just put this one together yesterday.Attachment 241136
Get us a shave test soon,,, nice looking razor.
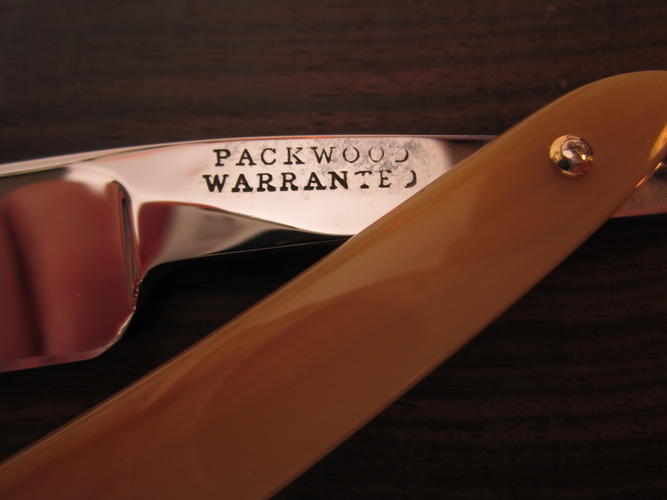
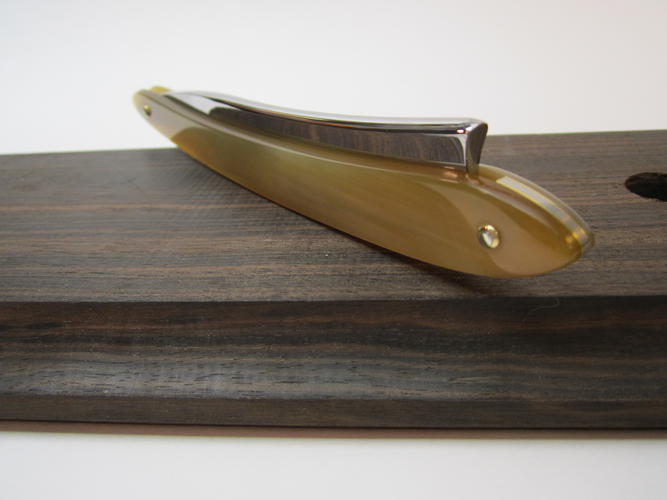
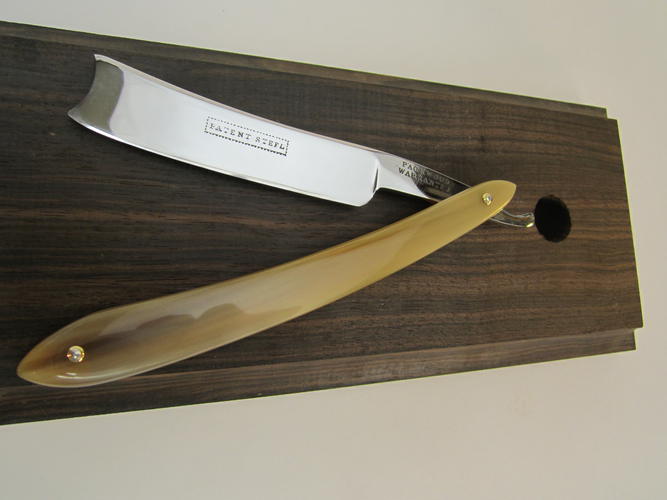
I've been working on restoring a Packwood. It seemed there were setbacks every step of the way but I stuck with it and figured it out. I wanted to reuse the lead wedge and floral collars and replicate the shape of the scales but with a lighter colored horn. Well, when I was almost finished with the new scales one of them started to peel away in layers and I discovered a sort of hollow part that spread and that was it - had to remake that scale. Then at test fitting I found that I didn't like how high the blade sat in the scales when closed. I could have removed material from the inside of the scales to get the blade to close deeper but I chose to add thin brass to either side of the wedge to open it up a tiny bit. OK, all set but then I found the collars were not going to work as one of them was falling apart around the inner hole and another had some damage too. So I made new collars from brass and used nickle silver pins to sort of match the wedge with brass liners. The whole process yet again reaffirmed my respect and admiration for the many folks around here who overcome restoration troubles much greater than these.
Attachment 241176Attachment 241177Attachment 241178Attachment 241179Attachment 241180
More Packwood: Attachment 241182Attachment 241183Attachment 241184Attachment 241185
Sorry so many pictures. Thanks for looking, it was a lot of work and it's nice to have people to share it with.
And we thank you for sharing it with us, that is quite the transformation from before you did very well.
It's a Great Shaver, it was the second honing session this morning and one more I think it will be just perfect.
We love pictures. Quality work is good to see. Nice restore. Keep up the good work. Like the jnat in the background.
That is some excellent work. The more pictures, the better IMHO!
Although I don't always comment, I do see all the work in this thread and have to say to everyone, keep up the good work.
Some very nice work and a lot of old razors brought back from the brink of death.
Great work, Gents! Keep 'em coming! :nj
Beautiful restoration on the Packwood!
1+! It probably didn't look that good as it was new!Quote:
Originally Posted by Mrchick
I decided I need a new workbench so bought some untreated pine yesterday morning (38mmx114mm) and cobbled this together this morning.
I ran out of wood screws so will need to finish it off during the week. I'll also have to get wood for the top.
Attachment 241439
I need to do that Tony. I have my part out in the garage for working along with a workbench but I need something inside the house so I can free up some space on my countertops & kitchen table. :banghead:
Here's an easy plan which I used.Quote:
Originally Posted by engine46
Ana White | Build a Sturdy Work Bench | Free and Easy DIY Project and Furniture Plans
That's nice Tony.....................but she's taken!
Just kidding, all bs aside, that is about what I need, maybe a couple. That way, if I ever have to move, they will be easy to get around corners & such. One of them would be my honing table, that is if not honing with stone in hand. It will also serve as the rock table.
Cleaning up an old Ellicottville Blackie CMon to gift to a friend. Have blued the tang and spine.
While I am at it, giving MikeT's Herder shortie some love. Will pin it up with some of Babur's domes, big's and littles.
Then both get honed, tested, and sent home.
Attachment 241624
Finished off my workbench this evening.
Attachment 241629
Ya know Tom.. Mike will be too scared to shave with it. He shakes like a dog crapping razor blades, when he gets close to your edge's. Then does the weirdest thing. He curls up in the fetal position on the shower floor, a bottle whiskey in his hand, and begins wetting himself...!!! So ya better cork the edge for him. [emoji23] [emoji23]Quote:
Originally Posted by sharptonn
HAR! Let's hope it won't get that bad, outback! :rofl2:
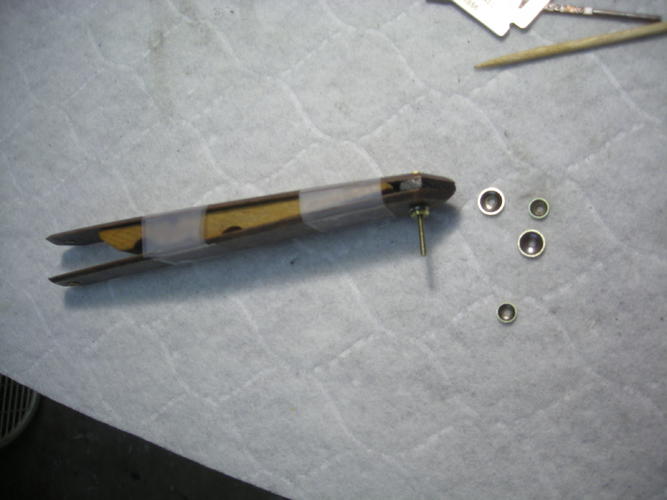
So my boy MikeT had the blade barely poking out the bottom, so I thinned his wedge a bit.
I oversized the pin-holes with a round file so that my undercollars barely pushed through and I sanded the top ones down to the scales. This will put the peening load on the brass spacers/tang and I can get it tight without busting any fancy wood.
Attachment 241636
On the bottom, I am leaving one alone and sizing the other a bit till they just meet in the middle of the wedge.
If I break a scale here, MikeT might hit the shower........:eek:
Attachment 241637
Just out it back together with Popsicle stixs then
Nah. Gotta do him proud.
So the outer domes come with some 'sharp' edges on the bottom due to the stamping. I like to rub them on some sandpaper a bit to flatten them out, like the ones on right
Attachment 241643
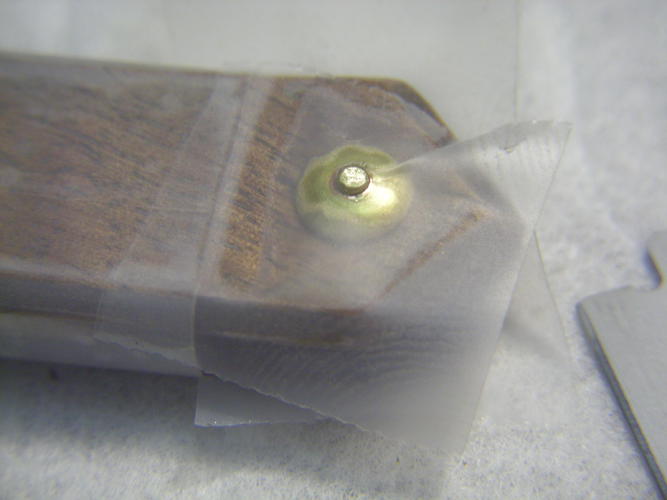
All mocked-up to pin the bottom.
Attachment 241644
A few bits of tape keep the domes on and comes off after peening a while.
Very little pin protrusion is necessary with these.
Attachment 241645
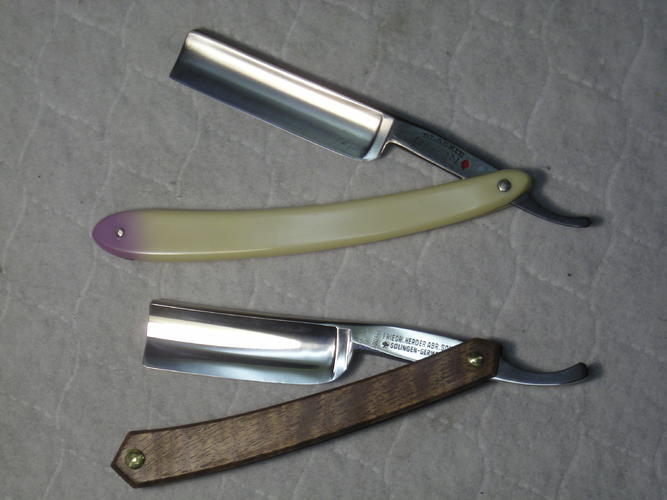
Did not turn out half bad. I will try to hone these 2 and my swastika razor tonight, if I can. I DO need a shave! ;)
Attachment 241646
Nice work tom!
Neat trick to keep the domes on as well.:tu
Finished a Ever-Ready, Barber's handle. A first in brush restorations.
http://uploads.tapatalk-cdn.com/2016...8f6bdfa8a4.jpghttp://uploads.tapatalk-cdn.com/2016...2b5f3b3ba6.jpg[IMG]http://uploads.tapatalk-cdn.com/20160721/732c17e74b7dd4aef23071267b9cc79b.jpg[/IMG
After disassembly I repaired a few small cracks in the cup, with epoxy and bog oak sanding dust. (Its black!). Then sanded and stained the handle, and applied three coats spar urethane, in semi gloss. Once dry, taped everything off, including the knot, marking the depth of the knot, as well as protecting the surfaces from errant epoxy.
http://uploads.tapatalk-cdn.com/2016...8307f492bd.jpghttp://uploads.tapatalk-cdn.com/2016...57cbf2003c.jpg
Epoxied all together, let set up.
Remove tape....!!!
http://uploads.tapatalk-cdn.com/2016...2fb1257e1a.jpghttp://uploads.tapatalk-cdn.com/2016...baf2dfa3de.jpghttp://uploads.tapatalk-cdn.com/2016...bfa5d2e0a6.jpg