
Results 14,131 to 14,140 of 20573
 91473Likes
Thread: What are you working on?
 LinkBack URL
 About LinkBacks
-
09-21-2018, 05:50 PM #14131Senior Member


- Join Date
- Jun 2015
- Location
- South Carolina
- Posts
- 1,838
Thanked: 516 Hey Mike I have a question about those pesky cracks that are so common on ivory scales..
 Originally Posted by outback

I've got a few that have cracks. When looking at them I notice they have some grime inside crack, and "seem" to have space in that crack. Maybe this is just an illusion?
If I clean out the dark crack, does this fix the problem visually, or do I need to fill the crack with CA? Or maybe epoxy with ivory dust?
On horn cracks, which are usually gapped, I know the protocol with epoxy and bog dust.
I just didn't want to assume it's the same with ivory.
Thanks for your posts, much learned!
Much appreciated!
EDIT: How do you clean/doctor those cracks?You must unlearn what you have learned.
Yoda
-
09-21-2018, 06:36 PM #14132Senior Member


- Join Date
- Mar 2015
- Location
- Akron, Ohio
- Posts
- 12,107
Thanked: 4313
I clean um with a good degreaser, then soak um in peroxide for several days. Then a drop of thin AC, and squeeze together. I've repaired bone with CA and soda, but its supposed to work with ivory, too. Actually designed for fixing ivory, and extremely strong. I've never tried hiding a crack in ivory, but I guess I should sometime.
I suppose I'd grind out the crack some, then fill it with soda, then a couple drops of CA.Mike
-
The Following User Says Thank You to outback For This Useful Post:
MikeT (09-21-2018)
-
09-22-2018, 02:55 AM #14133Razor Vulture

- Join Date
- Oct 2010
- Location
- Lone Star State
- Posts
- 26,152
Thanked: 8616
Lotsa talk about the bone-scaled NOS Herders lately.
Seems they are finally cutting them loose and are scaling them in bone.
I have bought some blades with and without the scales, but the scales are not too bad.
A bit bulky on the pivot-end. Depends on the blade. The black dye on the black ones and in the spade on the natural ones is deep. I dunno how they are made, but could use a bit of improvement. The wedge end is most guilty!
The ones I have were shredding the tangs on the NOS blades.
No taper to the wedge and no spacers at the pivot end.
After a fairly decent investment into one of the 'display board' razors, I decided to try the scales which the seller graciously included.
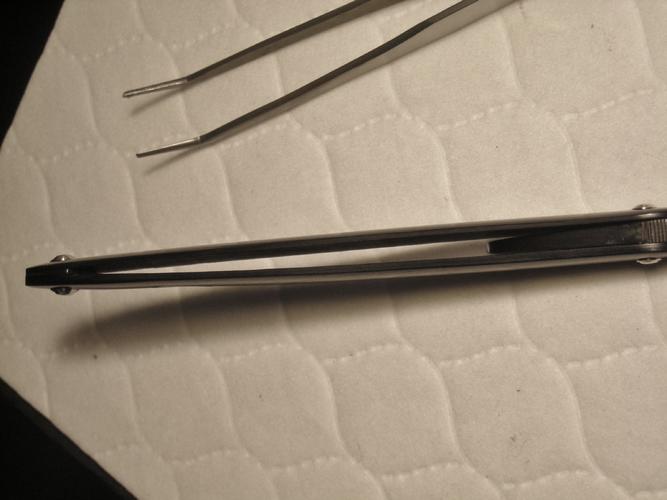
Firstly, here is a before and after...
Having the bulk of the tang open the scales on horn ones is desirable.
On bone, it should be controlled by the spacers at the pivot and the bow of the scales from a tapered wedge so the bone stays off the tang. Bone will gnaw at the steel!
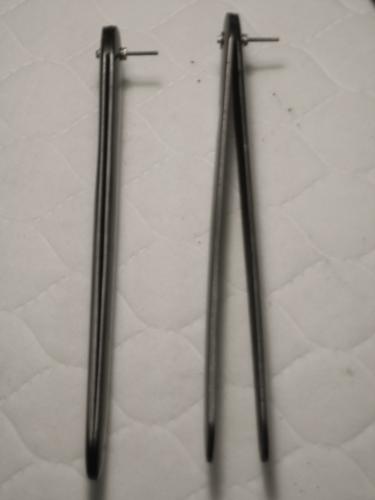
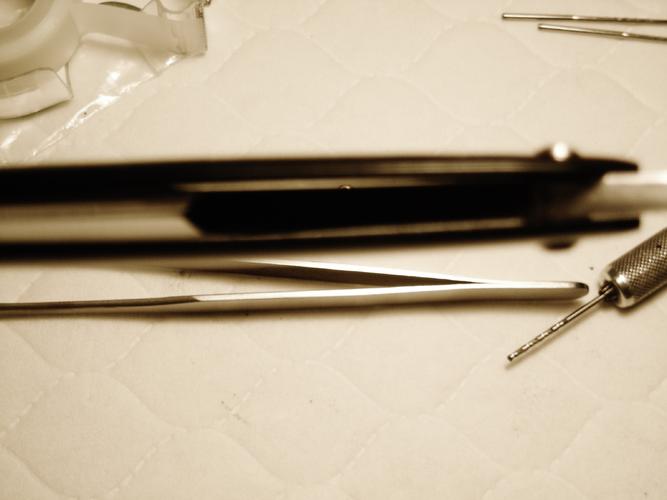
These were all wrong there so I disassembled the scales and saw the wedge had been glued to one side. I did not want to break anything, so I devised a way to taper it. Made a tool.....
Of a coat hanger, Sends sparks as you hit it!
Put it to a spinning sanding disk.
Tapered it into the scale....That's OK! Same black bone!
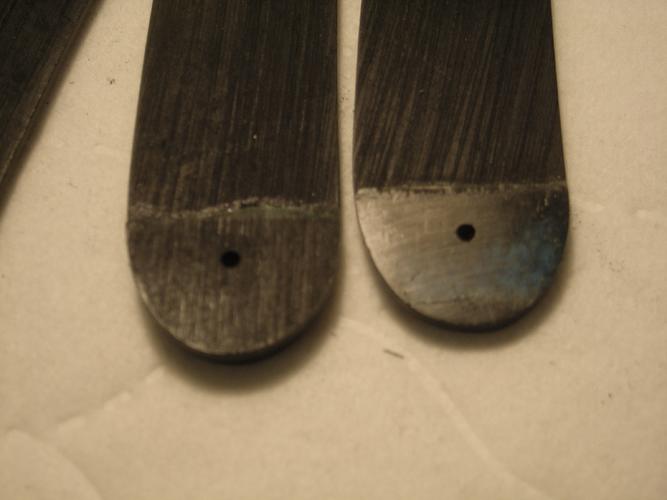
Anyhoo, after all said and done it worked out good. Nice and tight, closes center.
Nice bow to the scales and a tiny bit of daylight for the tang!
Last edited by sharptonn; 09-22-2018 at 04:49 AM.
-
The Following User Says Thank You to sharptonn For This Useful Post:
MikeT (09-22-2018)
-
09-22-2018, 03:27 AM #14134Skeptical Member


- Join Date
- Nov 2016
- Location
- Colorado Springs
- Posts
- 10,548
Thanked: 2194
Nice fix Tom.
It's just Sharpening, right?
Jerry...
-
The Following User Says Thank You to Gasman For This Useful Post:
sharptonn (09-22-2018)
-
09-22-2018, 02:03 PM #14135
Thanks for the tool idea! I have a bunch of halfazz methods but yours will work better by far, and, save broken scales a bunch!. By the way, Nice fix for the scales!
~Richard
PS. A good thing to use as a cam to split the scales apart.
Both flats should be parallel..
YMMVLast edited by Geezer; 09-22-2018 at 03:22 PM.
Be yourself; everyone else is already taken.
- Oscar Wilde
-
The Following User Says Thank You to Geezer For This Useful Post:
sharptonn (09-25-2018)
-
09-22-2018, 03:19 PM #14136Senior Member
- Join Date
- Jun 2015
- Location
- South Carolina
- Posts
- 1,838
Thanked: 516
Bravo Tom!
Excellent tool and fix. I'm writing that one down for sure.You must unlearn what you have learned.
Yoda
-
09-22-2018, 05:19 PM #14137Razor Vulture
- Join Date
- Oct 2010
- Location
- Lone Star State
- Posts
- 26,152
Thanked: 8616
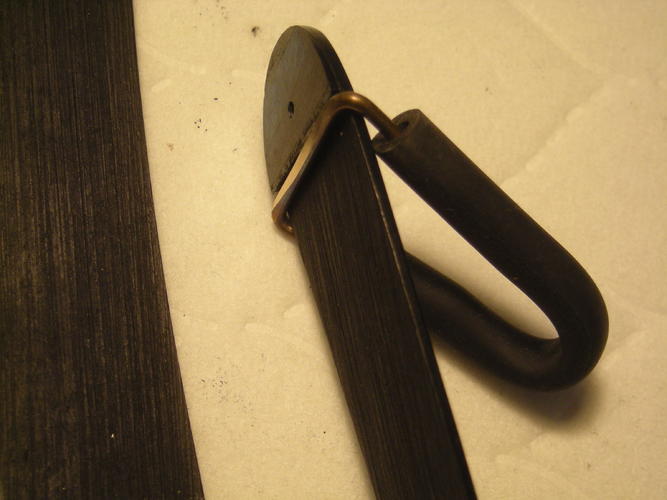
A few notes....The rubber hose is a must. If you hit the steel, it gets hot fast. Could melt scale if it gets too hot.
I just tried to increase angle a bit as I saw sparks until it was flat.
-
The Following User Says Thank You to sharptonn For This Useful Post:
MikeT (09-22-2018)
-
09-23-2018, 05:03 AM #14138Senior Member

- Join Date
- Feb 2013
- Location
- Haida Gwaii, British Columbia, Canada
- Posts
- 14,451
Thanked: 4829
Pretty clever that old Tom.
It's not what you know, it's who you take fishing!
-
The Following User Says Thank You to RezDog For This Useful Post:
sharptonn (09-25-2018)
-
09-24-2018, 02:07 AM #14139Senior Member
- Join Date
- Mar 2015
- Location
- Akron, Ohio
- Posts
- 12,107
Thanked: 4313
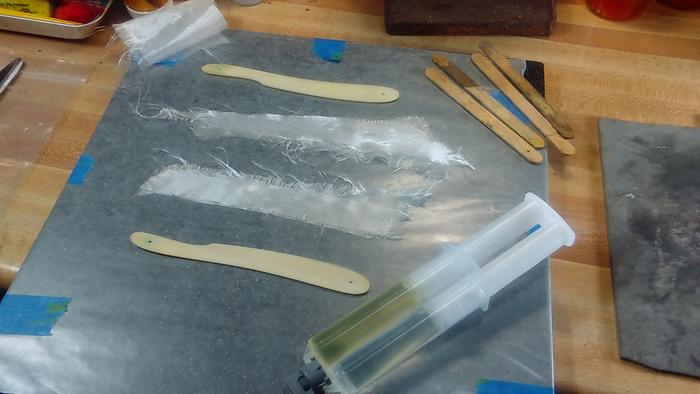
Fiberglassed up JP5's scales today. Being that I could only find 5 min. epoxy, I did them differently.
I taped a piece of wax paper down to a flat piece of corian, then cut two pieces of glass for each scale, roughened the inside of the scales with 400 W/D paper and cleaned with denatured alcohol. Mixed up more than enough epoxy, applied a good coat to the inside of each scale, then place them on the fiberglass, arrange Popsicle stick to distribute the weight of my RR track anvil ( Est. 9Lbs. ).
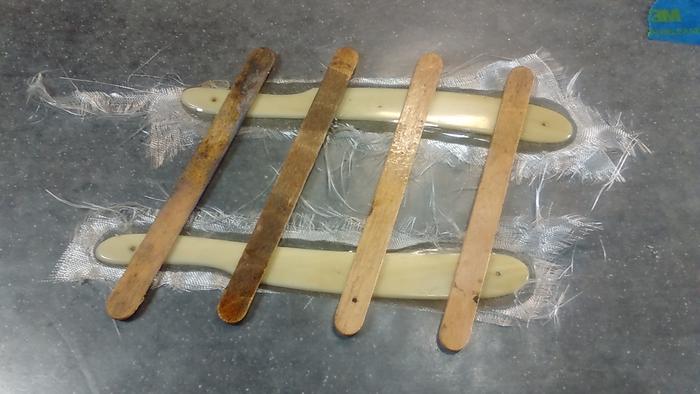
Had to hold the anvil in place while the excess epoxy oozed out from under, removing all air as well. After about 15 minutes, I removed the anviland Popsicle sticks ( in case any epoxy got on the Popsicle sticks ) and trimmed off some of the excess material . once cured over night, I can clean up the rest.
My thought was, that by doing it this way, instead of using a squeegy, that once cured all would be flat, and no sanding would be necessary. BINGO.!!
Inside
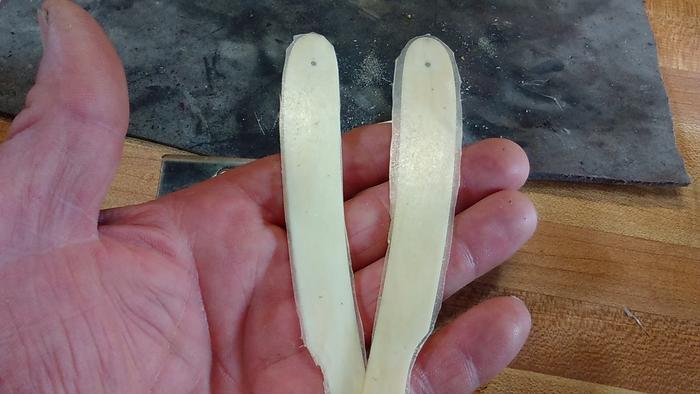
Outside
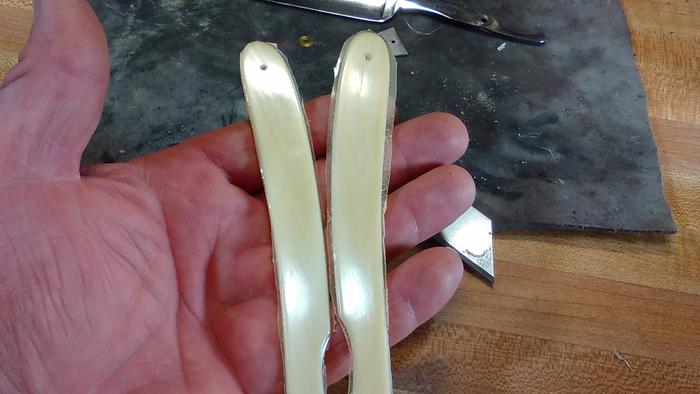
BTW the wax paper peels off, like the paper on a stick of butter

Last edited by outback; 09-24-2018 at 02:11 AM.
Mike
-
The Following 7 Users Say Thank You to outback For This Useful Post:
Benz (09-28-2018), cudarunner (09-24-2018), Gasman (09-24-2018), Geezer (09-24-2018), MikeT (09-24-2018), ScoutHikerDad (09-27-2018), sharptonn (09-25-2018)
-
09-24-2018, 11:47 AM #14140Senior Member
- Join Date
- Jun 2015
- Location
- South Carolina
- Posts
- 1,838
Thanked: 516
Why didn't I think of that! Excellent idea Mike.
Yesterday I had to dig out rotten coring, replace and glass over. Even though I had a full suit on from head to toe, I'm still itching. I hate grinding fiberglass.
Anyway, to prep my surface before the fiberglass is hardened I stretch cloth over it and pull that top layer off after hardened. This creates a perfect rough surface to paint on or lay more fiberglass without sanding.
If it is was wax paper... Then it would be a perfect smooth surface, no need to sand.. That's really cool, a definite must on the process you've outlined!
Sanding fiberglass sucks, so for anyone who has had to do it this is a great one Mike.
 You must unlearn what you have learned.
Yoda
-
The Following User Says Thank You to MikeT For This Useful Post:
outback (09-24-2018)


 Reply With Quote