
Results 141 to 150 of 20573
 91474Likes
Thread: What are you working on?
 LinkBack URL
 About LinkBacks
-
02-25-2014, 02:26 AM #141Senior Member


- Join Date
- Oct 2013
- Location
- Albuquerque
- Posts
- 508
Thanked: 32
I am working on 16 razors at a time! Lol! I am overwhelm... These 2 i got this weekend! I decided to work on these prior to finishing the other ones! Scales and honing needed
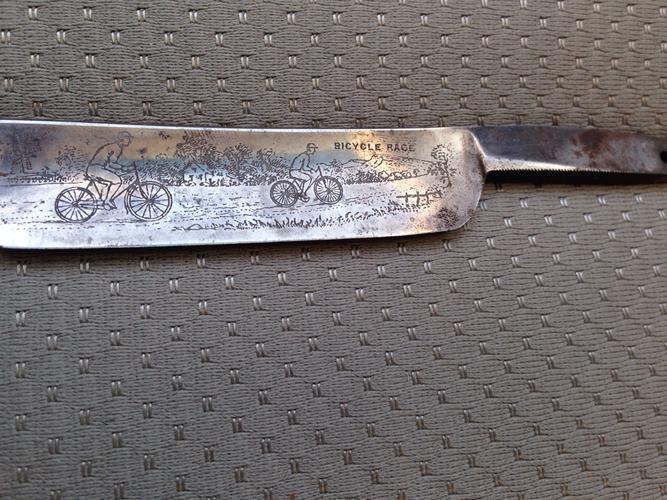
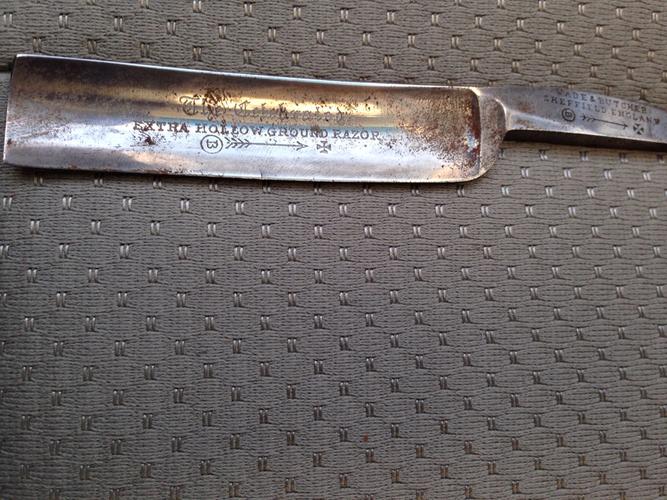

The wade had a hair crack! I fixed it and now its looking good
-
02-25-2014, 05:48 AM #142
 Originally Posted by Shaggy8675

How thick did you leave the edge? it looks kinda thin but that could be misleading.Til shade is gone, til water is gone, Into the shadow with teeth bared, screaming defiance with the last breath.
To spit in Sightblinders eye on the Last Day
-
02-25-2014, 08:25 AM #143Eagle-eyed


- Join Date
- Jan 2011
- Location
- Slemmestad, Norway
- Posts
- 1,535
Thanked: 418
The razors looks very nice, but it looks like you've made a frown on the W&B, you also have a heel problem that will need fixing before honing it. Originally Posted by robert2286
It's always a good idea to make sure you can put a proper bevel on it before putting a lot of work in a blade Need help or tutoring? Check out the .
Rune
-
02-25-2014, 02:33 PM #144Senior Member
- Join Date
- Oct 2013
- Location
- Albuquerque
- Posts
- 508
Thanked: 32
The pics are a bit deceiving... The light and all that! The edge is perfectly flat and parallel with the spine... When i grind i use a flat stone and measure as i go... The only thing that worries me a slight bit is the spine thickness... I might have to remove tape after setting bevel and set bevel again and hone with no tape for a better angle
-
02-25-2014, 02:41 PM #145Senior Member

- Join Date
- Jan 2013
- Location
- Croatia, Zagreb
- Posts
- 198
Thanked: 92
Grinding.

Last edited by Maximilian; 02-25-2014 at 03:07 PM.
-
02-25-2014, 04:53 PM #146Senior Member
- Join Date
- Nov 2013
- Location
- Houston, TX
- Posts
- 147
Thanked: 45
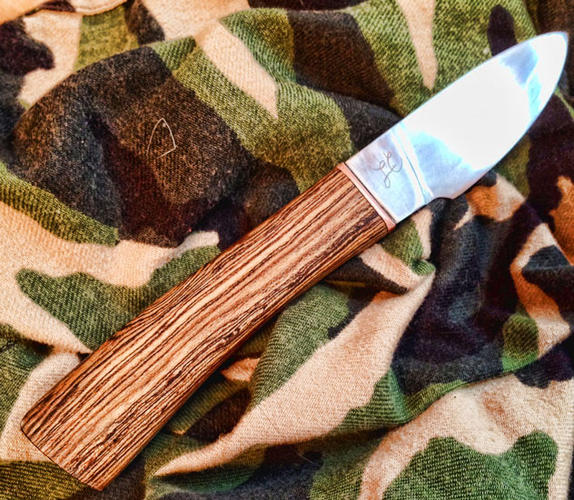
Tim Zowada did an article in Blade's Guide to Making Knives called "Making the Using Knife." I love Tim's work and respect anything he says about knife making, metallurgy, etc. so I just had to make myself one.
It's made out of 01 tempered to 61 HRC. The wood is Bocote. I'm proud of the slim bevel (not easy for me to get) and of the copper guard.
About the copper: I recently moved into a house that was built in 1930. Cleaning out some of the trash under the house, I pulled out a bunch of old copper wire. I didn't want to let it go to waste, so I stripped it and cut a bunch of it into smaller pieces then put it in my bench vise and twisted it together to make a thick copper cable. From there, I put it in the forge and forge welded it all together. Then, I took it to the belt grinder and finally the drill press and files.
My wife is using it as her main paring knife
Let me know if you need any help with shaving, honing, etc.
-
02-26-2014, 12:35 AM #147Senior Member

- Join Date
- Feb 2012
- Location
- Menominee,MI
- Posts
- 1,624
Thanked: 325
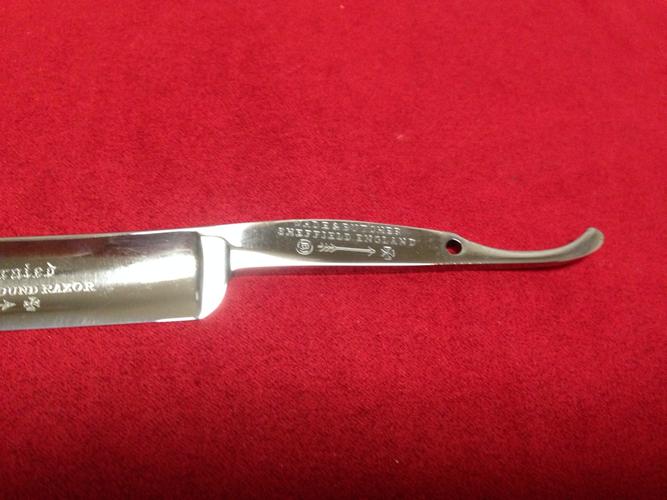
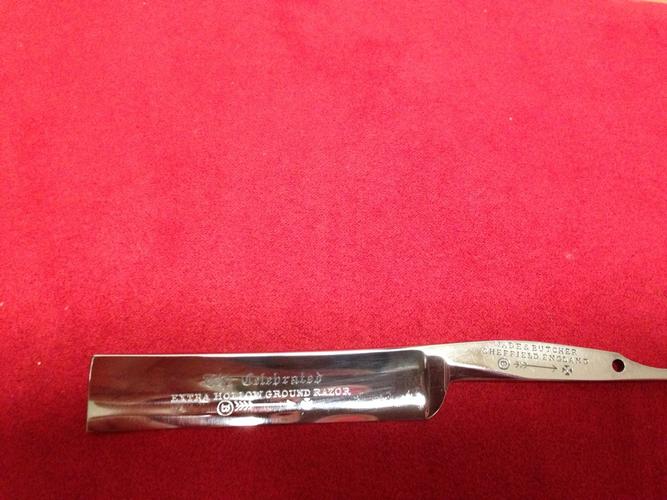
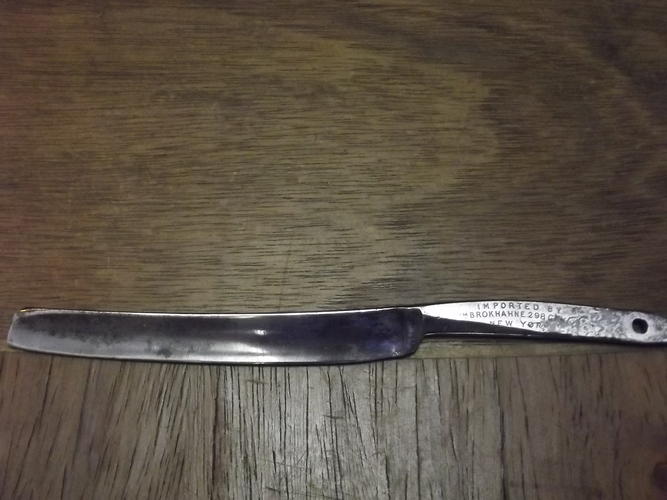
This razor is a near wedge 3/8 at the widest point and I want to shave with it so figured in order to do that the rust has to go and there was quite a bit of it. I also figured it was a good candidate to try something I read here of someone using a drill press as a drum sander since if it got ruined it wasn't really that big of a loss. I wasn't sure if I should post this cause I don't want someone trying it and getting hurt, but since I think we are all adults and will use common sense and good judgement I decided I would. I didn't want to use my drill press cause the torque would just throw the razor or do alot of damage if it grabbed the blade so I decided to use my cordless dremel instead of the corded on I have. I know, I know not a dremel, but I wanted to use something that that didn't have the torque and if too much pressure was applied it would stop the bit instead of grabbing the razor and throwing it. So I cut a strip of 1k wet/dry sandpaper and attached it to a 2" hard felt wheel with double sided tape. The 2" worked nice on this one since it fit perfectly in the hollow. Since I was afraid of heat I would make a pass on the razor and cool it down even though it wasn't even warm. Better safe than sorry. With only 1k sandpaper it removed the rust and alot of surface spots. The maker stamp is quite legible now. There are still alot of deep pits and spots, but the blade is so tiny it would take alot of metal removal to get rid of them it isn't worth it. I just wanted to experiment and only concerned with shaving with it. Now it can go to the hones. I will have to try this on a hollow grind to see how it will work. I will have to mess around with different size wheels for different size razors and different grinds. Now don't get me wrong I am not saying that a dremel is a good thing to use cause so much can go wrong just like with ANY powertool, but I was experimenting on a junk blade. The use of any power tools when it comes to straight razor restoration is dangerous.

 ScottGoodman and Trimmy72 like this.
-
02-26-2014, 10:58 AM #148Junior Member

- Join Date
- Jan 2014
- Location
- Michigan
- Posts
- 24
Thanked: 0
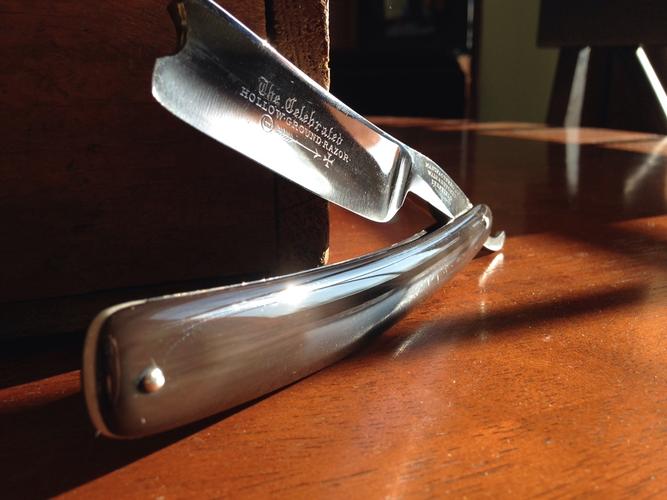
Putting the finishing touches on this W&B. First try at making horn scales. Not perfect but better then I thought I would do.
-
02-28-2014, 11:06 PM #149
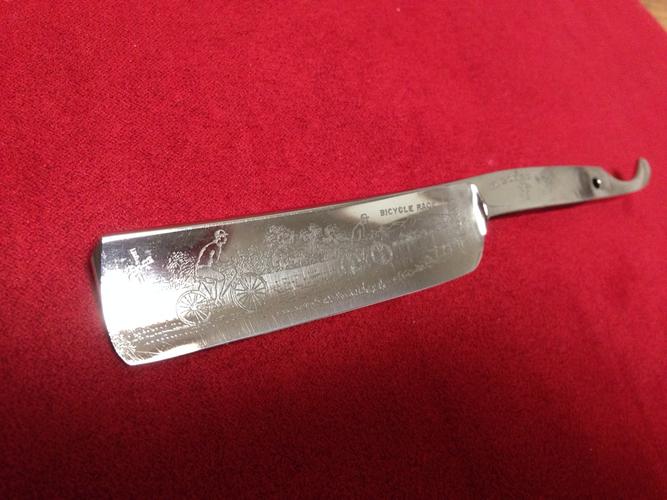
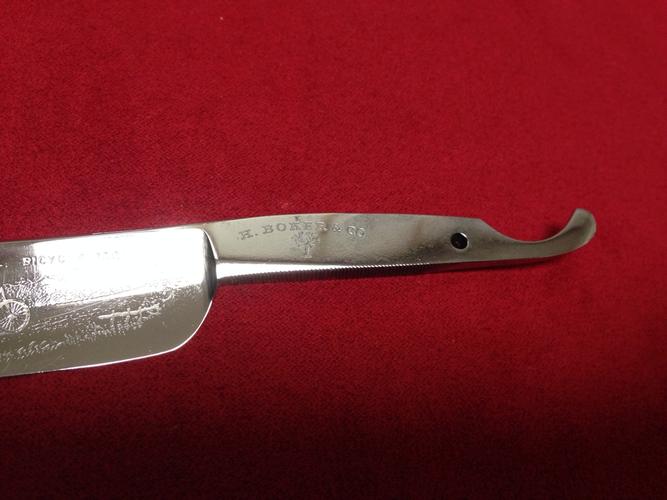
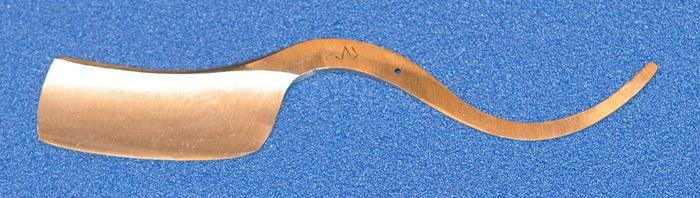
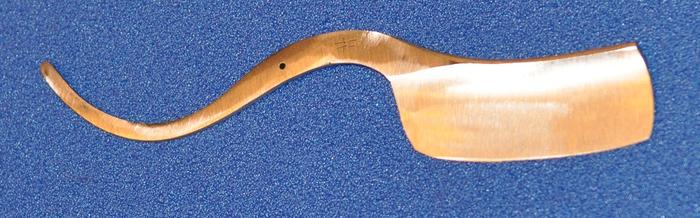
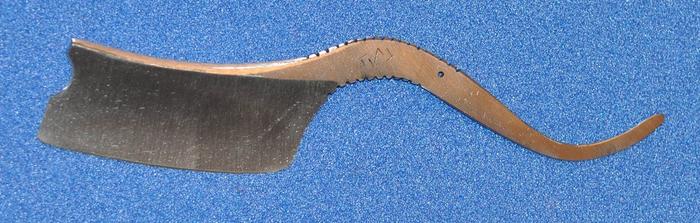
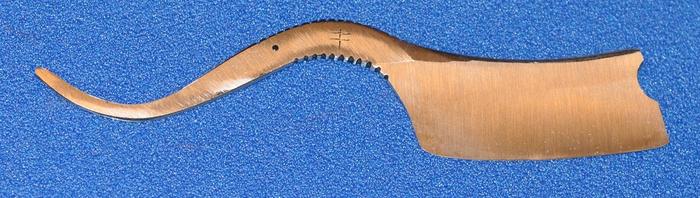
Today's work of the morning. I final ground the 2 choppers.
The round point is 9/8, the alien weapon is 10/8+
Both have a very fine bevel.
The afternoon was not as productive. I had a couple of kamisori style razors I wanted to grind, but only could do a little because they were not fully annealed so I'll have to do that again. Then I had 3 monkey tail razors that were under construction and I did part of the grinding, but not all. It was one of those days.... Had to go to the bank, had to pick up the kids from school, had to eat lunch with the mrs (normally I skip lunch on my blade making day and only drink coffee) so all in all I missed a couple of hours which I will make up tomorrow hopefully so that I can heattreat those monkey tails this weekend.Til shade is gone, til water is gone, Into the shadow with teeth bared, screaming defiance with the last breath.
To spit in Sightblinders eye on the Last Day
-
02-28-2014, 11:28 PM #150Senior Member


- Join Date
- Nov 2012
- Location
- Across the street from Mickey Mouse in Calif.
- Posts
- 5,320
Thanked: 1184
I have been working on a grinder for myself. Took apart my Craftsman 2X42 and turning it into a 2 x 72 . Not sure how it is going to work out using the cast part from the old grinder. I went that way because I like the tracking set up but may pay the price in trying to get it all aligned. The other part of this plan ( to come later) is water cooling. The cast housing should help contain the h2o. I am thinking water recovery and pump system for the end plan.
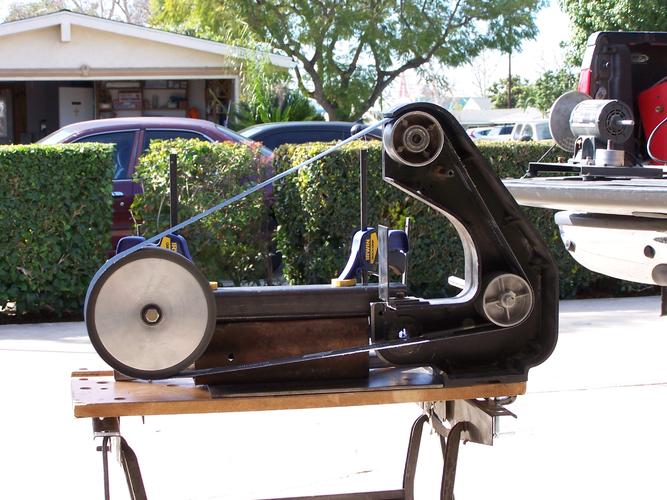
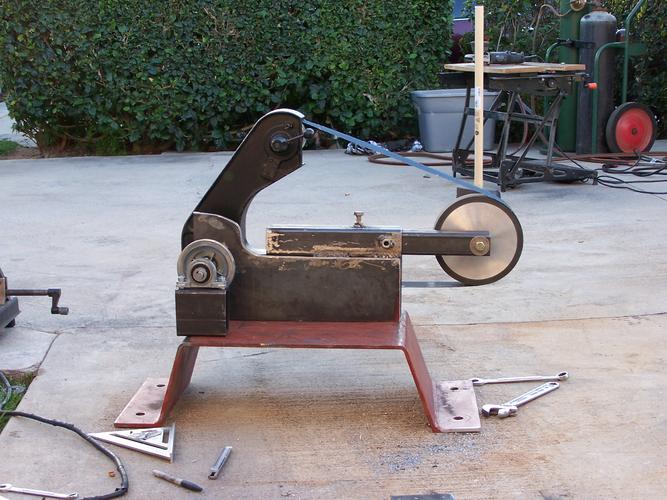 Good judgment comes from experience, and experience....well that comes from poor judgment.
-
The Following User Says Thank You to 10Pups For This Useful Post:
Shaggy8675 (03-01-2014)


 Reply With Quote

