I always like your videos. Thanks Gipson.
Printable View
I always like your videos. Thanks Gipson.
Thought I posted this but now I don't see it. :shrug:
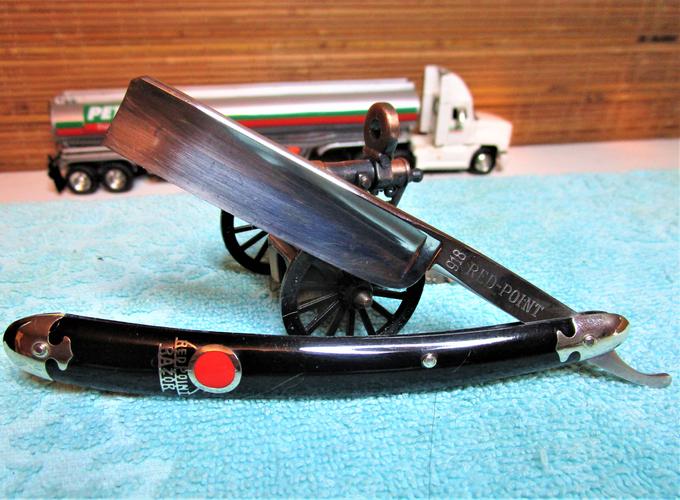
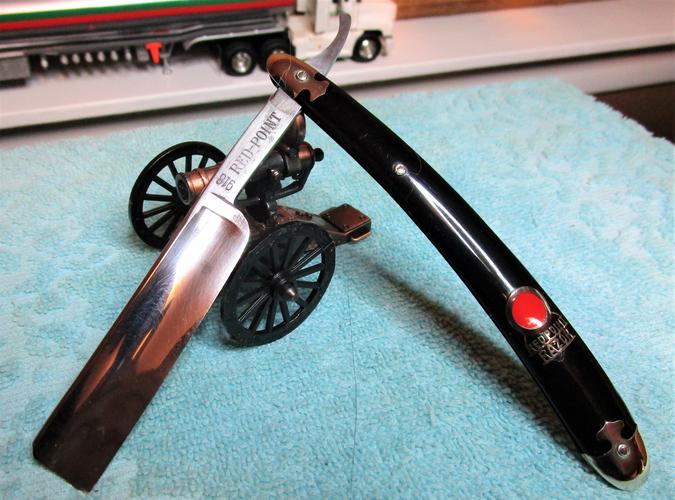
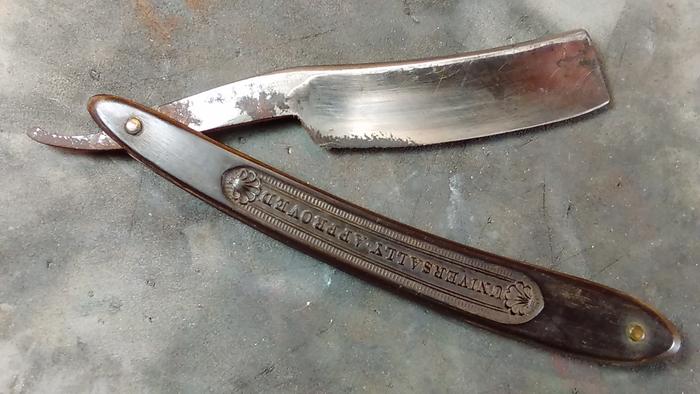
I picked up this Red-point #918 and it only needed a little cleanup. Surface rust in spots but not extreme. Didn't get any before pics but here it is after cleaning...
Attachment 313971Attachment 313972Attachment 313973
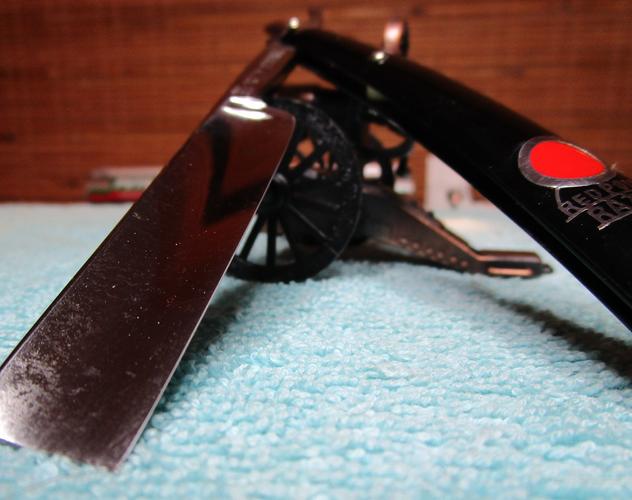
Here it is after honing. I found a few rust pits on the edge that had to come out but less than a mm would be my guess. Check out that bevel...
Attachment 313974
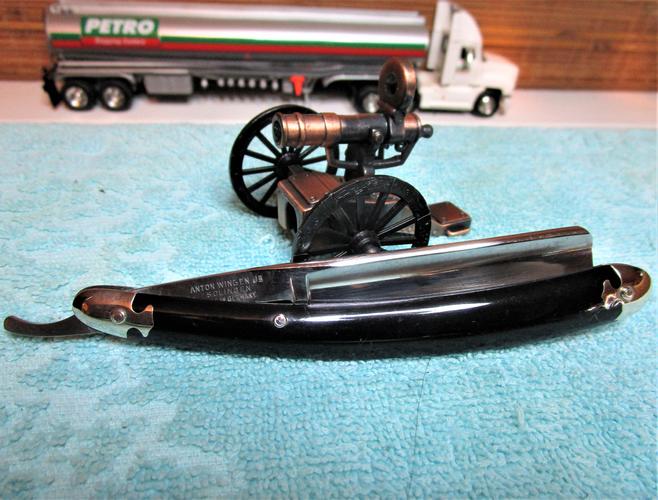
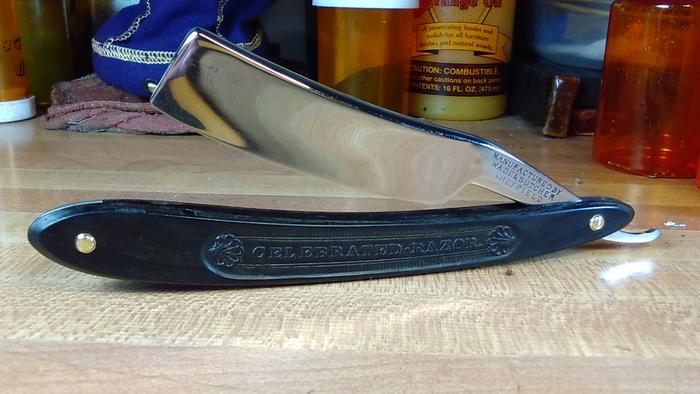
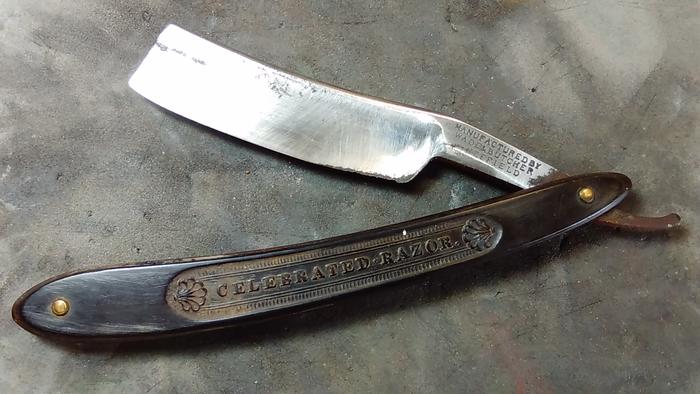
So does anyone have a clue when this was made? It does say Germany on it. My guess is the 1930's. Made by Anton Wingen jr.
Perhaps this link will be of some use--:shrug:Quote:
Originally Posted by Gasman
STRAZORS.com - all about classic razors - Anton Wingen Jr., Solingen.
I had found that one Roy but it didnt help much. All the pictures ive seen show the 918 being yellow scales and mine is black. But its all original.
At least you have some dates of operation--Quote:
Originally Posted by Gasman
This source Razor makers lists an Anton Wingen Jun in Solingen from 1925 to 1939. It would be marked Germany if made in that time frame.
Bob
Those are pre-war. I think made for U.S. consumption. I have one like Jerry's and a yellow one from Utica Knife and Razor, made in Germany.
So my guess of 1930 was a solid guess.
I'd say you are right on that. I think it is pre WWII as it is marked Germany and I believe post war it would have been West Germany to distinguish it from East Germany. After the German Unification it is probably back to Germany again.Quote:
Originally Posted by Gasman
Bob
Spruced up a box with some black shoe polish, figure contents within warrant that much.
Attachment 313992
Attachment 313993
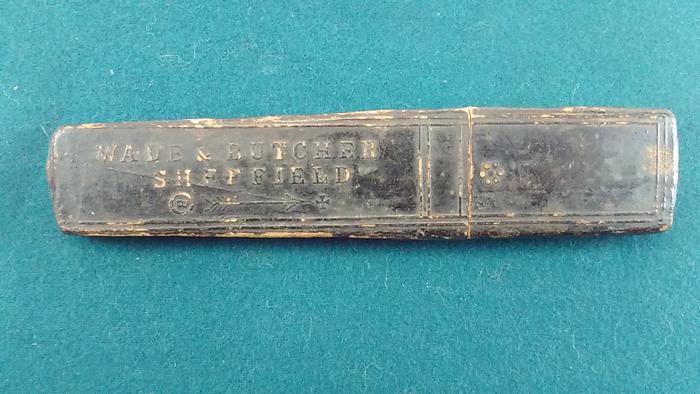
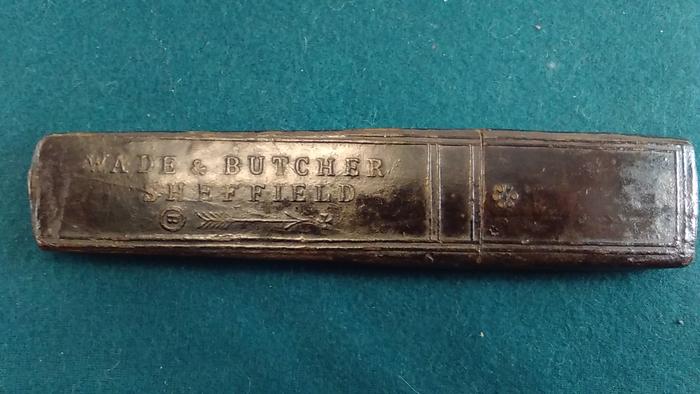
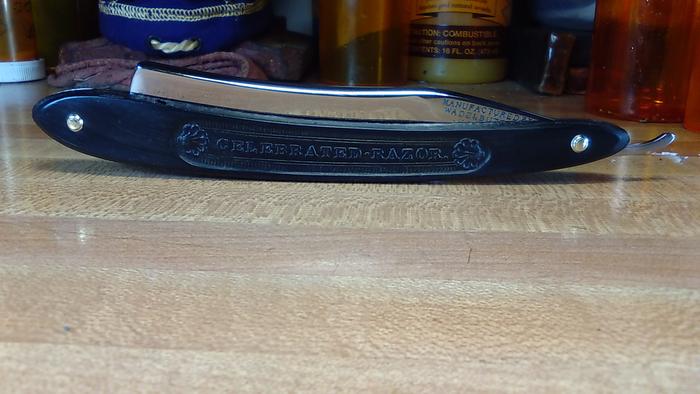
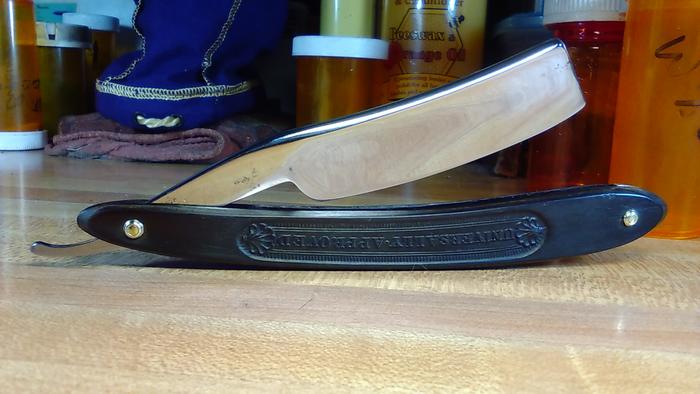
Y'all remember the Wade and butcher I was working on with the rusty heel, right!? well I finished it up tonight.
It survives with some pitting on both sides of the toe and on both sides of the tang. Pinned up with Austin's collars, brass rod, original pewter wedge.
Attachment 313994
Attachment 313995
Attachment 313999
Attachment 313996
Attachment 314000
Now to hone and enjoy another of the harem.
Attachment 313998
A Woooooo-Hooooo! :rock:
A woo-hoo indeed! Very well done. That looks fantastic! :chapeau:bow How was the rust at the heel? Inquiring minds want to know...
Pretty bad on the back side, the show side wasn't too bad.Quote:
Originally Posted by JellyJar
Backside was full of pits real small, actually there still a few left, hard to see in the pictures.
A clean band of metal appeared ahead of the pits, near the edge. As I kept sanding it became wider, so I sanded till I knew they would be hardly noticeable once I polished it. I got real lucky on this one....so far. I only lost a bevel width or two, still measures 6/8, heel to toe, and I had to reshape the heel a bit. Gonna have to swoop it pretty good, on the hones, she's a bit more curvy than she looks in the pics. :tu
Nice work Mike!
My thumb thanks you. Shaun. That was a lot of sanding, and polishing by hand. Gives me a couple days to rest my hands before I get to honing it. Sunday shaver..if the edge holds, which I feel it will, from what I'm seeing.
Great work Mike. Saved a box? That's new to me.
Just made it look a little better. Shoe polish was the only thing I could think of to spiff it up a little. Seems to of worked, I know water will bead, on it.
Thanks for the shoe polish idea. Seems so obvious, but I would never have thought of that myself.Quote:
Originally Posted by outback
Have a Wostie IXL box Im gonna try that on.
The ends of the top and bottom are gone. Any suggestions for how to patch that?
Attachment 314010
Attachment 314011
Shoe polish what an ingenious idea!
You people are all way smarter than I. Dont get all big headed it isn't that great a compliment as the bar is set very low ;)
Kinda have an idea...Quote:
Originally Posted by DZEC
I'm thinking of a piece of fabric that can be placed from inside the box, then sealed with something from the outside. :shrug: any thoughts.?!
Thanks for the suggestion Mike.
Those old cardboard coffin boxes, especially the ones for heavier razors, deteriorate at the ends. Probably from the razors being put away damp or sliding in the box and banging on the ends. I have a few in that condition.
I was scanning my local Yellow Pages and discovered a book binder who also does restoration work. Think I’ll take them in to him and see if he has any ideas. Seems like it might be similar to what he does for old books. If it is too costly, I’ll try the fabric idea.
I'm thinking of a piece of fabric that can be placed from inside the box, then sealed with something from the outside. any thoughts.?!
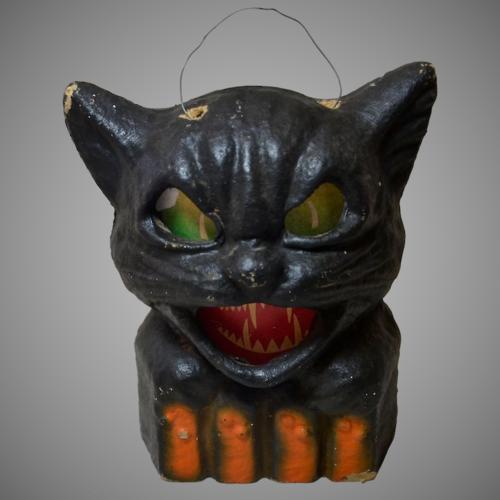
I repaired an antique Halloween Cat Lantern that had some holes and cracks. It was made from pressed Paper Mache.
I used CA glue and kicker to seal cracks while squeezing to shape, then small strips of brown paper soaked in thinned white glue and built up the layers. With a heat gun I could get several layers on at a time and build up layers from inside and out.
You can achieve any shape and thickness by layering and sanding the hardened material to shape and finish. I painted with black acrylic paints. The repairs were invisible from the outside.
For the box, I would cut some cardboard to the ID of the end and glue with CA inside the end to supply some rigidity and shape, then Paper Mache over the outside to shape. You could lay strips inside with some long tweezers for strength.
I dont have any pic of the project but here is a similar lantern.
Attachment 314016
If you have enough length in the box how about a plug like from a piece of balsa wood. Then put paper over the end to hide it.
I have used bits from donor boxes to make new bottoms and tops. A wide sharpie to paint them.
Took forever to dry, but Birchwood Casey tru-oil looks great and seeps-in, restoring stiffness.
I've thought also in some form of those directions as well as making a rectangular dowel that I could use as a mold to make a cup that fits the inside of the box, then build up the outside like Marty is talking about.
I could make it by wrapping wax paper around the dowel, then wetting down a piece of 3/4 oz fiberglass with epoxy and form it around the dowel. Once cured I can remove it from the dowel and slide it to the bottom of the box and secure with a couple drops of CA. The rest would be fillers of some sort. Won't never poke out the ends again, and done right, you could even lengthen the box slightly, being most seem to have shrunk some.
Here is the first one I used the Tru-oil on. Glad I was able to save it..
https://sharprazorpalace.com/custom-...different.html
I think it was science guy or voidmonster that had a thread on this a while back. I cannot search from this device, but the basic pretence was coarse fabric and paper-maché then died with shoe dye.
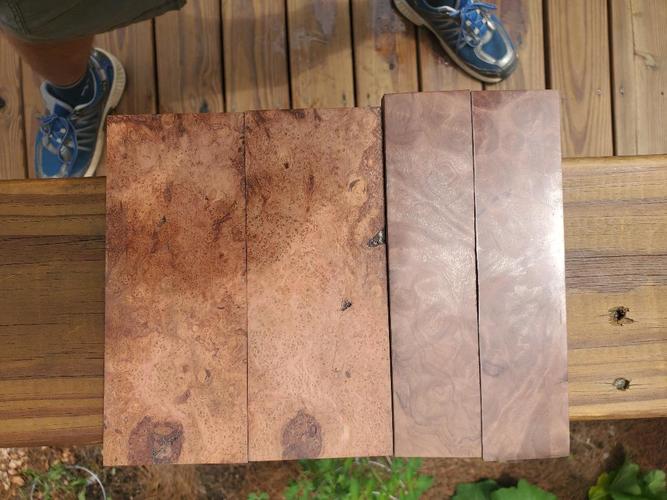
Wow, incredible work on that rusty heel, Mike-I swear you guys are always inspiring me with new ideas to up my game! I got in quite a bit of shop time myself today. No pics yet, but I met my local knife-maker friend at a craft show today. He made me a damascus straight razor blade that I have yet to see (apparently it's a Christmas present of sorts?). Anyway, I'm super excited, as I have some beautiful stabilized book-matched birdseye cherry burl that he also gave me that I think will show it off beautifully.
In anticipation of that, I went ahead and flattened/thicknessed the blanks and epoxied them on to .020 G10. I'm thinking brass hardware and maybe some sort of dark red recon stone wedge. I'll know more when I get the actual blade in hand. Here are the scales (on the left):
Attachment 314027
If this works out, I'm thinking of asking him if we can collaborate on some kind of series. The 1st one is going to be mine, though!
Cardboard folded into a U shape of cut so 4 tabs to fold up. Put glue on tabs, put in place with some kind of spacer to hold it there from the inside while glue dries, then some kind of filler to fill in the gaps and then a heard somewhere that shoe polish is good ;)Quote:
Originally Posted by outback
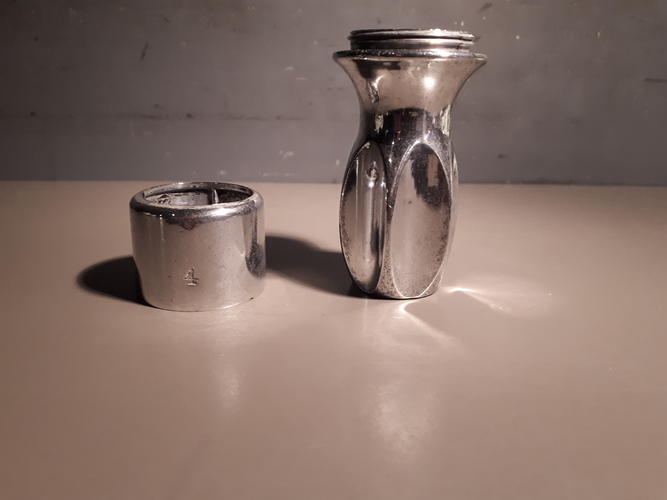
Cleaned up this rubberset and am just waiting for a knot to finish it
Attachment 314135Attachment 314136
And what was wrong with the knot that was in it.!?
I"m guessing that after removal it 'Now' looks like a cat with a bad case of mange :wQuote:
Originally Posted by outback
It was very brittle and stiffQuote:
Originally Posted by outback
Sounds like me when I get up in the morning, definitely not like my younger years. :rofl2:
Boy, those things went through the roof for a while. Maybe the repops stuck a pin in the price balloon?
Come to think, the repops are now pricey!
Were it me, I would go 24mm 2-band and fill the handle with coins and epoxy.
The Razorock clone I have these days is solid. The weight is nice to me.
Nice job! That old aluminum shine's-up sweet! ;)
I had 4 cramps going at one time by jumping out of bed too fast this morning! :dropjaw:Quote:
Originally Posted by outback
Sounds like you should eat some bananas.Quote:
Originally Posted by sharptonn
Yup. Wife has not procured any for the last few weeks.Quote:
Originally Posted by 32t
I have hit the pickle juice today I get from the local beer store as they sell out of big dills.
That stuff works wonders. A few ounces a day helps a lot of things!
Lots of things in pickle juice.
Brings back a memory of my old chief that in his youth worked at a local pickle factory. One night shift when he was half asleep and wheelbarrowing cukes down the ramp to the vat he kept going right off the end into the vat.:rofl2:
THAT would be ME! :D