
Results 31 to 40 of 51
 106Likes
 LinkBack URL
 About LinkBacks
-
11-13-2016, 05:21 AM #31Senior Member


- Join Date
- Feb 2013
- Location
- Haida Gwaii, British Columbia, Canada
- Posts
- 14,457
Thanked: 4830
Too bad about the scales. Sometimes things get broken when we are learning new things. I use a pin vice with a split point drill bit. The split point is very important. You will have a heck of a time trying to get a regular drill bit started with a pin vice. There are a few methods and we all have found the ones that work best for us. I would not spend too much time worrying about that vertical line. You will never see it once the scales are back on.
I am going to double down on what 10pups said.It's not what you know, it's who you take fishing!
-
The Following User Says Thank You to RezDog For This Useful Post:
outback (11-13-2016)
-
11-13-2016, 01:11 PM #32Senior Member

- Join Date
- Mar 2015
- Location
- Akron, Ohio
- Posts
- 12,118
Thanked: 4316
The way the scales broke, I'd say their quite brittle anyhoo. Save the pieces, they may come in handy for other projects down the road. Originally Posted by cmsessa

And they will... Trust me.Mike
-
11-13-2016, 03:57 PM #33
There are folks that succeed in clipping off the pin...not me...not for lack of trying!! I use a smooth file parallel to the scales to remove the dome of the pin and that helps me find the exact center of the pin because of differing colors of pin and washer. It looks then like a bulls-eye. After getting it flat, a careful centering of a drill bit ( split point ) can do the job. I often use a center drill/s...HF/ ebay/Amazon specials:
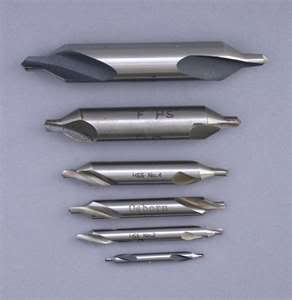
It is very stiff and is made to drill a starter hole.
~Richard
-
11-14-2016, 04:55 AM #34Member

- Join Date
- Nov 2016
- Location
- SF
- Posts
- 79
Thanked: 14
Update!
I just did some cleaning.
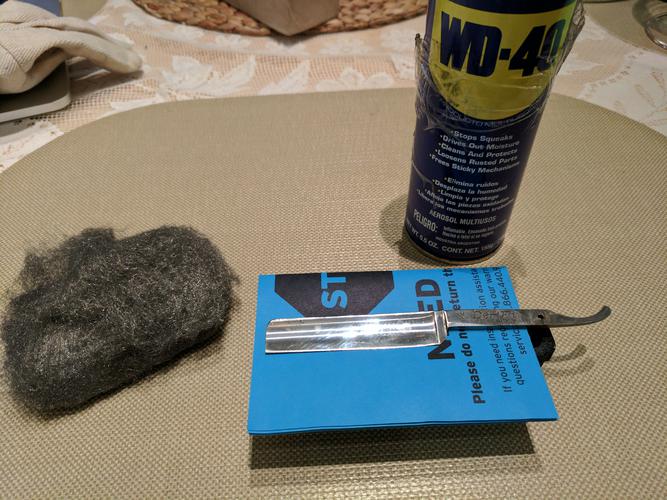
My setup: steel wool #000 with WD40 (The blue paper is hiding the amazing Mightly Mag recommended by @Karlej)
I applied WD40 to the blade and I did circles with the steel wool for 10 minutes in total.
Result:
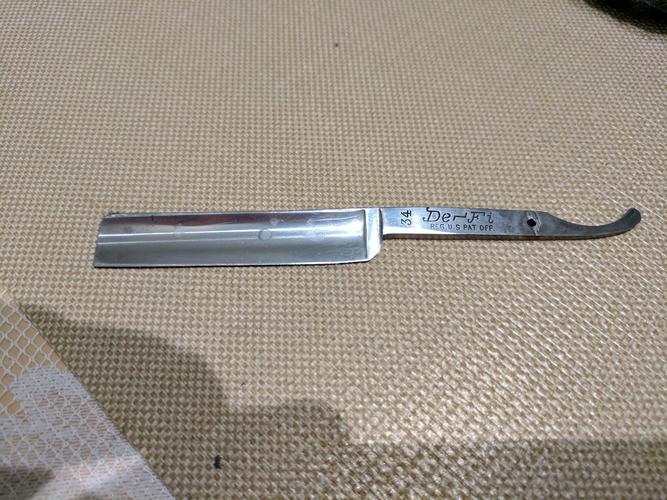
Notice how on the top left of the first image there is a black spot. I thought that was going to get away but it didn't
There are also those "circles" on the blade which, even thought I worked there, I couldn't remove them. I guess I need sandpaper to get rid of those.
Last thing I did was applying Mothers polish with a microfiber cloth. This is the result after 10 mins of work:
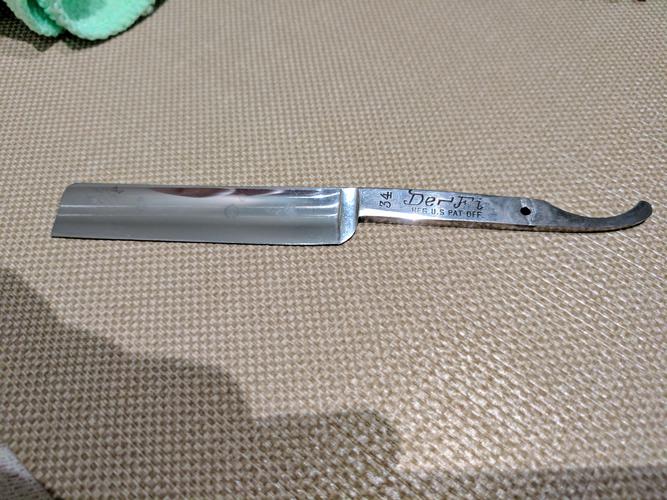
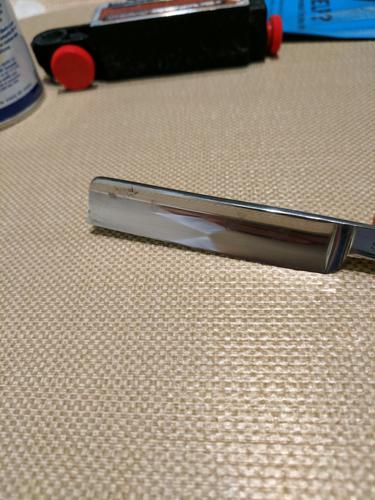
Black spot and "circles" still visible
Some questions:
- I want to get rid of the black spot on the top left and the circles. Sandpaper, right? 400 or 600?
- When using Mothers, when to stop?
- The black spot I guess is rust, but what are the circles?
Thanks!
-
11-14-2016, 04:59 AM #35Senior Member
- Join Date
- Feb 2013
- Location
- Haida Gwaii, British Columbia, Canada
- Posts
- 14,457
Thanked: 4830
For those little spots you might want to start with 1000 and see where that takes you. you can do a lot at that grit, if you think about it that's all you use to make a bevel.
It's not what you know, it's who you take fishing!
-
11-14-2016, 05:23 AM #36Senior Member
- Join Date
- Apr 2012
- Location
- Diamond Bar, CA
- Posts
- 6,553
Thanked: 3215
It is all rust, black rust is harder to remove. You can try some 1k paper, then go to 600. From 600, 1k will easily sand out 600 scratches, and 1k scratches will buff out with metal polish.
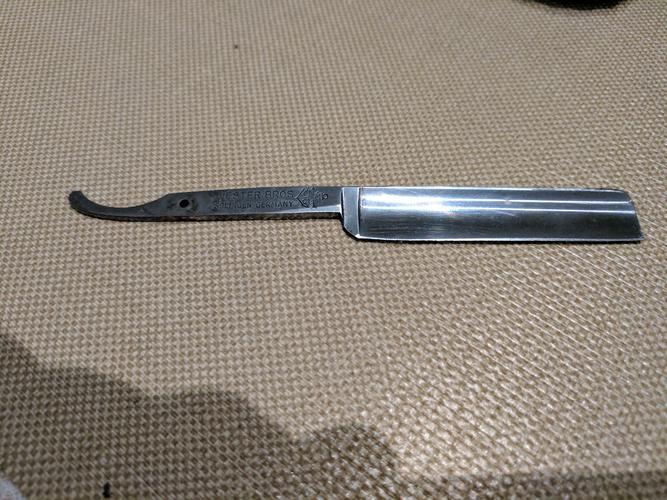
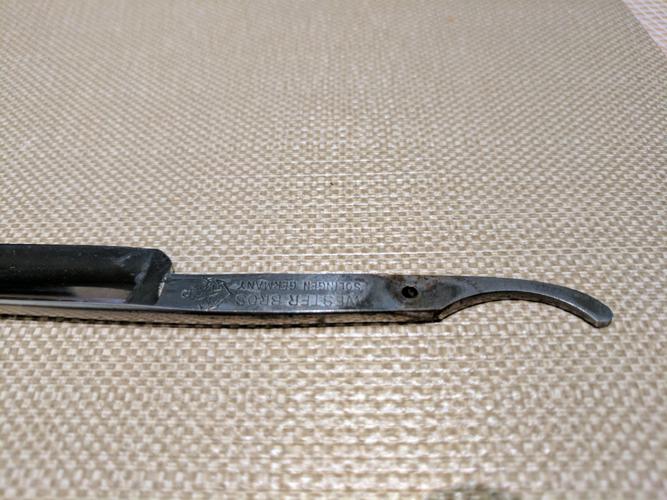
You also will need to reshape the heel, so the edge ends in front of the stabilizer. The wonky edge at the heel is from the stabilizer ridding on the stone. There are several good threads on reshaping heels.
If you want to save a pair of scales you have to drill them, I too have never been able to cut pins off with side cutters without breaking the scales.
Drill one side and lift the scale off, do not try to punch it though, the bottom scale will break.
So, now buy a slab of horn and follow Karlej’s post on how to make a pair of horn scales.
All can be done with hand tools, look up Charlie Lewis’s video on doing just that.
How to make a traditional set of horn scales ... the way I do it.Geezer likes this.
-
11-14-2016, 12:45 PM #37Senior Member


- Join Date
- Oct 2011
- Location
- Standish, Maine
- Posts
- 816
Thanked: 954
I use center drills in a drill press too. I find it easy to hit dead center and the center drills don't walk. Once started I go to a twist drill. Be cautious of heat build up. Not an issue really with horn but you can melt the collars into the scales made from celluloid. A lesson I learned the hard way early on. Originally Posted by Geezer
-
11-14-2016, 03:29 PM #38
Another use for the center drills is to use the wider part to drill ( by hand ) from each side of a wedge. Hole in wedge remains 1/16th but only in the center of the thickness. This allows the scales to be adjusted up/ down..back and forth before final tightening. Makes for easier centering of the blade!
~Richard
>=<Last edited by Geezer; 11-15-2016 at 12:32 AM.
-
11-15-2016, 07:56 AM #39Member
- Join Date
- Nov 2016
- Location
- SF
- Posts
- 79
Thanked: 14
I am looking at the blade clueless Originally Posted by Euclid440

Can you explain a bit more what are you seeing?
-
11-15-2016, 09:39 AM #40Senior Member
- Join Date
- Nov 2012
- Location
- Seattle,WA.
- Posts
- 579
Thanked: 55
I haven't unpinned as many razors as these guys have but so far I've been able to get them off just by using a small hand file and filing the pin down until the washer comes off on each side.
At that point the scales usually just slide off. Put the file flat between the scales (just beside the pin) and then twist to vertical if it needs a little help.
I also think that too often people jump in with steel wool and sand paper when just a little more time spent with metal polish would do the trick with far less scratches.
It's also OK to stop before the mirror polish stage. I actually prefer it to look like a well cared for razor rather than a new razor.Last edited by gcbryan; 11-15-2016 at 09:41 AM.


 Reply With Quote