
Results 11 to 20 of 50
 29Likes
 LinkBack URL
 About LinkBacks
-
06-01-2012, 08:37 PM #11Who's that guy think he is...


- Join Date
- Jun 2011
- Location
- The North Coast, Ohio
- Posts
- 2,455
Thanked: 146
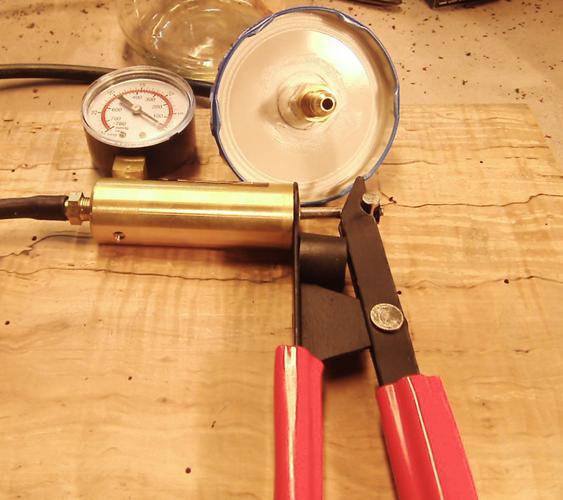
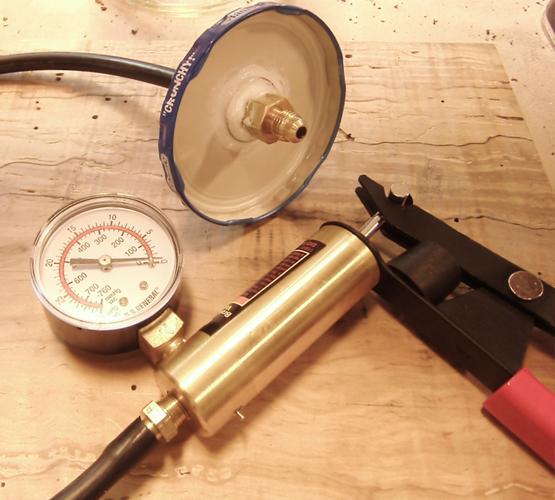
back to the matter at hand, did you use a brake bleeder type vacuum pump?
-
06-01-2012, 08:45 PM #12At this point in time...


- Join Date
- Jun 2007
- Location
- North Idaho Redoubt
- Posts
- 27,037
- Blog Entries
- 1
Thanked: 13249
 Originally Posted by pixelfixed

Yikes... we still haven't made it outta the 70's yet in fact it is 54 right now back back in a few and will load some pics
-
06-01-2012, 08:56 PM #13'with that said'


- Join Date
- Aug 2010
- Location
- Walla Walla in WA State USA
- Posts
- 11,244
Thanked: 4237
This is a very interesting project! I'm looking forward to see how it goes!
-
06-01-2012, 10:17 PM #14At this point in time...
- Join Date
- Jun 2007
- Location
- North Idaho Redoubt
- Posts
- 27,037
- Blog Entries
- 1
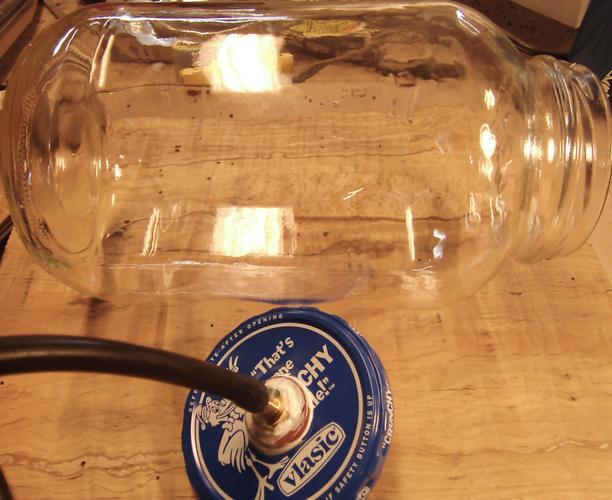
Thanked: 13249 PICS as demanded LOL
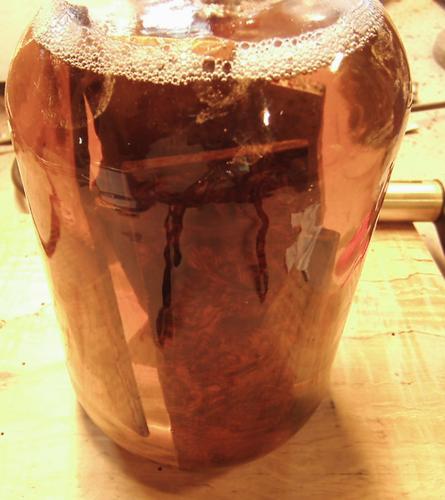
Jar = Valsic 1 1/2 quart $3.42 with Pickels
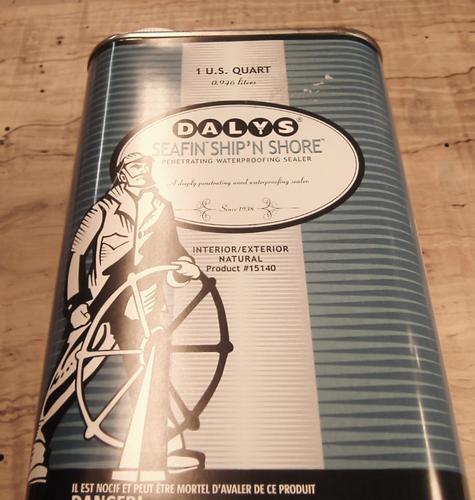
Daly's = $16 per Qt x 2
Fittings & Washers = $8.69
Silicon Sealer = $4.49
Pump Kit $24.99
Feeling of success when it worked, and didn't implode like so many people warned about = Priceless
Tricks I have learned already,
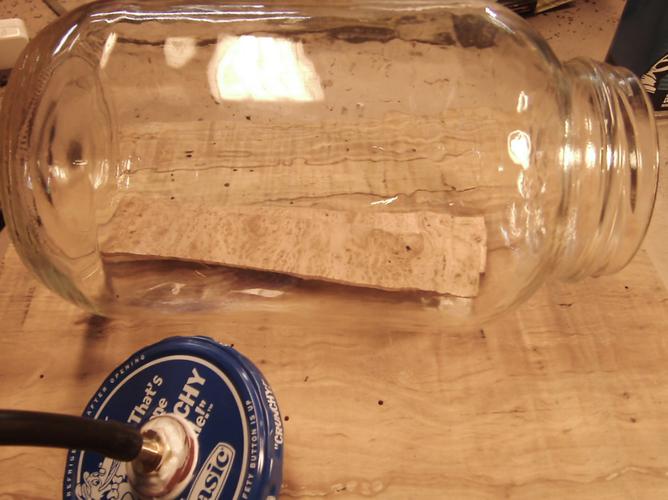
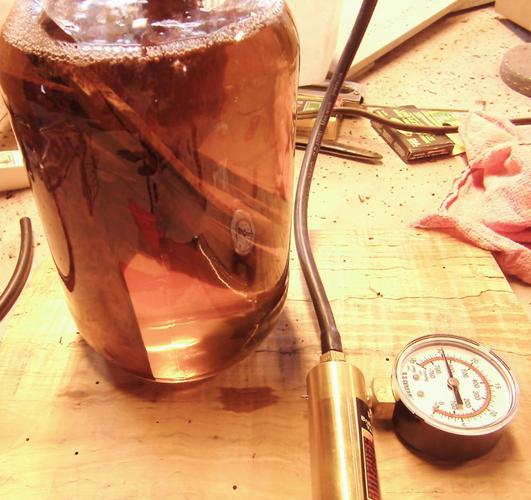
Slowly bring the pressure down about 5 in/hg at a time let the foam up occur and then bring it down again
After 1 hr release the pressure, and then let the wood sink lower, and drop the pressure again
I have it holding at 25 in/hg and it has held there today for over 4 hours so far
Do NOT let the sealer touch the fitting inside the jar it will wreck your pump if it gets sucked in
You can create a double "Boiler" type set up and keep things really safe if you can get the right size glassware ie: a smaller jar of finish inside a larger jar that holds the Vacuum
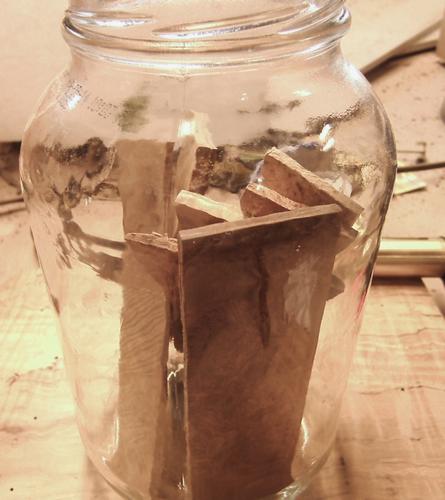
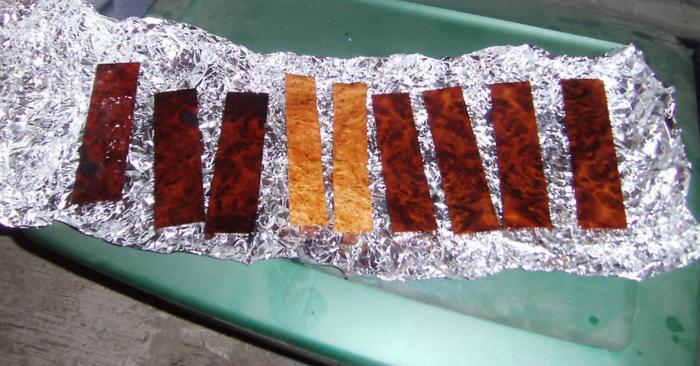
The first batch of Burls
Last edited by gssixgun; 06-02-2012 at 12:22 AM.
-
-
06-01-2012, 10:24 PM #15Senior Member

- Join Date
- Jan 2011
- Location
- Roseville,Kali
- Posts
- 10,432
Thanked: 2027
Thats a great thing,can you wgt a pce before and after? might be interesting.
Do you see any evidence of water in the mix? or was the wood dry beforehand.
This is great stuff,thanks.
-
06-01-2012, 10:25 PM #16Easily distracted by sharp objects

- Join Date
- Apr 2011
- Location
- Tempe, Arizona, United States
- Posts
- 824
Thanked: 94
that wood looks amazing Glen!
-
06-01-2012, 10:26 PM #17..mama I know we broke the rules...


- Join Date
- Feb 2010
- Location
- Toronto, Ontario, Canada
- Posts
- 2,895
- Blog Entries
- 8
Thanked: 993
Bottom line: This is freakin' cool.
-
06-01-2012, 10:28 PM #18Senior Member

- Join Date
- Jan 2012
- Location
- Spokane WA
- Posts
- 2,935
Thanked: 704
No one best be complaining for a lack of photography here, Glen.

Awesome set-up and nice results!
-
06-01-2012, 10:32 PM #19At this point in time...
- Join Date
- Jun 2007
- Location
- North Idaho Redoubt
- Posts
- 27,037
- Blog Entries
- 1
Thanked: 13249
So far the hardest parts were finding the right jar
Finding and adapting the fittings
and Resisting the urge to keep testing the wood every couple of hours to see how it is drying
BTW This is NOT my idea, I just simply adapted it specifically for my usage
-
06-02-2012, 12:07 AM #20'tis but a scratch!

- Join Date
- Oct 2010
- Location
- Durango, Colorado
- Posts
- 2,080
- Blog Entries
- 2
Thanked: 443
Hi Glen,
Once upon a time I took a class in electron microscopy, and we embedded our specimens in a resin that set when baked. Don't remember the temperature, but I don't think it would harm wood. We kept a range of resin solutions--10% resin, 90% solvent (acetone, I think, or absolutely dry ethanol), then 20% resin, and so on. It was really time consuming, time in each bath before moving on, but we got subcellular impregnation.
I have no idea what the stuff cost or where you get it, but it was tough and transparent when it set. There's got to be a microscopist among us. Anyone? Anyone?
Where did you get your pump and vacuum gage? With a little extra hassle you can put another container in series to catch any fluid and protect your pump.
Cool setup.Last edited by roughkype; 06-02-2012 at 12:10 AM.
gssixgun likes this.
-
The Following User Says Thank You to roughkype For This Useful Post:
gssixgun (06-02-2012)


 Reply With Quote