
Results 41 to 50 of 59
 113Likes
 LinkBack URL
 About LinkBacks
-
01-30-2014, 04:46 AM #41Captain ARAD.


- Join Date
- May 2011
- Location
- Pacifica, CA
- Posts
- 2,474
Thanked: 2226
More progress!
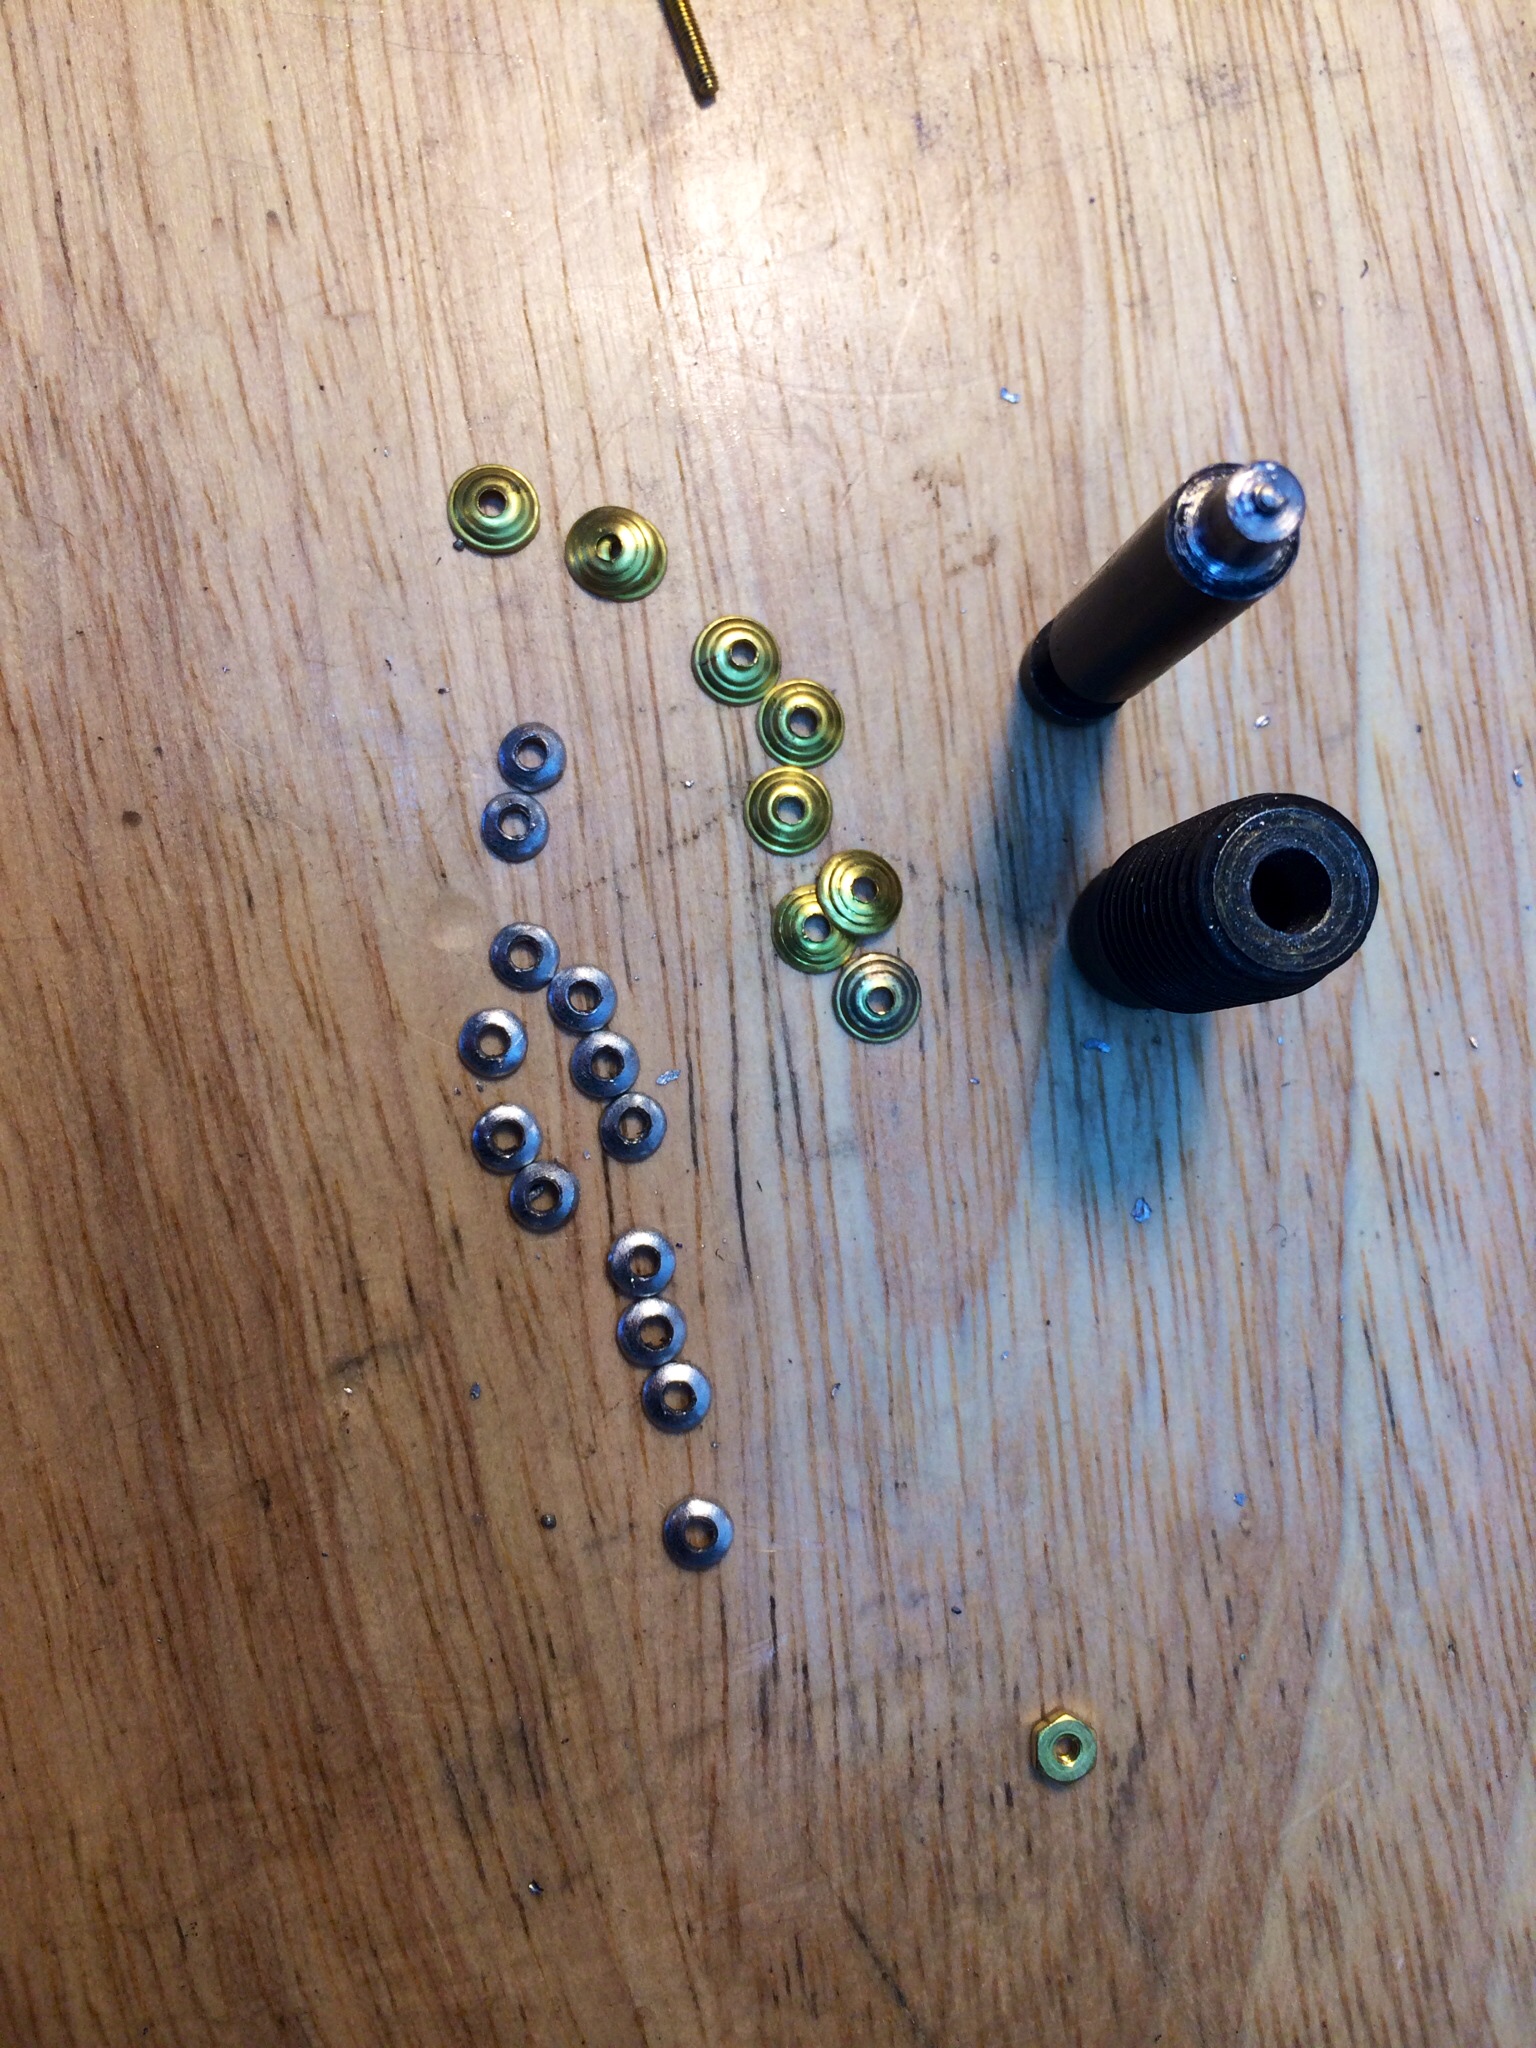
Today I got the punch for the under collars working great. What you're seeing there is a bunch of the triple stacked washers and a bunch of steel collars to go under them. Next to those are the bit and receiver from my hand-held power punch, but I stuck the bit into my drill press and used a file to shape the end of it to have a 1/16th nub and a more chamfered edge.
So, all I have to do is pre-drill 1/16th holes in steel sheet. What I'm using now is technically a bit too thick at 26 gauge, and it's also coated, but since these are going under the display collars, it should be fine. Once the holes are drilled the punch will sink into them then punch the little rounded washers, perfectly centered.
Who really cares though, without pictures of how it looks compared to originals?
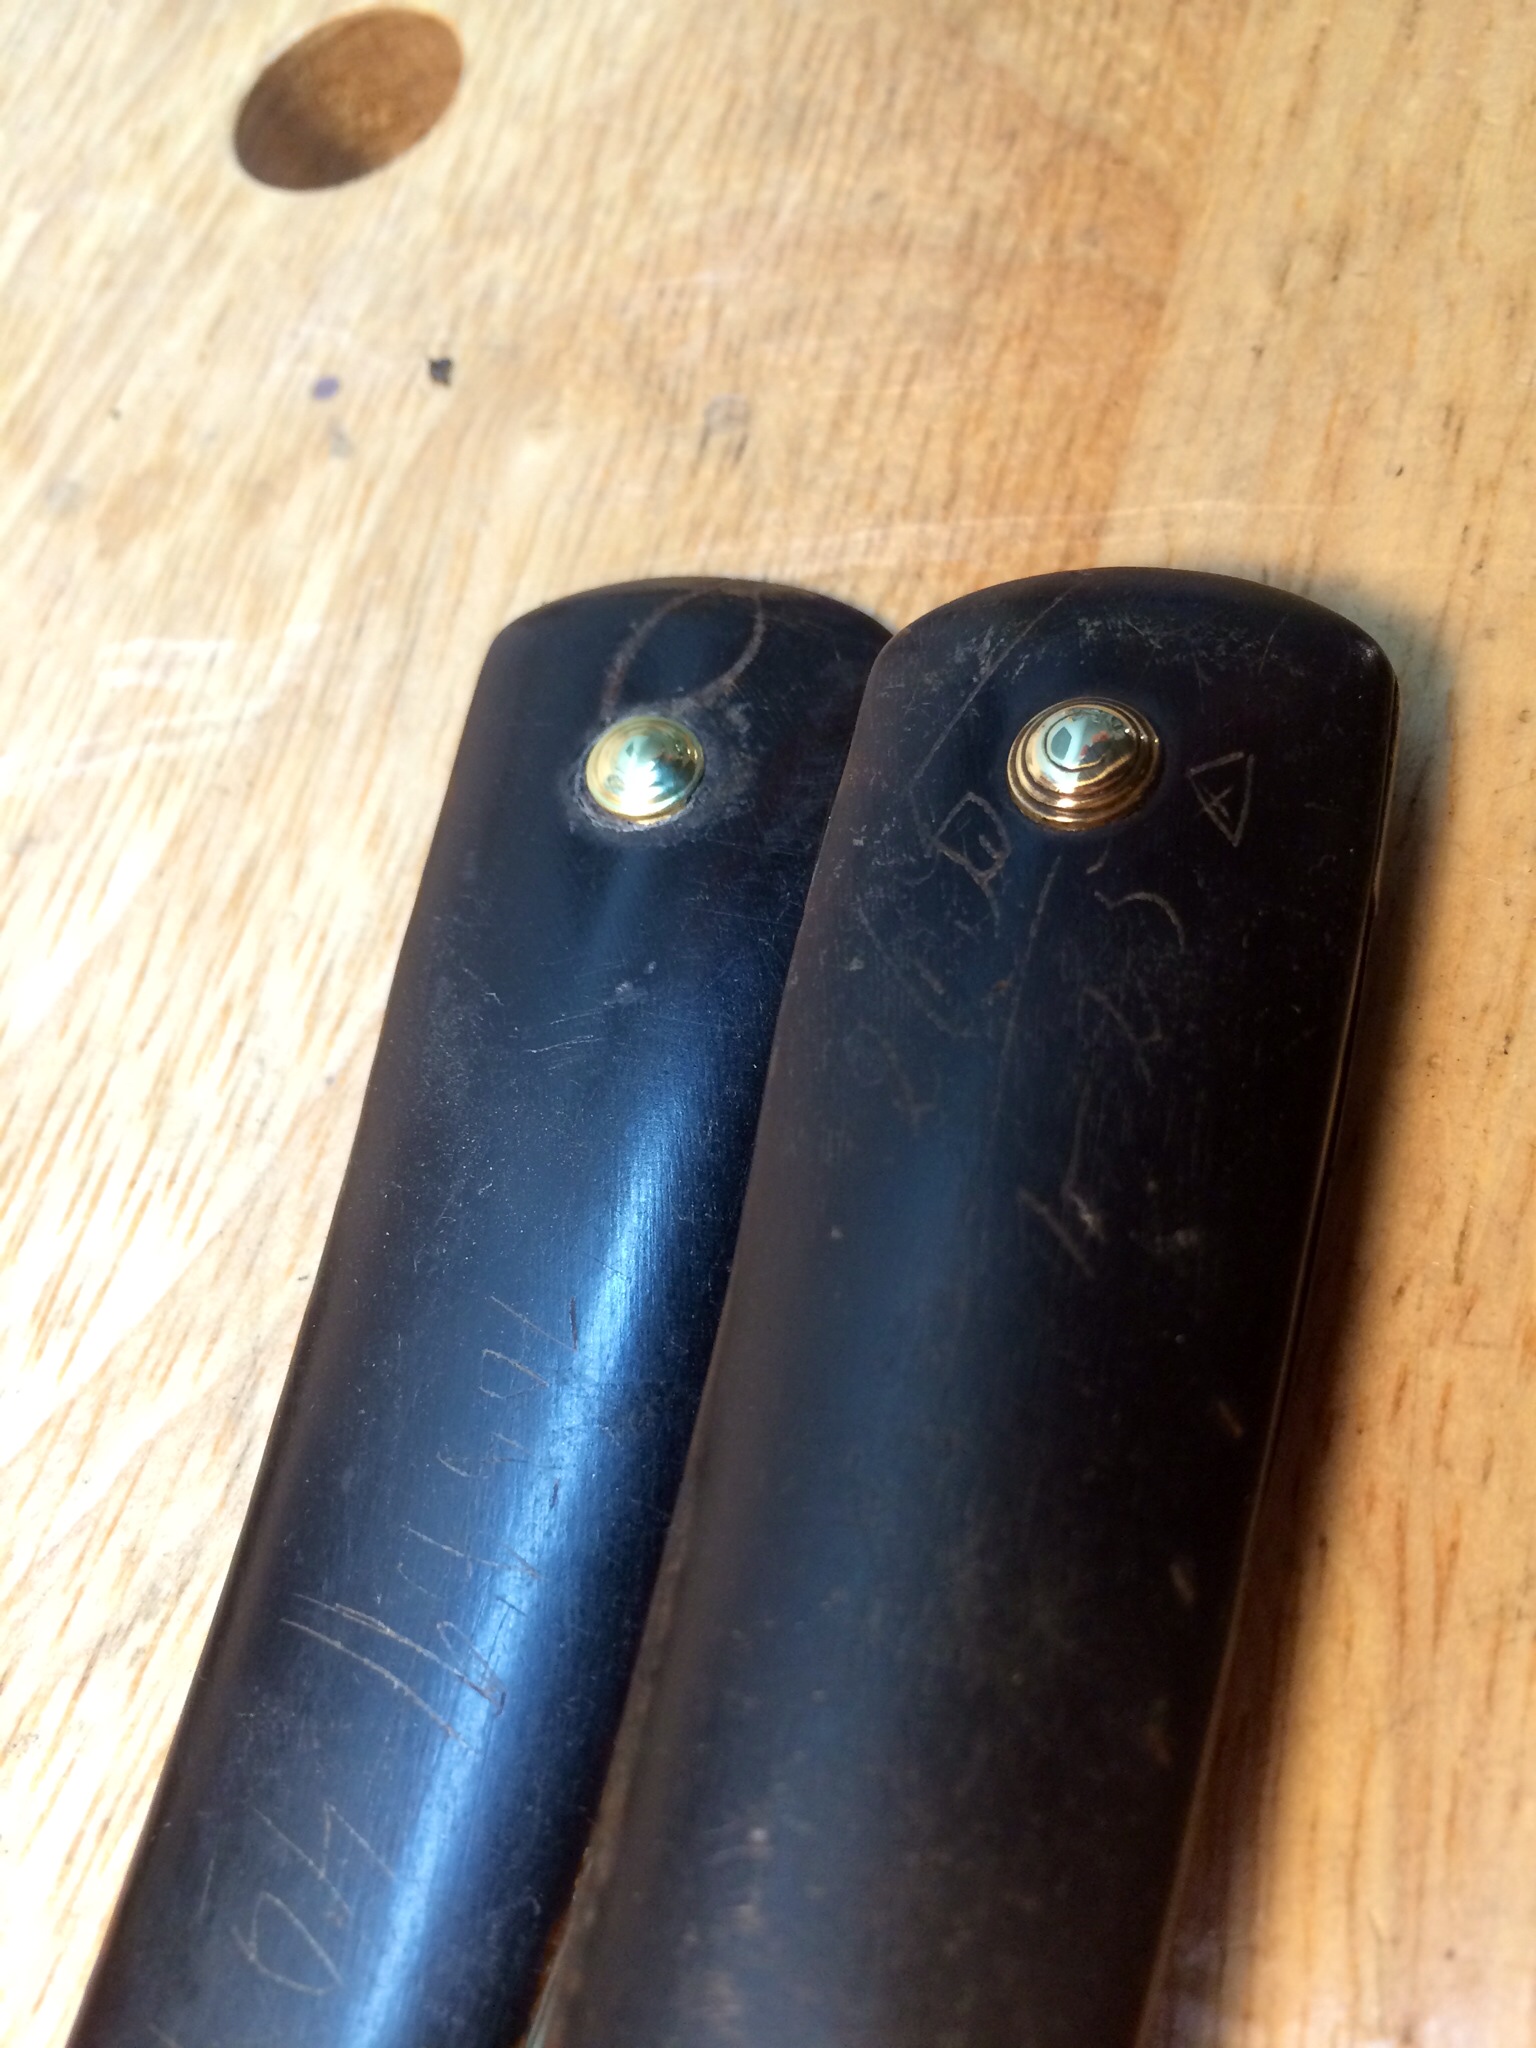
I don't need to tell you which is which because the vintage ones still have enough grime in them to be obvious. And no, they aren't an exact match... But neither are the same washers on any given razor of the same style. There's a wide amount of variation in the originals, and that includes tiny bits of flash sticking out and fairly different heights.
And here's an extreme closeup.

I'm using the drill press to cut out all the parts, here. The under collars are a 2-step process and the outer collars are 3 step. Retooling for each step takes 15-20 seconds, which is a little annoying when you're making 1-2 of them, but when you're making 30 or more, it's no big deal, and drilling the pin holes is the same for both sets of washers.-Zak Jarvis. Writer. Artist. Bon vivant.
-
-
01-30-2014, 12:11 PM #42Senior Member

- Join Date
- Dec 2013
- Location
- Kentucky
- Posts
- 1,840
Thanked: 124
Nice work void, thanks a ton for sharing, very helpful.
-
02-07-2014, 02:19 AM #43Senior Member
- Join Date
- Dec 2013
- Location
- Kentucky
- Posts
- 1,840
Thanked: 124
Ooooo, customer of mine should have the punch finished in the next day or two, it forms and cuts the collars and hes using a heavy rubber belt from the Toyota assembly line for the back surface to punch into. Cant wait to try it out!
Last edited by DennisBarberShop; 02-07-2014 at 02:21 AM.
-
02-07-2014, 08:49 PM #44Senior Member
- Join Date
- Dec 2013
- Location
- Kentucky
- Posts
- 1,840
Thanked: 124
Here it is.
Time to rescale some cleavers!
Thanks for the inspiration void!!!Last edited by DennisBarberShop; 02-07-2014 at 08:53 PM.
-
The Following User Says Thank You to DennisBarberShop For This Useful Post:
Geezer (02-07-2014)
-
02-07-2014, 09:15 PM #45Senior Member

- Join Date
- Sep 2011
- Posts
- 1,650
Thanked: 1341
Glad to see this is catching on. Now someone figure out how to make the rosette collars of the 1830s.
-
02-07-2014, 09:46 PM #46Captain ARAD.
- Join Date
- May 2011
- Location
- Pacifica, CA
- Posts
- 2,474
Thanked: 2226
Thank ScienceGuy too! He's the one that made the main die I'm using! Originally Posted by DennisBarberShop


Also, what're you doing for the locking washer under the collar?-Zak Jarvis. Writer. Artist. Bon vivant.
-
02-07-2014, 09:48 PM #47Captain ARAD.
- Join Date
- May 2011
- Location
- Pacifica, CA
- Posts
- 2,474
Thanked: 2226
I think for that we're gonna have to cast the die... I'm also gonna want to make the star collars like that 1820's Crawshaw! But that's the same as the rosettes. Clearly a sculpted die. Originally Posted by ScienceGuy
-Zak Jarvis. Writer. Artist. Bon vivant.
-
02-07-2014, 10:26 PM #48Obsessive compulsive

- Join Date
- Feb 2010
- Location
- New Zealand
- Posts
- 1,315
Thanked: 323
They look really good. Will there be spares? ;-)
-
02-07-2014, 10:28 PM #49Obsessive compulsive
- Join Date
- Feb 2010
- Location
- New Zealand
- Posts
- 1,315
Thanked: 323 Making triple stacked washers old school
Could model the complex ones in 3D and have a die CnC'd Originally Posted by Voidmonster
-
02-07-2014, 11:01 PM #50Captain ARAD.
- Join Date
- May 2011
- Location
- Pacifica, CA
- Posts
- 2,474
Thanked: 2226
Originally Posted by EisenFaust
Originally Posted by EisenFaust
If you want washers, just say how many! I've sniped enough razors out from under you that I owe ya some. The dies themselves I'm slightly lacking in spares, though.
Now if you've got access to a fancy CnC, I can totally do the 3d part. I have, so far, been unable to make CnC time worth the money for me.Geezer likes this.-Zak Jarvis. Writer. Artist. Bon vivant.


 Reply With Quote