
Results 1,491 to 1,500 of 1773
 6809Likes
Thread: We Have Skills Too !!
 LinkBack URL
 About LinkBacks
-
07-08-2020, 09:53 PM #1491Str8Faced Gent.


- Join Date
- Aug 2013
- Location
- Orangeville, Ontario
- Posts
- 8,456
- Blog Entries
- 1
Thanked: 4207
Had a challenge where I didnt want to spend 3k to have the yard dug up to install proper in ground pool starts in our pool.
Its an older install that had a ladder in the deep and shallow ends.
We wanted stairs so the dog, and older folk could get out easier.
So, bought a set for above ground pools for under 300, but they were designed to bolt to a wooden deck.
That bolt on design is a big part of the stability of the stairs so I needed to figure out a way to transition from stone to screw to keep things solid.
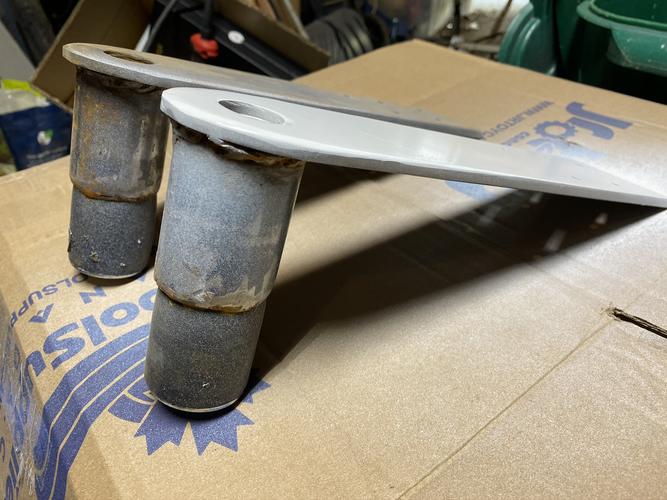
Bought a couple of pipe expansion plugs and welded them to some plate steel. Figure I can use the original ladder holes as anchorage if I can lock the brackets into the holes.
Left the hole in the top so I can reach in to tighten the plug in position and now need to find appropriate 4x4 material to make the deck block.
Results work well.


Not as wide as set in stairs, but I saved an entire decimal place!
Cheers gents, stay crafty.
 "Depression is just anger,, without the enthusiasm."
Steven Wright
https://mobro.co/michaelbolton65?mc=5
-
07-15-2020, 11:37 PM #1492Str8Faced Gent.
- Join Date
- Aug 2013
- Location
- Orangeville, Ontario
- Posts
- 8,456
- Blog Entries
- 1
Thanked: 4207
Following along to the above, the deck used to end at a small lawn area that was now above the stones and held water on the deck after rain. I have a lot of left over old flagstone so want to extend the patio area with that stone.
Hit a few significant roots though.
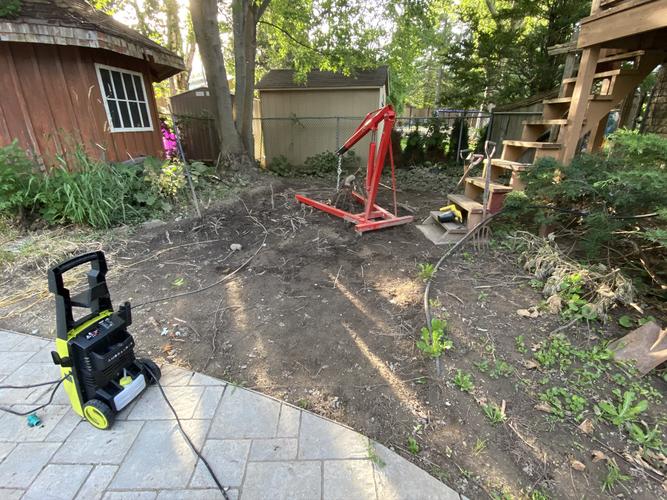
Not using the engine hoist at the moment so a bit of constant up tension and some high pressure water helped loosen the tendrils from the dirt.
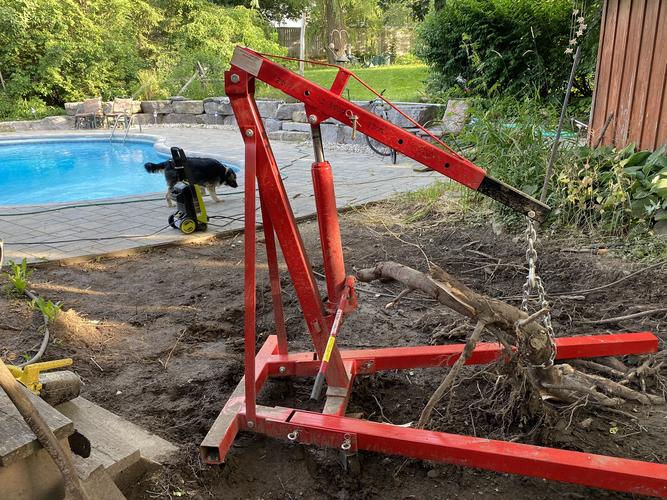
Working quite well, albeit dirty and slow..
The things we do to save money, and our backs..
But should look nice when done. Just need to recruit my lad for help with the rocks.
"Depression is just anger,, without the enthusiasm."
Steven Wright
https://mobro.co/michaelbolton65?mc=5
-
07-16-2020, 12:53 AM #1493Skeptical Member


- Join Date
- Nov 2016
- Location
- Colorado Springs
- Posts
- 10,548
Thanked: 2194
Nice idea Mike.
It's just Sharpening, right?
Jerry...
-
The Following User Says Thank You to Gasman For This Useful Post:
MikeB52 (07-16-2020)
-
07-18-2020, 12:03 AM #1494'with that said'

- Join Date
- Aug 2010
- Location
- Walla Walla in WA State USA
- Posts
- 11,249
Thanked: 4237 Old Friend's Rescue
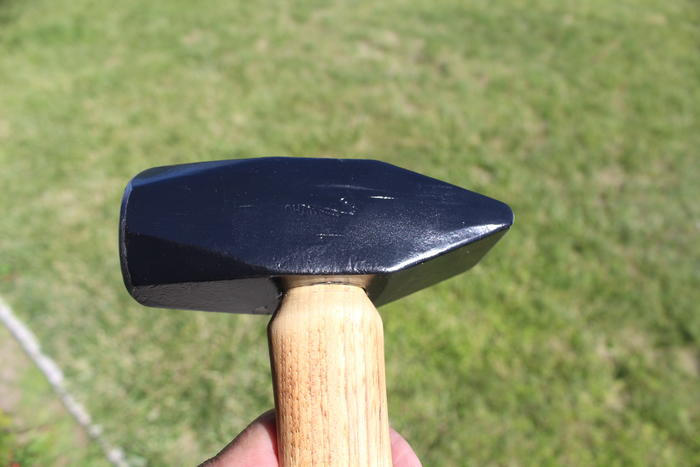
Years ago my dad told me he wasn't going to let me use his tools at home anymore and I needed to buy my own. So I went to the dealer where dad bought most of his tools and Wow tools were pricey! However since my dad was a longtime customer and a good friend of the dealer I was given a very nice discount.
One of the tools I originally purchased was a 2 lb sledge with a cross peen. That thing stood by me as both a swather mechanic, a combine working summers for Green Giant, then my years as an auto body mechanic and countless times working on countless back yard projects.
I can't even recall the incident when I screwed up and missed the mark and broke the handle. I could still be used but not to really pound on anything so it pretty much stayed in the drawer as I has a similar weight in a ball peen and dad's old 3 lb with dual sledge faces on both ends but I wanted to get my old friend back and ready to go.
I ordered a new handle,stripped the factory finish off then started using low heat to really dry the wood. My thinking is that 'IF' I got the handle really, really dry and then a nice tight fit that after driving the metal wedge in that nature would provide more than enough moisture to swell the wood fibers and since it wouldn't ever be as dry as I had it that the head would hold tight and never need to have the wedge hammered further in OR the head end soaked in water.
I used the natural heat during the day and then at night at 100 degs in my oven for a couple of days and decided that today was the day.
I do hope it works out and the head will stay tight, if not-----there's always driving the wedge down OR soaking in water.
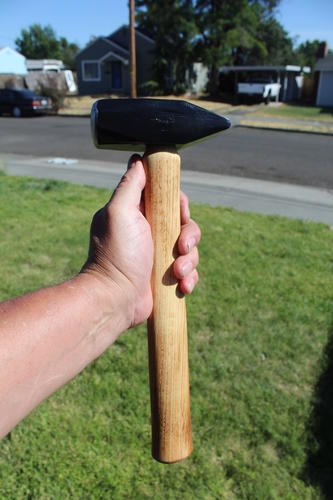
I forgot to add that I applied many coats of linseed oil that I'd diluted using 1 part oil to 2 parts paint thinner. Took awhile but the surface is nice and smooth and I really like the way the handle feels.
Last edited by cudarunner; 07-18-2020 at 12:08 AM.
Our house is as Neil left it- an Aladdins cave of 'stuff'.
Kim X
-
07-18-2020, 01:41 AM #1495Incidere in dimidium


- Join Date
- Mar 2012
- Location
- Val des Monts, Quebec
- Posts
- 4,070
Thanked: 1440
Two blacksmith tricks for you to consider Roy:
1) fill a container with linseed oil, deep enough to cover the head of the hammer, then set it in to soak standing on its head. Oil will soak into the handle, further swelling it.
2) have you ever charred your handles? I first tried this a few years ago at the suggestion of my blacksmithing mentor, and have not looked back. I just take a propane torch and lightly char the entire handle, then (re)apply boiled linseed oil. It gives a better (IMHO) grip than bare wood, and dammit, it looks cool.
It was in original condition, faded red, well-worn, but nice.
This was and still is my favorite combination; beautiful, original, and worn.
-Neil Young
-
07-18-2020, 02:05 AM #1496'with that said'
- Join Date
- Aug 2010
- Location
- Walla Walla in WA State USA
- Posts
- 11,249
Thanked: 4237
Thank you for your counsel, it's very much appreciated.
The soaking in linseed oil is something I've never heard of. However I'll give it some thought.
Funny you should mention the 'charred wood' as the handle came with it, but sanding the finish off removed most all of the char. However the feel of just the diluted linseed oil has a nice feel to it. I can always strip and then use a torch to char it later on.
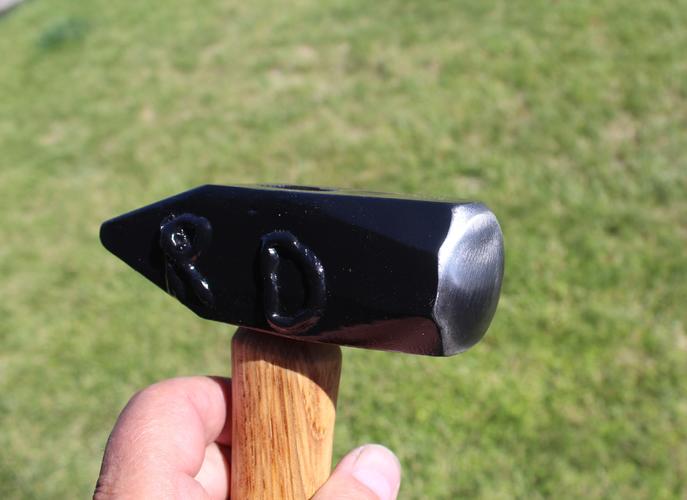
The handle was advertised for a 2-3 lb hammer head but the end was far too large for my application so it took a lot of work to get it down to where I needed it. The handle came with both a wooden and a steel wedge.
After driving the head onto the modified handle you really had to look to see any gap in the middle to drive a wedge in so I figured the wooden one was out but when I tried to drive the steel wedge in it only bounced back Sooo I ground the wedge down a bit and had another go--not quite as bad but the 1 lb ball peen wasn't doing the job sooooo I broke out dad's 3 lb sledge to drive the wedge with. Even then it took a bit. I was actually worried about splitting the handle but finally got the wedge close to flush but I didn't want to damage the fresh paint so a thin piece of leather was laid over the end and the wedge was driven flush then a short pin punch drove the wedge just below the surface but that was a struggle.
Anyway I will keep your counsel in mind and if by chance the head loosens up or the handle needs more grip I'll remember your counsel. Our house is as Neil left it- an Aladdins cave of 'stuff'.
Kim X
-
07-18-2020, 02:08 AM #1497Incidere in dimidium
- Join Date
- Mar 2012
- Location
- Val des Monts, Quebec
- Posts
- 4,070
Thanked: 1440
Hey, the handle is on and it feels good. That's all that really matters!
It was in original condition, faded red, well-worn, but nice.
This was and still is my favorite combination; beautiful, original, and worn.
-Neil Young
-
07-18-2020, 11:56 AM #1498Senior Member


- Join Date
- Jun 2013
- Location
- archbold ohio
- Posts
- 2,378
Thanked: 546
nice looking hammer. Linseed oil is the way to go. i remember reading in one of Roy Underhill's books that soaking a hammer head in water will indeed tighten it but it will also crush the wood fibres and then once dry the head will be looser than before.
cudarunner and Cangooner like this.
-
07-18-2020, 01:25 PM #1499Incidere in dimidium
- Join Date
- Mar 2012
- Location
- Val des Monts, Quebec
- Posts
- 4,070
Thanked: 1440
I'm pretty sure I've also read that soaking in antifreeze can work as well. The ethylene glycol swells the fibres but then is persistant, so it doesn't have the drying out problem. But before anyone tries this, please do some googling unless someone else can confirm. I may have dreamed it. Originally Posted by tintin

It was in original condition, faded red, well-worn, but nice.
This was and still is my favorite combination; beautiful, original, and worn.
-Neil Young
-
07-23-2020, 08:39 PM #1500Str8Faced Gent.
- Join Date
- Aug 2013
- Location
- Orangeville, Ontario
- Posts
- 8,456
- Blog Entries
- 1
Thanked: 4207
20+ years ago I had a bad car accident that knocked all my teeth out, among other things.
Most of the teeth retook happily but a few on the bottom didnt which meant partial denture.
Fast forward to last night and the molar on the lower left that held the partial broke clean off at the gum line.
Aside from the obvious pain, which passed, as pain does. I now had no molars on the bottom jaw to hold my partial properly.
Pandemic backlog is such I cant see my dentist till next week and am not really keen on them pulling the roots out and spending more money on a modified denture.
So whats a clever tech to do,,,,
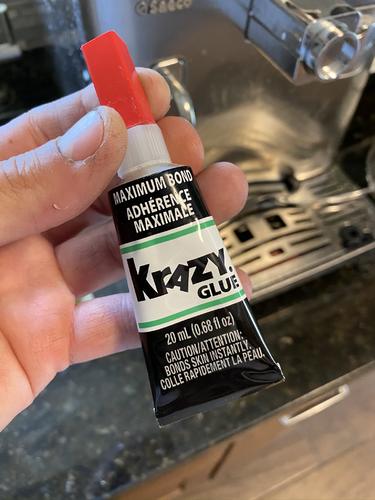
Well it does say maximum bond, and if I can match up the jagged break line edges and get everything dry enough..... maybe.
So practice fit the tooth on the stump a few times to gain proficiency working backwards in a mirror, brush mating surfaces aggressively with tooth paste and rinse, dry everything With hair dryer and apply a little, but enough dollop of ca such that if fills the void, but shouldnt ooze out into the gum line.
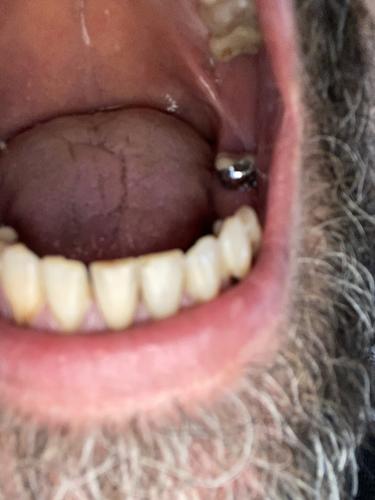
Suffice it to say I was surprised it not only has held since lunch, but holds the partial too. Havent tried real chewing but have clenched the teeth a few times and no issues and the fit is perfect..
Tooth had a root canal previously, was effectively dead, and will be pulled if this doesnt hold, or gets infected, or or or.
But hey, in a pinch it works. CA is a good temporary stitch, or suture tape, as its sterile. I always knew that, but this was a bit of a Hail Mary trial.
May not try popcorn tonight, but may be able to stomach spaghetti.
Just sharing some of the weirder crap I try to do gents..
Ymmv."Depression is just anger,, without the enthusiasm."
Steven Wright
https://mobro.co/michaelbolton65?mc=5


 Reply With Quote