Results 71 to 80 of 187
Thread: Homemade leather bags.
-
10-07-2013, 10:55 PM #71
-
10-07-2013, 10:58 PM #72May your bone always be well buried


- Join Date
- Jun 2010
- Location
- Brisbane/Redcliffe, Australia
- Posts
- 6,380
Thanked: 983
My first attempt at formed leather work looked like it was made with an out of control temper and a sledge hammer
 .
.
Mick
-
10-07-2013, 11:03 PM #73

,,,,,but I bet you kept it, didn't ya.

-
10-08-2013, 06:12 AM #74May your bone always be well buried


- Join Date
- Jun 2010
- Location
- Brisbane/Redcliffe, Australia
- Posts
- 6,380
Thanked: 983
I did, but it has long since been lost somewhere along the way. Can't believe I tossed some of my leatherwork out in one of my many big minimalist mentality clean ups over the years. Maybe now that I have a wife, kids, dog etc. I might manage to keep something to pass on...Or at least use it 'til it's worn out for a change
 .
.
Fiddling around with buckle placement and attachment on the bag today. Decisions to be made to overcome problems created by not thinking things through earlier. I made the front pouch section of the bag to close to the edges of the main body, and now don't have enough room to place buckles for the main closure on that section. I've decided to proceed by putting those two buckles on the front pouch with a third one in the centre for the pouch closure. Once the buckles are on and there are no last minute desires to add anything else internal to the bag, I can start stitching the main components together before adding the finishing touches. Still a bit of work to go yet though.
Mick
-
10-08-2013, 11:42 AM #75May your bone always be well buried


- Join Date
- Jun 2010
- Location
- Brisbane/Redcliffe, Australia
- Posts
- 6,380
Thanked: 983
The promised progress report is now in. Today I was working on buckle placement as previously stated and making the straps for the buckles attachment. The main bag buckles were always going to be where they are and so too the side pouch buckles, but the main lid buckles were meant to be on the body of the bag. They are now aligned with the front pouch buckle, making for three in a row.
The sidewalls of the bag and pouches are sewn into place, and it's all double saddle stitched, which is turning into a very time consuming task. I'm now thinking that the front parts will look neater if I just double up on stress points like start, end and corners. The front is also subjected to less wear and rubbing, making this a more desirable option to save time. I can always hit it with another line of stitching if I feel it needs it down the track.
I am planning on adding one more small pouch onto the side wall of the front pouch, and this will be for a mini Maglite. Apart from that, most of the fiddly stuff is done now and the main parts can be sewn together. The shoulder strap has been started and just needs some tack stitching and a few holes punched for adjustment, and the who lot will want some decorating when it's done, but I think that might be an ongoing or future task for when I feel artistic.
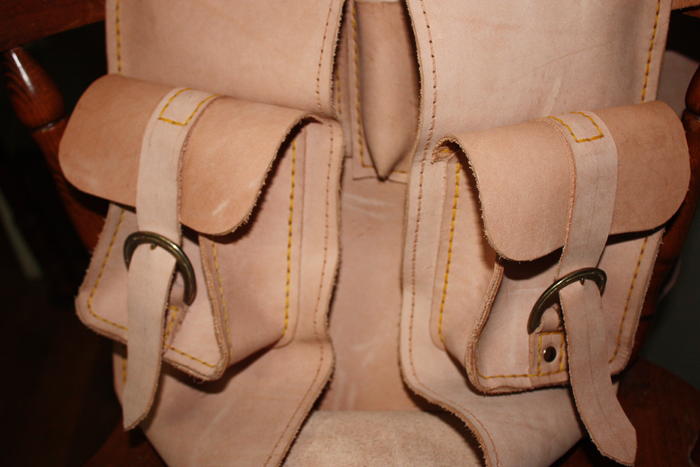
The horseshoe buckles. The larger two I just bought today. The rest are a bit more vintage being 40+ years old. The main buckles are pointed downwards for a better view of the detail. In use they would be showing you their backs and pointing to the top of the bag.
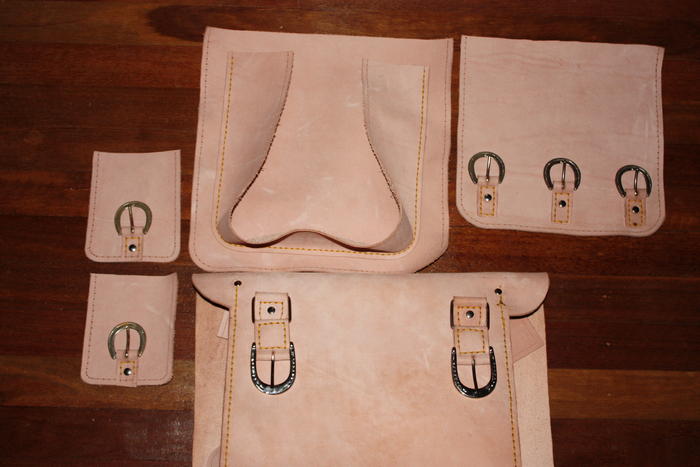
A bit more of an overall view. The larger part of the leather, the main flap looks like it will be in for some trimming down to size before I'm finished.
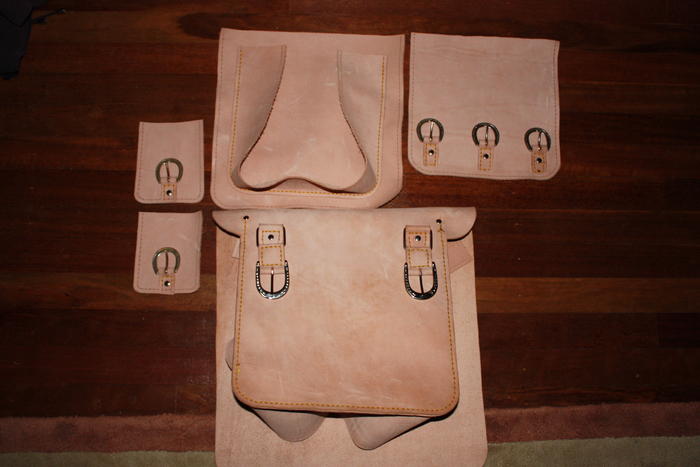
A view showing the side walls of the side pouches attached to the main bag.
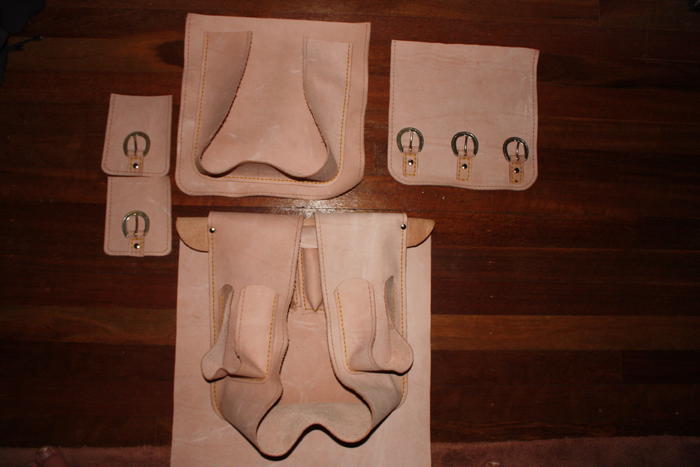
Mick
-
The Following User Says Thank You to MickR For This Useful Post:
Hirlau (10-08-2013)
-
10-09-2013, 12:28 AM #76

All those buckles are plenty of decoration.

-
The Following User Says Thank You to 32t For This Useful Post:
MickR (10-09-2013)
-
10-09-2013, 06:29 AM #77May your bone always be well buried


- Join Date
- Jun 2010
- Location
- Brisbane/Redcliffe, Australia
- Posts
- 6,380
Thanked: 983
Had a minor setback today. One of my side pockets ended up misaligned. And as is the way of these things I only noticed when it was completely sewn into place. I had to unpick it all, align it and re-sew the damn thing. I thought about just leaving it, as I'm trying to go with the rough enough is good enough mentality, but I just couldn't. It irked me to look at it.
Those buckles should be plenty enough decoration without hopefully being too much of a clutter or eyesore material. And since nobody will let me have concho's on it...
Mick
-
10-10-2013, 01:12 PM #78May your bone always be well buried


- Join Date
- Jun 2010
- Location
- Brisbane/Redcliffe, Australia
- Posts
- 6,380
Thanked: 983
Latest update in pictures.
A dee ring added as an after-though and simple grab handle. I find I grab my current satchel at the top when taking it off. If nothing else it'll find a use somewhere.
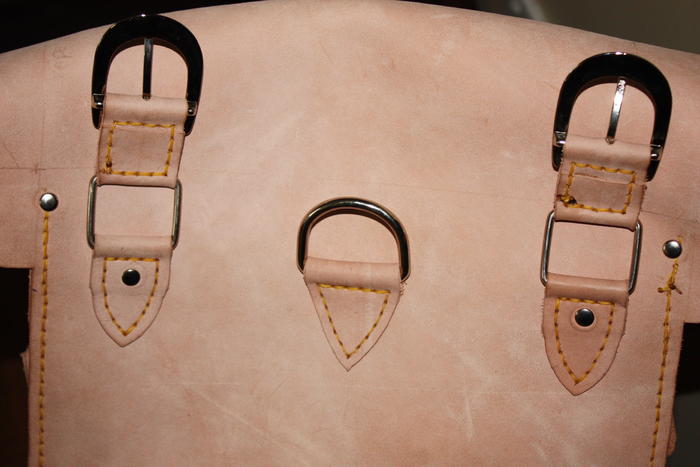
Side pockets with lids and straps and the highest hole punched in.
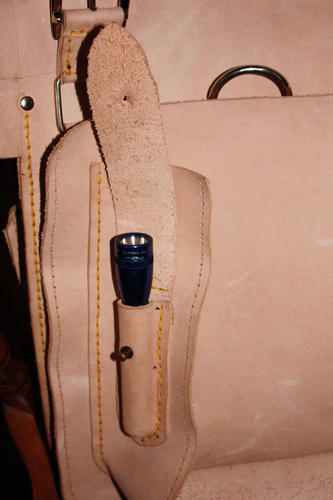
Torch case closed. I did a quick bushmans job of forming the leather on this pouch, as it's exposed to view on the side of the front pouch. I simply nailed the wet leather down on a bit of scrap timber, using the torch as the mould.
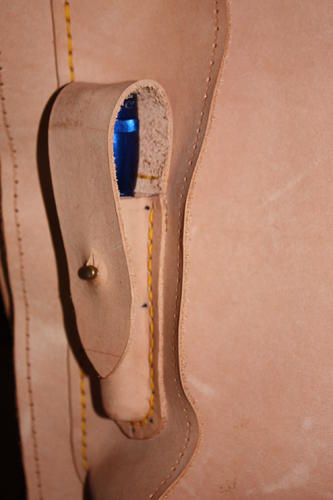
Torch case with lid open.
A general overall view of the still incomplete bag. The main pocket, front panel is now sewn in. The front pocket still needs a lid and strap, side pockets need more holes punched, front panel needs to be sewn into place and main lid needs straps and holes punched as well as trimming down to finished size. Shoulder strap (not shown) needs to be sewn in places and holes added for adjustment.
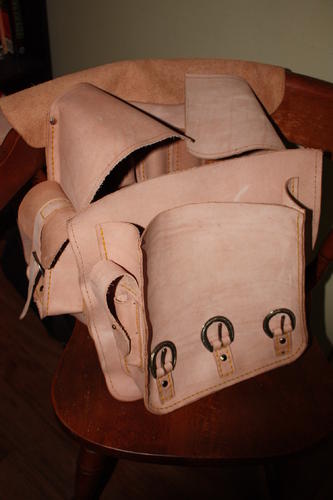
It shouldn't be too much longer before this is complete now, and a finishing coat of leather treatment applied to give it it's colour and weatherproofing.
There's still a lot of hand sewing to do, and maybe one or two more additions that might crop up.
Mick
-
10-11-2013, 02:52 AM #79Bladesmith by Knight


- Join Date
- Jun 2007
- Location
- Murrumba Downs, Queensland, Australia.
- Posts
- 571
Thanked: 203
Great looking work Mick...now you just need to market your own range of Manbags......

Adam
-
10-11-2013, 06:15 AM #80May your bone always be well buried


- Join Date
- Jun 2010
- Location
- Brisbane/Redcliffe, Australia
- Posts
- 6,380
Thanked: 983
I don't think so Adam. The amount of time I'm putting into this one is making me wish I had have used a better quality leather. And if I was to market them, they would be priced out of the market just on time spent.
Now if I had have made it somewhat smaller than the monster bag that it has become, I might think differently. I was looking at the near complete front pocket today and thinking that that was more the size of bag I was after. The main bag is about four times larger. No point in b!tching about it though. It is the bag it wants to be, and I'm not exactly the skinniest bloke around, and I also have three kids, so if I want to stow a jacket for a possible day turning to evening thing, or I'm out and about with the kids, there'll be room for the extra's without having to resort to a daypack.
I'm thinking I'll have this bag as good as done tomorrow. Some finishing bits and pieces like coats of leather dressing, how I might add some decoration and what kind etc., but that won't be here nor there...And you blokes will finally be free to pursue the antics of other mad, raving, demented, loony middle aged men and their hobbies, and that must be a good thing!
Mick


 270Likes
 LinkBack URL
 About LinkBacks

 ,,
,,


 Reply With Quote