Results 11 to 20 of 63
Thread: 1095 stubby WIP
-
01-15-2020, 03:15 AM #11

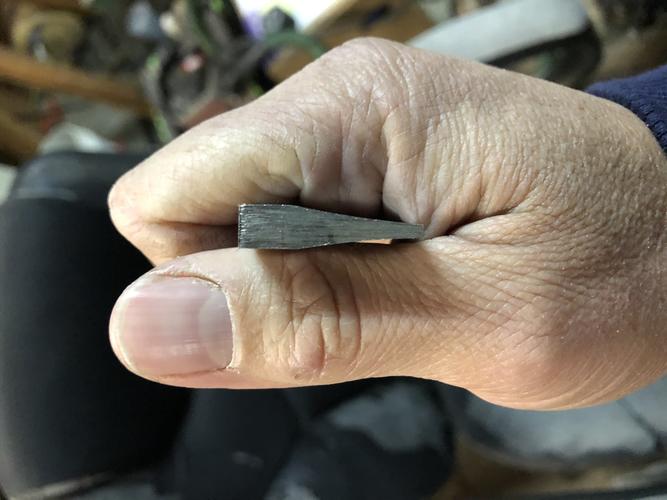
Currently an 1” from spine to edge. I should end up at 7/8+ assuming no unforeseen “modifications”. Blade length is a touch under 3”.
-
01-15-2020, 07:04 PM #12

The 1820's approve of those dimensions!
-Zak Jarvis. Writer. Artist. Bon vivant.
-
The Following User Says Thank You to Voidmonster For This Useful Post:
jfk742 (01-17-2020)
-
01-15-2020, 07:18 PM #13

I just finished restoring a very similar blade last week. Your blade looks great so far and I'm following with great interest. Looking forward to seeing the finished blade.
-
The Following User Says Thank You to karlej For This Useful Post:
jfk742 (01-17-2020)
-
01-17-2020, 05:24 AM #14

I just saw your stub tail, she’s a beaut.
If you wouldn’t mind, could you take a couple of pics of it for me? One from the top of the spine to the tail and another looking at the edge and the bottom of the tang? I don’t have one and haven’t really handled one while paying attention to how they ground them.Last edited by jfk742; 01-17-2020 at 05:43 AM.
-
01-17-2020, 07:28 AM #15
-
The Following User Says Thank You to Voidmonster For This Useful Post:
jfk742 (01-17-2020)
-
01-17-2020, 07:38 AM #16

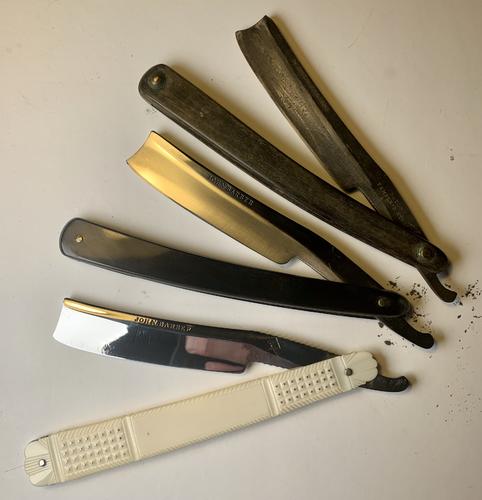
It should be pretty clear which is which:


You’re absolutely welcome to come by my place and raid my collection for blade specs as long as you give me a couple days notice!
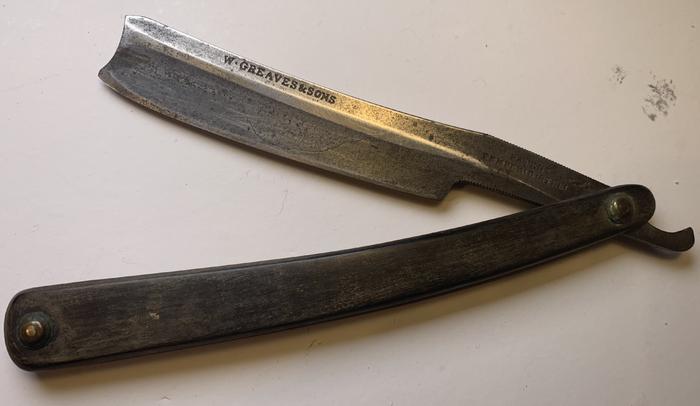
(Amusingly, I had both fewer and more of these style blades than I thought! I was pretty certain I had one other one, but that was part of a lot that went to ScienceGuy and then I’d forgotten I had that Greaves, it was lurking in its original box next to another Greaves I’d forgotten I had.)-Zak Jarvis. Writer. Artist. Bon vivant.
-
The Following User Says Thank You to Voidmonster For This Useful Post:
jfk742 (01-17-2020)
-
01-17-2020, 04:10 PM #17

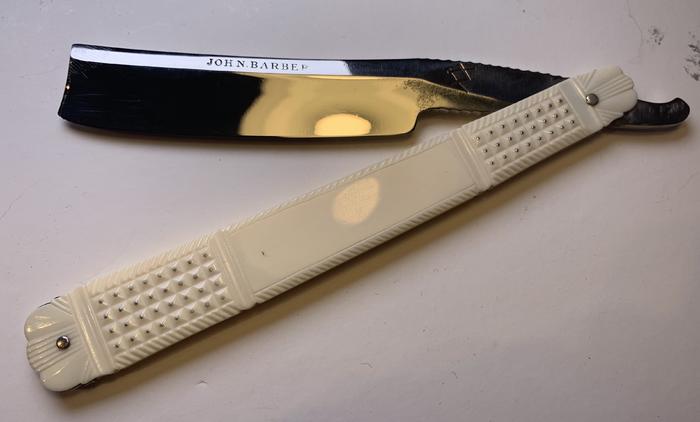
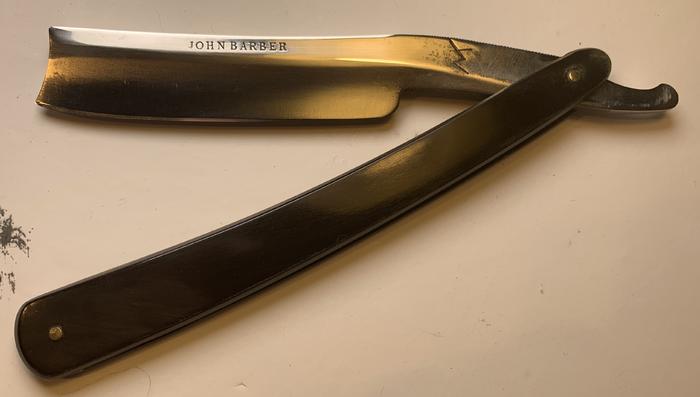
Wow, the pique work and carving on the ivory scaled blade is beautiful. It would appear the ivory scaled razor and the J. Barber are ground differently. The Ivory scaled razor looks to be evenly tapered toe to tail with an almost even grind width on the blade face while the Barber has a more parallel spine with a taper from heel side of tang to the tail. The grinding appears to follow the decreasing width to maintain geometry from edge to spine contact area to set the bevel angle. Zak please correct me if my observations don’t align with yours.
I’ll definitely try and find an afternoon to swing by. Hopefully with a couple of projects done so I can get your input. I’ll bang out a blank tonight and see if I can get some rough grinding done and figure out all the lines correctly.
The hole is deep, sir. I’m afraid I may never go back the way I came....
-
01-17-2020, 10:12 PM #18

I forgot there was an entrance to this hole...
Sorry it took me a little to get back to you on this, I wanted to use the calipers to get a more definitive answer.
All three have a small degree of taper along the spine. The larger of the two Barber razors goes from 5.32mm at the heel to 6.09mm at the point, and that's basically how much all three taper.
It's hard to say if this is because they were intentionally made to have a slight smile to the blade or if the smile is a result of hammer forging. Either way, they've all got a slight smile engineered into the geometry.-Zak Jarvis. Writer. Artist. Bon vivant.
-
The Following User Says Thank You to Voidmonster For This Useful Post:
jfk742 (01-18-2020)
-
01-18-2020, 04:35 AM #19

Thanks Zak, those are helpful measurements.
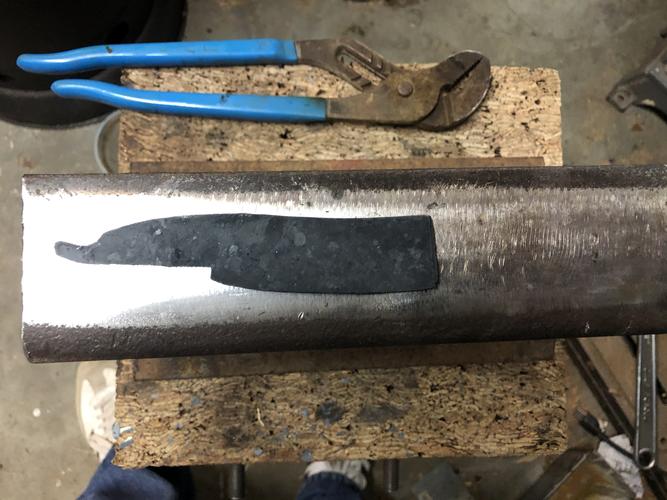
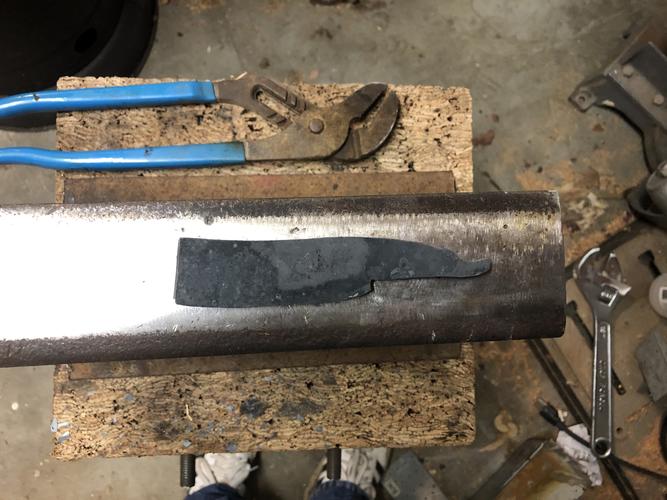
Did some forging today and as far as the slight smile is concerned I think it was more of a by product of forging the blade faces. As I hammered in the smile and tapered the blade from toe to tail the form more or less made itself. I would think a well practiced smith could hammer one of these out by hand in 4-5 heats pretty easy. The most difficulty I had was drawing out the tail, once I got it drawn out I hammered in the tail and then hammered the bevels in from toe to heel. I used a piece of round bar on the anvil, put the tail on the round bar, rested the spine at the toe to create some space and tapped the heel a little to get the hump in there at the spine tang junction. Just going through the motions made it really apparent just hammering in as much of the geometry I could, on its own produced the shape I wanted. I think with some thought I could probably figure out how to get the hump in there without doing any gymnastics to produce it.
Really got me thinking about the dip at the toe razors. I would like to figure out or at least try to make an educated guess as to why they have that specific trait. I can only imagine it is some sort of byproduct of producing the form. It could be in part from the exaggerated smile at the toe in most specimens. As the smith upsets the metal for the bevels maybe he would just strike it more in that area to accentuate the smiling toe making the dip at the spine. A curved toe is fairly useful.
Anyhow remembered to actually take a picture of the eventual razor before I do any grinding.
-
01-18-2020, 04:52 AM #20
 -Zak Jarvis. Writer. Artist. Bon vivant.
-
The Following User Says Thank You to Voidmonster For This Useful Post:
jfk742 (04-23-2021)


 161Likes
 LinkBack URL
 About LinkBacks


 Reply With Quote


