
Results 21 to 30 of 56
 7Likes
Thread: Tim's 1st Blade
 LinkBack URL
 About LinkBacks
-
12-04-2011, 09:55 PM #21Senior Member


- Join Date
- Dec 2006
- Location
- Burkburnett TX
- Posts
- 3,095
Thanked: 2392
Super cool! You are one persistent dude.
I would deburr the edges then scribe a center line before starting to file. I like to do the blade first then taper the tang. Having a square tang will make clamping easier when working on the blade area.
I would clamp a piece of metal on wither side of the blade to work as a guide when you start filing the shoulders on the blade.
Charlie
-
The Following User Says Thank You to spazola For This Useful Post:
tumtatty (12-04-2011)
-
12-04-2011, 09:59 PM #22Senior Member

- Join Date
- Mar 2011
- Location
- North Carolina
- Posts
- 407
Thanked: 72
Thanks Charlie! Originally Posted by spazola

I'm having trouble visualizing what you are saying. How thick a piece of metal? Does it matter?
-
12-04-2011, 10:44 PM #23Senior Member

- Join Date
- Jul 2011
- Posts
- 768
Thanked: 99
Tim, I learned this today over on Bladeforums. Generally the cheap way to make a center line is to darken the edge with layout fluid or a sharpie and then scribe down the middle with a drill bit half the width of the steel. However, what I learned that I'm going to try next time is this: grab a thick book like a phone book or similar and use a single edge razor blade stuck in there at the appropriate height to scribe the center line. Cheap custom made height gauge.
How did you get the edges so smooth with a chisel??
If you haven't already, don't buy harbor freight files. They are horrible. Go buy craftsman from sears. I have a Nicholson that I like too, and use it a lot. One that I wish I had is a wide 10" or 12" double cut bastard for roughing out the bevels.
Scribe your lines on the middle of the edge and at the edges of the spine, then connect the lines with a plane. It's not as simple as it sounds, but picture it like that and you'll understand what I mean. Are you planning to hollow it any?
-
12-04-2011, 10:56 PM #24Hones & Honing

- Join Date
- May 2005
- Location
- Saint Paul, Minnesota, United States
- Posts
- 7,974
- Blog Entries
- 1
Thanked: 2204
To scribe a line down the center of 1/4" steel, this was shown to me by Mike Blue, simply take a 1/4" drill bit, lay it flat on a table and clamp it down, then lay the blank flat on the table and simply draw the blank along the point of the drill bit.
The point of the drill bit is about 1/8" so it should be very close to center. Now flip the blank over and repeat. You will end up with 2 lines, very close together, the center is in the middle of those 2 lines.
Be sure to scribe the line around the entire blank. It really helps with tapering the tang and is a god send when hollow grinding, then you can reference your grinding progress by looking st the lines on the toe end of the blade to see if your grinding is even.Randolph Tuttle, a SRP Mentor for residents of Minnesota & western Wisconsin
-
The Following 2 Users Say Thank You to randydance062449 For This Useful Post:
greenbriel (04-01-2012), tumtatty (12-04-2011)
-
12-04-2011, 11:45 PM #25Senior Member
- Join Date
- Mar 2011
- Location
- North Carolina
- Posts
- 407
Thanked: 72
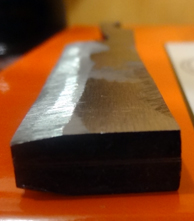
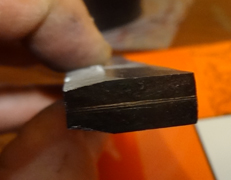
I ordered 5/16 stock so I took a 5/16 drill bit and scribed a line on the blank (after I coated the edges with a black sharpie). I flipped it over and repeated the scribe and it looks like the center is pretty well defined!
Now I guess i need to clamp it down and start filing. ( Oh..Brian I meant that I filed the edges...not chiseled!). I did get some Harbor Freight files since I have a store very close by. So far they have worked pretty well, but I'm not expecting them to last very long for $10.
Is the idea to connect the spine to the middle line on the (soon to be) blade edge?jdto likes this.
-
12-04-2011, 11:53 PM #26Senior Member
- Join Date
- Dec 2006
- Location
- Burkburnett TX
- Posts
- 3,095
Thanked: 2392
I was thinking of clamping a couple of the precision ground scraps to simulate something like this #FG100 Hardened File Guide
You could even make you own with your drill press and a couple of roll pins
Charlie
-
The Following User Says Thank You to spazola For This Useful Post:
tumtatty (12-04-2011)
-
12-05-2011, 12:03 AM #27Senior Member
- Join Date
- Jul 2011
- Posts
- 768
Thanked: 99
Charlie, I don't understand how this works? How does it guide the file. I feel like I'm missing something very obvious here....... Originally Posted by spazola
Randy, I'm going to have to try clamping the bit down and moving the stock. That sounds easier than vice-versa!
Looking good Tim. Filing makes much more sense than chiseling. Lol. I've been wondering how you did it.
-
12-05-2011, 01:09 AM #28Senior Member
- Join Date
- Dec 2006
- Location
- Burkburnett TX
- Posts
- 3,095
Thanked: 2392
The edge of file rides up against the side of the guide. Because the guide is lined up the same on both side of the razor you shoulders will come out the same on both sides. A guide makes it a lot easier to get neat looking shoulders. Originally Posted by medicevans
Charlie
-
12-05-2011, 03:07 PM #29Senior Member
- Join Date
- Mar 2011
- Location
- North Carolina
- Posts
- 407
Thanked: 72
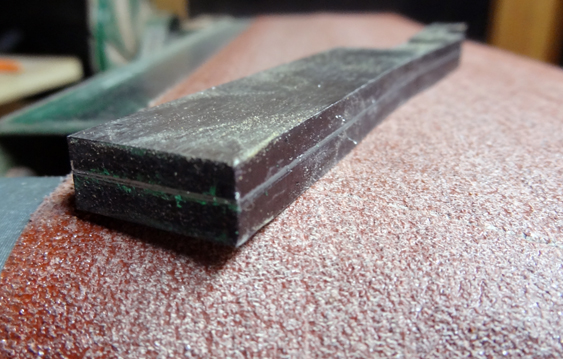
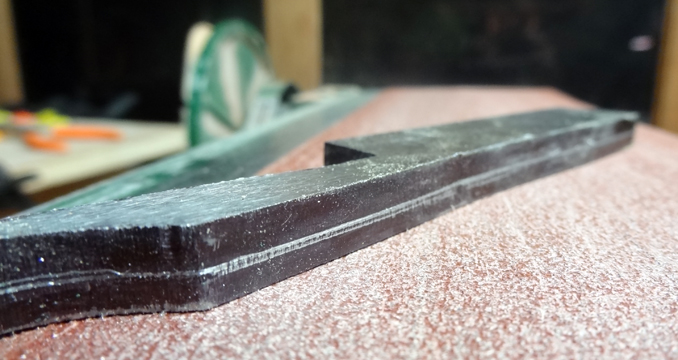
Started working on filing/grinding the blade. Man, I feel like I'm shooting in the dark here. Do I just grind away until I have a blade shape? I wish I had a jig or a template or something to guide me. I know this is hardly any progress at all, but is it heading in the right direction? I started using the files then did a bit of grinding with 4" (60 grit) wheel.
-
12-05-2011, 09:04 PM #30Member

- Join Date
- Apr 2011
- Location
- Brisbane, Australia
- Posts
- 1,434
Thanked: 642
Tim, looking good. You're doing really well. I would rip some more material off with the 4" before going to the files. Just keep checking your depth so as not to go too deep. Once you have most of the hard work done then use your files to finish up. Just MHO, I haven't used files to do major stock removal but it makes sense to me get rid of most of the material with the power tool.
Stu
-
The Following User Says Thank You to Str8Raz0r For This Useful Post:
tumtatty (12-05-2011)


 Reply With Quote