
Results 31 to 40 of 91
 148Likes
Thread: Can't get 2 razors to shave
 LinkBack URL
 About LinkBacks
-
05-19-2020, 01:05 PM #31Senior Member


- Join Date
- Oct 2013
- Location
- Oakland Tn
- Posts
- 6,588
Thanked: 1894
All that honing thru the stones, yet the bevel isnt set. You dont move on till the edge is right. Its that simple, put down the other stones and work on that bevel which isnt fully set and there are quite a few chips too.
I,m getting the impression that everyone thinks I have TIME to fix their bikes
-
The Following User Says Thank You to tcrideshd For This Useful Post:
onimaru55 (05-20-2020)
-
05-19-2020, 01:24 PM #32Home of the Mysterious Symbol


- Join Date
- Dec 2019
- Location
- New Orleans LA
- Posts
- 853
Thanked: 123
Right on. Most common beginner mistake is, "It MUST be set by now. I did X many laps on the bevel setter." Originally Posted by Gasman

-
05-19-2020, 02:49 PM #33Senior Member

- Join Date
- Apr 2009
- Location
- Yamato, Japan
- Posts
- 258
Thanked: 48
You're on your way... you're looking at the edge pattern as you move along, and starting to understand what's what. Originally Posted by mpukas
That's how you learn. What is going on with this stone? What are my conditions when I'm ready to move to the next? That's a big reason I don't like the "systems" that work by a set number of strokes and don't look for feedback at every level... they encourage honing blindly without understanding what's going on.
As others have said, you need to start at edge repair, then go to a bevel setter. Euclid will be along soon; he is the master.Last edited by HungeJ0e; 05-19-2020 at 03:07 PM.
-
05-19-2020, 05:34 PM #34Senior Member
- Join Date
- Apr 2012
- Location
- Diamond Bar, CA
- Posts
- 6,553
Thanked: 3215
Your bevel was not fully set and the root of all your issues. A FULLY set bevel is were the bevels meet from heel to toe fully. That is the point of honing a fully usable shaving edge, from heel to toe.
Eliminate as many variables as possible and simplify the honing progression, a 2,4,8k is a solid progression. If you can shave off an 8k edge adding a 12k or paste is just frosting on the cake. Simplify. Eliminate the diamond paste also. Try some Chrome Oxide. If you do use Diamonds use lite pressure.
I suspect you are jointing and not bread-knifing, two very different techniques.
You are not honing to the edge. (first photo post 27). Use 2 layers of tape to increase the angle. Kapton tape will make you tape last longer.
Spend more time and pressure on the 2k, Joint the edge first, to straighten it. If you must start the progression with a straight edge, you first must create an edge to polish it.
You also have pitting on the bevel and edge, (photos 4.5 &6. Post 27) the pitting on the edge will need to be hone past on the 2k. Add more pressure at the 2k and refine with lite pressure finishing laps, stay on the 2k until the edge is fully created, past the pitting and all the stria is uniformed. Joint as many times as needed. Pitting only matters if it is on the edge, pitting on the bevel does not matter. Generally, you need to go a bit deeper than the pit to get to good steel.
It is not uncommon for the steel beneath a pit to be weak, it may look and test ok, but will fail with stropping.
The toe will need to be fully honed using an X stroke and very slightly lifting the heel to fully hone the toe, jointing the toe will also speed up and make a smoother radius.
Stay on the 4k use as much pressure as needed, until all the 2k stria is removed, this is critical.
“I don't see any shiny spots looking at the edge w/ a back light. I think the main issue is still the edge isn't refined. I didn't want to over do it.”
You must have seen shiny reflection at the heel and the toe. Joint the edge and look at it, so you can calibrate what an unset edge looks like, then hone until the reflections are eliminated.
Using more loupe magnification and lighted, will help greatly, at least 100X.
All your issues are common new honer issues. You are close. Make your bevels and edges match the ones posted in the Second Try at Honing at post 3.Last edited by Euclid440; 05-19-2020 at 05:40 PM.
mpukas likes this.
-
05-20-2020, 09:16 AM #35Senior Member
- Join Date
- Apr 2009
- Location
- Yamato, Japan
- Posts
- 258
Thanked: 48
To add to this excellent advice... as others have suggested consider stropping (cloth then leather only... no pastes) off the 4K and then again at the 8K. Don't expect the 4K to go ATG, expect shaving WTG. 8K should shave well WTG & ATG without razor burn. If you can't do that, no point in going further up a progression... Originally Posted by Euclid440
mpukas likes this.
-
05-20-2020, 01:15 PM #36Skeptical Member

- Join Date
- Nov 2016
- Location
- Colorado Springs
- Posts
- 10,548
Thanked: 2194
Follow what has been said and you will be in like flint. When I first started honing and wasn't sure if bevel was fully set I would go until I felt it was right on the 1k. Then joint/kill the edge lightly and go back to the 1k. After doing this 3 or 4 times I knew for sure I was there and I had a straighter more solid edge to go on to the next stone.
Just keep working at it and you will learn to feel and hear when things are right. But without many times on the stones, you don't know what to listen for or feel. Practice!mpukas likes this.It's just Sharpening, right?
Jerry...
-
05-23-2020, 04:40 AM #37Member
- Join Date
- Mar 2011
- Location
- Gyptuckey, CO
- Posts
- 57
Thanked: 1
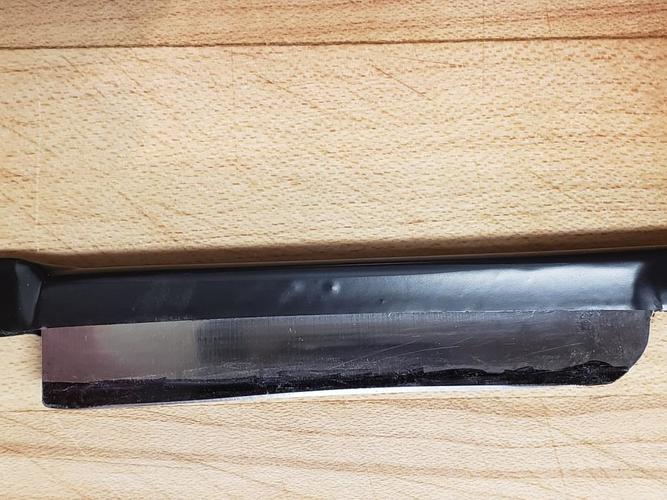
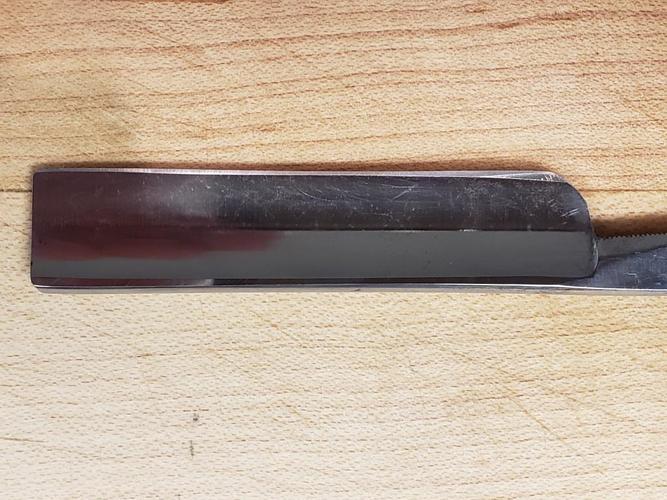
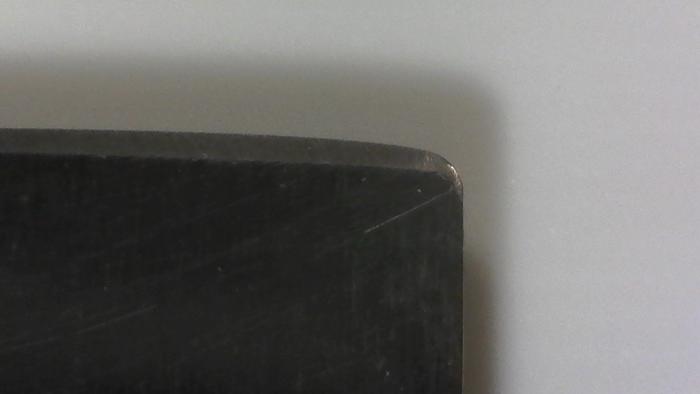
I did some work on just the 2k tonight. 2 layers of tape on the spine. Marked the edge. A couple sets of about 50 circles per side, some sets of back and forths, and x-strokes. I was focusing on the heel and toe. I got the ding out of the toe, but the bevel isn't quite set there. There's something going on with the old bevel at heel on the right side. The edge still looks a bit jagged to me and still has some pitting in places.
-
05-23-2020, 04:45 AM #38Member
- Join Date
- Mar 2011
- Location
- Gyptuckey, CO
- Posts
- 57
Thanked: 1
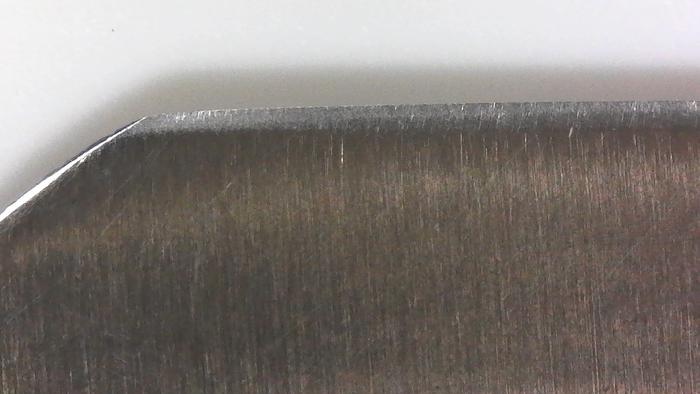
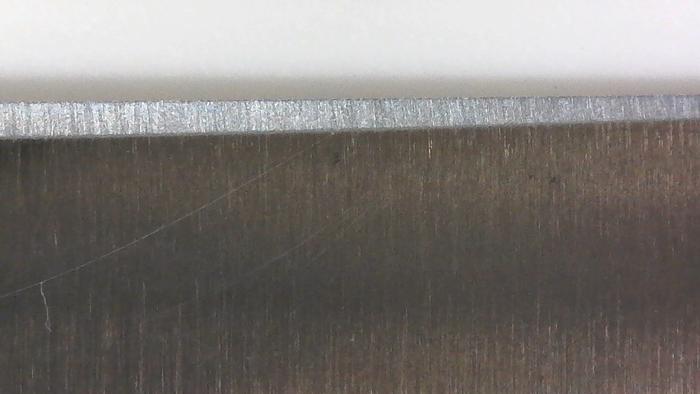
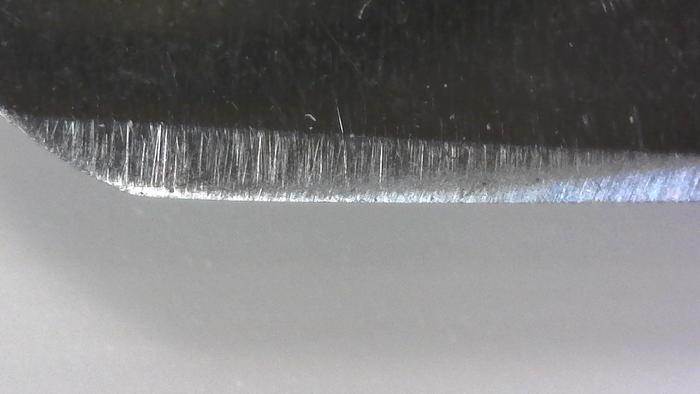
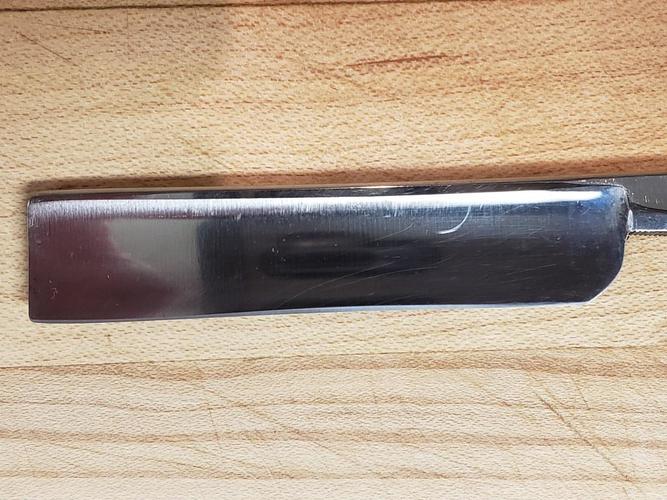
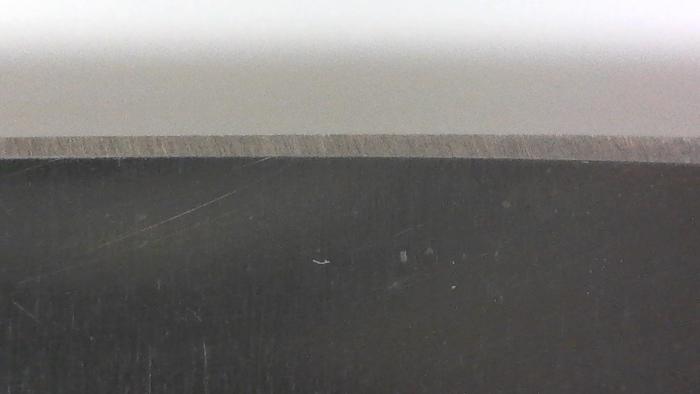
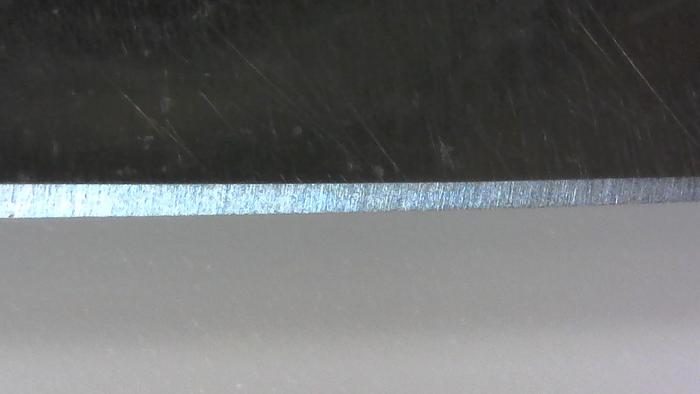
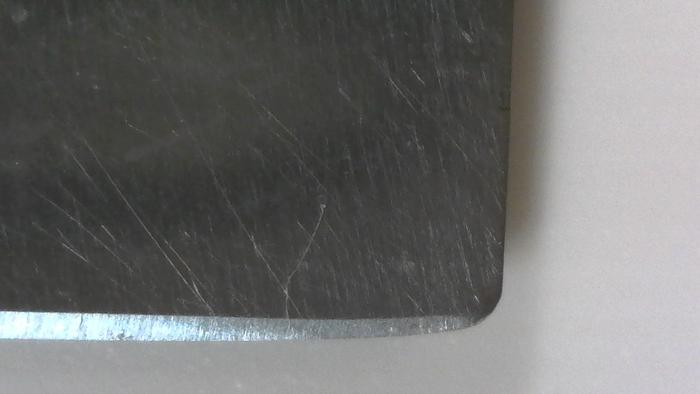
These pics are the edge freshly marked with 20 circles per side. The heel and toe did not get evenly honed.
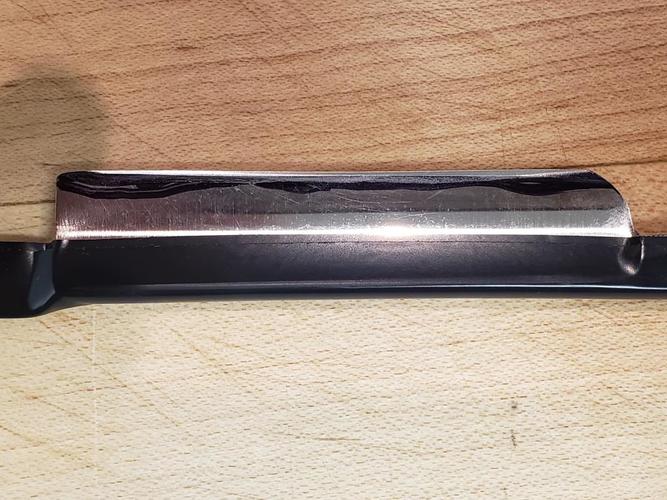
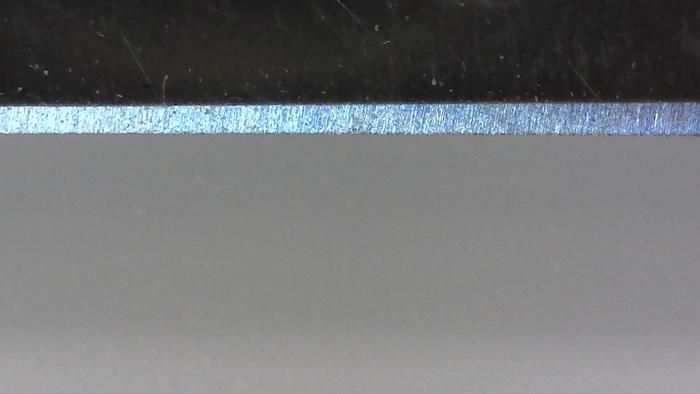
These pics are with the edge freshly marked and 10 x-strokes per side. The heel and toe were more evenly honed.
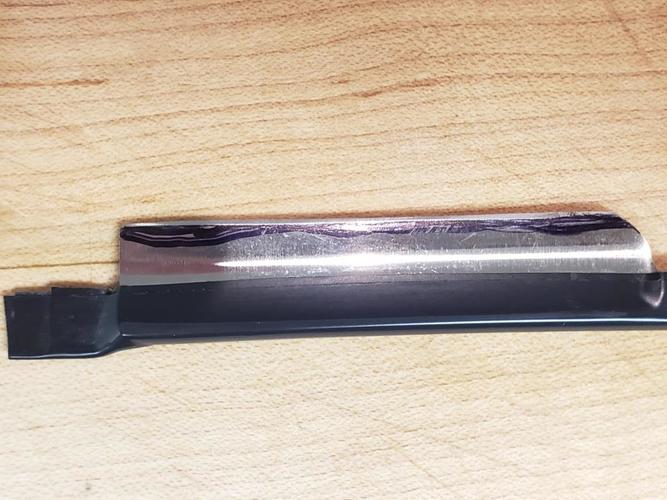
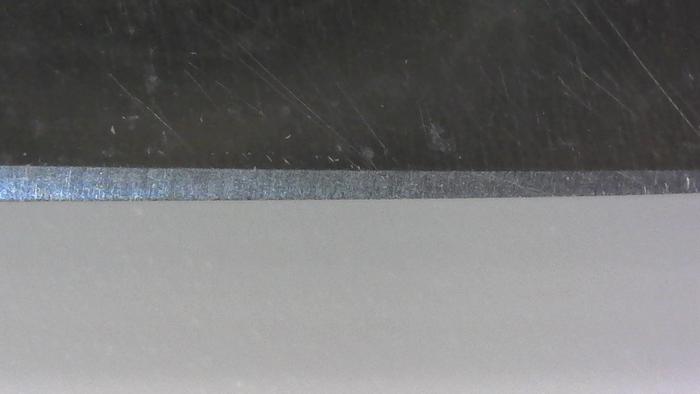
Naked edge. The bevel is not even from heel to toe, and the more I hone it, the more uneven it's getting. It appears to me that there's a frown developing in the center.
-
05-23-2020, 04:49 AM #39Member
- Join Date
- Mar 2011
- Location
- Gyptuckey, CO
- Posts
- 57
Thanked: 1
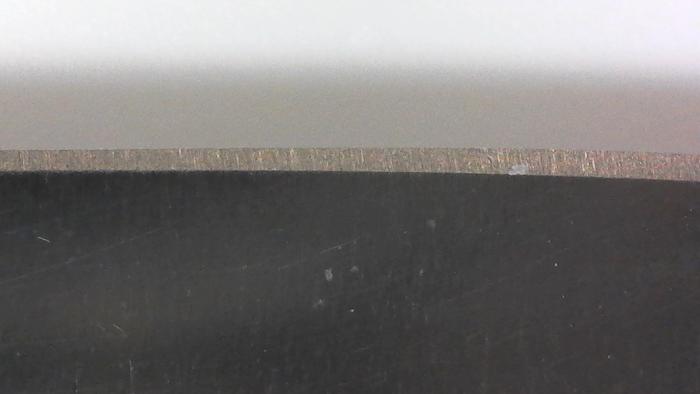
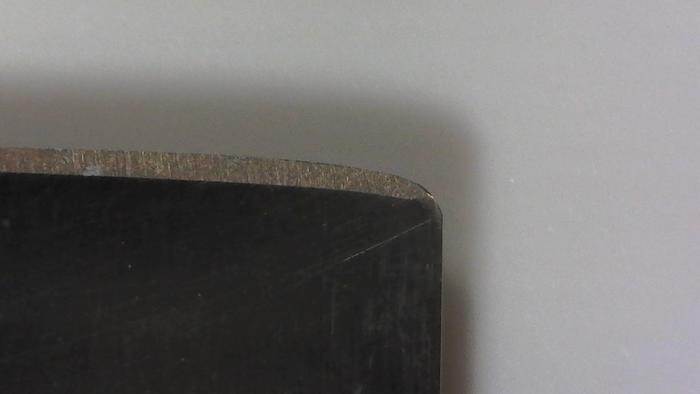
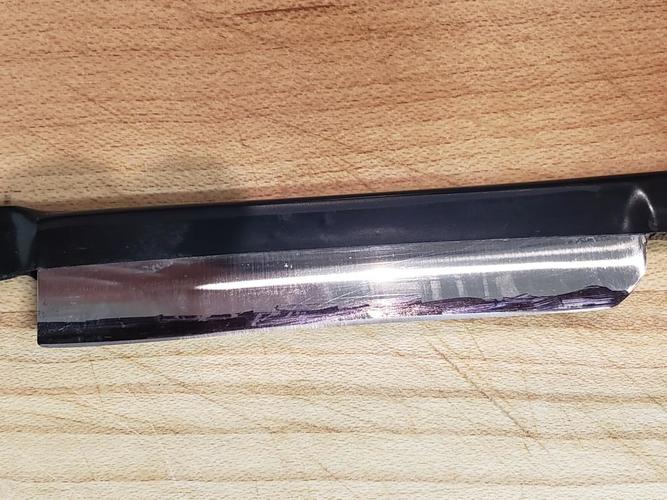
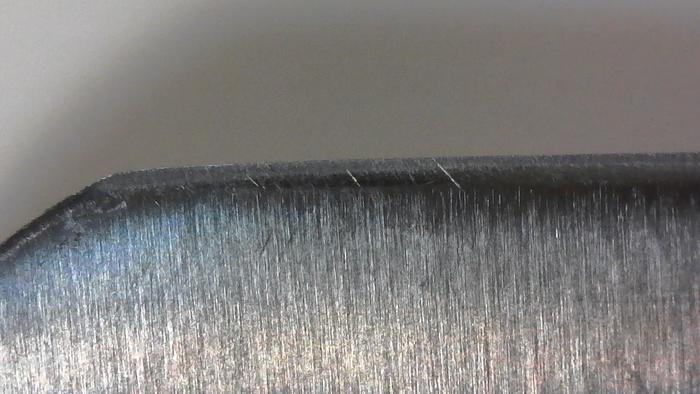
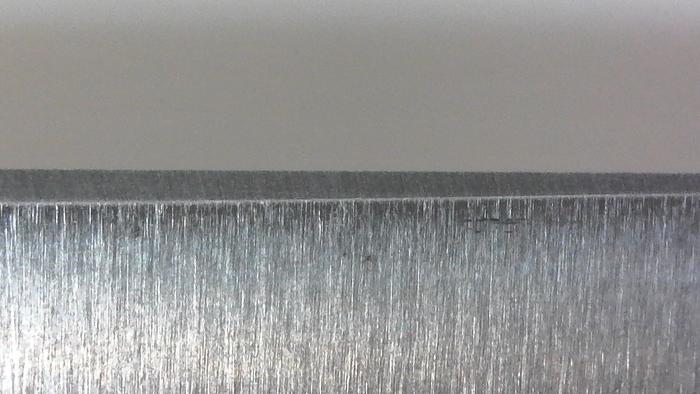
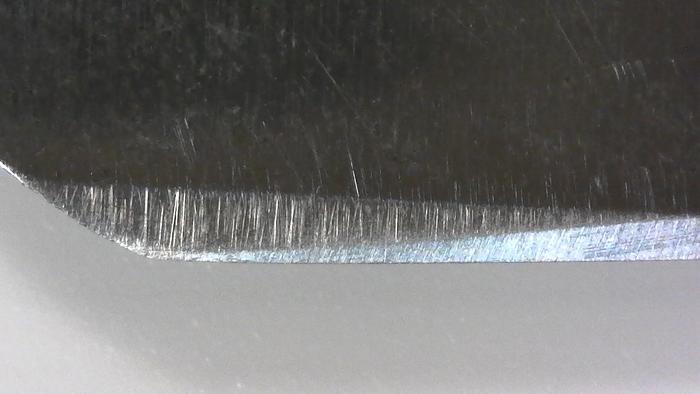
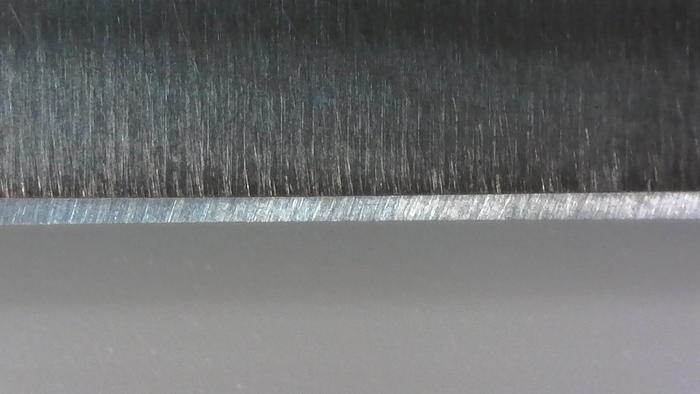
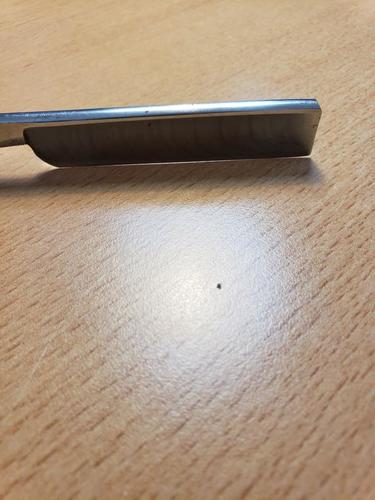
And a bit more 2k work. A couple more sets of back and forth strokes and a couple more sets of x-strokes, with focus and light pressure on the heel and toe. I did not joint the edge in this session. The front 1/3 of this edge won't cut arm hair at all, the rest will roughly cut. It has a lot of bite on TNT.
Last edited by mpukas; 05-23-2020 at 05:05 AM.
-
05-23-2020, 05:22 PM #40Member
- Join Date
- Mar 2011
- Location
- Gyptuckey, CO
- Posts
- 57
Thanked: 1
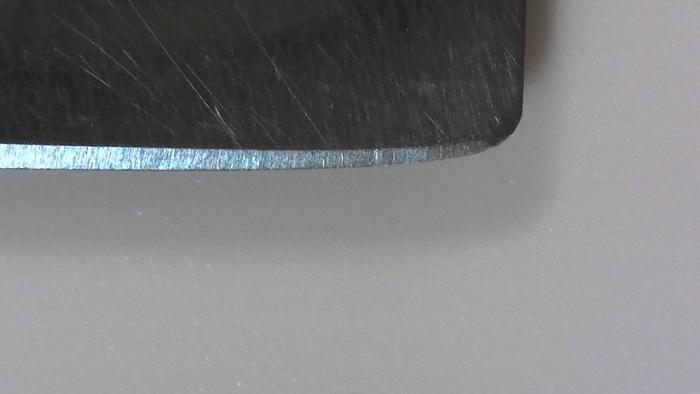
The edge looks like it's starting to show signs of being more ground in the middle than the heel and toe, leading to what I believe is a frown? Prior to this most recent session, the edge was almost perfectly flat from heel to toe, except for the slight curve upwards at the toe. This is what happened to my Dovo. I've been trying to correct my strokes to applying pressure only at the heel and toe, and using x-strokes and paying attention to to the heel and toe and trying to not over-grind the middle.
My stones are flat. Yes, I use the same stones on my kitchen knives, and I regularly flatten and bevel the stones. Especially when I sharpen razors, just not every time I touch up a knife.


 Reply With Quote