
Results 51 to 60 of 66
 157Likes
Thread: Bevel width
 LinkBack URL
 About LinkBacks
-
07-24-2020, 07:29 PM #51Senior Member


- Join Date
- Apr 2012
- Location
- Diamond Bar, CA
- Posts
- 6,553
Thanked: 3215
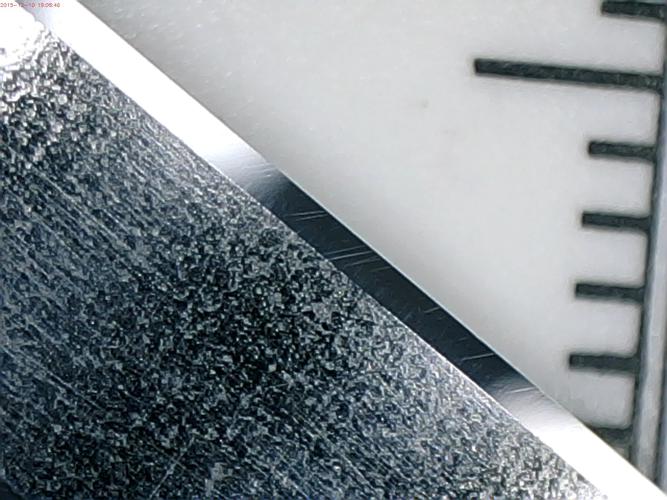
This is an 8k bevel.
Your issue may be your strop(s) there is a lot of deep stria on that bevel and in random directions.
Try stropping on a clean piece of cardboard and see what the bevel and edge look like.
Stropping after honing and before shaving makes a huge difference by straightening the edge. Often a finished edge will not cut hair, but after stropping will pop an HHT effortlessly.
-
07-24-2020, 07:54 PM #52Senior Member


- Join Date
- Oct 2019
- Location
- Kingsville On, Canada
- Posts
- 2,435
Thanked: 207
Hi, I hope my stopping isn't causing me problems. I don't think I could take it I discovered I had to go back that far! Originally Posted by Euclid440

Fortunately (I think) I don't think it's my strop or stropping because my 8K edge never looked like that, not even close!
How do I make mine look like that, and is it even possible to make it nicer on a 12K?
If it did turn out that it was my strop, would it be the strop or the stropping?
If it's the strop I can look around for another one, but if it's the stropping, I have a problem.
I guess the first thing to do is get a bevel like yours before I strop and then check it again after stropping, or try cardboard as you said.
Can I assume that edge in the pic hasn't been stropped?
How different will it look after you strop it?
An edge like that on an 8K, does everyone manage that on an 8K?
I'm depressed now. Why am I even bothering if that is right for 8K, mine was all kinds of wrong and I thought I had it cracked - - Steve
You never realize what you have until it's gone -- Toilet paper is a good example
-
07-24-2020, 08:51 PM #53Home of the Mysterious Symbol


- Join Date
- Dec 2019
- Location
- New Orleans LA
- Posts
- 857
Thanked: 123
Don't take it like that, Steve. You are close to success.
Why don't you go back to your 4k and give it a couple dozen extremely light laps and see if you don't get a nice consistent scratch pattern and a flat bevel out to the edge. You had it before. Then hit the 8k again and don't stop until your 4k scratches are gone, replaced by new 8k scratches. Make sure your bevel is flat all the way out to the edge with no separate reflection coming from the edge. The shave should be pretty good. Report back here with a shave report and bevel pics. Nail it on the 8k and you will be ready for the 12k.
What are you using for a strop? Any chance that any abrasive might have contaminated it? A pic might give us a clue. A beginner strop should be cheap and expendable, but not TOO cheap and shoddy. You don't want the hide of the nauga. You don't want super thin leather or pleather, and you don't want flimsy hardware or a strop that is just too darn narrow. You don't want a strop that is severely cupped, i.e. the central part sort of dips down below the edges. And you don't want anyhting that has ever been treated with abrasive pastes.
If you change the heel leading angle a bit when you change grits, you can tell the different scratch patterns apart. That makes it easier to tell if you have finished eliminating the previous stage scratches or not.
-
07-24-2020, 11:00 PM #54Senior Member
- Join Date
- Oct 2019
- Location
- Kingsville On, Canada
- Posts
- 2,435
Thanked: 207
Ok, been busy.
I decided that something went wrong so I killed the edge and started again.
Last time I used two layers of tape and Kapton tape. I don't know why but it seemed to help.
This time I used 1 layer of tape and the kapton tape.
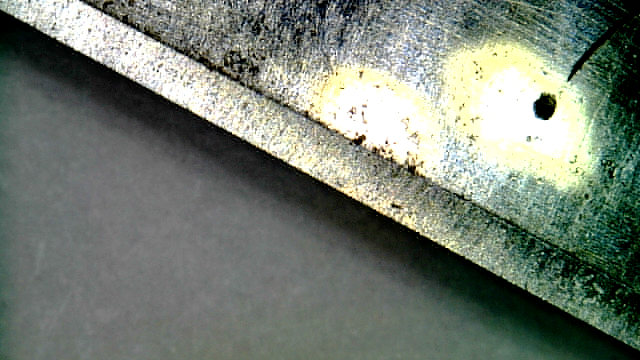
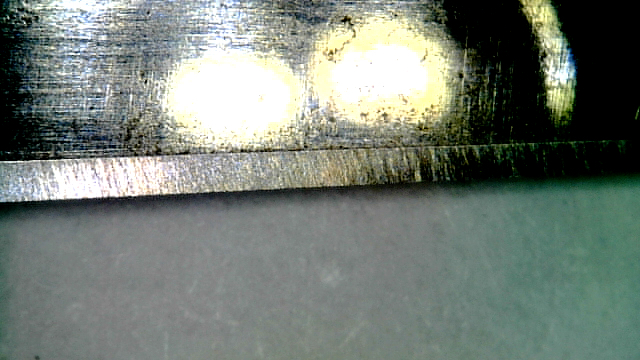
I set my bevel on the 1K.
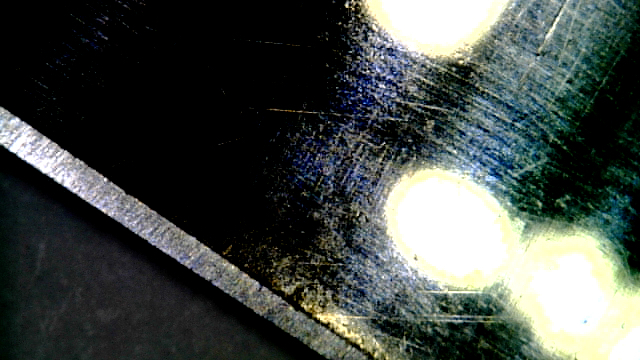
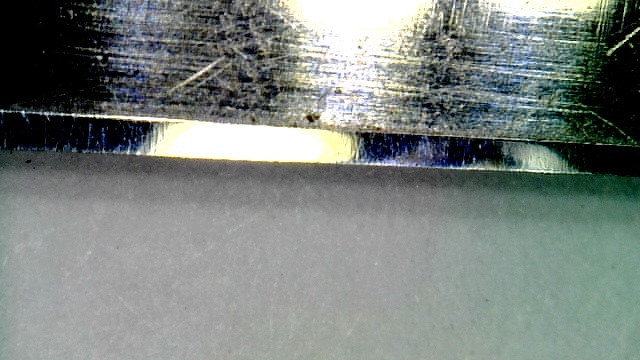
moved on to 4K.
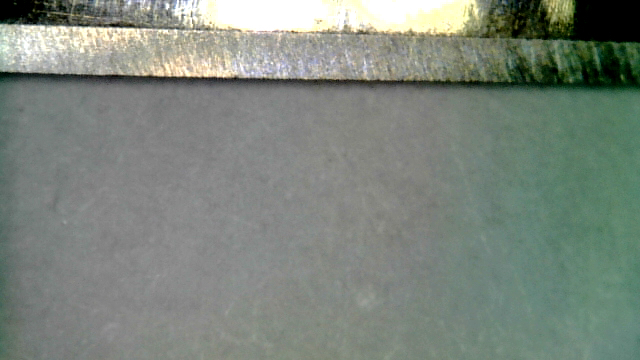
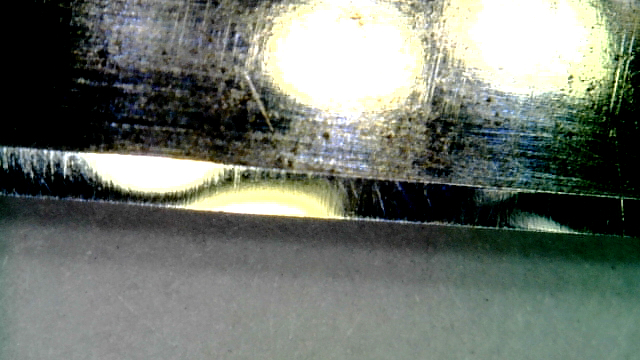
8K, any better?
 - - Steve
You never realize what you have until it's gone -- Toilet paper is a good example
-
07-25-2020, 12:07 AM #55Home of the Mysterious Symbol
- Join Date
- Dec 2019
- Location
- New Orleans LA
- Posts
- 857
Thanked: 123
Well, no harm done, but you didn't need to start over. And you especially didn't need to glass the edge. But yes, better, and the 1k and 4k are pretty good. The 8k you still need to go some more. Do you see how the edge still reflects separately from the bevel face? You are not there yet. Go some more, and don't forget to clear the edge with a half dozen pull strokes and a couple dozen very short x stroke laps. You are SOOOOOOO right there. Riiiiiiiiight there almost almost THERE. Just get rid of that extra reflection and you got it and it will be time to move on to the finisher.
-
-
07-25-2020, 03:27 AM #56Senior Member

- Join Date
- Mar 2015
- Location
- Akron, Ohio
- Posts
- 12,107
Thanked: 4313
I'd say a bit more on the 4K, but that's me.
The third and fourth pics, look chippy.
Second to last, I see heavy stria along the bottom of the bevel, and a frosted edge. Possible case of too much pressure.
But I'll say this, Steve. Your already way ahead of me, compared to when I started honing them. I learned on my own, with no internet, or forums, or someone that could coach me.
Don't get discouraged, your doing great. Really.! Mike
Mike
-
The Following User Says Thank You to outback For This Useful Post:
PaulFLUS (07-25-2020)
-
07-25-2020, 04:32 AM #57Home of the Mysterious Symbol
- Join Date
- Dec 2019
- Location
- New Orleans LA
- Posts
- 857
Thanked: 123
Now that you mention it, there are some chips there that would take a lot of laps to remove at 8k. Revisiting the 4k maybe is a good idea. Originally Posted by outback
-
07-25-2020, 04:49 AM #58Senior Member
- Join Date
- Apr 2012
- Location
- Diamond Bar, CA
- Posts
- 6,553
Thanked: 3215
Mark the belly of the bevel for registration, take photos of the same spot each time for comparison.
If you are using less tape now, you must get the bevels flat to the new shallower angle. You may not be honing to the edge. Ink the bevel and ensure that you are honing to the edge and that the bevels are flat at 1k.
Is that rust on the right side of the first 1k photo and the 4k photos? If so, all that needs to be honed out on the 1k.
On the 4k, a lot of 1k stria is still visible and the edge looks chippy, again you may not be honing to the edge. You need more laps on the 4k to remove as much chipping and all the 1k stria. You must remove all the 1k stria from the bevel.
At 8k the bevel is polished, but a lot of 1k stria is still visible that end in a chip at the edge. The edge is chippy. At 8k the edge should be very straight, your edge is not.
Ink the bevels and do circles in sets of 20, until all the ink is gone, and the bevels are flat, do 4 sets of 20. Then ink the bevel and do X laps until you have flat bevels, an even 1k stria pattern to the edge
At 4k joint the edge, ink the bevels, and do circles in sets of 20 until all the 1k stria is removed. Then do X laps until you have a uniform 4k stria pattern. The edge should be straight, and stria runs all the way to the edge. Ink the bevels as often as needed. Replace tape as soon as it begins to wear. Kapton will make the tape last longer, but once it goes, replace all the tape.
When you go to the 8k replace all your tape, add a layer of tape, and joint the edge before you start on the 8k, a single stroke on the corner of the stone.
Do circles in sets of 20 until the ink and 4k stria is removed, then X laps until you have a uniform stria pattern and all random circle stria is removed.
Ensure that you are honing to the edge, the 8k edge should be straight and look like the photo of the 8k.
BTW, that is not a photo of a razor I honed. It is PCM’s razor from the post My second Try at Honing, as are all the photos I posted. It was the second razor he had honed.
Read through that post and look at the photos, your bevels and edges should look like his at the various stages in the progression. Also, he experienced all the issues you are, and his razor was probably in worst condition that yours.
You are close, but you have to finish each stage before you move up. You really should clean all the rust off the razor with steel wool and metal polish.
-
The Following User Says Thank You to Euclid440 For This Useful Post:
STF (07-25-2020)
-
07-25-2020, 04:52 AM #59Home of the Mysterious Symbol
- Join Date
- Dec 2019
- Location
- New Orleans LA
- Posts
- 857
Thanked: 123
Steve, I know this is frustrating, but you WILL get it. Don't give up! Believe me, it is worth it when you totally crush it and you are shaving like a boss with a razor that YOU made sharp yourself.
-
The Following User Says Thank You to CrescentCityRazors For This Useful Post:
STF (07-25-2020)
-
07-25-2020, 11:03 AM #60Senior Member

- Join Date
- Dec 2018
- Location
- Gainesville, FL
- Posts
- 6,629
Thanked: 670
Wow! I missed a lot while busy yesterday. Mike is right Steve. You really are making good progress for the little time you have been doing it. I too learned in the dark and had to unlearn then relearn and am still learning. You're way ahead of where I was at your stage also.
Going WAY back to synth vs nats: I think of it like the difference in fancy tent and gas stove camping and primitive, no modern equipment camping. NATs are something I would suggest waiting on given your personality. What I mean by that is that you are so hungry to succeed and so engrossed in the details that you have enough on your plate. You're going to get it or bust and I really admire that. That being the case (in my personal opinion) stick with this now. As has been said you really are about.to break through. Once you hammer pound this one take inventory of how you got there and digest it well. There are plenty of ways to achieve the same end and you will find over time that you will do different things for different razors. You'll use what you learn here to learn more and different things. So much good information has been given ahead of this I'm keeping quiet. I will say, or rather emphasize, keep an eye on your tape. Change it often and if it is wearing out quickly at this stage maybe check your pressure. Keep it up buddy. You're close.
EDIT: Oh yeah, study Marty's last post and read that thread he posted pics from.Last edited by PaulFLUS; 07-25-2020 at 11:07 AM.
STF likes this.Iron by iron is sharpened, And a man sharpens the face of his friend. PR 27:17


 Reply With Quote