I just used mark up to edit a screen shot for the first time. We are all learning.
Printable View
I just used mark up to edit a screen shot for the first time. We are all learning.
You have a lot to share, Tom......We shall help you!
Attachment 288838
I say! ;)
You have to save pics in an outside place in order to attach them to a PM.Quote:
Originally Posted by cudarunner
Silly!
Or if you have them saved here you can attach them by URL.
Correct. It's only safe to do this with pictures already uploaded to SRP. If you use pictures uploaded to other sites (not photo sharing sites but say other forums), in theory that works as well but that can be detected by the other place and it used to be a sport among admins to automatically replace those pictures with something you really, really, REALLY don't want to see :)Quote:
Originally Posted by RezDog
These days perhaps not so much, but back when disk space was very expensive, they didn't want to be used as pseudo photo sharing sites and used this tactic to discourage the practice.
Rezdog, Sharptonn, and Bruno: I still have learning to do on this skill - after suggestions I attempted to post again. In one frame on my screen I had a file with the pictures I was trying to
share; in another frame, on the left side of the screen I had "what are you working on." When I drug a picture from the file side to the left side frame the picture followed but when I lifted
my finger from the mouse the picture spread and completely covered the "what are you working on" screen. Meaning it didn't become an addition on that screen but dominated the screen.
What up?
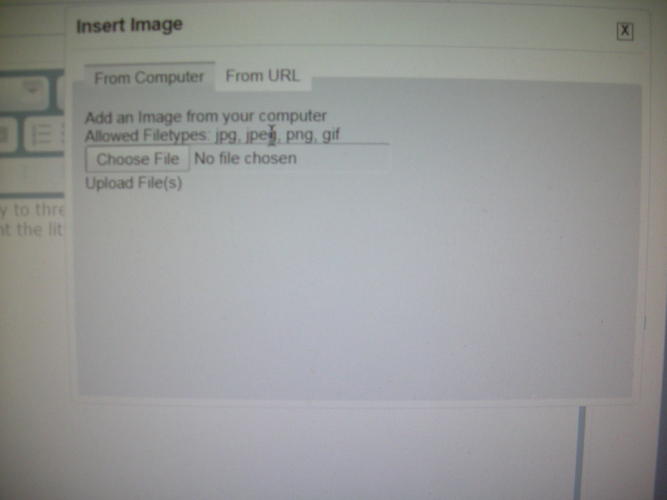
Hum....Ok. I hit 'reply to thread' I usually then hit 'go advanced' at the bottom so I can see it better. I then then hit the little picture when I want to insert a pic
Attachment 288847Attachment 288848
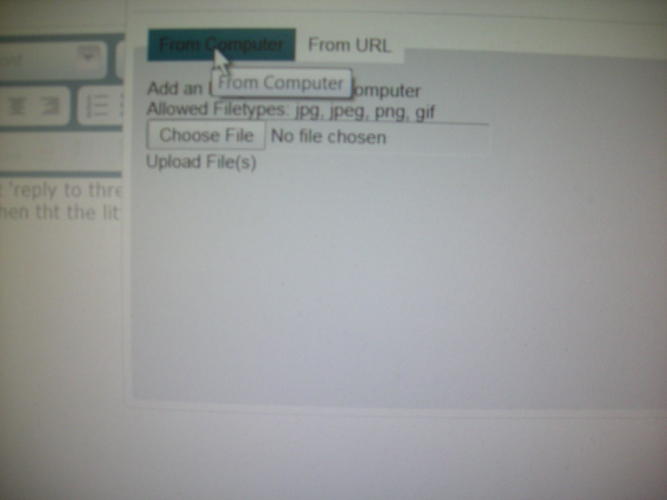
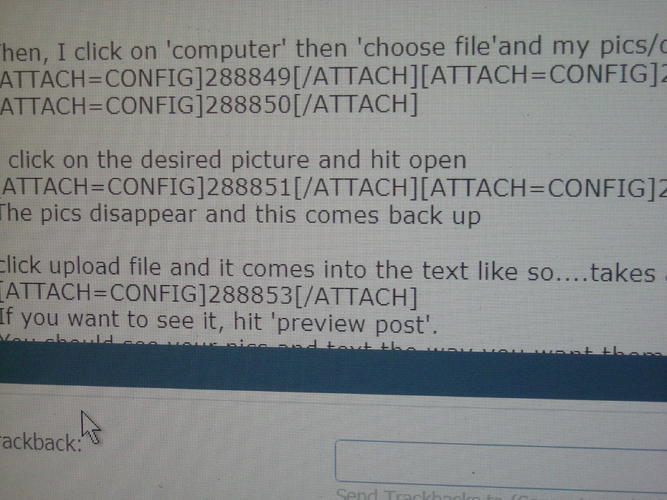
Then, I click on 'computer' then 'choose file'and my pics/downloads appear
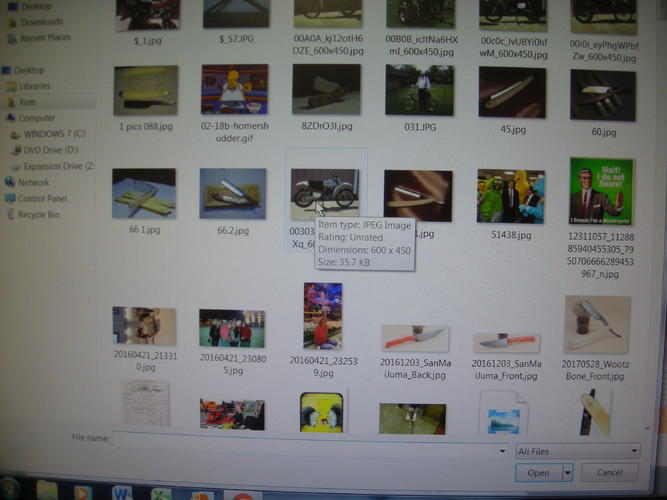
Attachment 288849Attachment 288850
I click on the desired picture and hit open
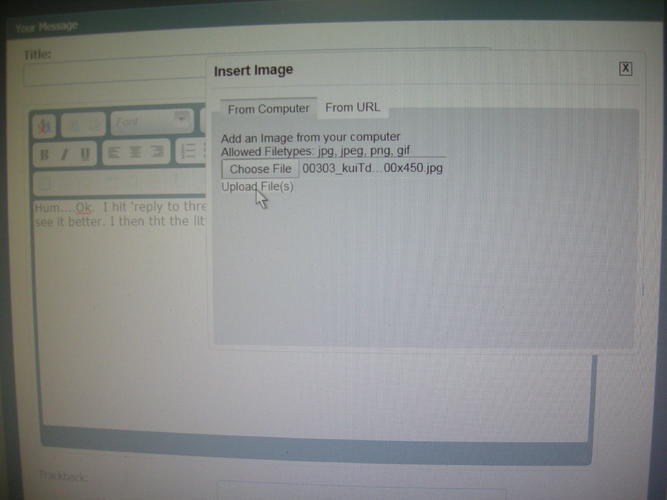
Attachment 288851Attachment 288852
The pics disappear and this comes back up
click upload file and it comes into the text like so....takes a while!
Attachment 288853Attachment 288854
If you want to see it, hit 'preview post'.
You should see your pics and text the way you want them to be.
Attachment 288846
Then submit reply.
Right on the money!
Thanks for sharing the step by step with pics. Maybe this should be placed somewhere for new folks to find. It probably is but...
If you click on my post number up there (13077) and go to the top, it can be added to bookmarks in order to save/share the link to that post.
Might be worth it? Took me a half-hour to do it! ;)
Oh...send me a dollar every time you use it, Jerry! :deal:
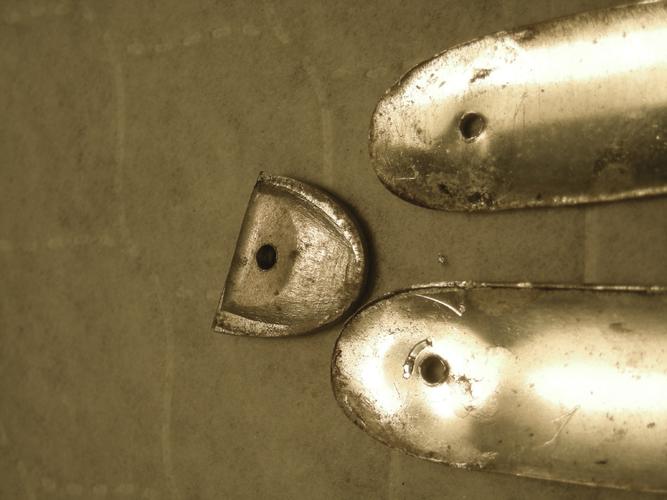
Working on my aluminium scales. These have aluminium pins in the bottom. Pain to get out. Looks like they poured the wedge in the scales as it conforms to each scale inside.
Attachment 288875Attachment 288876
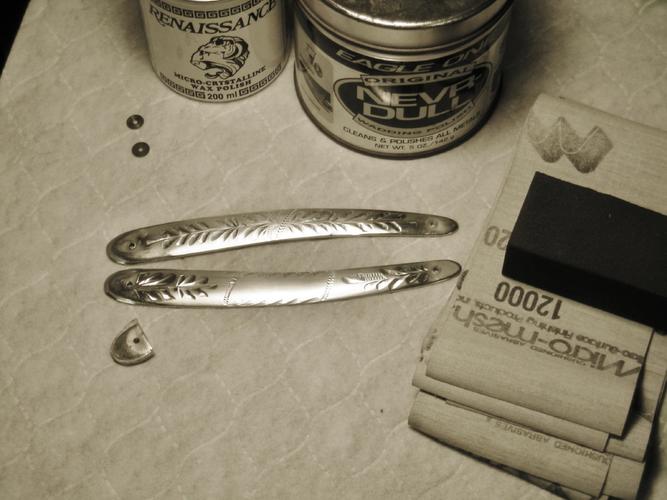
I used to take them to the buffer, but it makes them too shiny and blows out the details some.
I use a progression of micro-mesh after sanding out deep scratches and then 3 rounds of NeverDull, 3 rounds of Renwax.
If you get them too shiny, they will scratch easily.
Good enough, I think. Time to shop for collars.
Attachment 288877
Found a set of stainless collars which were a gift from Austin a while back (Thanks, Austin!).
Not even going to polish on them as they look great here as-is.
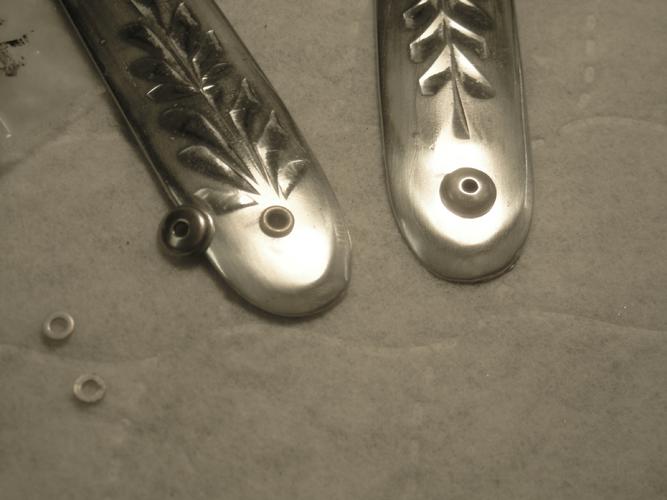
Think I will use babur's under the collars as the holes are quite large and they press right in.
Attachment 288880
Got a test-fit and the wedge needs to come out and be filed a bit so the blade will close. This thing is LONG!
Oh well. Why we test-fit!
Attachment 288882
Attachment 288883
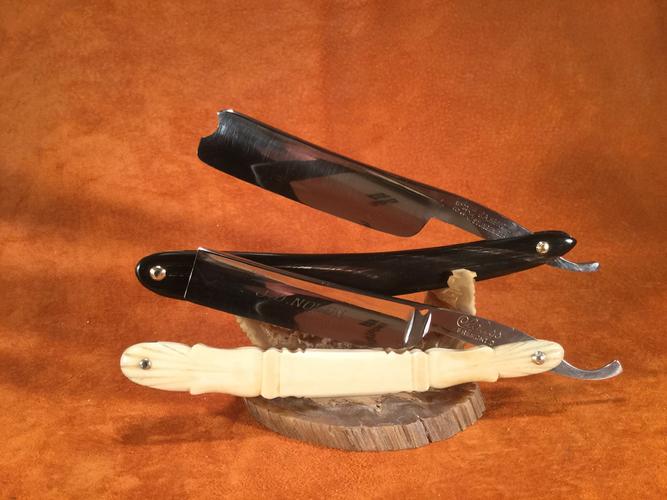
Two more for the needs honing box.
I’m digging those aluminum scales Tom. I think those collars match in nice unpolished. They would be hard to get to look the same colour polished. I’ve always wanted to try to get the nickel collars to go black. Perhaps when I find exactly the right scales for it I might try.