
Results 211 to 220 of 20573
 91473Likes
Thread: What are you working on?
 LinkBack URL
 About LinkBacks
-
03-17-2014, 08:05 PM #211
 I prefer to stay at 1/16. I know I can go some thinner, but by leaving it at 1/16 I know for sure that I have good steel in the middle, not affected by decarburization or scale formation.
 Originally Posted by bdcoffey
 ScottGoodman and silverloaf like this.Til shade is gone, til water is gone, Into the shadow with teeth bared, screaming defiance with the last breath.
To spit in Sightblinders eye on the Last Day
-
The Following User Says Thank You to Bruno For This Useful Post:
bdcoffey (03-17-2014)
-
03-17-2014, 08:12 PM #212Member


- Join Date
- Jan 2014
- Location
- Milwaukee, WI
- Posts
- 85
Thanked: 17
I think 1/16" is about where I am at. On my last two razors I went to the same thickness and things went well. It's good to know what others use as a general rule. Thanks. Originally Posted by Bruno
-
03-18-2014, 01:51 AM #213Always Thinkun

- Join Date
- Nov 2012
- Location
- Grain Valley, Missouri
- Posts
- 818
Thanked: 348
Nicely done Roy. I can't think of any other way to have made that repair.
You did the best that could be expected with what you had to work with for sure.
Job well done sir!!
Ray
-
03-18-2014, 01:58 AM #214Senior Member


- Join Date
- Dec 2011
- Location
- Springdale
- Posts
- 976
Thanked: 94
Great save cudarunner a unbelievable story and remarkable journey indeed glad you were able to make the razor complete Originally Posted by cudarunner
FacialDirt likes this.
-
03-18-2014, 02:34 AM #215'with that said'


- Join Date
- Aug 2010
- Location
- Walla Walla in WA State USA
- Posts
- 11,250
Thanked: 4237
Thanks Ray! Originally Posted by walleyeman
I wasn't quite sure how I was going to go about it! My first thought was to sacrifice a steel feeler gauge but a friend said that the wood was a no brainer as far as adhesion went! I agreed! However as a machinist you know that there can second thoughts/well at least sometimes! If I was to do it over again I'd have followed my instincts and used the feeler gauge as after all was done I realized that I had some strong magnets that are only about 1/2" wide and 1 1/2" long! I 'think' that if I'd used the steel then I could have used the magnet on the back side after the epoxy had set to help keep the 'chunk' in place so that the alignment was better!
I've tried to live my life by a phrase that I learned from a movie in the 70's and that is 'Practice the 6 P's'!
Proper
Planning
Prevents
Piss
Poor
Performance!
 FacialDirt likes this.Our house is as Neil left it- an Aladdins cave of 'stuff'.
Kim X
-
03-19-2014, 01:15 AM #216Senior Member

- Join Date
- Dec 2013
- Location
- missouri
- Posts
- 125
Thanked: 7
Frederick Reynolds needed scales
Maple was the medium this time. Coming along well.
-
03-19-2014, 11:34 PM #217Senior Member
- Join Date
- Dec 2013
- Location
- missouri
- Posts
- 125
Thanked: 7
Ok so it's a case of too many too fast...
I still need to but my norton 4k/8k!!! Lol
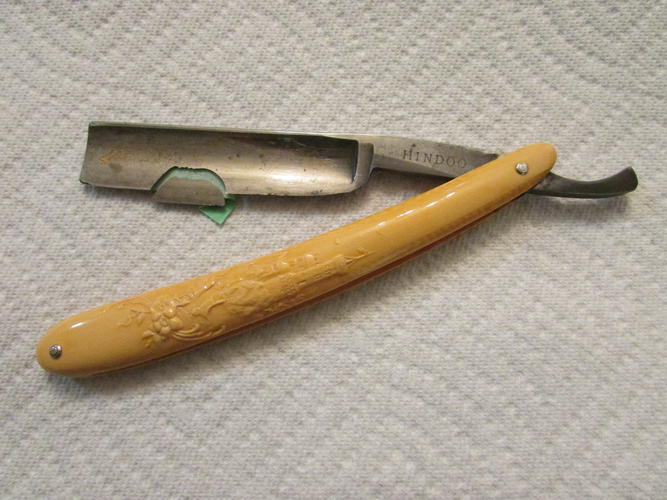
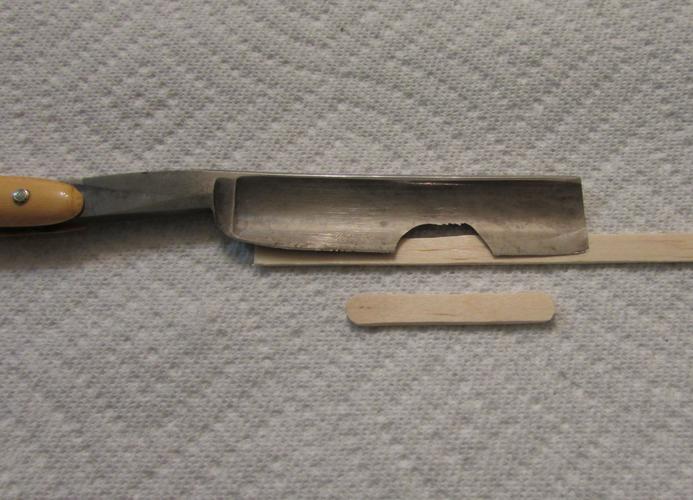
A wostenholm IXL in horn. Found on eBay real cheap at $13.00
Got it naked and took a quick run at it with some 1500 wet/dry. Under the tap.
The frown is only from bad angle it actually slightly smiled
Looks as if it broke at the tang. I flexed it with considerable pressure and it didn't move so it couldn't be glued.. strange anomaly in the steel? It goes all the way aroynd. Anyways gonna get rid of cancer tonight and maybe re pin it into its original scales.ScottGoodman likes this.
-
03-20-2014, 10:57 PM #21850 year str. shaver

- Join Date
- Aug 2008
- Location
- Pothole County, PA
- Posts
- 2,258
- Blog Entries
- 2
Thanked: 522
_____________________________________________
Just received my Bruno blade today. Looks great.
I am in for a long sanding session. Then to make scales. Then to hone the blade.
Can't wait until it is done. Thanks Bruno.............. JERRY
JERRY
OOOPS! Pass the styptic please.
-
03-21-2014, 10:02 PM #219
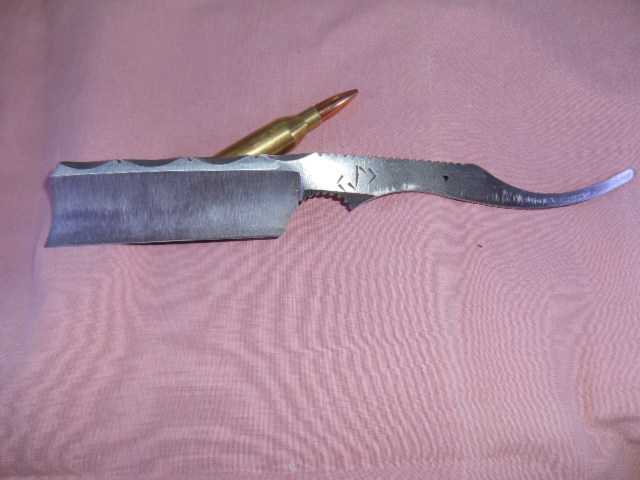
Today's work.
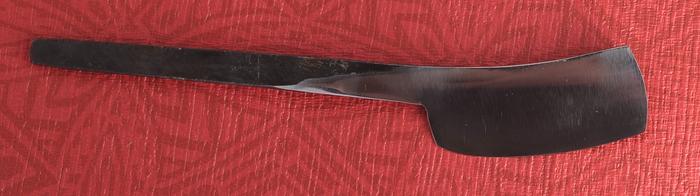
Started out with a bummer. I wanted to grind the kitchen knife which was commissioned for a birthday present. I HTed it last week. During grinding I thought it behaved oddly. After some testing I figured out it had not fully hardened. My fire is too small for evenly heating a long blade. I thought I had managed to pull it off but no such luck. So I molested my fire in order to make it bigger and spread the air around more while burning an upside down pyramid of charcoal, more or less.
The end result was a properly hardened blade. Only now it had warped a bit so I needed 4 temper cycles to straighten it out. I lost more than an hour re HTing the blade. And my fire has pretty much disintegrated completely. But there is good news as well. The owner of the dealership where I bought my car had a 16 gallon oil drum which is large enough to build the fire I want. Got it for free so that was nice. Tomorrow I'll buy a small stick welder and some steel to build the frame.
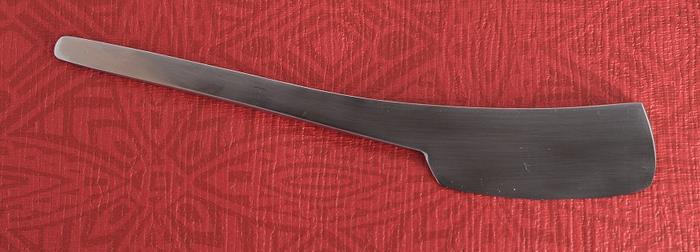
I spent the rest of the day grinding 3 razors, and grinding and polishing 2 kamisori style razors so that they're finally ready. Next week I'll continue making new razors and finalizing the blanks that are currently halfwya to being a razor blank.
The top one has the fire black still attached. In this case it is even, and covers the entire blade. I thought it looks nice, and since I took care to round the corners and center the blad before HT, it could remain like this. Or not. But I thought I should at least ask because I think it looks nice.
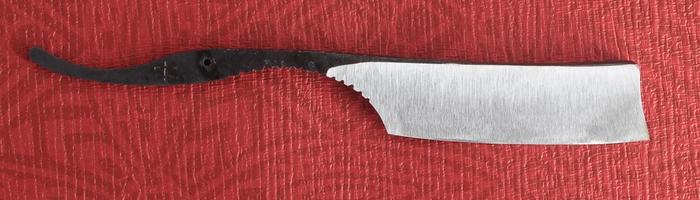
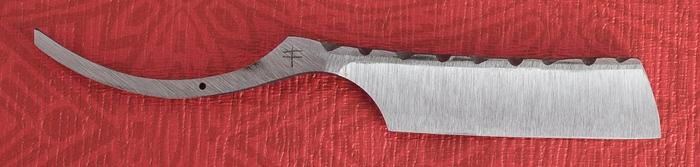
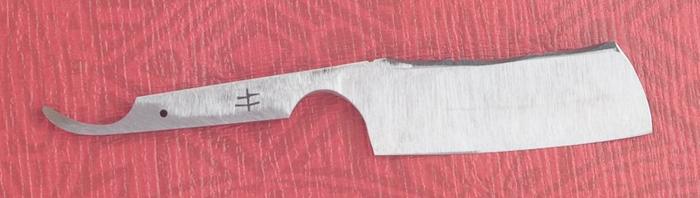
I finished the Japanese style razors in 2 different ways. One has the fireblack and grinding lines. The other had the grinding lines removed and was then lightly satin polished.
 Til shade is gone, til water is gone, Into the shadow with teeth bared, screaming defiance with the last breath.
To spit in Sightblinders eye on the Last Day
-
03-21-2014, 10:16 PM #220Senior Member

- Join Date
- Mar 2013
- Location
- Cedar City, Utah
- Posts
- 131
Thanked: 12
Bruno,
I LOVE that top blade. Great work!!


 Reply With Quote
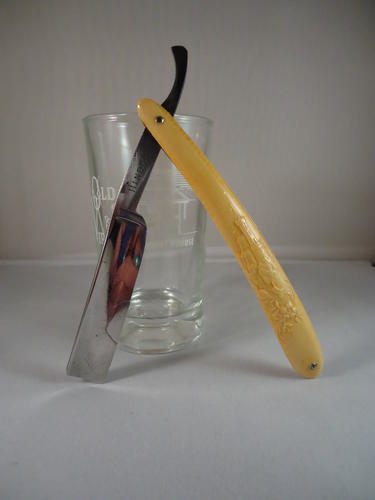
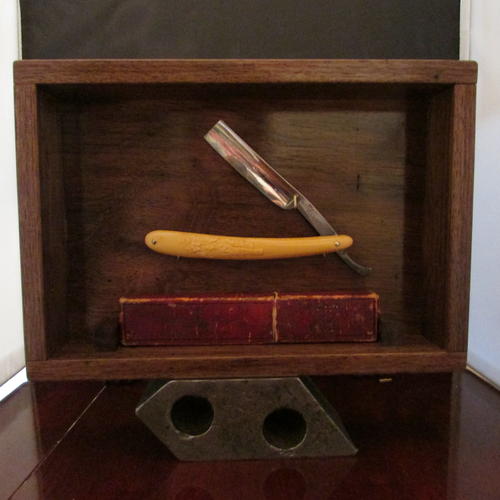
 I do hope that the owner will be pleased when he sees it first hand as the pictures really don't do either the Razor or the display case justice!
