'D' the answer is always 'D'
Printable View
'D' the answer is always 'D'
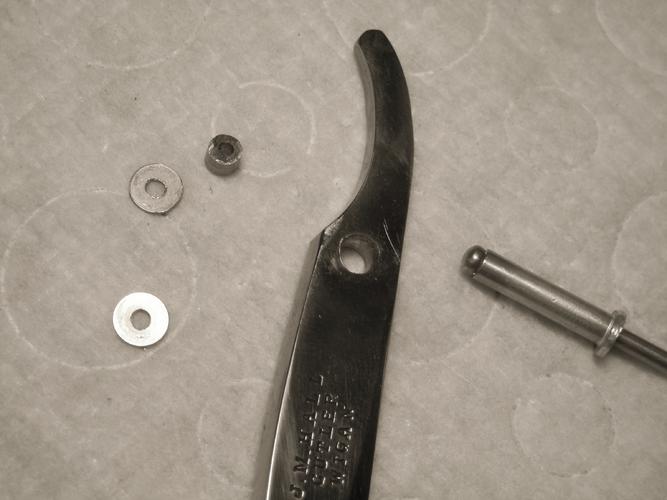
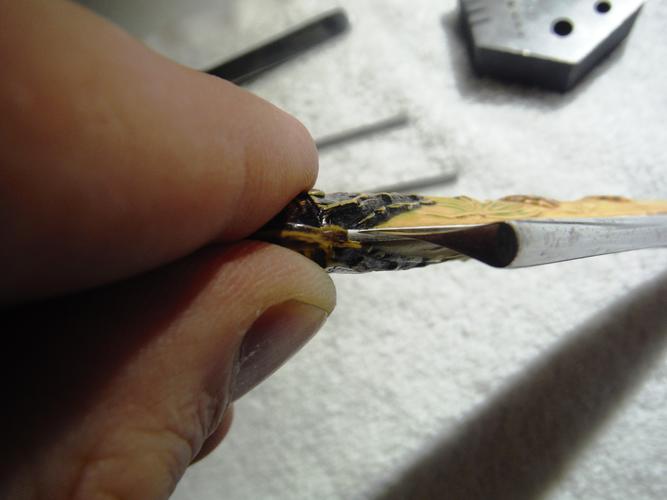
Tom's pop rivet bushing. Pop an aluminum rivet in, grind close to the tang. A bit of aluminum pin in the middle hole, Peen it all in tight. Drill the hole wherever you want! Attachment 233825Attachment 233826Attachment 233827Attachment 233828
Works well with blades where the tangs are bent, and won't center in the scales too.
Sent from my C6740N using Tapatalk
Hey my friend,Quote:
Originally Posted by sharptonn
I'd seen your very ingenuous idea a while back and it's a great idea. :tu While I have tools and the means to use them, I was thinking of something very simple for those who don't have the equipment.
As Richard (GEEZER) has said the JB Weld works---With Proper Prep. Which I know that I hadn't practiced the first time.
Tom what kind of a drill bit are you using to get the hole round in the tang?
Shaun, when I have had to make a hole round in a tang, I first use a small file to make it as round as possible, then I use a carbide drill bit. If it isn't round, the carbide is brittle & will break. We'll see what Tom says.Quote:
Originally Posted by RezDog
Carbide bits that small, huh. Golly the things you guys find in the big cities.
I was more specifically wondering about titanium bits, because without ordering from the big city that is the best we can find here.
I really did not think that carbide bits came that small either.
I have larger carbide bits for drilling hard plate steel.
The pop rivet will take the shape of the hole, then peen the rivet anvil, then file it flat with the tang, then drill it out.
Sent from my C6740N using Tapatalk
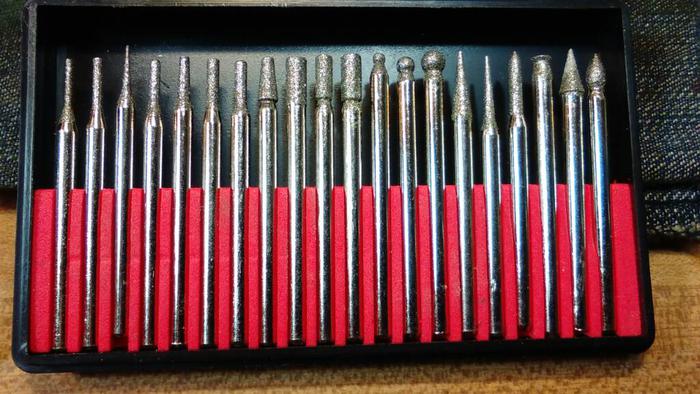
If memory serves Tom uses a tapered Diamond piece with a 1/8" shaft. Harbor Freight carries such creatures.Quote:
Originally Posted by RezDog
If you ever need anything, just let me know and I'll get it to you in the Great White North. :tu
Machine gun Mike is right but I have also used carbide drill bits to drill the tang. I got them of eBay Shaun.Quote:
Originally Posted by RezDog
Like Mike said, it will spread & take the shape of the hole. Then it can be drilled to 1/16".
I believe Roy is right about Tom using the diamond piece. I remember that from a post quite a ways back.
I use a Dremel brand which was originally a 1/8 pointed reamer. Looks like crap now, but still goes through drilling slowly with a drop of oil.
For certain, JB weld should work fine as well!
You can get a whole set at harbor freight for under $10.
Attachment 233850
Sent from my C6740N using Tapatalk
It's not fast but I have had good luck with DRET - Diamond Retractable Sharpener for enlarging holes and truing holes.Quote:
Originally Posted by cudarunner
Attachment 233851
As to filling the hole I've use the shaft from plastic Q-Tips (their hollow) on smaller lighter blades with good luck. JB drilled just fine with sharp carbide bit and light pressure.
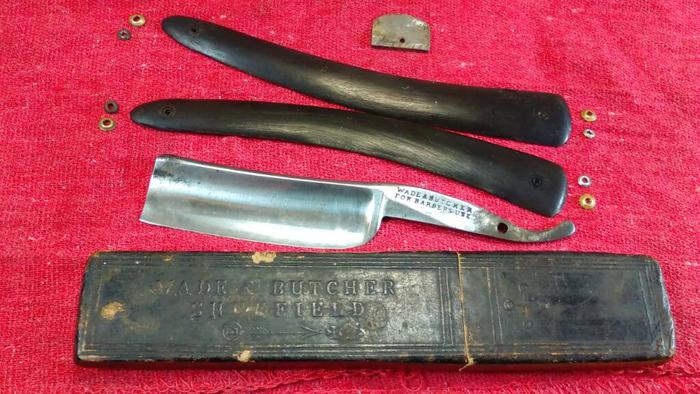
Cleaning up a W&B FBU
Attachment 233864
Sent from my C6740N using Tapatalk
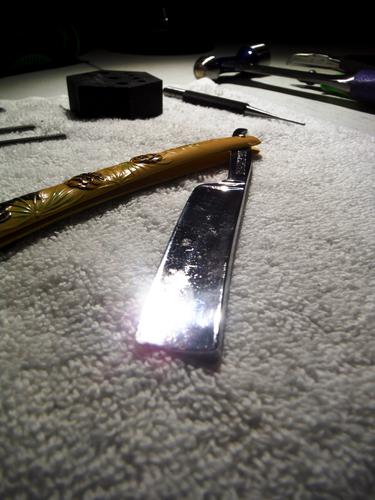
I got to pin this razor twice this evening. The mock up result was not quite the same as the pinned result and i was hitting the inside of the scales when closing after the first pinning. I abandoned the extra collar idea and instead removed some material from the inside of the scales to center the blade. Worked like a charm.
Im gonna force myself NOT to hone this razor tonight because i will rush and that's a no no.. so hopefully tomorrow but i doubt it. The woman will swoop in and keep me occupied tomorrow night.. gun club work party has me on Saturday morning and Sunday im up a river.. literally.
Straight razor life.. the struggle is real.
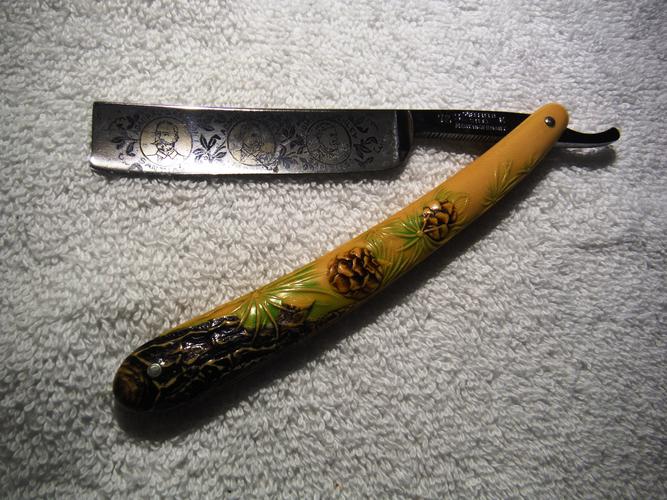
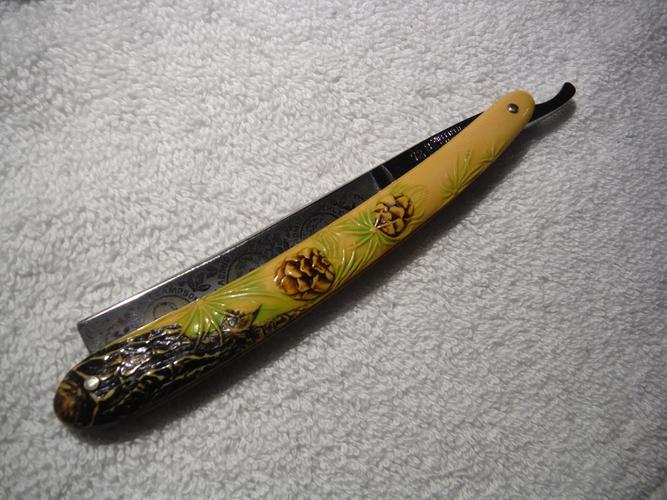
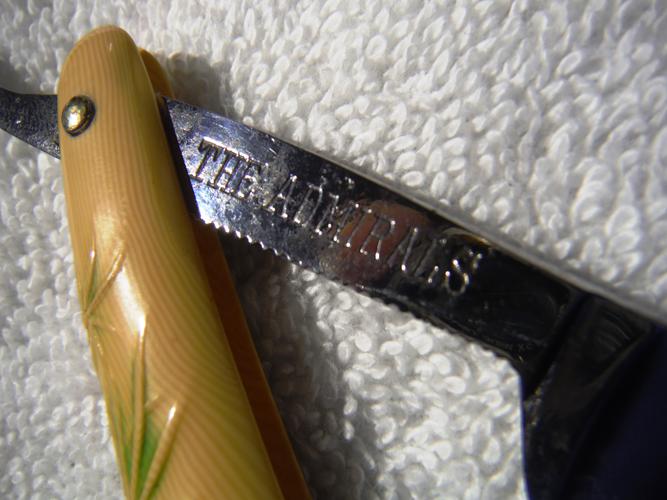
Anyway here she is polished and pinned. Ill be flipping the Norton on this old girl ASAP.
Attachment 233868
Attachment 233867
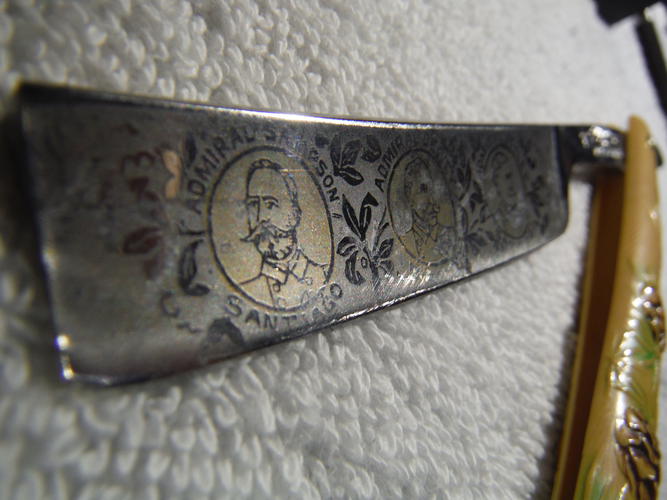
The goldwash. I would have been proud to sail under any of these gentlemen. Look at the stache on that dude!
Attachment 233869
Attachment 233870
Attachment 233871
A wee bit close to the side still but she fits in the slip. Getting it to clear the wedge and then the scales took some work but i got er done. Fitting these things back together is a science in itself.
Attachment 233872
Tonight i will dream of bevels.
What a great razor! You did fantastic with it and I'm sure honing it will be a great experience too. I always find honing relaxing when it's a razor that I'm excited about, but somehow still end up with a sore back. Take your time with the honing and don't rush it. Make it a good experience not a stressful one.
Edit: Just to add, maybe think about a couple layers of tape before starting. That blade etch is close to the edge, an extra layer of tape might help keep the bevel away leaving it intact. Just a thought.
That's a beaut FBU Mike. Would really love to have a big hollow ground like that in the future. Let us know how she shaves, I'm sure the first one will be epic!Quote:
Originally Posted by outback
Sent from my Acer chrome book. :)
You have made a decision that I struggle with and that is of just saying 'F**k 'it' I'll wait. Seeing something so close to completion is Sooooo Tempting to just push on and 'try' to finish it!Quote:
Originally Posted by MW76
However it CAN wait until you are refreshed and have a clear head!
Good For You!! :tu :bow:
. Just a thought, taper the hole in the wedge which will allow you to adjust the scales to more easily get the blade to center as you pin them lightly at the wedge and more strongly at the pivot. Work both pins alternately till all is proper and then finish the job.
~Richard
Indeed, Roy! Tomorrow is a new day, I always say! :)
Good advise, Richard! I sometime don't completely peen the wedge end tight until I see what happens as I peen the top.Quote:
Originally Posted by Geezer
Minute adjustments can be made with the hammer by directional peening quite often! On BOTH ends! :)
Thanks for this Richard. I've never read that before and it makes sense. Will try it on my next wonky repinQuote:
Originally Posted by Geezer
Some nice work here gents!
That's a very nice looking razor Matt, and outback,, wow, nice FBU brother.. Very nice..
I'm cleaning up a very nice French blade phrank gave me tonight. Was going to unpin it but after some Maas and some high grit wet dry, I think not..
Pics to follow from the stones I think.
Cheers gents!
+1 Richard:rock:Quote:
Originally Posted by HARRYWALLY
Well it's been said that 'Tomorrow is Another Day' :wQuote:
Originally Posted by sharptonn
https://www.youtube.com/watch?v=TUDNRU_tv6A
Sent from my Acer chrome book. :roflmao
Good one Andrew!!!
Quote:
Originally Posted by engine46
Lol, my BlackBerry has the same sort of signature when I send emails. I've had buddies do this same thing to me so I figured I'd give Outback a poke. :)
Leave it to Steve to see that! I have been thinking outback could turn that advertising crap off. It sucks. A new phone thing. I know.
So we must make a plan to destroy it. Since I am a flip-phone Tracphone cheapskate, I must digress.........Leave it to you propellerheads!
Quote:
Originally Posted by sharptonn
My iPhone does it but you can disable it. On my old iPhone I was able to change it.
Why what's it doing...?Quote:
Originally Posted by sharptonn
Is it off now?
Seems I read where Glen oversizes holes in scales to 5/64ths for just this reason/purpose.
I would think it would certainly be handy for wood scales. Those can be unforgiving.
A few more tricks, test fit your stuff with microfasteners. Use some tweezers to tighten the nut 'til it slips. See what you have. Take note!
This one looks pretty straight. HOWEVER, if you want one to pull right or left during peening, Taking that very 1/16 bit and squeeze the scales together spinning it into the direction you want to go. Test fit again! I often use a half clothespin to shove a blade over as I peen the top or bottom.
In fact, most of the time I have to begin with 'leveling' out the wobble at the top, esp if the bottom is tight.
Here!
Attachment 233879Attachment 233880
Yes, that IS a silver-steel Genco!
YES! It IS! :yQuote:
Originally Posted by outback
Thanks again for the compliments guys. It really means alot.
I was gonna use tape when i hone it up and im waiting till i have some time. Sunday afternoons are usually me time, if i can get the GF off my back.
There is some rustiness slightly close to the edge as well so id like to set a nice thin bevel. Cant wait to friggin shave with this thing.
I plan to wear this hat while shaving with it.
Attachment 233883
Your welcome. Thanks for letting me know
Sent from my C6740N using Tapatalk
Huge Huge Huge save. Wow well done.Quote:
Originally Posted by MW76
After all that work, The Spine is pristine.
To tape or not to tape, Coming over the top onto the etch with tape scares me.
You have done so well with saving the etch I applaud any choice you make.
This is supposed to be fun, enjoy your work. I look at before and after pics. Amazing.
Sent from my HP Pavilion . Yours is back on Machine Gun:)
You are welcome@Quote:
Originally Posted by outback
Sent from my old Dell commercial frame with a hard drive from a laptop and windows 7.
Har Har. Gotta click the damn thing off every f...in time too.Quote:
Originally Posted by sharptonn
"DAMMIT".
We SO need to fix this! Propellerheads? :w
There's gotta be a way to turn it off completely. I'll google it.
Sent from my brain to my fingers to my Acer Chromebook.