Results 1 to 10 of 59
Hybrid View
-
08-29-2014, 04:54 PM #1
 First Restoration Need some help!
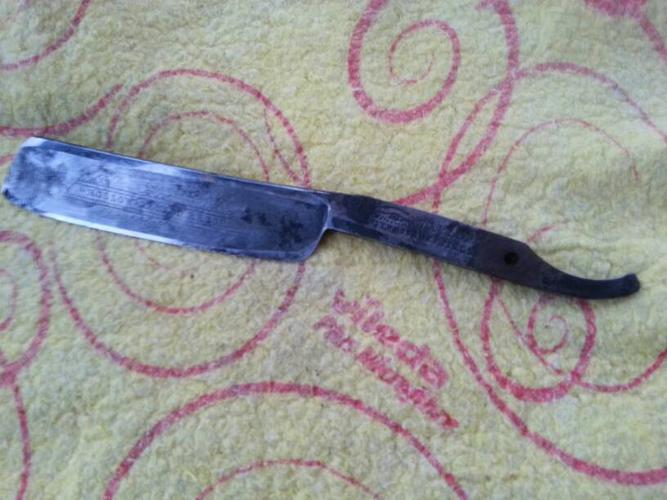
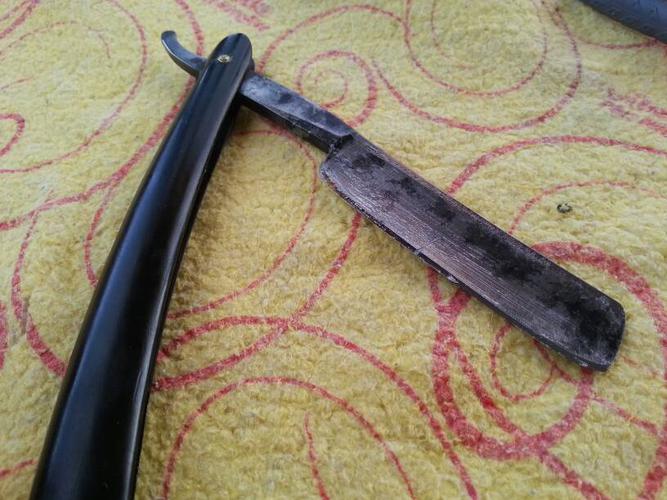
Hello everyone, I've started to hand sanding of my razor. There are little actual rust on the blade and it came of quickly. But I don't know what the black areas are. They don't come of easily with 220 grit. Can anyone seen this before. What shall I do?


-
08-29-2014, 05:31 PM #2

The black areas are most likely rust. If you continue to remove the black you will find pitting underneath. Before you receive anymore advice on what to do, what are you hoping to acheive in your restoration? The advice for obtaining a mirror finish is going to be a bit different than going for a period aged look.
MattThe older I get the more I realize how little I actually know.
-
The Following User Says Thank You to MattCB For This Useful Post:
Chinaski (08-30-2014)
-
08-29-2014, 05:42 PM #3

Thanks for reply Matt, my first goal is remove all the rust as much as possible. I know it's quite difficult to obtain a mirror finish from that razor, but a little period aged look is ok for me.
-
08-29-2014, 05:59 PM #4

First off it has been said many times for good reason:
Make sure you can set a bevel on the razor.
NOTHING is worse than doing a TON of work to a blade only to find out it is bent, crooked or somehow out of wack.
Proceed from there on how you want it to look.
Ed
-
The Following User Says Thank You to Chevhead For This Useful Post:
Chinaski (08-30-2014)
-
08-29-2014, 06:02 PM #5
-
08-29-2014, 06:40 PM #6

For handsanding, start by reading up here Handsanding howto and http://straightrazorpalace.com/works...tml#post809470.
One tip I learned from RezDog awhile back was to use a piece of steel wool dipped in polishing compound to scrub the razor with. This will remove most of the rust without removing more metal or damaging the etching. Once most of the rust is removed, you can make a decision as to whether or not to sand out the pitting all of the way or to leave it as is and polish it with some off the shelp polishing compound (Mothers, MASS, Blue Magic......).
Be warned that it takes quite a bit of effort and may not turn out how you envision it, but it's all part of the process of learning the skill set. I currently restore 2 that don't go how I imagined for every 1 that goes how I wanted it to.The older I get the more I realize how little I actually know.
-
The Following User Says Thank You to MattCB For This Useful Post:
Chinaski (08-30-2014)
-
08-29-2014, 06:58 PM #7Senior Member


- Join Date
- Jun 2013
- Location
- Pompano Beach, FL
- Posts
- 4,049
Thanked: 636
I have found that before I go to sandingI use CLR and a soft brass brush. This gets rid of most rust and grunge. Then I use bartenders friend (scouring powder for pots) and a scotch brute sponge scrubber. This makes for a lot less sanding. Good luck.
-
The Following User Says Thank You to bouschie For This Useful Post:
Chinaski (08-30-2014)
-
08-29-2014, 08:53 PM #8Senior Member


- Join Date
- Feb 2013
- Location
- Haida Gwaii, British Columbia, Canada
- Posts
- 14,457
Thanked: 4830
the 220 scratches are pretty deep at this point. If you use a backer like a cork on your sandpaper it will help to keep things straight and more of the lines crisp as you proceed. Make sure you start wet sanding with WD-40 or similar once you hit 600, it will keep the scratch pattern a little more consistent and give the steel a nice glow. You can hit it with steel wool and polish after the 2K grit, and then just the polish to finish, if it is a little pitted back up to 2K and sand in one direction to get a matte or satin finish. Wine corks are my sanding backer of choice but many things will work. One of the fellows here uses old hair curlers. Be sure to follow the other good points already made.
It's not what you know, it's who you take fishing!
-
The Following User Says Thank You to RezDog For This Useful Post:
Chinaski (08-30-2014)
-
08-30-2014, 06:17 AM #9
-
09-01-2014, 06:11 PM #10

Just from my own experience, I always started off with a 320 grit. If you start with anything coarser, you will leave deep scratch marks that you will have to sand out quite a bit with 320 or a finer grit sandpaper. Use wet or dry & WD 40 or an equivalent lubricant. It does look a lot better already so you definitely have done some good. Like the others have said, sand in one direction only & keep at it. It will take a lot of elbow grease but it will eventually look better than it was. I do like your results already but I would have started with a 320 grit & then progressively move up to a 2000 grit but that's just me. Then in the end follow up with 0000 steel wool with WD 40 on it. It should come out with a nice shine to it.
Last edited by engine46; 09-01-2014 at 07:57 PM.
-
The Following User Says Thank You to engine46 For This Useful Post:
Chinaski (09-02-2014)


 35Likes
 LinkBack URL
 About LinkBacks


 Reply With Quote


