
Results 41 to 49 of 49
 101Likes
Thread: WIP: W.G. Wilton
 LinkBack URL
 About LinkBacks
-
02-05-2019, 06:13 AM #41Hones & Honing


- Join Date
- May 2005
- Location
- Saint Paul, Minnesota, United States
- Posts
- 8,023
- Blog Entries
- 1
Thanked: 2209
Have you considered wrapping the MDF wheel with double sided carpet tape and then sticking some sandpaper to it?
I have done this and it works but it is tedious to change the sandpaper .
The other pain is that you must remember to wrap the double sided tape in the opposite direction of the sandpaper. if you don't then when you remove the sandpaper you also remove the double sided tape!
Last edited by randydance062449; 02-05-2019 at 06:17 AM.
Randolph Tuttle, a SRP Mentor for residents of Minnesota & western Wisconsin
-
02-05-2019, 02:41 PM #42Senior Member

- Join Date
- Jan 2015
- Location
- Pinole, ca
- Posts
- 1,526
Thanked: 339
I thought about that but two things kind of soured me to the idea. First is the time, like you said, tedious. The second is material cost. They offer all sorts of rolled abrasive paper, but at 3’ every paper change plus the double sided tape it would get expensive fast.
-
02-05-2019, 02:56 PM #43Senior Member


- Join Date
- Feb 2013
- Location
- Haida Gwaii, British Columbia, Canada
- Posts
- 14,450
Thanked: 4829
A future option could be to use some low grit paper to start and get the heavy lifting done and progress through the compounds. It will take time and experimenting to dial in your process and you may go back and forth finding what really is best. I do like the idea and your progress thus far is a great experiment. Keep going!
jfk742 likes this.It's not what you know, it's who you take fishing!
-
02-05-2019, 10:21 PM #44Senior Member
- Join Date
- Jan 2015
- Location
- Pinole, ca
- Posts
- 1,526
Thanked: 339
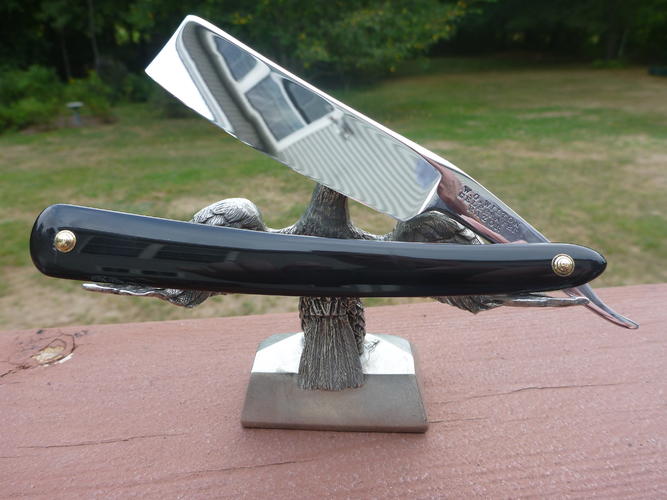
Definitely not going to be my go to for every razor. This one in particular had a shoulder removed by bench grinder at some point as well as a divot from said grinding. I got the shoulder back to a point that it almost match’s the other side. This is definitely a process I can use for some blades of mine who have been abused by poor honing or “custom” work. I do like the way the finish looks from the buffing compound off the mdf wheel. I have lots more experimenting to do, should prove interesting at the very least.
Gasman likes this.
-
02-09-2019, 04:56 AM #45Senior Member
- Join Date
- Jan 2015
- Location
- Pinole, ca
- Posts
- 1,526
Thanked: 339
This restore has been a pain in the ass.
3 trips back to “grinder” to correct my poor technique, which thankfully got better with each trip.
2.5 sets of scales. First set came out beautiful except I made a slip up on the belt sander while shaping the pivot side and had to shorten them. The pivot then was too close to the tips, didn’t look right and also didn’t grip the tang well in the stropping position. The 1/2 set failed to even get off the ground, the blank was terribly warped and took me three trips through boiling water and flattening, then the bastards just curled right back up as soon as even the tiniest amount of heat built up from the sander while trying to thickness them.
(Tried to fix the screw up after the screw up. Honey horn doesn’t lend itself to invisible repairs)
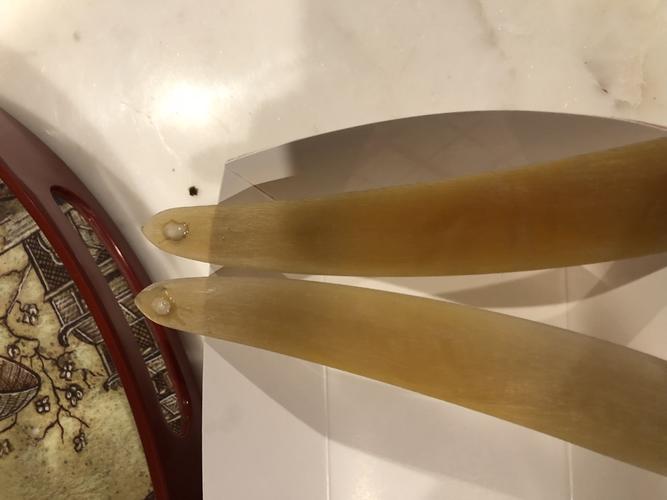
The 2nd set came out pretty good but is streaked horn instead of honey, as I ran out of honey horn. Sorry no photos, at this point I was questioning my sanity.
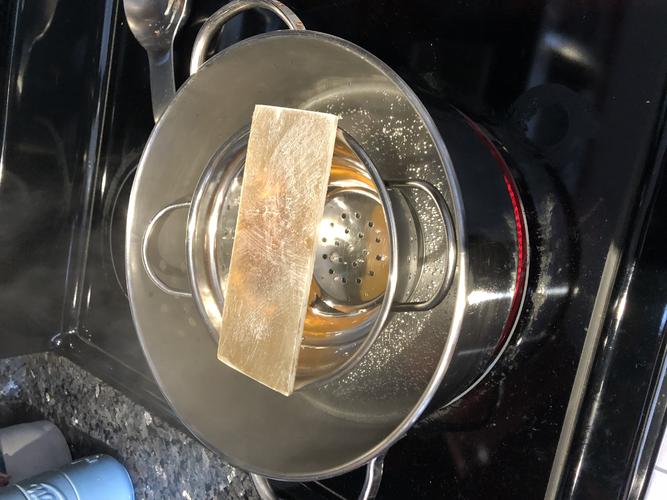
(Flattening the first set of blanks, I ended up just putting the blanks into simmering water for 10 minutes then clamping them in between a couple pieces of wood. Had to do a couple rounds of it through the thicknessing process).
Then the wedges, oh the wedges...
I couldn’t for the life of me decide on something, I wanted bone but didn’t have any and am impatient. I decided on black horn. The first wedge was for the first set of scales but was too thin to get the blade to sit where I wanted it, so made another that worked, but then I trashed the scales and the wedge didn’t fit in the final iteration, so I made another.
Normally wedges aren’t a big deal, but, I had decided to laminate my wedge with a sheet of brass in the middle. This makes tapering a wedge very time consuming, both sides need to be identical or it looks like crap. I had probably 2 hours in this project just making wedges.
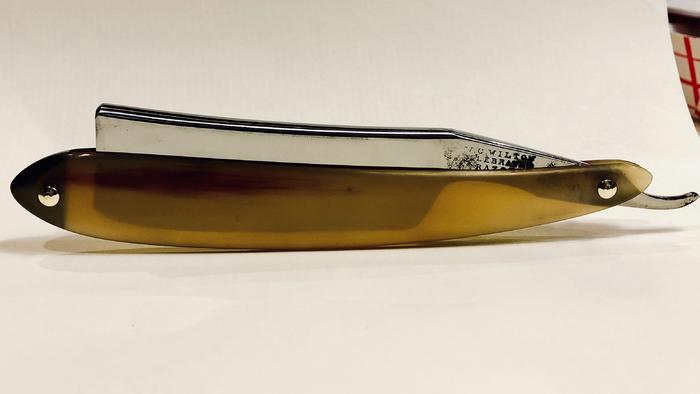
Well I ended up from a complete departure from the original plan which was to try and keep things fairly true to the razors most likely original form. Oh well, I’m happy with it.
-
-
02-09-2019, 05:08 AM #46Razor Vulture

- Join Date
- Oct 2010
- Location
- Lone Star State
- Posts
- 26,151
Thanked: 8616
Thing turned-up sweet! Well-Done!

-
The Following User Says Thank You to sharptonn For This Useful Post:
jfk742 (02-09-2019)
-
02-09-2019, 06:38 AM #47Senior Member
- Join Date
- Feb 2013
- Location
- Haida Gwaii, British Columbia, Canada
- Posts
- 14,450
Thanked: 4829
JFK,
I guess all is well that ends well.
That little thing with the sander is part of the reason I use files and scrapers to shape horn. It is close to the same amount of time in the long run.
It looks good, and wound up being a great save.It's not what you know, it's who you take fishing!
-
The Following User Says Thank You to RezDog For This Useful Post:
jfk742 (02-09-2019)
-
02-16-2019, 02:00 PM #48Senior Member


- Join Date
- Oct 2011
- Location
- Standish, Maine
- Posts
- 816
Thanked: 952
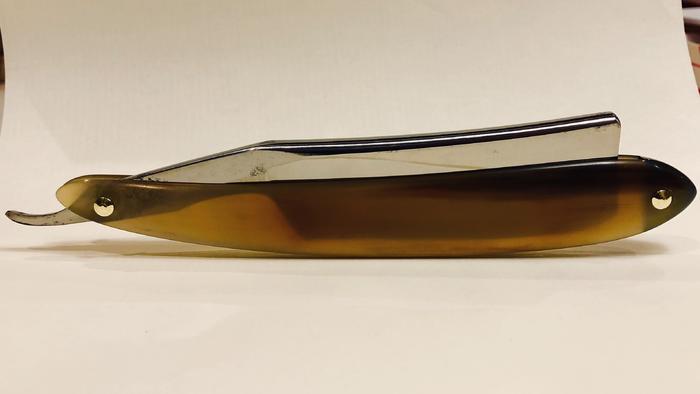
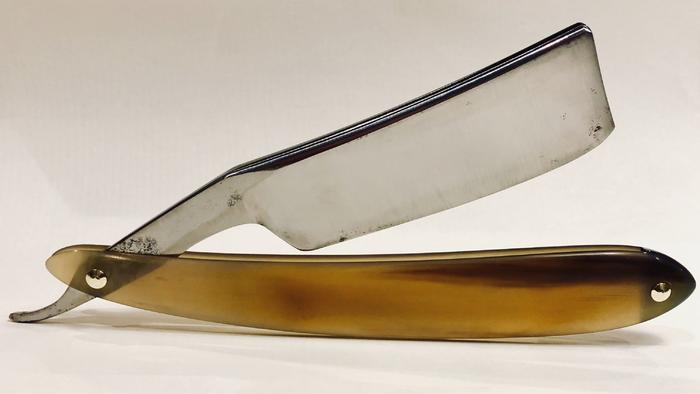
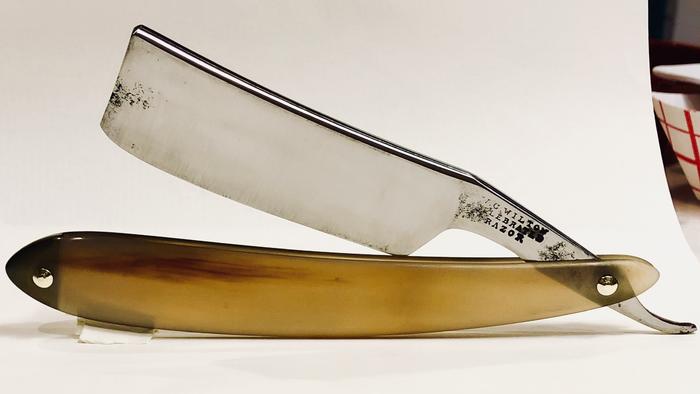
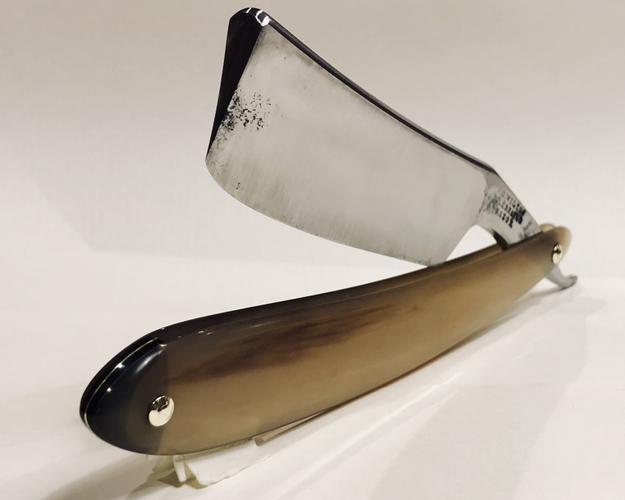
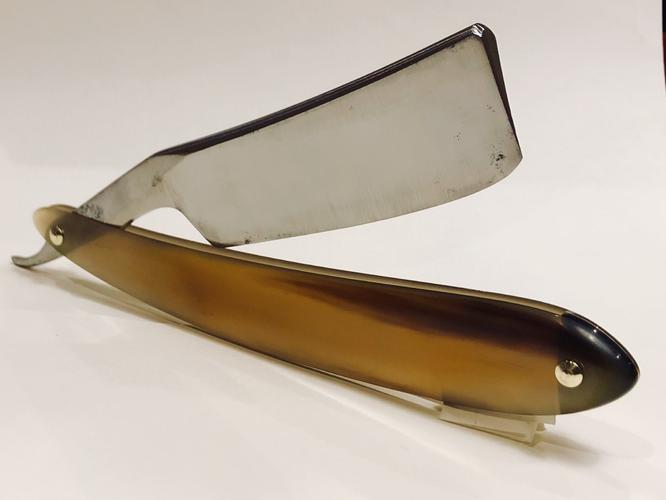
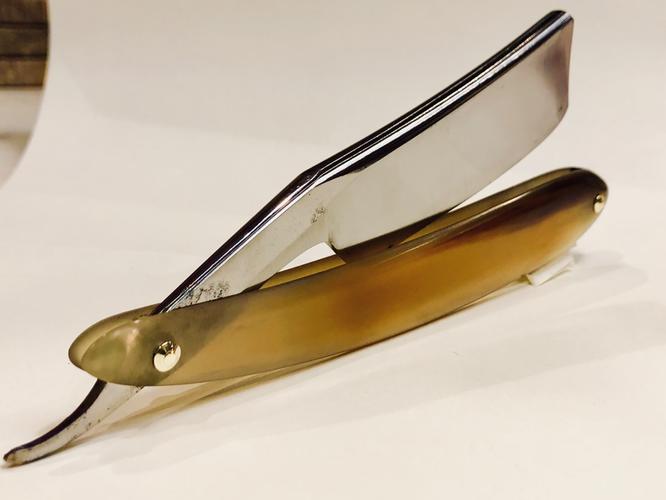
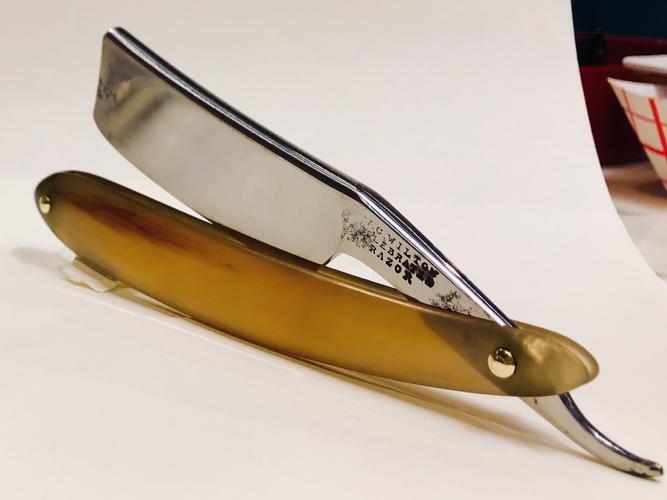
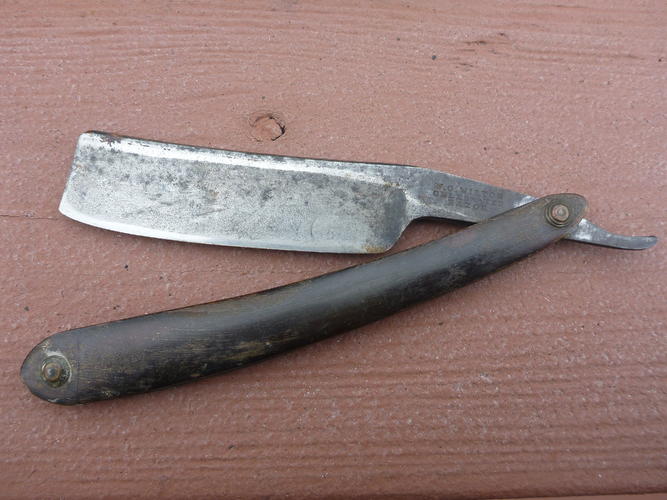
I'm late to the party. Nice work on the razor. Your stiff wheel allowed you to retain the blade details and profiles. A buffer would have destroyed all that. Next time I might suggest using a wheel that is smaller than the blade face. Choosing a wheel that covers the blade face will cause a big loss in blade width if there is a lot of metal to remove because of pitting. I see you left some pitting so you may have figured out you'd lose blade width. When I regrind a blade if an 8 inch wheel covers the blade face I drop to a 6 inch wheel. At some point in your grinding experience you will learn to roll/walk the blade over the wheel and get a nice even grind as Bruno explained to me some time ago. Maggard also has a good video out there on grinding and explaining why you start with a smaller wheel. Here is a Wilton I did back in 2016.
-
The Following User Says Thank You to karlej For This Useful Post:
jfk742 (02-16-2019)
-
02-16-2019, 11:13 PM #49Senior Member
- Join Date
- Jan 2015
- Location
- Pinole, ca
- Posts
- 1,526
Thanked: 339
Love your work karlej.
Thanks for the tip. What kind of motion do you use? I assume lots of practice and experience to get the blade face “straight”. I had trouble seeing the facets I created until I got up in grit a ways, then would have to step it back to fix it. Once I started using a lamp so I could better see how even the faces were or weren’t, things got better. Any pointers would be great.
Hoping to have a 2x72 by years end but we’ll see, my house needs a lot of work and money is a little tight for those kind of purchases.


 Reply With Quote