
Results 81 to 90 of 98
 318Likes
Thread: An idea for a contact grinder.
 LinkBack URL
 About LinkBacks
-
04-16-2019, 01:54 AM #81Captain ARAD.


- Join Date
- May 2011
- Location
- Pacifica, CA
- Posts
- 2,474
Thanked: 2227 It's especially tempting on mine, which doesn't even have a crank to raise and lower it. It's just a cast iron plate that weighs about 30 pounds that has a brake to keep it in place when you position it on the mast of the drill press.
 Originally Posted by Cangooner

Then I added a 15 pound milling vise onto it. So it'd be really nice to be able to raise and lower that without all the weird crab dancing.
I've been living with my OCD long enough I can mostly keep it under control... It was just realizing I had two extremely similar looking jars of liquid and one of them I actively want to put very hot things into and the other one I should definitely never put very hot things into... It seemed like a good idea to make sure I knew which was which. Originally Posted by DZEC
Honestly, the smell would probably have been enough. There's no mistaking the smell of solvent from canola oil that's quenched 3-4 red hot lumps of steel. Well. Except that the whole garage kind of smells like the quenching for a day or two.-Zak Jarvis. Writer. Artist. Bon vivant.
-
04-16-2019, 02:14 AM #82Senior Member

- Join Date
- Oct 2010
- Posts
- 26,211
Thanked: 8626
OH MY!
 Voidmonster likes this.
-
04-17-2019, 12:08 AM #83Captain ARAD.
- Join Date
- May 2011
- Location
- Pacifica, CA
- Posts
- 2,474
Thanked: 2227
I’ve now definitively answered my long-ago question: can I grind a razor from stock to finished razor using my drill press and a drum sander?
The answer is: Yes. You can also whittle redwood replicas of the works of Rodin with a penknife.
The better question is: do I want to?
And the answer to that one is NOOOooooooOOoooOoOOOoOoooooooOooo...oOOOoooo....oo .
That said, I got about 85% of the way through the pre-heat treat grinding before the cut-down sanding belt disintegrated too much to use.
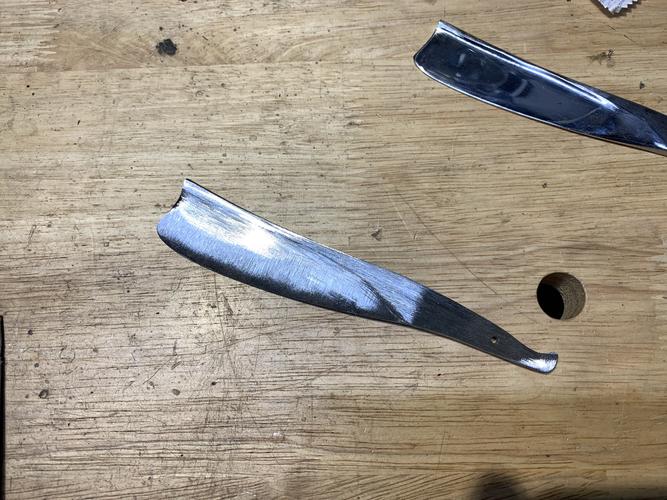
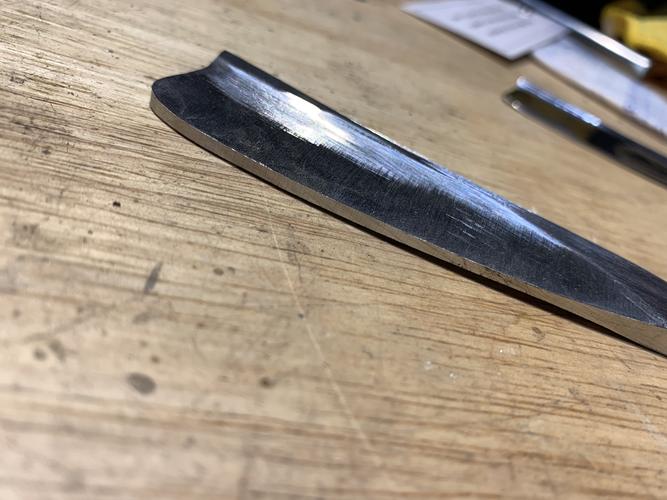
At the max speed of my drill press, that took about 2 hours on an 80 grit ‘belt’.
If I didn’t get sunburned while doing it, I definitely got swarf-burned from all the sparks. To grind flat like that, on a drum sander, required somewhat regularly having at least one arm in the spray of newly liberated metal.
(I wore a face shield and respirator and did the grinding outside).
So, I am now fully ready to build a real contact grinder. Just as soon as I have access to the waterjet again, and once John has settled on a design.-Zak Jarvis. Writer. Artist. Bon vivant.
-
04-17-2019, 12:41 AM #84Senior Member

- Join Date
- Jan 2015
- Location
- Pinole, ca
- Posts
- 1,526
Thanked: 339
I’m working on it, so much more to this than I ever imagined, doesn’t help that I know next to nothing about metal fabrication, all my experience begins and ends with wood. I think if for whatever reason your motor quits on you we can just swap the motor mount for the dc motor you have to whatever motor you move to without effecting the rest of the frame. I based the cutout in the frame to accommodate any motor with a diameter up to 6.625”.
Speaking of which what does the mounting area look like on your motor?
The razor is looking good, you did way more than I would have attempted with what you’re using.Voidmonster and MikeB52 like this.
-
The Following User Says Thank You to jfk742 For This Useful Post:
Voidmonster (04-17-2019)
-
04-17-2019, 12:59 AM #85Captain ARAD.
- Join Date
- May 2011
- Location
- Pacifica, CA
- Posts
- 2,474
Thanked: 2227
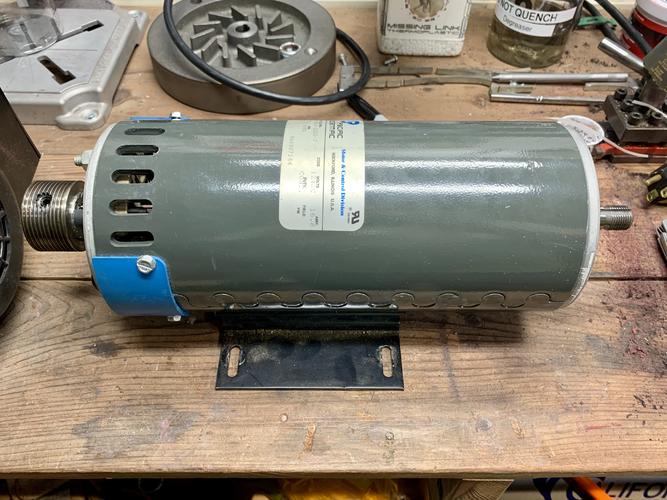
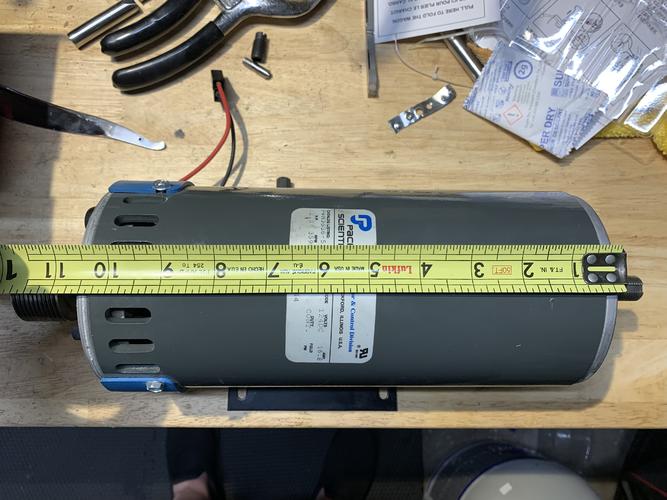
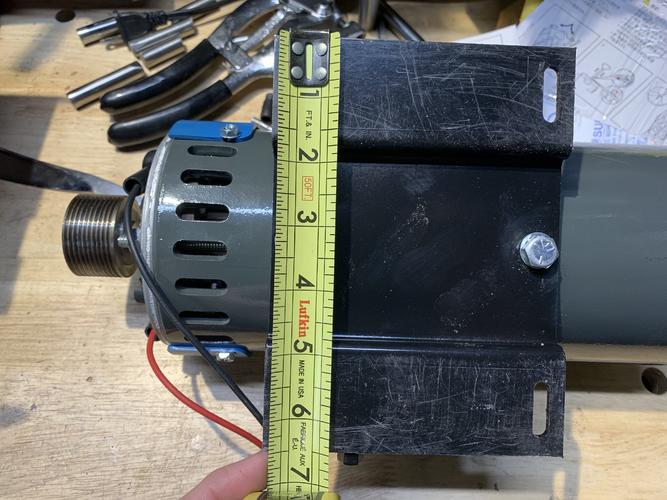
This is the motor (I’ve taken measurements so I can build a CAD model, but I haven’t built it yet). Originally Posted by jfk742
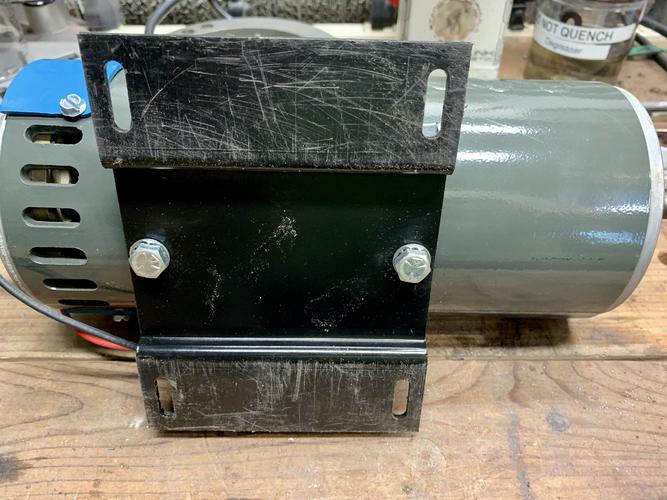
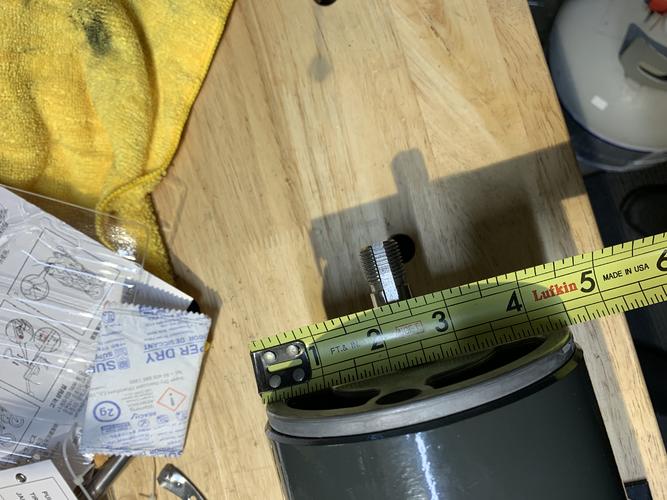
The mounting plate:
And the pulley wheel:
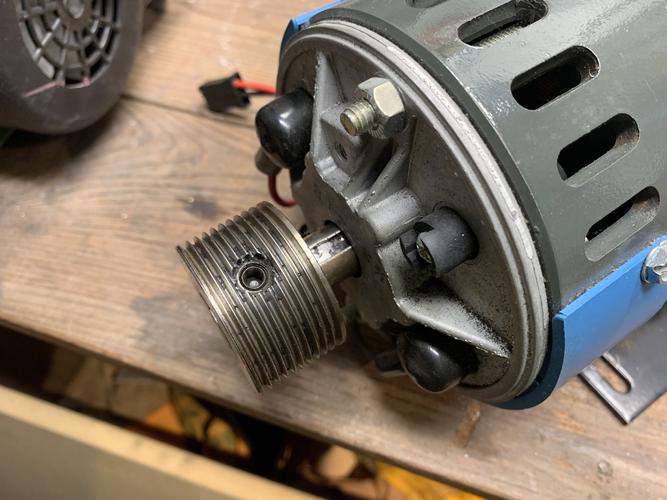
Since I want to enclose the motor and also step-down the speed with a pulley wheel, I’ll slightly modify the cut for mine so that instead of mounting the motor, it mounts a pulley and drive wheel.
Gonna stow the motor under the table so there’s room to duct out the motor and keep dust out.
It’s worth noting, I’ve got a fair bit of square steel tubing that could be used in this design to help with rigidity. Hooray for treadmill parts!-Zak Jarvis. Writer. Artist. Bon vivant.
-
04-17-2019, 01:03 AM #86Captain ARAD.
- Join Date
- May 2011
- Location
- Pacifica, CA
- Posts
- 2,474
Thanked: 2227
Duh.
Measurements.
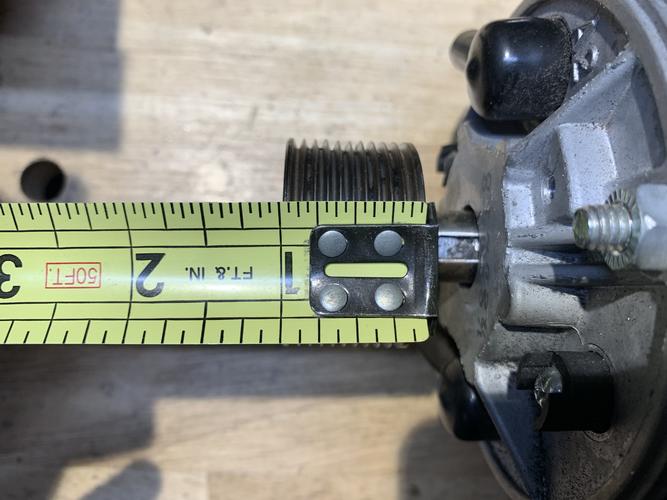
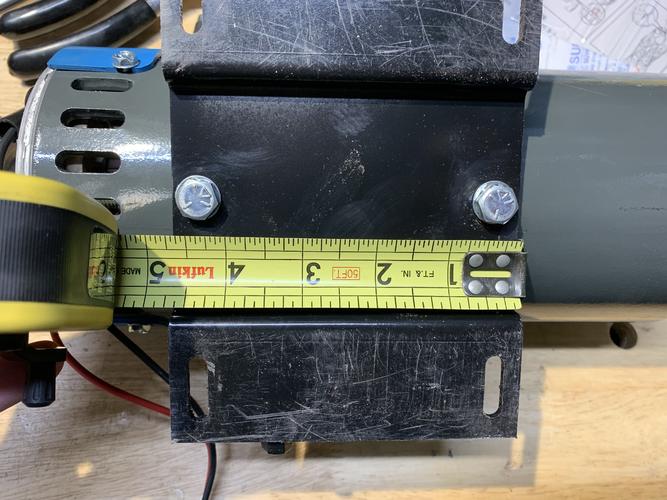
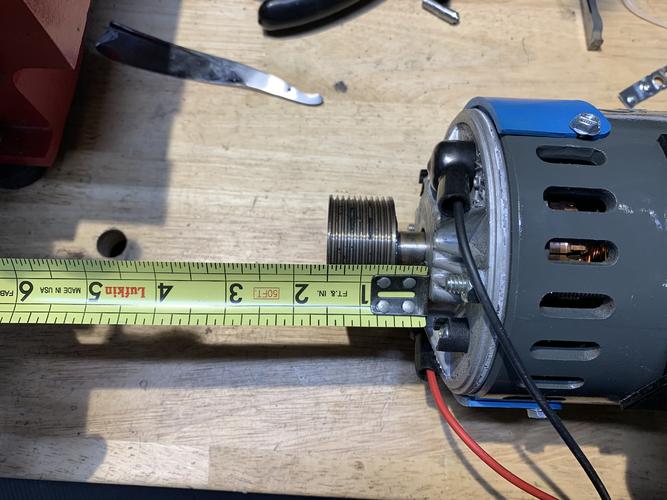
Originally, the key on the pulley wheel was a fair bit longer than the wheel itself, which was definitely going to make enclosing that end of the motor annoying, so I ground it flush with the wheel. (I think the original is visible in some of those pics)-Zak Jarvis. Writer. Artist. Bon vivant.
-
04-18-2019, 09:49 PM #87Captain ARAD.
- Join Date
- May 2011
- Location
- Pacifica, CA
- Posts
- 2,474
Thanked: 2227
This morning I finally made real progress on washer punches.
Ive settled on making bits for my power punch.
(Image grabbed from Micromark, there are a billion versions of these things, but theyre all basically the same).
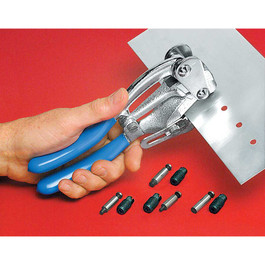
Ive got making the punches on my lathe down pat. I can get within 5 thou by eyeballing. That threaded part has been giving me FITS though. Ive only got cheapo Harbor Freight tap & die kits, and they are impressively not up to the task.
Because I dont have a bench grinder, Im using insert tooling on my lathe, and I dont have any inserts with the correct cut angle for these threads (7/16-20).
I had this piece with lathe-cut threads that didnt work.... then I had an epiphany. Use the threading die on that. A LOT less material to remove. It still took a LOT of force though.
This of course killed the flimsy die stock. It literally tore the set screw out.
SOOOOOOO...
I mounted the die into the compound vise (which Id been incorrectly calling a milling vise) on my drill press and got ready to abuse that tool some more.
With the part chucked up in the drill, I used the compound vise to center everything. This is useful because it means my fallible sense of straight down never comes into it.
Then I turned the ends on two short steel bars down until they fit into the key detente of the chuck, this making a manual wrench for rotating the quill.
After some sweating, swearing and a busted knuckle, the job was done. I cleaned up the threads with files & sandpaper, and voila!
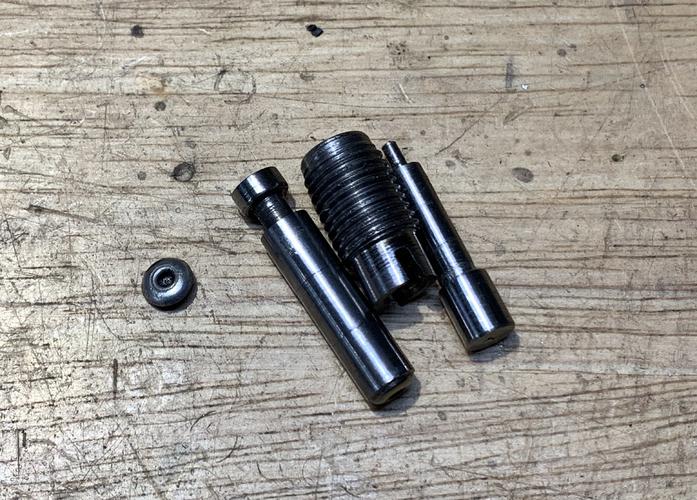
Id already turned and heat treated the forming punch, so I just needed to holllow out the threaded die and make a center punch to fit inside.
Theres a bit more work to do I need to heat treat the two new parts (I thiiiiiiink that center punch is made of hardenable steel. It might be Home Depot welding rod though, so thats something to look forward to), then I need to add solder into the receiving hole of the threaded die so it will fully form the washer some detail is lost. But it all works as is.
And it works just like the power punch, except after you cut through the sheet metal, you then tap that center punch through to knock out the center hole. As a bonus, that punch will also then push the washer out when you release the forming die.
Anyway, Ill get video once its all finished. Im out to lunch at the moment.
Last edited by Voidmonster; 04-18-2019 at 09:52 PM.
-Zak Jarvis. Writer. Artist. Bon vivant.
-
-
04-19-2019, 01:55 AM #88Captain ARAD.
- Join Date
- May 2011
- Location
- Pacifica, CA
- Posts
- 2,474
Thanked: 2227
As promised, video:
The center punch ended up not being hardenable steel, but it still works okay. I'll still probably make another one. Just because.
To make the shaped interior of the receiving die, I originally cut out the shallow hole using an end mill so it'd be nice and flat. I made it a little deeper than it needed to be to cut sheet metal.
Then, once I heat treated the part, I dropped a small blob of solder down in there and chucked up the punch in my drill press. I spun that down into the receiver until it heated up and squished out all the solder that didn't fit, then I punched one piece of steel and ran that in there until it brazed onto the solder.
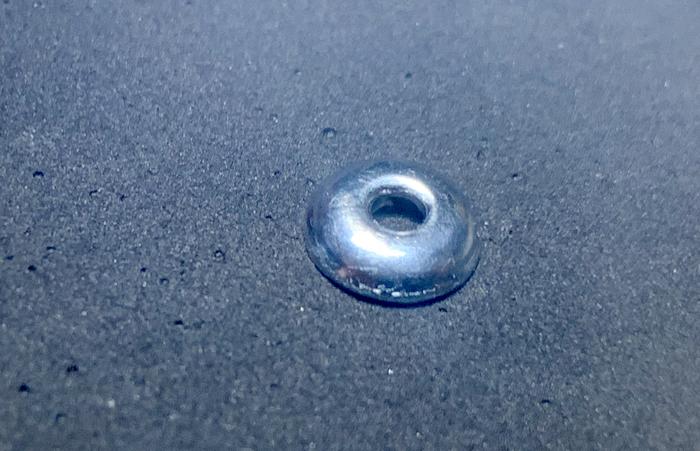
With that done, I reamed out the center hole again with a drill bit on a pin vise and a needle file. That's responsible for the nicely defined little shoulder on the washers. If I hadn't done that, the cut parts would just be little blobby domes.
Geting parts out is a little more hassle than I'd like it to be, but sitting here I just realized that one way to do it would be to simply punch out a bunch of washers without doing the center hole, then screw the receiver down a little so it doesn't make snug contact, put a washer back in, THEN punch out the center. They shouldn't be stuck, then. In theory.
Still, this is by far the easiest way I've found of quickly making small numbers of washers.
Now to just make a bunch more kinds!-Zak Jarvis. Writer. Artist. Bon vivant.
-
The Following User Says Thank You to Voidmonster For This Useful Post:
jfk742 (04-19-2019)
-
04-19-2019, 02:40 AM #89Senior Member
- Join Date
- Jan 2015
- Location
- Pinole, ca
- Posts
- 1,526
Thanked: 339
Nice looking washer. Maybe try using some compressed air to blast it out of there? May be more trouble than it’s worth though if you’ve got washers flying around the shop.
Voidmonster likes this.
-
The Following User Says Thank You to jfk742 For This Useful Post:
Voidmonster (04-19-2019)
-
04-19-2019, 02:54 AM #90Captain ARAD.
- Join Date
- May 2011
- Location
- Pacifica, CA
- Posts
- 2,474
Thanked: 2227
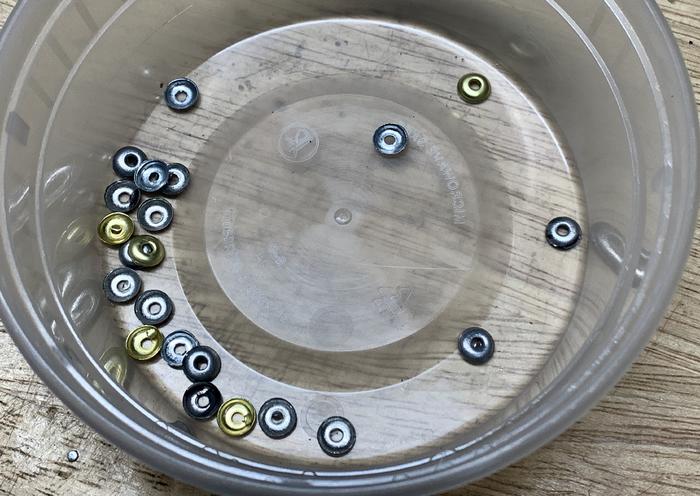
After posting, I went back down to the workshop and played around with it some more. The idea I had up there of punching washers, then punching centers does work, and they’re really easy to get back out (though steel sticks in there because the die is slightly magnetic for some reason). Originally Posted by jfk742
Better still, I figured out how to just probe around a little with that center punch and get it to push the washer out after the first go. Sometimes need to fish it out with needlenose pliers because of the magnetism, but it’s not so bad.
I also tried using some 26 gauge galvanized steel sheet and that worked even better.
The end result?
 -Zak Jarvis. Writer. Artist. Bon vivant.


 Reply With Quote