
Results 31 to 40 of 73
 LinkBack URL
 About LinkBacks
-
12-14-2009, 08:05 PM #31Senior Member

- Join Date
- Nov 2009
- Location
- Houston, TX
- Posts
- 159
Thanked: 39
Well, after seeing all the fine examples so far, I am reticent to post these pictures. First, I am a newbie, only str8 shaving for a month. Second, I'm not the greatest photographer in the world and am using a "el cheapo" brand camera.
I was given a Clauss a few weeks ago (no I have no pictures of it because I thought I would have ruined it anyway). Scales were broken and unrepairable. The blade was rusty to say the least. My wife said: "Surely your not going to try to fix that? Are you?"
Armed with sandpaper, a Dremmel Tool, and some left over Walnut from a gunstock I had made, I entered into the realm of restoration! Tracing the scales onto paper was the easy part. It got harder as I went along!
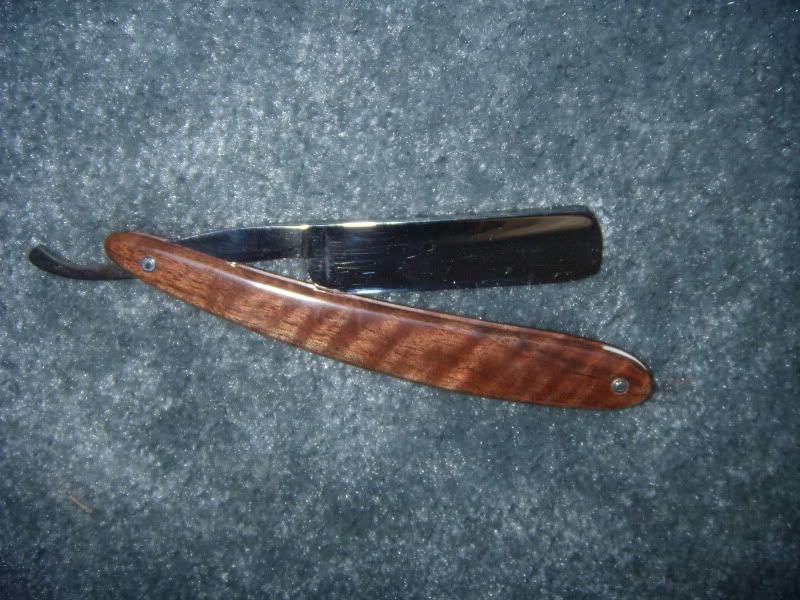
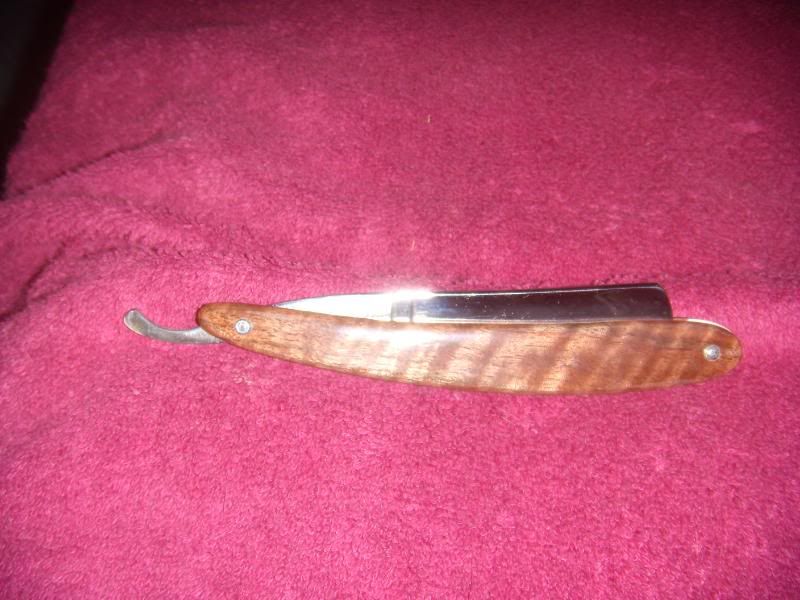
OK There it is. First off, I wish to thank Bob Allman for the use of his buffers (Oh I GOT to get one of those!) and his overview of my work (stopping me just short every time was going to screw up or about to remove a finger or two!). Also I would like to thank Hoglahoo, Holli4, Gugi and Lynn for their watchfull eye during chat nite while I honed this bad boy up while consuming two bottles of Shiraz in the process (well, my wife did help in that department).
By the way, I shaved with it this morning and I had a wonderfull shave! This thing is sharp and smoooooooothhhh! I like it.
Mistakes? Oh yeah, plenty. ` I see all the warts, but they are my warts! I learned a lot and hope to take that knowledge with me on my second attempt!Last edited by flylot; 12-15-2009 at 12:50 PM.
-
The Following User Says Thank You to flylot For This Useful Post:
shutterbug (12-14-2009)
-
12-14-2009, 09:45 PM #32Senior Member

- Join Date
- May 2009
- Location
- Reno, NV
- Posts
- 282
Thanked: 124
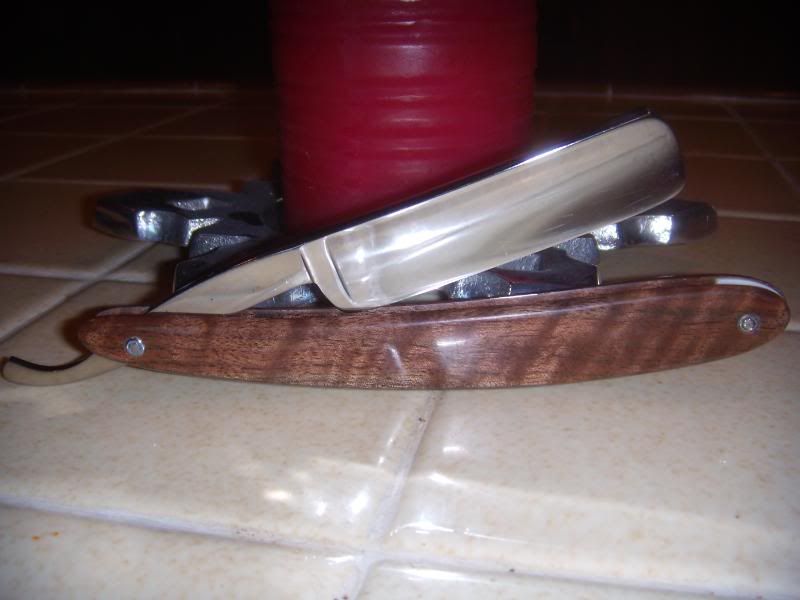
Fantastic figuring on that walnut.
I did not take any process images of the work and it looks like I forgot to take before images as well. I took a quarter inch thick piece of wood and split it with a japanese razor saw. I then epoxied the two halve to the copper with the outside halves down. After it cured I then took it to my belt sander to smooth out and flush up the edges. Quite simple and it helps bolster up the thinner scales after spliting it for the bookends. CA is simply superglue. I use the thinnest I can get and sand it smooth with 600 grit between layer applications.
-
12-15-2009, 04:29 AM #33Member
- Join Date
- Nov 2009
- Posts
- 93
Thanked: 12
Lovely Flylot. I hope my first turns out that nice.
I love the way that layer of metal inside the scales looks. I think I might try bronze or nickel or something that will match the pins. Or better yet... can I get/make copper pins? Copper is my favorite metal color. My mind is racing with ideas. Originally Posted by Muirtach

I have several ebay razors as candidates. My friend at work lent me his tumbler he uses for polishing his bullet casings, so I'll be tossing a blade or two in there sometime this week.
Sorry for discussing restoration on this thread. Can we make a thread to discuss these entries, or is discussion on this thread OK?
-
12-18-2009, 06:25 PM #34Tonsorial artist

- Join Date
- May 2009
- Location
- detroit
- Posts
- 230
Thanked: 65
So I decided to take my razor as close to original condition as possible, there was a bit of pitting that I wasn't able to remove.
The razor is a W&B diamond edge.

I made the big washes with a hole punch.

-
The Following User Says Thank You to detroyt For This Useful Post:
shutterbug (12-19-2009)
-
12-18-2009, 06:33 PM #35Tonsorial artist
- Join Date
- May 2009
- Location
- detroit
- Posts
- 230
Thanked: 65
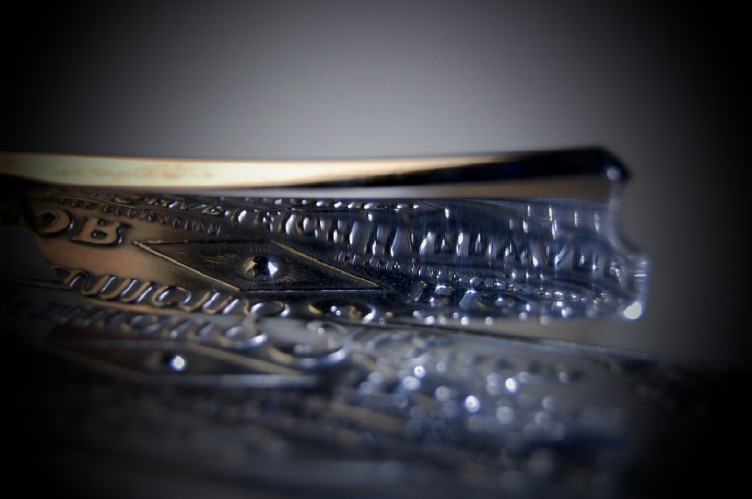
When I got the razor it was covered in a black patina and pitted really bad it used to say "diamond edge" on the blade but it had to be removed so I could get the finish I wanted.
Here are a couple pics of the blade about halfway through sanding and the scales before polishing.


Many thanks to the judges and everybody else here. I learned so much from everybody here and I am excited to start on my second restoration. This forum has been a real pleasure to be a part of. Win lose or draw this contest is a great idea and was a great learning experience so I feel as though I have already won.
Thanks again, Loren
-
The Following User Says Thank You to detroyt For This Useful Post:
shutterbug (12-19-2009)
-
12-18-2009, 07:58 PM #36Member
- Join Date
- Nov 2009
- Posts
- 93
Thanked: 12
Nice work Loren
Are those stacked washers at the pins functional or just for aesthetics?
-
The Following User Says Thank You to Hayduke For This Useful Post:
detroyt (12-18-2009)
-
12-18-2009, 08:19 PM #37Tonsorial artist
- Join Date
- May 2009
- Location
- detroit
- Posts
- 230
Thanked: 65
Just for aesthetics. Originally Posted by Hayduke
-
12-30-2009, 01:29 AM #38lost
- Join Date
- Jan 2008
- Posts
- 3,446
Thanked: 416
just a reminder this contest only has one more month to go lets get those restore projects finished up!!!!!
-
12-30-2009, 08:50 AM #39Member

- Join Date
- Oct 2009
- Location
- Kolkata, India
- Posts
- 91
Thanked: 7
nice work.. and thanks doc for conducting such a competition which will give courage to newb
-
01-08-2010, 05:05 AM #40Junior Member

- Join Date
- Nov 2009
- Location
- Littleton Colorado
- Posts
- 7
Thanked: 1
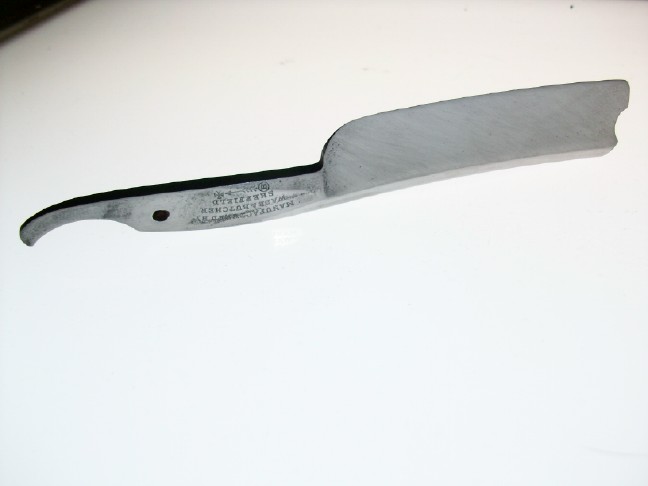
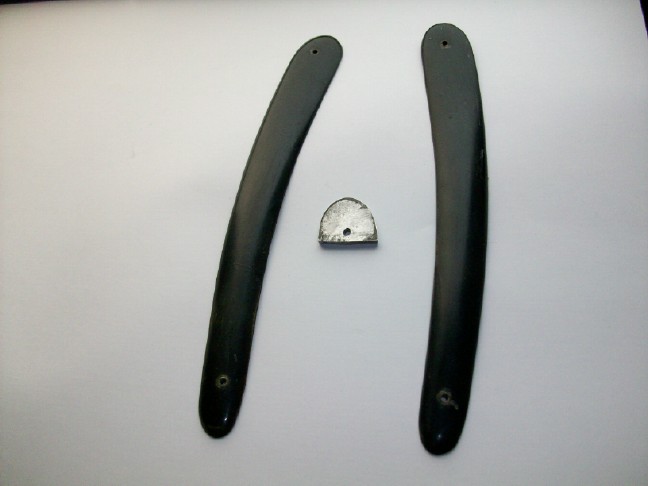
I had this blade in a bunch of stuff I bought to play with. The blade was badly pitted and took some serious sanding to get down to some better looking steel. The hard part was not going so far as to loose the stamps and etchings but still get a decent look, so I had to stop without removing all the pitting. The scales were in pretty good shape from another razor with a busted blade. My camera isn't the greatest.
I put the Cut Throat Porter in as a cheap ploy for beer points.
-
The Following User Says Thank You to AcesN8s For This Useful Post:
shutterbug (01-08-2010)


 Reply With Quote