
Results 41 to 50 of 73
 LinkBack URL
 About LinkBacks
-
01-08-2010, 05:39 AM #41Senior Member


- Join Date
- May 2009
- Location
- Reno, NV
- Posts
- 282
Thanked: 124
Very nice classic restore there. Got to love the pipes
-
01-14-2010, 05:32 AM #42Senior Member
- Join Date
- Oct 2009
- Location
- Shanghai
- Posts
- 119
Thanked: 14 Kropp Made and Ground in Sheffield: Bone w/black ox horn
Hey Guys,
I wasn't sure if I was allowed to enter this one or not because while it is my first blade restore, I had tried some other scales for this blade before, but they didn't work out, so I went back and did some in bone. Here is the original thread about the scales. You can see the initial sanding on the Kropp there.
The blade was in pretty bad shape in the beginning. It took a lot of hand-sanding from 80-grit all the way to 2000-grit, and finished up with Maas. It was especially heavy at the toe area. Not sure if I took off to much metal or not, but still hones up quite easily. There is still some pitting, but it doesn't affect the shave, and this is going to be a workhorse. I would still like to put it on a buffer to get all the scratch marks out, but I guess that will have to wait for another day.
The blade balances perfectly at the pivot pin which was surprising because the bone was heavy. However, the blade really has some heft to it so it offset the weight of the bone. You guys that have worked with bone know that it is not a material the neighbors will appreciate. Ironically, my dogs got a hold of this bone before I got to shaping it. I had laid it on the kitchen counter after boiling it and cutting it. I thought it was far enough back to be safe, but in the end they were determined. Luckily, I caught them before they crushed it, though I needed to change my game plan on how I was going to shape it to remove the material correctly. It ended up working out with millimeters to spare.
Anyway, to the photos.
Kropp Made and Ground in Sheffield, Bone Scales with black ox horn wedge. Stainless steel washers and brass pins.
Before:


After:


Last edited by Shangers; 01-14-2010 at 05:42 AM.
-
The Following User Says Thank You to Shangers For This Useful Post:
shutterbug (01-14-2010)
-
01-15-2010, 01:06 AM #43Senior Member

- Join Date
- Sep 2009
- Location
- Mesa, AZ
- Posts
- 218
Thanked: 46
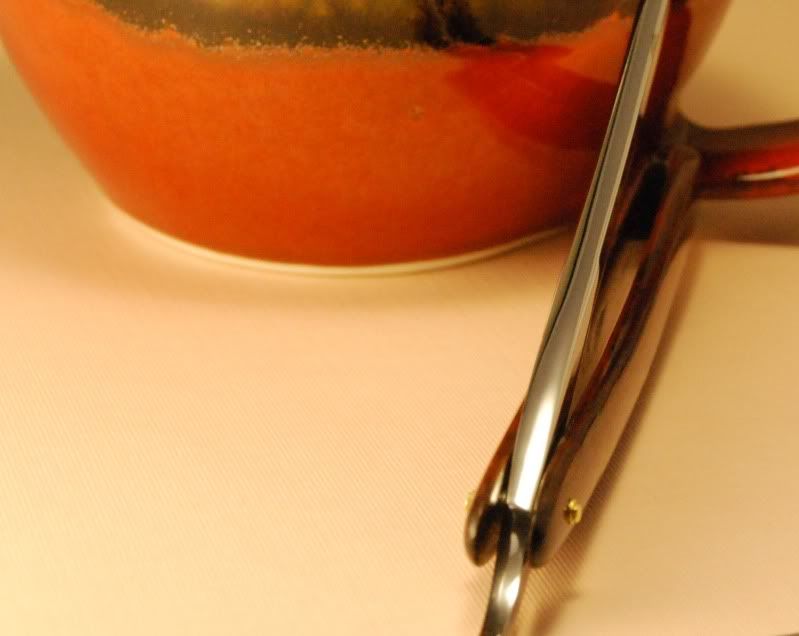
First one ever done, I didn't take the before pictures but it was a pitted, patina covered blade with lite oxidation on the scales. I really liked the look of the scales so I carefully removed the pins to avoid damaging them.
Last thing I need to do is get out the paint to refill the red

unfortunately, my photo snapping skills suck as well
-
The Following User Says Thank You to wpfontenot For This Useful Post:
shutterbug (01-15-2010)
-
01-24-2010, 05:22 AM #44Senior Member

- Join Date
- Jan 2010
- Location
- Ontario,CA
- Posts
- 242
Thanked: 40
Just take a bunch of pictures from a bunch of angles and then pick the best few to share with everyone. That looks like a fantastic job and I would like to see more.
-
01-24-2010, 11:00 PM #45.

- Join Date
- Jan 2010
- Posts
- 7
Thanked: 2
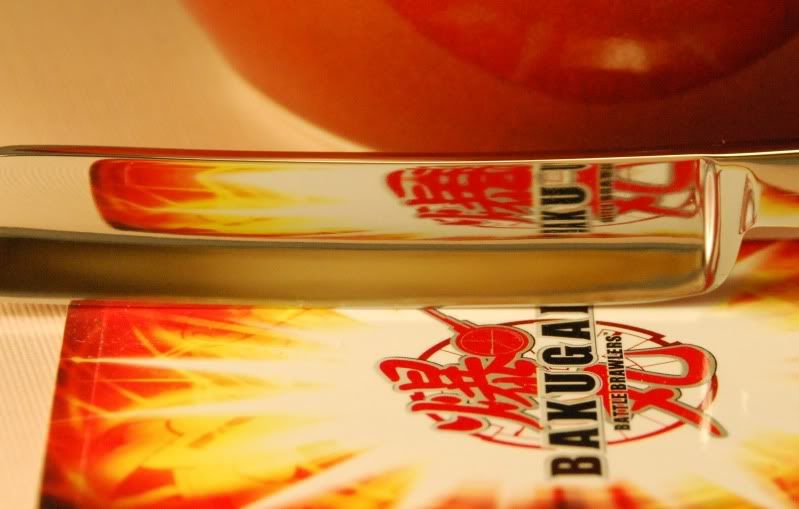
First full restore is of a "Boker" King Cutter i restored it for my old man as a birthday present. thought he might enjoy a good shave as much as i do.
Sorry no pictures of the before but it had cracked scales and heavy black rust around the pin, but thankfully no pitting.
the deets:
blade: polished and honed to 8000 - stropped - and delivered shave ready
scales: purple mahogany
i cut the initial shape with a scroll saw then clamped a belt sander to my workbench to shape the curves. finished it by hand, stained it as dark as it would take and polished it with beeswax to seal it.
The final touch was to carve my dads initials into the scales, i thought maybe when i'm long gone my kids or something will be able to have some family history.
-
The Following User Says Thank You to bluejacket For This Useful Post:
shutterbug (01-25-2010)
-
01-25-2010, 05:38 PM #46Senior Member

- Join Date
- Sep 2009
- Posts
- 122
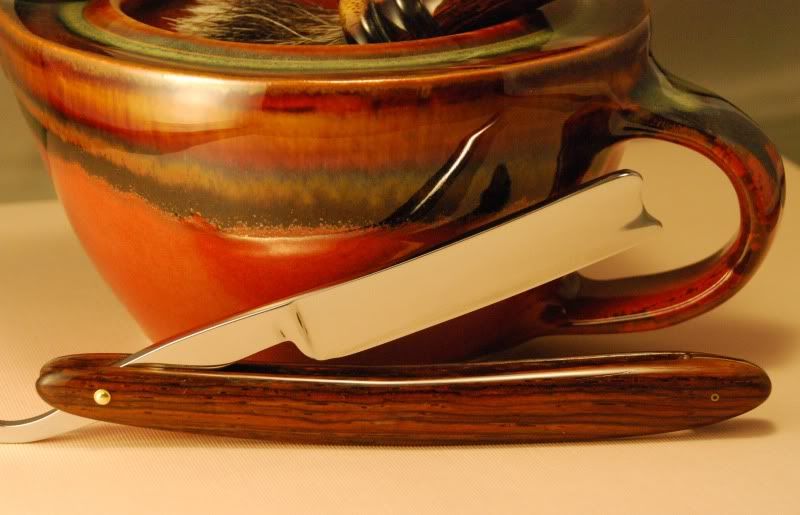
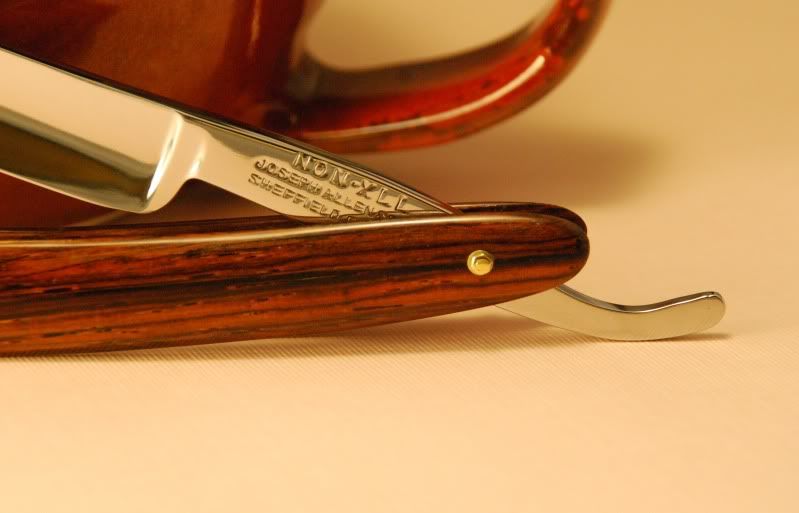
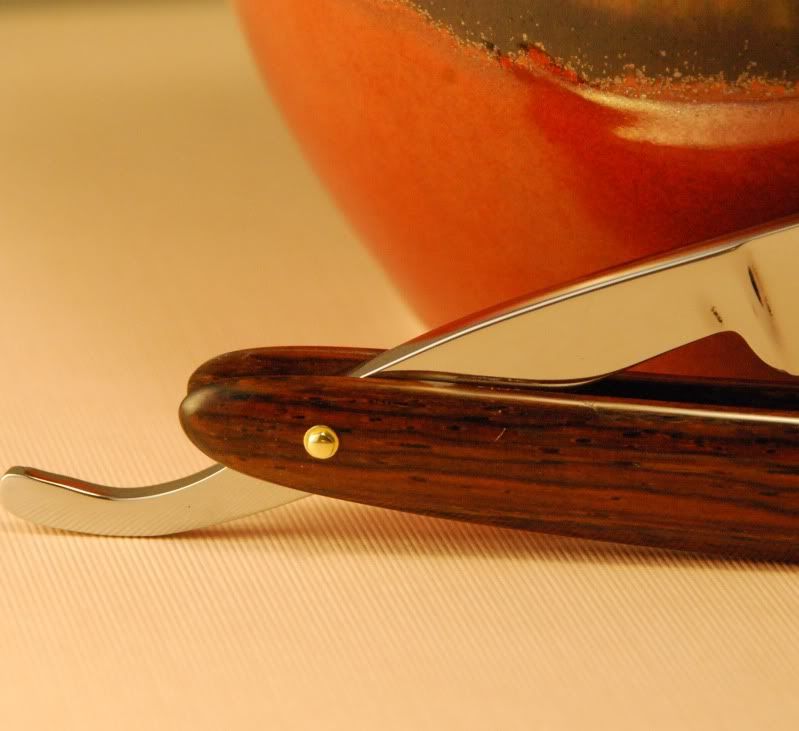
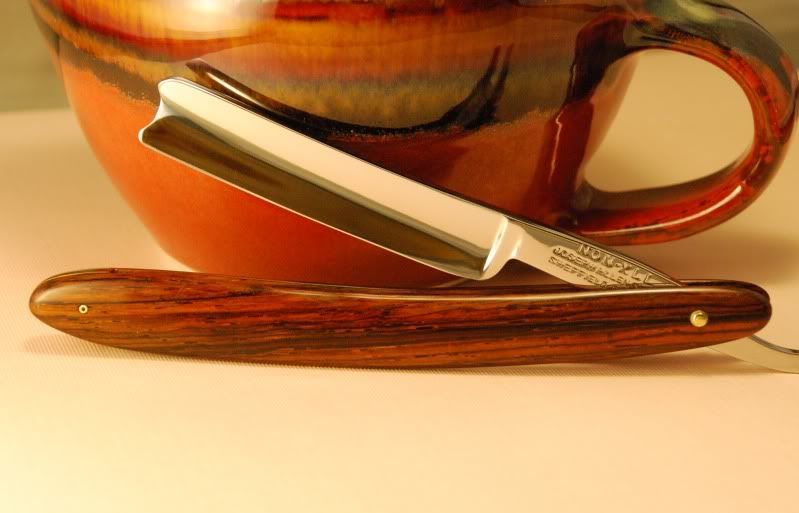
Thanked: 27 Joseph Allen NON XXL Restore
Here is a link to the before pics... http://straightrazorpalace.com/506431-post10.html
I posted some pics of ithis back in December but I wasn't happy with the results and I started over on the restore. I started with a lot of dremel sanding and hand sanding on the blade and new scales. I tried Epoxy finish on the scales and didn't like that. Tried CA and after two weeks of fighting little spots, started over with epoxy again. The blade has been sanded and sanded, buffed, run over with 600 greaseless, tumbled and buffed again. I finally am calling it done and will use it for shaving. The scales are Cocobolo and the wedge is multiple inlays glued in a wedge shape and glued into the finish scales. The rear "pinning" is there just for looks and the hinge pinning is an adjustable bolt. Hope you like it......
BTW..... Don't know what is glaring in the first picture here....... It isn't black on the blade... TRUST ME! I am too much of a perfectionist to leave something on there....
Last edited by bjanzen; 01-25-2010 at 05:42 PM.
-
The Following 2 Users Say Thank You to bjanzen For This Useful Post:
Muirtach (01-25-2010), shutterbug (01-25-2010)
-
01-31-2010, 08:57 PM #47Senior Member

- Join Date
- Oct 2009
- Location
- Northern Virginia
- Posts
- 380
Thanked: 193 Rebirth of the Phoenix
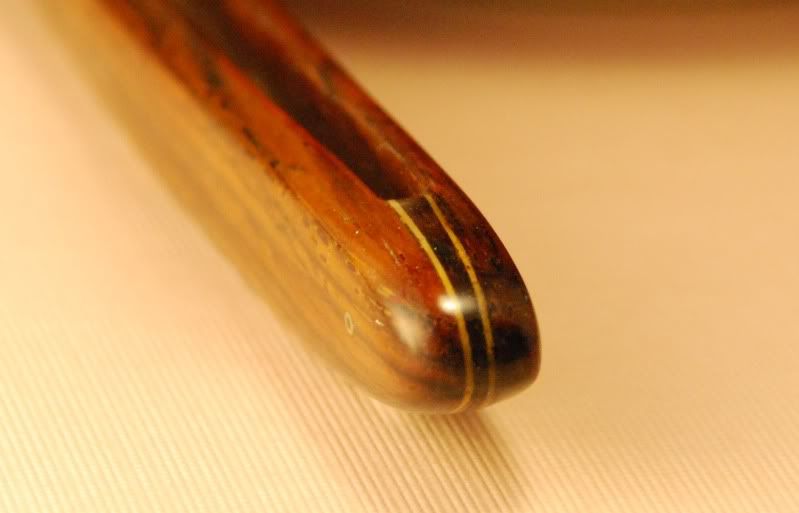
Despite the wear and tear on it, when I saw this 4/8 Baker & Co. Phoenix razor in the SRP classifieds a couple of months ago I just knew I wanted helping this Phoenix to rise again to be my first restoration attempt.
AND, since, according to legend, the Phoenix has bright scarlet and gold feathers, I decided to use that as the theme for its rebirth.
Summary of original condition:
- black rust on the very nose of the blade
- specks of pitting on the front 1/3 of the blade along with several small stain blotches
- scale cracked (but not completely broken) all the way across at wedge pin
- a previous owner's name very lightly scratched into the scale
- significant hone wear
Tools used:
- Proxxon brand rotary tool (my Dremel actually died during this project and I decided to give a Proxxon a try instead of another Dremel)
- Palm sander
- homemade fixture for reducing scale slabs to 1/8" thickness with said palm sander (For anyone interested, I've put a How-to article on it in the Wiki)
- various sand paper grits, a micro-mesh kit, and a LOT of elbow grease


At the start of the project I was really, really hoping to be able to save/keep the beautiful blade etching. Unfortunately, the depth of the staining and pitting the nose and the start of the etch (combined with my inexperience) resulted in a very rough, wavy, uneven, homely look when it was sanded clean without comparable sanding along the rest of the blade face...
So I made the painful choice of sanding the entire blade in the hope of obtaining a smooth, mirror finish rather than having a rough, ugly uneven blade with an etch on it.


Summary of finished razor:
- Raspberry-gold polyester Pearl scales
- Brass lined, black paper micarta wedge
- Razor pivot hole sleeved with brass (hole was oversized and very loose on original razor)
- brass thrust washers 'hole punched' from 36 gauge (~.005") brass sheet (thanks for the how-to thread mackie!)
- brass pins and washers
Conclusion: I lost the etching and it took 6 weeks worth of free time, and required no less than 3 passes through all the sand paper grits from 200 - 2000 (followed by about 8 grits of micro-mesh) to figure out what I was doing and how to get the finish I wanted -- but it was worth every minute of it. I'm very happy with the outcome and can't wait to try my second restore (either a Henckels or Jos. Smith, haven't decided which yet).Last edited by Malacoda; 01-31-2010 at 11:39 PM. Reason: added link to Wiki article for homemade scale fixture
John
-
The Following 2 Users Say Thank You to Malacoda For This Useful Post:
Muirtach (01-31-2010), shutterbug (02-01-2010)
-
02-01-2010, 12:43 AM #48Senior Member
- Join Date
- Nov 2009
- Location
- Houston, TX
- Posts
- 159
Thanked: 39
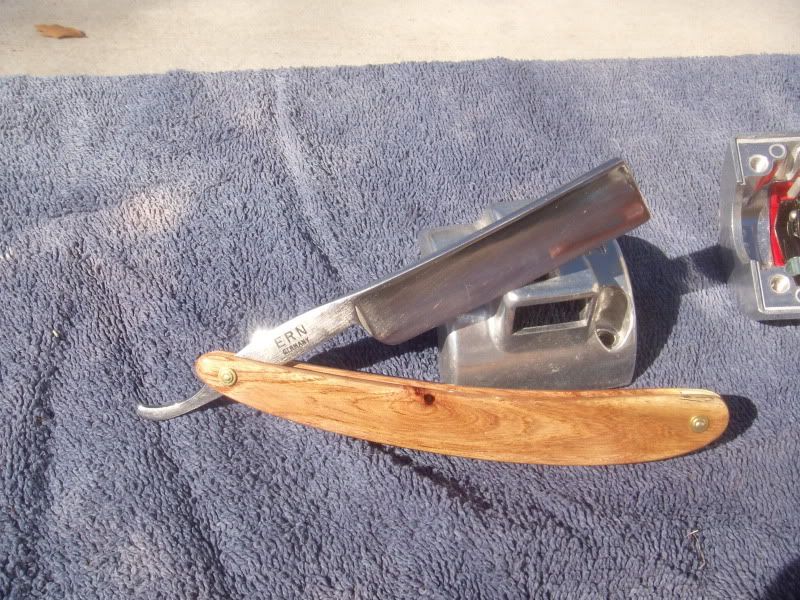
Just a quick pic of a rescale I did for a relative. It is scaled in mesquite which came from his ranch. i will PIF it to him.
-
The Following 2 Users Say Thank You to flylot For This Useful Post:
Muirtach (02-01-2010), shutterbug (02-01-2010)
-
02-01-2010, 01:48 AM #49The Razor Whisperer

- Join Date
- Jan 2008
- Location
- Rhode Island
- Posts
- 2,197
Thanked: 474
Looking good everyone!
You still have until midnight to post! Let's see 'em!
-
02-01-2010, 04:05 AM #50Senior Member

- Join Date
- Nov 2009
- Location
- I live in Dallas, Texas
- Posts
- 142
Thanked: 40 First Restore on London Cutlery Co. Limitted Razor
Hello Everyone!
Well had a lot of fun and learned a ton..including how to take and post these pictues!
I started with an Ebay Razor I bought for 8.99 shipped... I wasnt sure how it would turn out but have been pleasantly surprised.. It took me two weeks of hand sanding and polishing to get it in this condition... I appreciate all the hard work and effort that have gone into all of the entry's ... there are some beautiful razors in the contest.. It's amazing what you can do with lots of effort, lots of determination and persistance.. I just wouldn't give up on some of that pitting and eventually ... to my surprise at times... I finally beat it!!
I had rust on both sides of the blade, tang and monkey tail.. however ..the largest portion of rust on my blade was on the spine... must have taken me 3 or 4 days just for that area of the blade..
There is an interesting criss / cross pattern on the tang that I had to sand very meticulously in order not to damage the pattern.. I was also happy not to have removed the etch on the blade while sanding the rust and pitting away around it. All this experience will make the next restore much easier!
I finished the razor 3 weeks ago or so and someone said hey you are not done till you shave with it.. So I got it sharpened and shaved with it yesterday morning.. I'm happy to say that it shaves great and left my face BBS too!
Thanks once more to all the help and suport I got from the folks on the Workshop Forum.. I'm sure you get tired of answering the same old questions over and over.. I appreciate your patience, help and support...
I had a great time and can't wait to do it again...
Keep you chins up!!
MaqLast edited by Maq; 02-01-2010 at 04:27 AM.
-
The Following User Says Thank You to Maq For This Useful Post:
shutterbug (02-01-2010)


 Reply With Quote