
Results 21 to 30 of 187
 270Likes
Thread: Homemade leather bags.
 LinkBack URL
 About LinkBacks
-
09-28-2013, 01:33 PM #21May your bone always be well buried


- Join Date
- Jun 2010
- Location
- Brisbane/Redcliffe, Australia
- Posts
- 6,380
Thanked: 983 Ah damn! I missed a chance to take the p!ss out of Ed...
 Originally Posted by 32t


Originally Posted by edhewitt
The 3rd grade stuff I have, has some bad habits. It's dry and was when I bought it. It's stretchy for the most part and because of that you better hope your fairy godmother holds the rain off for you, because it likes to sag all out of shape and is prone to tearing. Some of that is because it's a 2mm thick hide, which isn't that thick as far as cow hide goes. I plan on applying a beeswax waterproofing to it to fend off the rain after rehydrating with some good old dubbin. If it was any better quality I wouldn't want to use it...Depending on what it looks like when I'm finished, I might not want to use not anyway
I also figure if something goes wrong with the leather in places, I will probably be able to fix it. It might end up as a patch work, but I think (if I'm being honest with myself) that it will be just fine, regardless of it's perceived and known faults.
Mickedhewitt likes this.
-
09-28-2013, 01:37 PM #22May your bone always be well buried
- Join Date
- Jun 2010
- Location
- Brisbane/Redcliffe, Australia
- Posts
- 6,380
Thanked: 983
No knife straps going on. I've already got a pouch sewn in for a quick folding knife and that will have to do. I can always add something to the inside of the lid if I like. Plenty of room there for a bit of customising later on. Originally Posted by edhewitt
Mick
-
09-28-2013, 05:09 PM #23Senior Member


- Join Date
- Nov 2012
- Location
- Across the street from Mickey Mouse in Calif.
- Posts
- 5,320
Thanked: 1185
All these posts you could have had it done :<0)
Good judgment comes from experience, and experience....well that comes from poor judgment.
-
09-28-2013, 08:09 PM #24
Sorry that was me talking to 32t, I had already noted your no knife comments earlier.
MickR likes this.Bread and water can so easily become tea and toast
-
09-28-2013, 08:55 PM #25Senior Member

- Join Date
- Oct 2010
- Location
- 50 miles west of randydance
- Posts
- 9,685
Thanked: 1354
We are usually the worst critics of our own work. Originally Posted by MickR
-
09-28-2013, 10:19 PM #26May your bone always be well buried
- Join Date
- Jun 2010
- Location
- Brisbane/Redcliffe, Australia
- Posts
- 6,380
Thanked: 983
Originally Posted by 10Pups
Ha! Any time you want to come over and see what I'm up to, you're welcome you know. I spend more time scratching my head and re-thinking everything (agonising over if you want the truth) I want to do, than any actual work...But enough, I need to do some more, and take photograph of just how little progress I have made.
Mick
-
09-29-2013, 12:00 AM #27Senior Member
- Join Date
- Nov 2012
- Location
- Across the street from Mickey Mouse in Calif.
- Posts
- 5,320
Thanked: 1185
LOL we are 1 in the same my friend. I don't have to come over to see what's going on. I have shiny things on my work bench I can look into and see exactly what your saying.
Good judgment comes from experience, and experience....well that comes from poor judgment.
-
09-29-2013, 08:20 AM #28May your bone always be well buried
- Join Date
- Jun 2010
- Location
- Brisbane/Redcliffe, Australia
- Posts
- 6,380
Thanked: 983
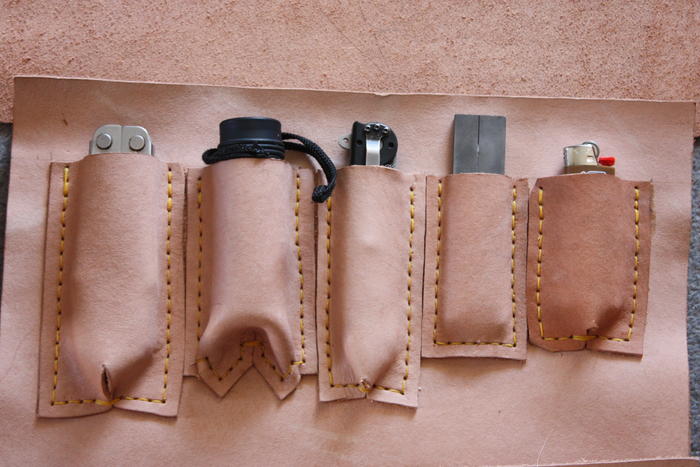
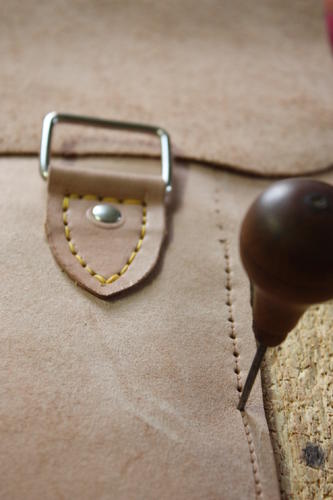
Progress report...Not much progress to report. I'm back to a house full of kids and have knocked off early. What I've been doing in the meantime has been to put the final shape on the shoulder strap ends ready for gluing and sewing, marking out stitch lines on individual pieces and punching hundreds of little bloody holes with the awl, stitched down the shoulder strap attachment points to the back of the bag, made and stitched in some rough and ready pouches for the bits that I want to have ready access too and glued in the panel containing the pouches and that also forms the loose papers pocket.
God help me! Look at all this work still to go! Inside pouches sewn down but...
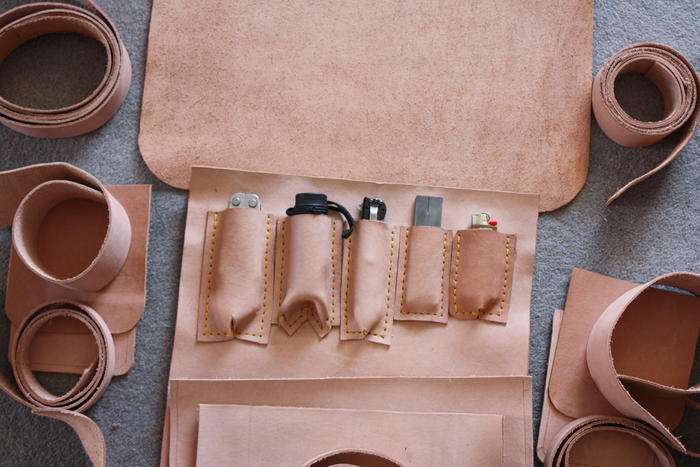
No real plan here. No real measurements taken. Practicing being rough and ready and hating it!
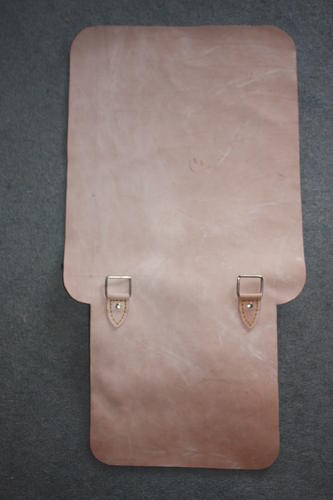
Shoulder strap attachment points sewn on the back of the bag.
Inside pocket glued down ready for stitching holes
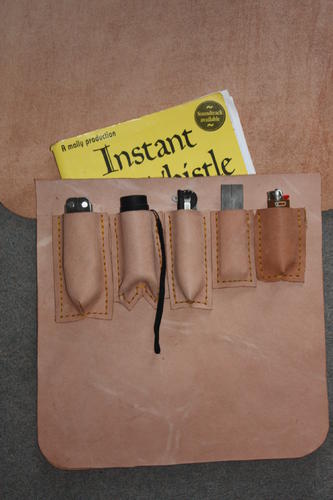
Hundreds of holes made. Hundreds more to go!
Mick
-
09-29-2013, 09:08 AM #29Bladesmith by Knight

- Join Date
- Jun 2007
- Location
- Murrumba Downs, Queensland, Australia.
- Posts
- 571
Thanked: 203
Good stuff Mate. I have an old leather belt pouch with a loop inside for a torch. Eventually decided I needed bigger as the utility belt attracts too much attention when not in uniform.. Daytime in Queensland is a shorts and light shirt type of thing.
Anyhow.. Found a leather satchel on run out at some store and picked it up for $15. Not as macho looking as yours will be but holds everything... Tool kit, multi-tool, torch, knife, pens, laser, binoculars, etc,etc...
By the way.. I found a product at the saddlery a couple years ago called Australian Leather Wax. It is a combination of neatsfoot oil and bees wax. Works good for protection and waterproofing..
Can't wait to see your finished result. AdamMickR likes this.
-
09-29-2013, 09:18 AM #30Senior Member

- Join Date
- Jun 2013
- Location
- Gladstone QLD AUSTRALIA
- Posts
- 3,245
Thanked: 804
Looking good Mick
MickR likes this.Saved,
to shave another day.
-
The Following User Says Thank You to Substance For This Useful Post:
MickR (09-29-2013)


 Reply With Quote


