
Results 91 to 100 of 143
Thread: An experiment in steel
 LinkBack URL
 About LinkBacks
-
01-21-2010, 12:34 AM #91Comfortably Numb


- Join Date
- Jan 2009
- Location
- Charlotte, NC
- Posts
- 2,095
Thanked: 668
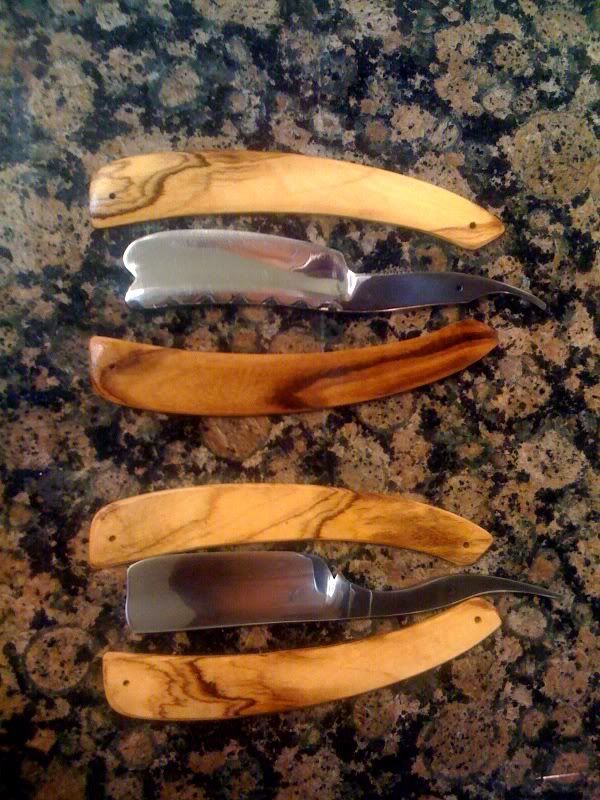
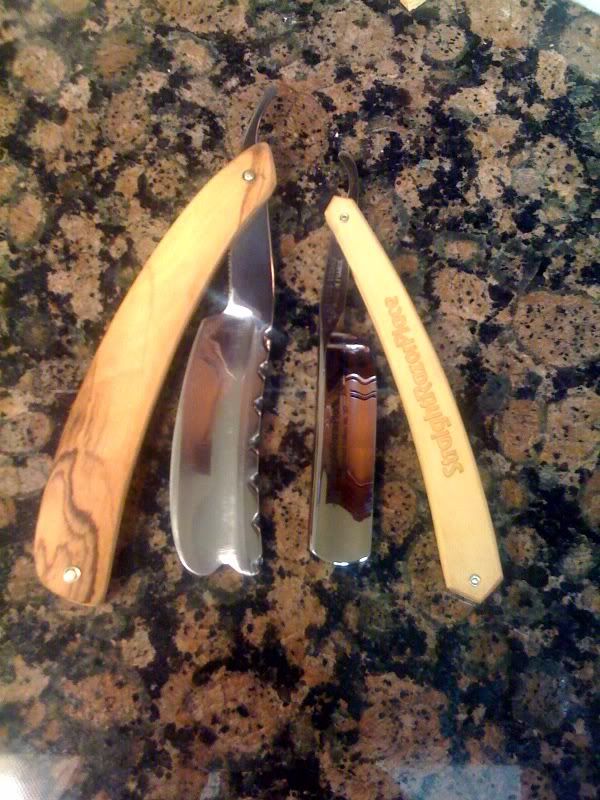
looking great mike! love that olive
-
01-21-2010, 02:22 AM #92Junior Honemeister

- Join Date
- Jan 2008
- Location
- Central California
- Posts
- 1,023
Thanked: 82
I tempered the scrap of O-1, at 400 for 1 hour, and tried to break it again today... Originally Posted by Mike Blue

Pre temper it was very hard, but brittle...
After the temper, I put it in my vice, and tried everything I could to break it... I failed.
It threw sparks when hit with a hammer, and dented the hammer, but didn't break.
It had a small jagged edge pre temper from where I cut it off to make my blades, and that slightly mushroomed and has some very fine cracks, but only visible under magnification... it also has some shiney spots that look like polished silver, but I think that's from the hammer, not the O-1
The mushrooming of the jagged area is almost too small to see with the naked eye.
This chunk of steel is tough...
-
01-23-2010, 06:25 AM #93Junior Honemeister
- Join Date
- Jan 2008
- Location
- Central California
- Posts
- 1,023
Thanked: 82
far from perfect, but getting there... Originally Posted by Del1r1um
-
01-23-2010, 06:54 AM #94Senior Member
- Join Date
- Jan 2008
- Posts
- 701
Thanked: 182
one think i have learned is get the tec down first then work on the level of finish
its better to have satin finish worker then polished turd
that said they look good ( by no means a turd )
but the extra time spent on making a shine is time away for refinine how you grind the mains (this is for all lookers of this thread as its one of the better WIP on razors otu there)
-
-
01-23-2010, 07:43 AM #95Junior Honemeister
- Join Date
- Jan 2008
- Location
- Central California
- Posts
- 1,023
Thanked: 82
the grind as butch noticed isn't as thin as I would like, I thought I was extremely shallow, and found I had some way to go.
I wanted to stay low tech, and I did way better than I thought possible.
My next purchase is going to be a belt sander...
The blade pictured above is not finished yet, but I am going to hone it and see if it can shave before I try to polish this turd any further...
Lessons learned:
#1 be patient, impatience will make you bleed or turn your blade blue.
#2 read everything you can about the steel you will use and practice on scraps before doing your HT
#3 it can be done bare bones, but the right equipment will improve results, and save you countless hours of grief.
#4 if you have fun and learn something, any result can be a good one.
Shave on
-
The Following User Says Thank You to Mike_ratliff For This Useful Post:
spazola (01-23-2010)
-
01-23-2010, 08:49 AM #96Senior Member
- Join Date
- Jan 2008
- Posts
- 701
Thanked: 182
fun is fun and pain is short learnign is long
i hope you dont think that i dont fight getting grinds right cause its one of the most ime eating parts of the razor making
i can hog out a blade close to finish in short order btu the tie to get the edge looking right and the finish jsut right is easy 2x the time
-
01-23-2010, 09:34 AM #97Junior Honemeister
- Join Date
- Jan 2008
- Location
- Central California
- Posts
- 1,023
Thanked: 82
Hollow grinding has been the most difficult part, and I don't imagine doing it on a bader is any less difficult than a bench grinder ... If there is any area I'm not satisfied with, that is it...
I'm scared of getting too deep into it on a grinding wheel...
Hopefully a belt will feel better, and give cleaner lines.
Also I should have done a second temper.
I spent over an hour trying to hone it with little progress...
My 1k stone is cutting slower than an 8k.
Will go to a coarser stone in the AM and try again when I'm fresh... I set the bevel on 400 grit, and spent over an hour trying to hone out the scratches... I may have to go to diamond pastes to polish the bevel and get a shaving edge...
-
01-23-2010, 09:59 AM #98Shaveurai

- Join Date
- May 2009
- Location
- Rowley Regis, England
- Posts
- 487
Thanked: 126
It's been great following this thread and I've learned a ton.
Thanks Mike for sharing, I'm sure this has encouraged some of us to have a go who otherwise may have shyed away, it's certainly given me new enthusiasm.
The scales realy do make a big difference, that's a nice job.
Hadn't noticed the jimps before Mike, would be nice to elaborate on that aspect at some time.
hollowing and ht are the steps that give me cold sweats, but following your progress has eased this somewhat, look forward to test shaves, keep us posted.
JG
Deckard
-
01-23-2010, 07:01 PM #99Senior Member
- Join Date
- Jan 2008
- Posts
- 701
Thanked: 182
best bet to keep from grinding through the blade when hollowingf out is a good light and make sure that the grind is even heel to toe
i have found that as i grind i need to work the heel and toe more then the center of the blade with the good light you cn see the reflection in the dip
but even with all that i grind right through a blade now and then some near the edge making a frown and others higher up with the 2 inch wheel making a hole not a singing blade
-
The Following User Says Thank You to L R Harner For This Useful Post:
Deckard (01-23-2010)
-
01-23-2010, 09:35 PM #100Shaveurai
- Join Date
- May 2009
- Location
- Rowley Regis, England
- Posts
- 487
Thanked: 126
Shucks,
I thought I might take my first down to a full hollow after ht, I think I'll stick with 1/4, to much time investment to face getting a hole.
I've a friend who has access to wire eroder with real prospect of getting stock blanks in volume which will cut down the time aspect. Won't mind so much experimenting with these once I get this off the ground, or even just practice on some rectangular mild steel stock.
Thanks for the benefit of your experience Chris.


 Reply With Quote