
Results 21 to 30 of 50
 54Likes
Thread: Building New Grinder
 LinkBack URL
 About LinkBacks
-
08-31-2012, 04:37 AM #21Member


- Join Date
- Apr 2011
- Location
- Brisbane, Australia
- Posts
- 1,434
Thanked: 642
Coming along nicely Charlie
 , thanks for keeping us up to date. Looks very solid.
Stu
-
08-31-2012, 01:17 PM #22Member

- Join Date
- Jul 2011
- Location
- North Texas
- Posts
- 53
Thanked: 28
 Originally Posted by spazola

I know the feeling well.
Looks good Charlie
-
09-03-2012, 04:05 AM #23Junior Member

- Join Date
- Aug 2012
- Location
- Townsville, Australia
- Posts
- 8
Thanked: 0
Your grinder is coming along nicely, well done.
-
09-03-2012, 11:35 PM #24Hones & Honing


- Join Date
- May 2005
- Location
- Saint Paul, Minnesota, United States
- Posts
- 8,023
- Blog Entries
- 1
Thanked: 2209
Looks really good! It will be interesting to see the final result. It is good to see that lathe put to good use again!
 Randolph Tuttle, a SRP Mentor for residents of Minnesota & western Wisconsin
-
09-06-2012, 02:16 AM #25Senior Member


- Join Date
- Dec 2006
- Location
- Burkburnett TX
- Posts
- 3,100
Thanked: 2392
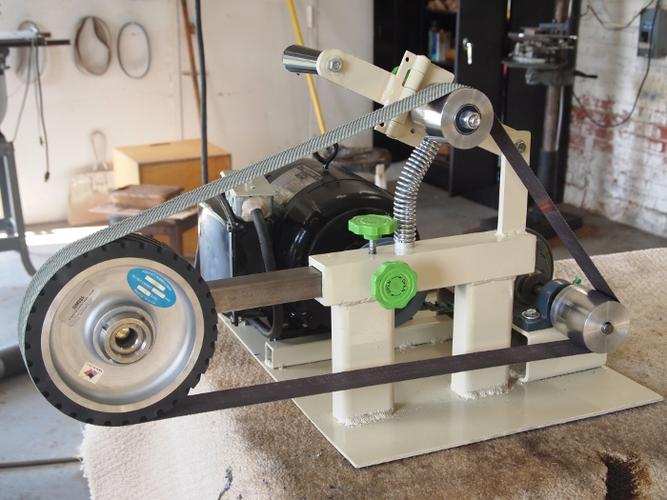
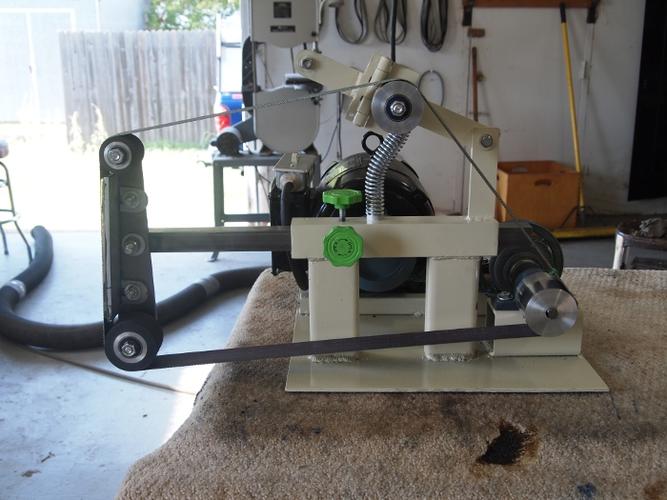
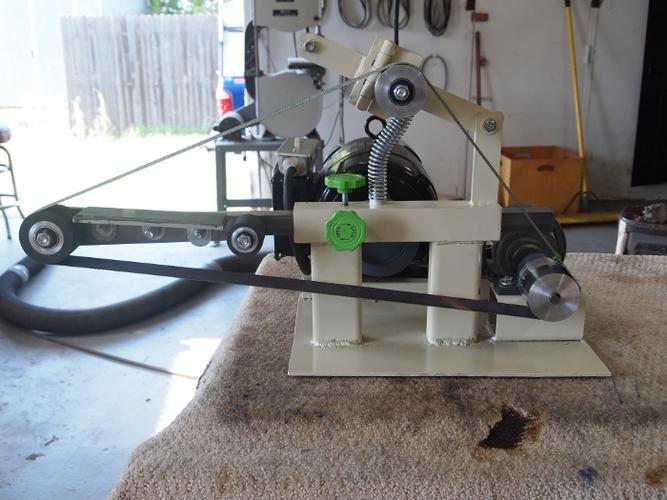
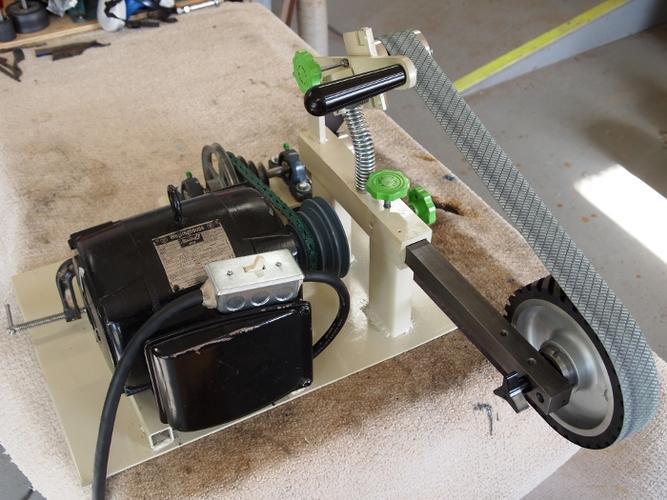
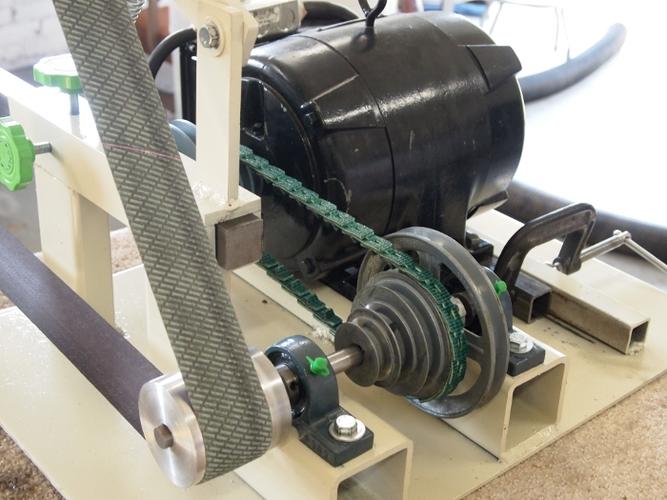
Here are some pictures of the completed grinder, I was in a constant state of correction when I built this grinder. I usually feel like I know what I am doing when it comes to mechanical noodling, but this thing was a source of frustration at every step of the way.
I ended up changing the axis of my hinge that I used for tracking, I also relocated the drive wheel lower and further to the back, and also ended up raising the main bar and receiver tube. All of these were changes from my original ideas.
The spring looks a bit wonky, but it is working great.
The grinder is finished and working well now.
At a later date I think I will make a small wheel adapter, and make or buy some better quality pulleys for the rear shaft.
Charlie
-
The Following 7 Users Say Thank You to spazola For This Useful Post:
Adam G. (09-06-2012), adrspach (09-14-2012), Cangooner (09-06-2012), randydance062449 (09-06-2012), Robbied (01-13-2015), rodlonq (09-06-2012), ScottGoodman (09-16-2013)
-
09-06-2012, 02:29 AM #26
I have worked with graduate mechanical engineers that would be hard pressed to do in any period of time what you do..with TLABR, plus ongoing modifications! Originally Posted by spazola
Thank you!
~Richard
-
09-06-2012, 02:35 AM #27Junior Member
- Join Date
- Aug 2012
- Location
- Townsville, Australia
- Posts
- 8
Thanked: 0
Great job on your grinder Charlie, even the paint job looks good. What type of belt do you have on it?
Cheers....... Rod
-
09-06-2012, 02:50 AM #28Senior Member
- Join Date
- Dec 2006
- Location
- Burkburnett TX
- Posts
- 3,100
Thanked: 2392
Here is a link about this kind of belts Vibration Free Link Belts I like these belts they run smooth and tolerate a bit of belt/pulley misalignment. Originally Posted by rodlonq
CharlieGrump likes this.
-
The Following User Says Thank You to spazola For This Useful Post:
rodlonq (09-06-2012)
-
09-06-2012, 03:02 AM #29Member
- Join Date
- Apr 2011
- Location
- Brisbane, Australia
- Posts
- 1,434
Thanked: 642
Awesome work Charlie. A great looking grinder have designed/made there.
The TLAR method always yeilds both the most frustration and the most satisfaction, I think. I am a mech engineer and a boilermaker (first profession) and am constantly torn between a full set of plans and TLAR
How do you find the serrated wheel for the finer grits? What sort of grinding belts are your running there.
StuLast edited by Str8Raz0r; 09-06-2012 at 03:05 AM.
-
09-06-2012, 03:04 AM #30Junior Member
- Join Date
- Aug 2012
- Location
- Townsville, Australia
- Posts
- 8
Thanked: 0
Thanks for the link Charlie, everything you can do to cut down vibration is useful especially for noise reduction. Also what type of grinding belt do you use, or is that belt for polishing? I have only used aluminium oxide or carborundum grinding belts on my multitool.
Rod


 Reply With Quote
