
Results 41 to 50 of 150
 117Likes
 LinkBack URL
 About LinkBacks
-
12-08-2016, 12:17 PM #41Senior Member


- Join Date
- Dec 2014
- Location
- Southern NH
- Posts
- 562
Thanked: 41
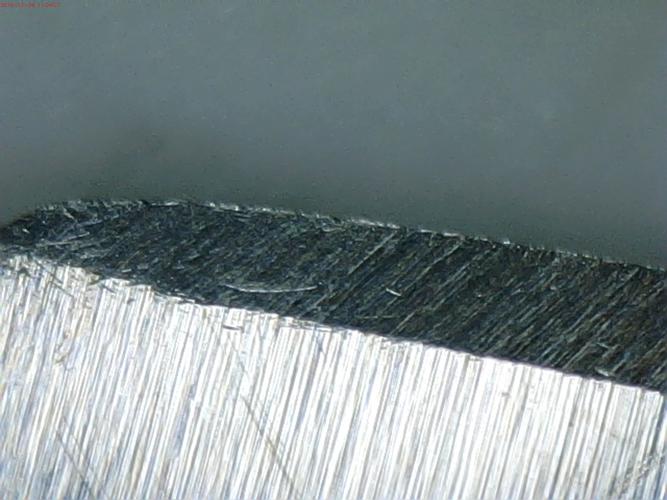
WIll try two layers of tape and will stay on 1K, until I get rid of the deeper stria seen. I see what you mean about the heel not going to the edge. Thanks!
Here are some shots (3 of each side, spine on bottom and top) of the spine. Sort of dark...
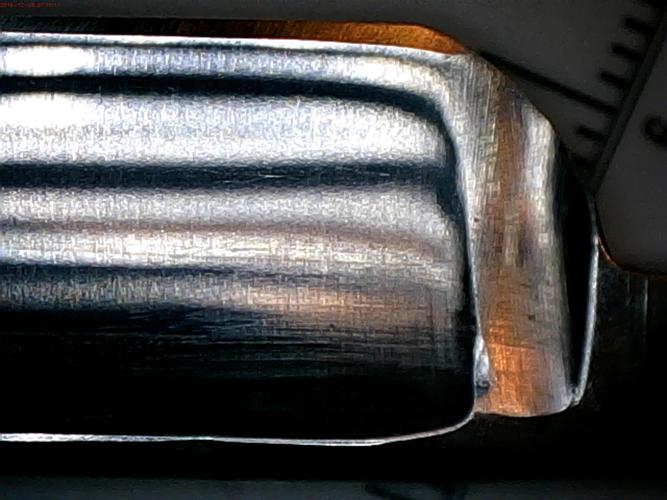

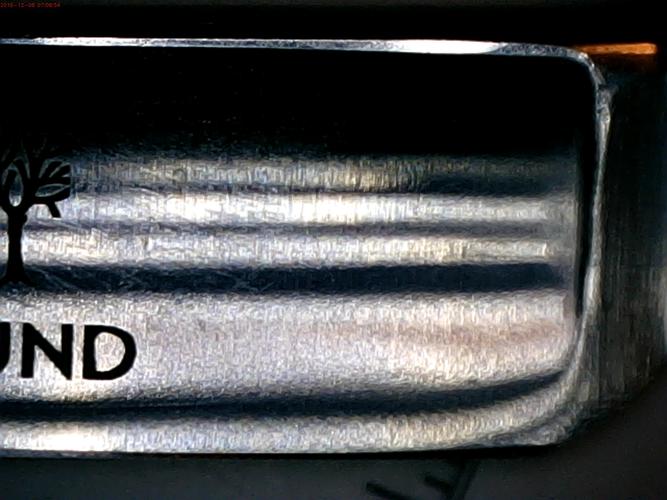
I've been using tape for all honing, so wear would have been when it was first honed by SRD (as it was a new razor).Regards,
PCM
-
12-08-2016, 04:27 PM #42Senior Member
- Join Date
- Dec 2014
- Location
- Southern NH
- Posts
- 562
Thanked: 41
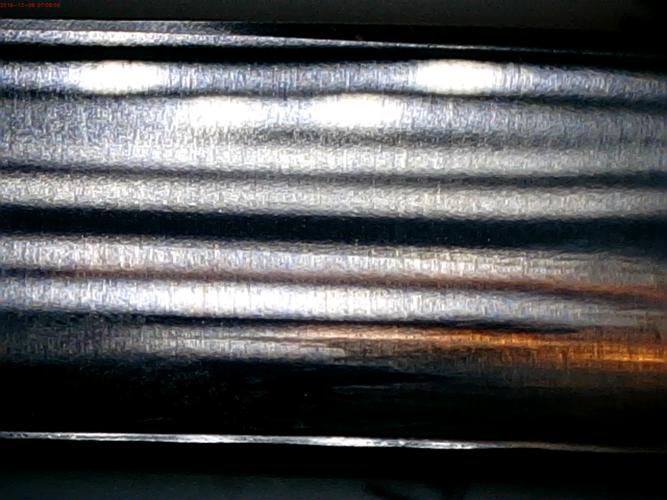
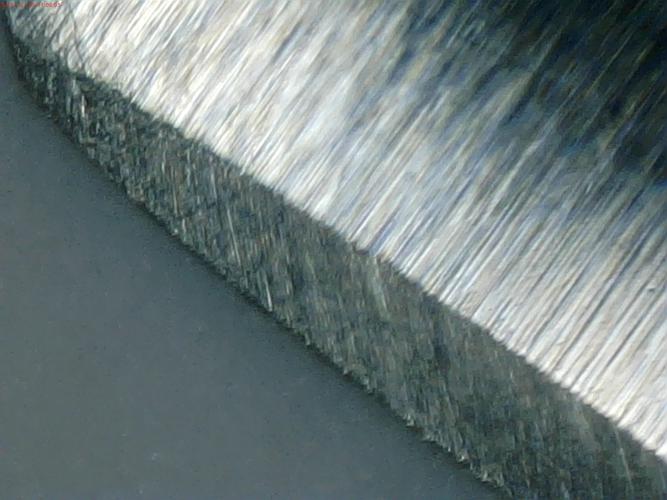
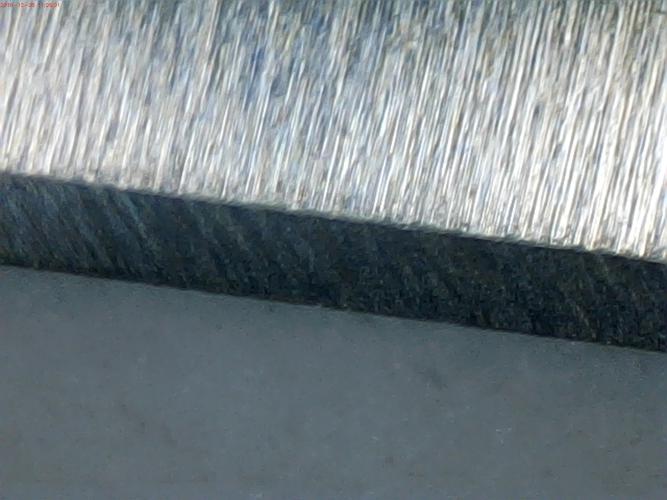
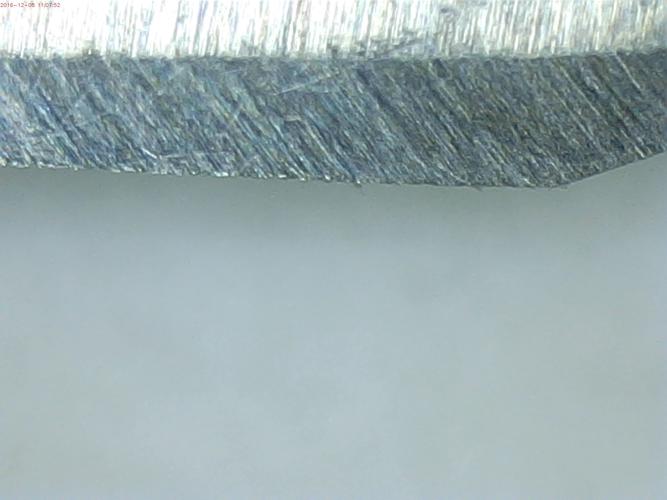
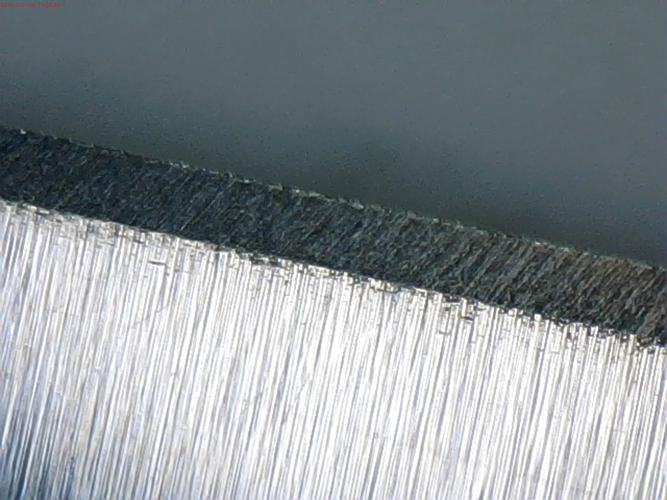
Spent quite some time doing X strokes on the 1K today, using 2 layers of tape and replacing it once. It' looks better w.r.t. removing deeper stria. Still having some trouble getting to the toe. Some of the pictures are a bit blurry. Hopefully viewable.
 Regards,
PCM
-
12-08-2016, 05:22 PM #43Senior Member


- Join Date
- Apr 2012
- Location
- Diamond Bar, CA
- Posts
- 6,553
Thanked: 3215
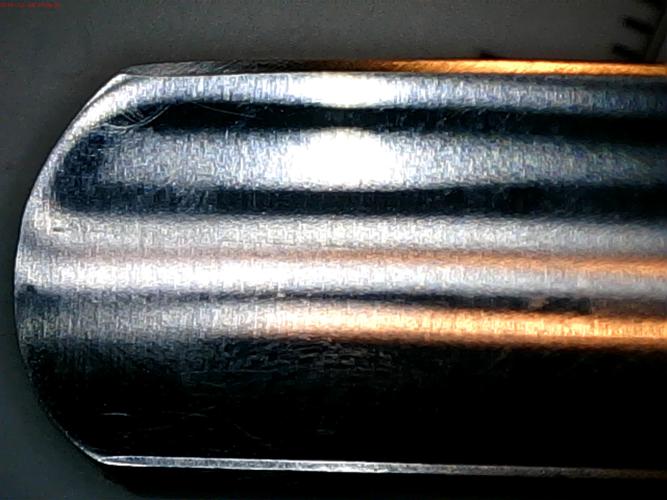
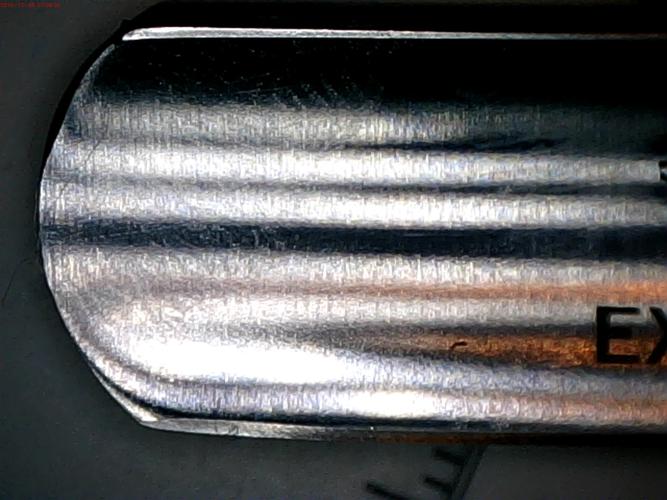
Looks better, the heel half came together nicely and looks better than the toe, still some horizontal stria at the toe.
Try some extra pressure, torqueing the toe or adding a finger on it. A light jointing to remove the flashing at the edge.
I always take a good look at the toe and heel before moving up, usually the toe need a bit more work. Sometimes you must lift the heel, just a bit, almost thinking about it, is enough with a rolling X stroke.
Personally, I use the toe a lot when shaving, so it’s kind of a pet peeve, that the tip of the toe be properly honed.
Very close.
-
12-08-2016, 05:29 PM #44Senior Member
- Join Date
- Dec 2014
- Location
- Southern NH
- Posts
- 562
Thanked: 41
Thanks. Yeah the heel looks good, but not so much on the toe. Will try pressure or rolling x stroke tomorrow.
sent from my phone.Regards,
PCM
-
12-08-2016, 11:24 PM #45The Great & Powerful Oz


- Join Date
- May 2008
- Location
- Bodalla, NSW
- Posts
- 15,638
Thanked: 3751
Not trying to be harsh but I think you missed the point of using 2 layers of tape.
If your pressure was light enough you would have ended up with a secondary bevel but your bevel set problem would be fixed.
It should have put you right onto the edge in no time yet it looks like you decided to cut a whole new bevel propagating your original issues
I would advise against adding finger pressure at this point but judging by all your pics & the varying bevel width your razor has a slight warp you are not dealing with by using an ideal stroke to compensate or you are using uneven pressure.
Fixing that toe should take no more than 5-10 featherlight strokes if you use a slight rolling X. No jointing needed.Last edited by onimaru55; 12-08-2016 at 11:27 PM.
The white gleam of swords, not the black ink of books, clears doubts and uncertainties and bleak outlooks.
-
12-09-2016, 11:26 AM #46Senior Member
- Join Date
- Dec 2014
- Location
- Southern NH
- Posts
- 562
Thanked: 41
I was trying to get rid of the circular and deeper stria, and with the time I spent on the bevel, I lost the secondary bevel (it was there for a period of time). I guess I could have stayed on one layer. Originally Posted by onimaru55

Trying to parse this statement. Can you elaborate? The bevel, from the start, was uneven. Largest at the heel, narrowest at about a 1/3 from the toe, and then in-between at the toe. What would be the ideal stroke to compensate, so that I can learn how to deal with this blade? Early on, when using the 4K, I was just using a heel forward stroke. Later, on the 1K, I've been doing an X-stroke.I would advise against adding finger pressure at this point but judging by all your pics & the varying bevel width your razor has a slight warp you are not dealing with by using an ideal stroke to compensate or you are using uneven pressure.
I can try that. Had to do that for the first time, with a near wedge months ago, so I can try that again and see if the toe cleans up.Fixing that toe should take no more than 5-10 featherlight strokes if you use a slight rolling X. No jointing needed.Regards,
PCM
-
12-09-2016, 06:41 PM #47Senior Member
- Join Date
- Apr 2012
- Location
- Diamond Bar, CA
- Posts
- 6,553
Thanked: 3215
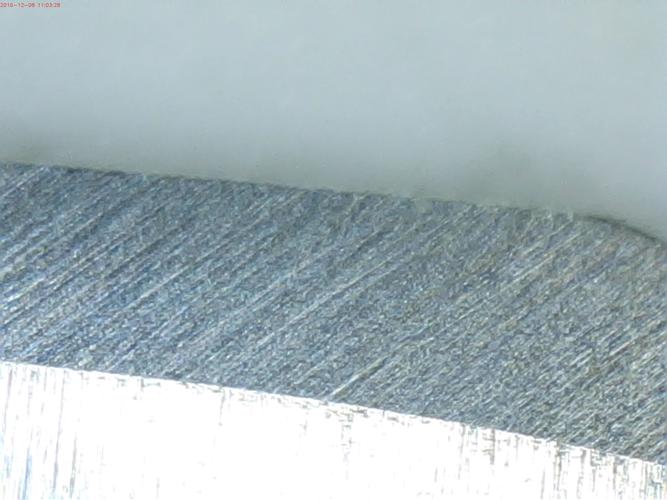
Because the bevel is uneven, wider at the toe than the heel on the one side you have photographed, it is probably slightly warped and this is the convex side.
So, when the razor sits on the stone the toe and middle, (at the edge), are just off the stone and not making full contact. Which is why in photo 3 of post 32 you have a double bevel, at the toe, where the back of the bevel is riding on the stone, the edge is not making full contact.
Keep in mind the warp is very slight.
So, there are 2 schools of thought, hone an edge, by removing material on the stone, at the edge until you get to good steel and the bevels meet and straighten the edge. Or straighten the edge, by jointing, then hone, to that straight edge, to get the bevels to meet at an edge, that is already straight and chip free.
You will remove exactly, the same amount of material, (very little), but either way you must, remove the flashing to get to good steel. It is just personal preference and either way works, the results are exactly the same.
Now because there is a warp in the blade, a straight stroke is not as effective and you must use a rolling X stroke, lift the heel slightly to hone the toe of the convex side and drop the heel off the stone to hone the middle on the concave side. A very slight rolling X will do both.
Or you can add a bit of pressure where the edge is not on the stone fully, remember the warp is very slight. Either way works.
Keep in mind this is a very slight rolling X, not like some of the smiling edge, rolling x videos, where the heel is lifted an 1/8 to a ¼ of an inch. As I said earlier, it is almost just thinking about lifting the heel, is enough, very slight pressure lifting of the heel, to get the toe to make contact.
And letting the heel fall off the stone on the opposite side. Here, some sharpie ink will help you see your progress and where you are making progress.
Try both techniques to find one that works for you. Keep in mind that none of us hone exactly, the same way, you have to find a technique that works for you. And keep a bag of tricks to resolve issues with each razor, sometimes one technique will work on one spot sometimes you empty the bag to hone the whole razor.
I often use just a bit of pressure on the toe, as most razors are not perfectly flat and I do a modified X stoke, rolling slightly when needed to blend a bevel.
There are no rules, whatever it takes.
-
12-09-2016, 07:30 PM #48illegitimum non carborundum

- Join Date
- Jan 2008
- Location
- Rochester, MN
- Posts
- 11,552
- Blog Entries
- 1
Thanked: 3795
PCM,
You said you used two layers of tape and replaced it once. How much more honing did you do after replacing the tape?
I ask because that second tape also wears, so when you are ready to finish using a hone, especially a bevel setter, you would be served best by using fresh tape for just the final 10-15 light strokes. That will ensure that you have a clean edge.pcm likes this.
-
12-09-2016, 11:16 PM #49Senior Member
- Join Date
- Dec 2014
- Location
- Southern NH
- Posts
- 562
Thanked: 41
About half or two thirds way through the process. I was noticing wear on the spine and replaced. Good point to put on clean tape at the end, when doing light strokes. Since I need to work the toe more, I'll have a new set of tape (I take it all off at the end of a honing session). Originally Posted by Utopian
Will work on this more tomorrow and post results.
Thanks for all the comments and tips folks!Regards,
PCM
-
12-10-2016, 03:53 AM #50The Great & Powerful Oz
- Join Date
- May 2008
- Location
- Bodalla, NSW
- Posts
- 15,638
Thanked: 3751
X stroke is good but combine it with using the edge of the stone. Be sure it is smooth & well chamfered. Originally Posted by pcm
Again be sure of an especially light touch & visualize lifting the toe a coupla thou' off the stone during the stroke. It's just a slight pressure shift.
If there is a warp that say, doubles the bevel size on one side you will be more prone to forming a burr as it is essentially getting more stone contact. Work more on the smaller bevel area to counteract this. You won't equalise the bevel size just worry about an even meeting of both sides identified by no burr. Then a few full length strokes to even up the whole edge.
Would be so much easier to show this one on one pcm likes this.The white gleam of swords, not the black ink of books, clears doubts and uncertainties and bleak outlooks.


 Reply With Quote