
Results 31 to 40 of 150
 117Likes
 LinkBack URL
 About LinkBacks
-
12-06-2016, 12:55 PM #31www.edge-dynamics.com


- Join Date
- Feb 2013
- Location
- London
- Posts
- 3,066
Thanked: 512
Probably double the size of yours .
I like to have minimum teeth with the bevel set before I move on, metal type dependant of course.
If I see micro chips or teeth I nail drag it and come back more tentatively.
I think if you start off well you can end well and get really decent edges..
These are my thoughts at this moment in time. It's a constant learning curve..
-
12-06-2016, 09:37 PM #32Senior Member

- Join Date
- Dec 2014
- Location
- Southern NH
- Posts
- 562
Thanked: 41
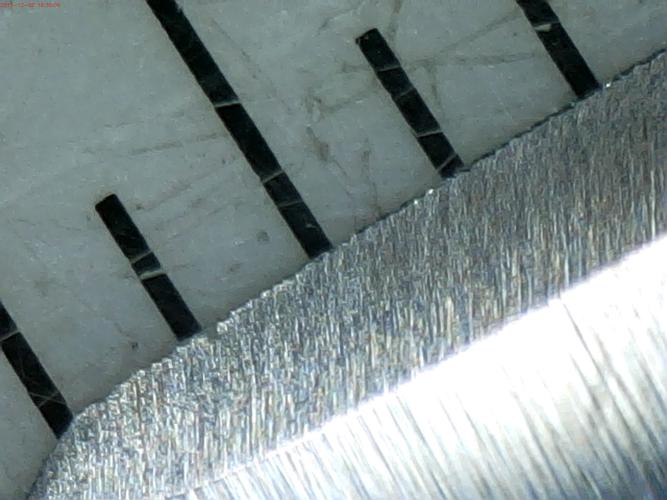
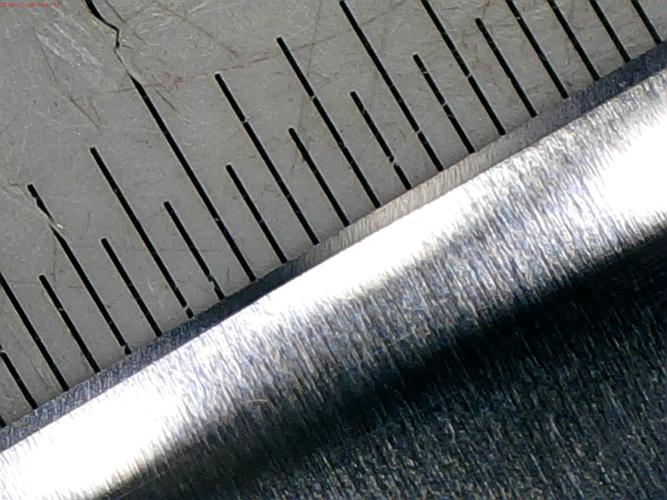
With 4K did a bunch of circles, and then heel leading strokes with pressure on mid and toe, then lighter strokes. This is where it is right now (the marks are 1mm apart.
 Regards,
PCM
-
12-06-2016, 09:42 PM #33Senior Member
- Join Date
- Dec 2014
- Location
- Southern NH
- Posts
- 562
Thanked: 41
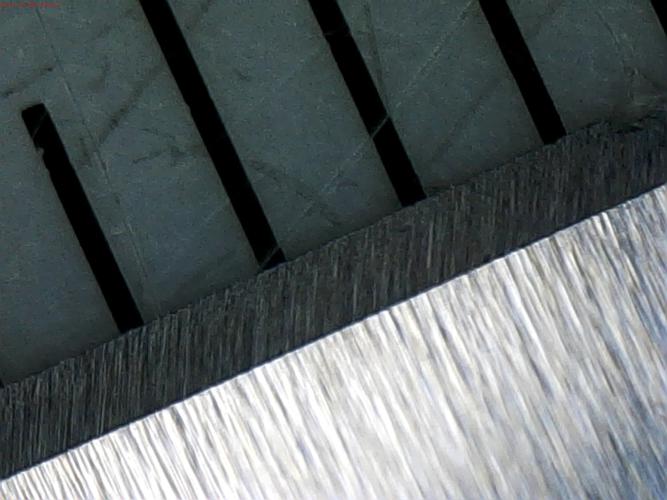
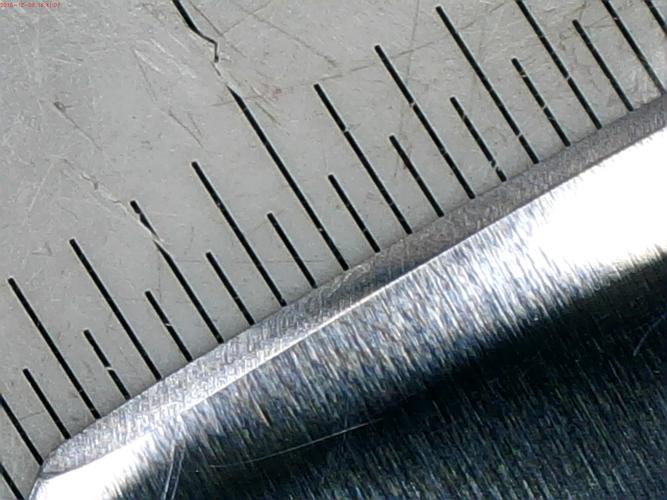
Lower rez of this side of the blade:
 Regards,
PCM
-
12-07-2016, 03:32 AM #34Senior Member


- Join Date
- Apr 2012
- Location
- Diamond Bar, CA
- Posts
- 6,553
Thanked: 3215
Much better, but the edge looks weak. If you look just, behind the edge the steel looks to be a different shade and the edge crumbling, usually an indication of an edge failing. Second photo, post 32.
You might get lucky and if you spend enough time on the 8k bring the edge together fully, but why. This is what is meant by maxing out each stone.
Look at Job15’s 1k edge on post 29, notice how the stria and steel, look the same from the back of the bevel to the edge, and how straight his 1k edge is. Very nice edge. Once the bevel is set, do slow, light pressure laps, to max out the stone. It just takes a few minutes more.
An edge is built, one step at a time.
At 8k your edge should be super straight, compare that to your 12k edge. Compare your post 32 second photo edge to your post 21, second photo edge. Then to Job’s post 29.
Joint the edge and re-set on the 4K.
You are close…Last edited by Euclid440; 12-07-2016 at 04:01 PM.
-
12-07-2016, 03:49 AM #35The Great & Powerful Oz


- Join Date
- May 2008
- Location
- Bodalla, NSW
- Posts
- 15,638
Thanked: 3751
Or take it back to 1k especially if you keep getting a ragged edge. Any compromised steel simply has to go but be mindful of not bearing down heavily. Excess pressure can also smash up an edge.. Originally Posted by Euclid440
 The white gleam of swords, not the black ink of books, clears doubts and uncertainties and bleak outlooks.
-
12-07-2016, 11:08 AM #36Senior Member
- Join Date
- Dec 2014
- Location
- Southern NH
- Posts
- 562
Thanked: 41
Yeah, I'm debating whether I should drop down to the 1K (or the 2K SS I have). Originally Posted by onimaru55
Regards,
PCM
-
12-07-2016, 04:03 PM #37Senior Member
- Join Date
- Apr 2012
- Location
- Diamond Bar, CA
- Posts
- 6,553
Thanked: 3215
Either one, the 2 is aggressive leaving a shallower stria.
You do not need to remove much steel.
-
12-07-2016, 08:52 PM #38Senior Member
- Join Date
- Dec 2014
- Location
- Southern NH
- Posts
- 562
Thanked: 41
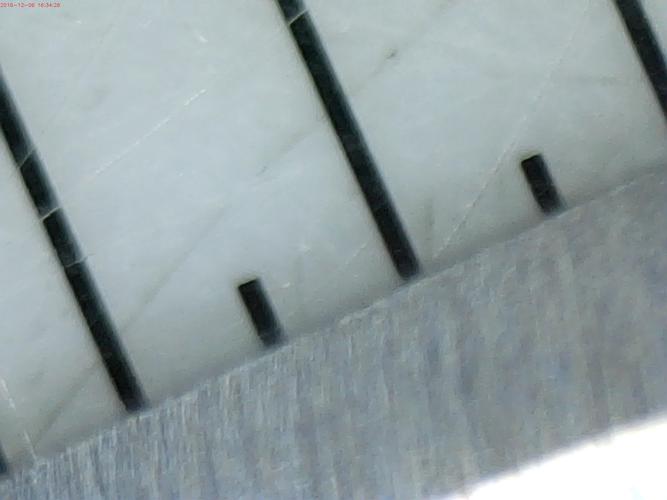
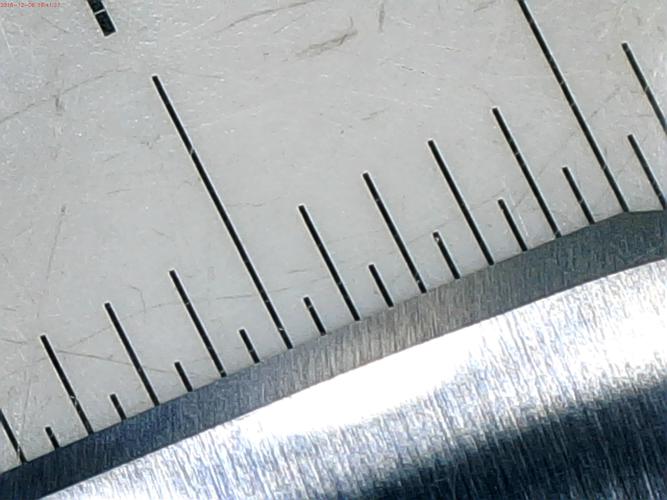
Dropped to the 1K, ran the edge across the corner of the stone, and then did X strokes. Checked and it seemed pretty jagged on the edge. Did another run across the corner, and then more X strokes, most with the weight of the blade. Here is what I have (high magnification, both sides).
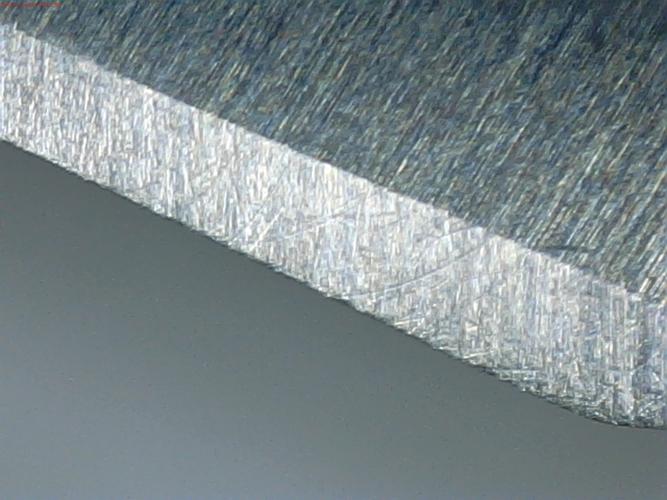
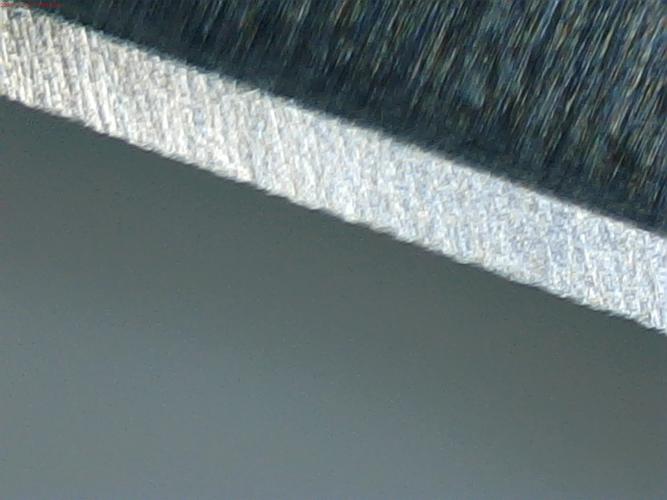


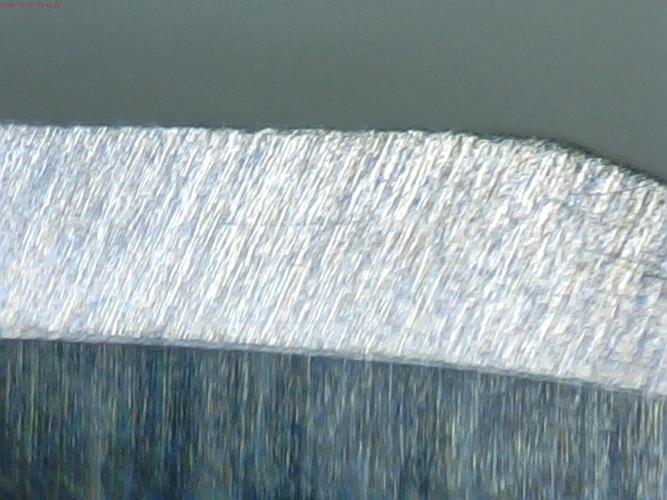
Still some stria from circles. Not sure about the edge smoothness. Thoughts?Regards,
PCM
-
12-07-2016, 11:13 PM #39The Great & Powerful Oz
- Join Date
- May 2008
- Location
- Bodalla, NSW
- Posts
- 15,638
Thanked: 3751
Still looks like the edge is getting flint-knapped in some spots but I don't know what mag. we are looking at.
Thing is if you progress higher at this point only 2 things can happen. The edge will improve or faults will become more apparent that can be remedied by dropping back a grit.
If this is a 1k edge, you can try to improve it on 2k. If the edge smooths out you know you were close, if it's slow going you could go back to 1k. Pyramid honing of sorts. Remember tho that light strokes are imperative now as you want to contact the edge, not so much the bevel's shoulder.pcm likes this.The white gleam of swords, not the black ink of books, clears doubts and uncertainties and bleak outlooks.
-
12-08-2016, 04:33 AM #40Senior Member
- Join Date
- Apr 2012
- Location
- Diamond Bar, CA
- Posts
- 6,553
Thanked: 3215
Yea, still looks like you are not honing to the edge and a lot of circular stria. Remove all of that with X strokes. Look at photo, 1 in post 38, look at the edge at the heel. Not reaching the edge there and lots of deep stria on the bevel from edge to the back.
Same for photos 2 & 3.
Photo 6, shows horizontal stria on the bevel. Do x laps until all that is gone and you are honing to the edge.
2 layer of tape might help. Make sure to watch your tape and change at the slightest indication of wear.
If you switch to 2 layers of tape, say on it until you get an even stria pattern, from edge to the back of the bevel.
What does the spine look like on this razor?pcm likes this.


 Reply With Quote