
Results 161 to 170 of 220
 110Likes
 LinkBack URL
 About LinkBacks
-
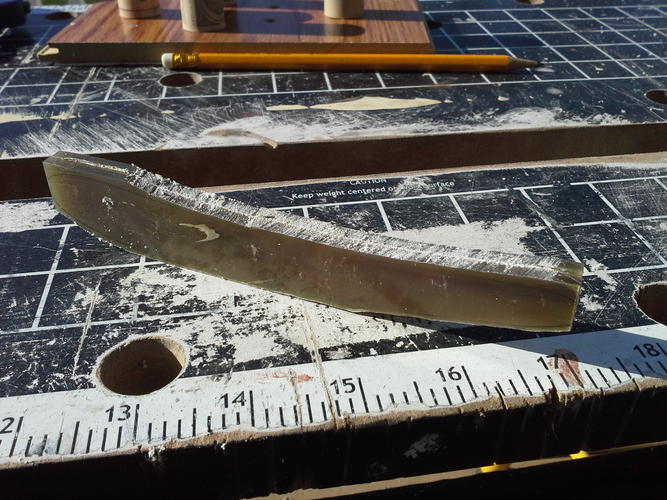
10-13-2013, 07:48 PM #161

To the dremel!
-
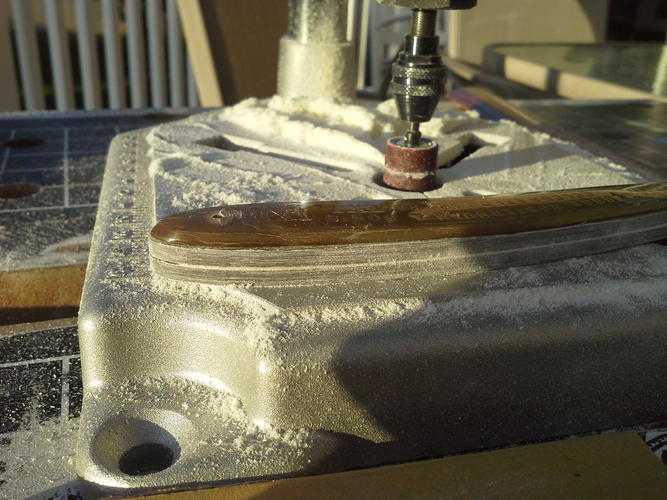
10-13-2013, 07:53 PM #162
You certainly dont need this rig, but it makes things a little easier.
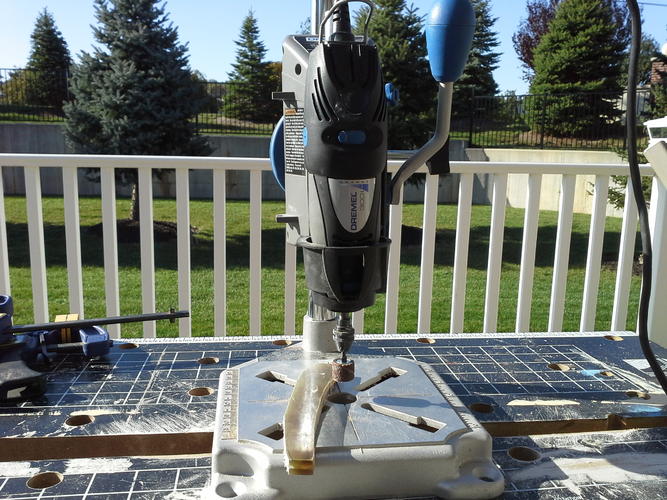
Sand just to the line. Fine sanding removes alot of material, and you dont want to overshoot, especially when trying to match an existing scale.Chevhead likes this.
-
10-13-2013, 09:53 PM #163
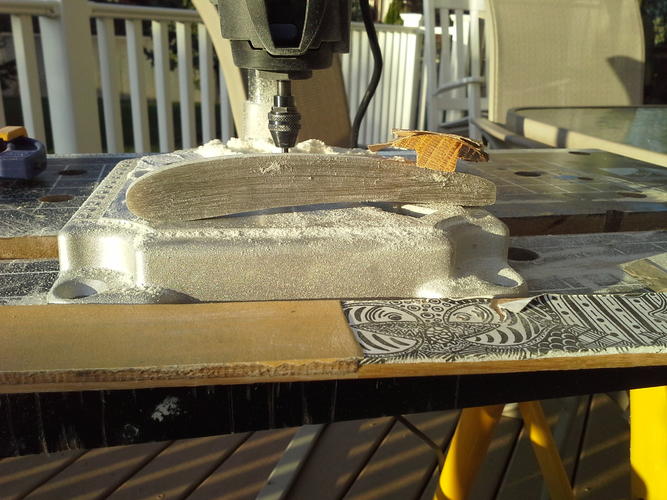
General shape attained
Now to reduce thickness.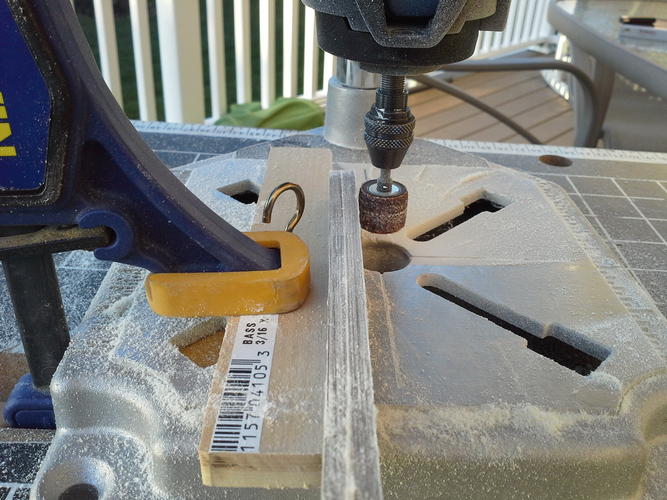
-
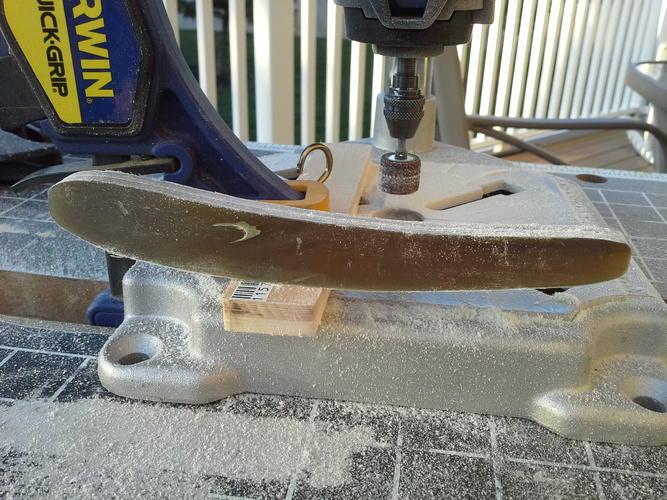
10-13-2013, 09:54 PM #164
The wood is there to guide for uniformity.
-
10-14-2013, 01:43 AM #165Senior Member

- Join Date
- Aug 2013
- Location
- bakersfield ca
- Posts
- 160
Thanked: 0
Looking great
-
10-14-2013, 12:29 PM #166Senior Member

- Join Date
- Apr 2013
- Location
- Somewhere east of Montauk, LI NY
- Posts
- 710
Thanked: 101
Looking good. Next time, try the thinning step before you do the contour step, especially if your edges/cuts are true. You'll have more material sitting on the bench. Just my $0.02.
---------------------------------------------------
Love new things that look old, and old things, made to look new again!
-
10-14-2013, 01:15 PM #167
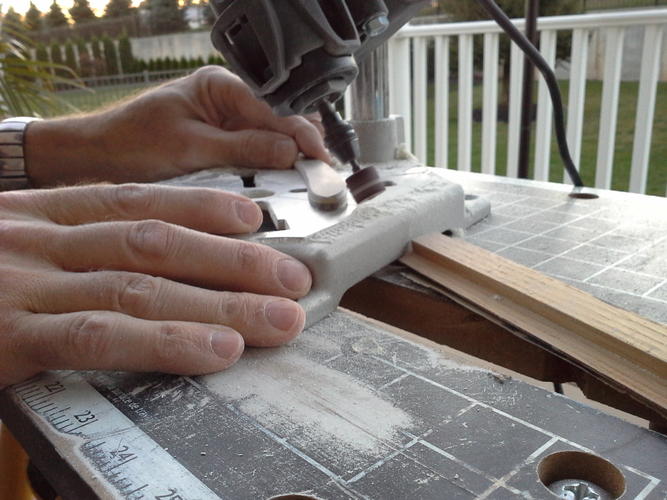
I have to contour first for 2 reasons.
 Originally Posted by MikekiM

1, sanding down the thickness would make ig difficult to trace onto/ see the pencil line.
2 the dremel drum is not very wide. In fact it is just wide enough to do 2 passes.
I have thinned first before, using an orbital/vibratory type hand sander. That is another way to go. But I prefer this technique for these tools.
Obviously a belt sander would be the best, but for hobbyists without a ton of tools....
-
10-14-2013, 09:39 PM #168
After dremel sanding at 60 and 120, i switch to hand sanding, using increasingly
 finer grits taped to a rounded stick for the inside curve, and a flat stick for everything else
-
10-14-2013, 10:54 PM #169
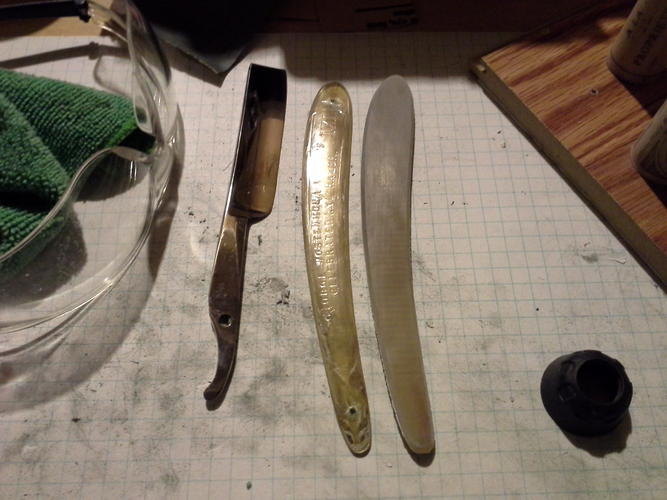
Here I am beveling the edge of the scales
 MikekiM likes this.
-
10-14-2013, 11:07 PM #170
Side by side 400 grit done.


 Reply With Quote