
Results 3,911 to 3,920 of 20600
 91543Likes
Thread: What are you working on?
 LinkBack URL
 About LinkBacks
-
06-25-2016, 05:42 AM #3911Senior Member


- Join Date
- Jun 2015
- Location
- South Carolina
- Posts
- 1,838
Thanked: 516
Nice one!
You know, I think it's about time for you to make a tutorial video I gotta learn some tricks to speed up my game..
You must unlearn what you have learned.
I gotta learn some tricks to speed up my game..
You must unlearn what you have learned.
Yoda
-
-
06-25-2016, 01:19 PM #3912Senior Member


- Join Date
- Mar 2015
- Location
- Akron, Ohio
- Posts
- 12,116
Thanked: 4315
Some day Mike.
Next up on the bench. Replacing a broken scale on the Crown & Sword, and making brush for a lost, but found again friend, and a couple for two new guys to the forum.
 Mike
Mike
-
-
06-25-2016, 01:26 PM #3913Historically Inquisitive

- Join Date
- Aug 2011
- Location
- Upstate New York
- Posts
- 5,782
- Blog Entries
- 1
Thanked: 4249
Agree with everyone, very nice restoration Outback, no need to mess with something that as work so well for so many years.
-
The Following User Says Thank You to Martin103 For This Useful Post:
outback (06-25-2016)
-
06-25-2016, 02:14 PM #3914Senior Member

- Join Date
- Oct 2010
- Location
- Everett, Ontario
- Posts
- 1,554
Thanked: 309
What did you use for the stamp. Looks like the sharpie trick. Originally Posted by outback

-
06-25-2016, 02:23 PM #3915Senior Member


- Join Date
- Apr 2015
- Location
- Johannesburg
- Posts
- 2,498
Thanked: 410
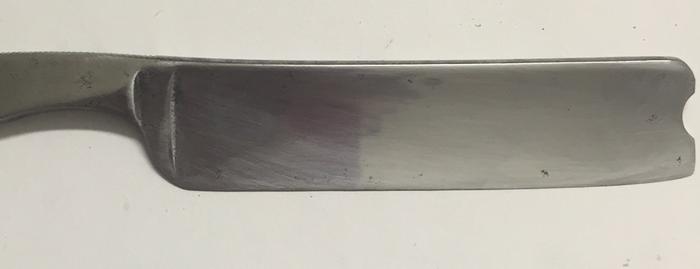
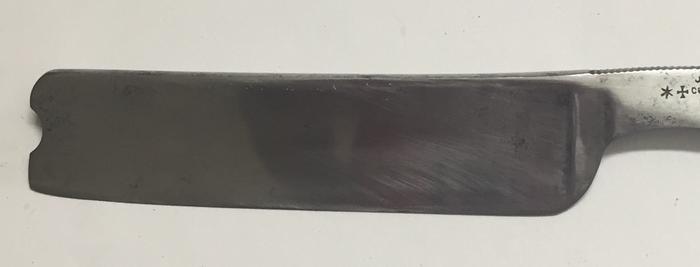
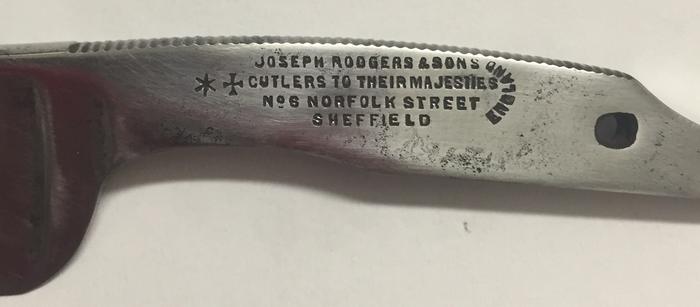
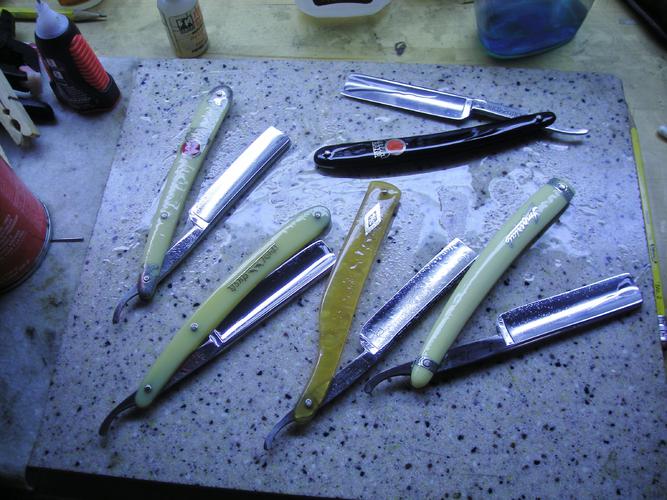
Now that I have a bit more spare time available, I managed to spend some time sanding down this Joseph Rodgers & Sons.
Went through the various grits 360/400/600/800/1000/1200 & 1500 this afternoon but not really happy with the outcome as there are still quite a number of marks on the face of the blade and tang. I suppose I'll have to go back to the 360 grit to remove those spots/blemishes before progressing again unless anyone has some suggestions.
 Tony
Tony
-
06-25-2016, 02:58 PM #3916
That turned out nice Tony. I like to remove any rust like you did yet leave it looking old. I hate it when I see someone think they can restore something by polishing & buffing on it to the point where it rounds the edges of the lettering & makes any pitting look worse. I have respect for those who can do a restore the right way but many people these days ruin some good blades & people buy them up not knowing the seller who restored it did more un-reversible damage to it. I can't wait to see it finished.
Thug likes this.
-
The Following User Says Thank You to engine46 For This Useful Post:
Thug (06-25-2016)
-
06-25-2016, 03:07 PM #3917Senior Member
- Join Date
- Mar 2015
- Location
- Akron, Ohio
- Posts
- 12,116
Thanked: 4315
Black enamel touch up paint. Originally Posted by TrilliumLT
Apply, dry, cut off excess with DE razor blade.Mike
-
The Following User Says Thank You to outback For This Useful Post:
dinnermint (06-29-2016)
-
06-25-2016, 04:12 PM #3918Razor Vulture

- Join Date
- Oct 2010
- Location
- Lone Star State
- Posts
- 26,182
Thanked: 8620
Good to see you guys working away.
 I cannot find time these days.
Keep em coming!
I have a pile of Joseph Rodgers snurdler-fodder enroute. 2 of them look Like the handles are separated at the hilts.
Hopefully I can save them.
Also, cleaning and slathering some German razors (Don't tell Hirlau!) and discovered the yellow Red-Point is from Utica! It's going in with it's American Brothers now..
Last edited by sharptonn; 06-26-2016 at 02:29 AM.
"Don't be stubborn. You are missing out."
I rest my case.
-
The Following 4 Users Say Thank You to sharptonn For This Useful Post:
dinnermint (06-29-2016), engine46 (06-28-2016), outback (06-25-2016), Thug (06-25-2016)
-
06-26-2016, 07:35 PM #3919'with that said'


- Join Date
- Aug 2010
- Location
- Walla Walla in WA State USA
- Posts
- 11,258
Thanked: 4238
Well I've got my new air compressor broken in. After adding the oil, I ran it with the drain open and a nipple plugged in so that the pressure couldn't build and the pump could just run without any stress. I ran it for 1/2 an hour, then let it sit for 1/2 an hour and then repeated. Then I ran it with the drain closed and no nipple in the connector.
I then repeated the above and then have been using it. I figure it's got about 4-5 hours of actual run time so I went ahead and drained the oil and installed a magnet in the drain plug. (I'd planned on installing the magnet before I set it up but hadn't found what I wanted).
Anyway, here's what the drained oil looked like beside a small sample of the oil right out of the container.
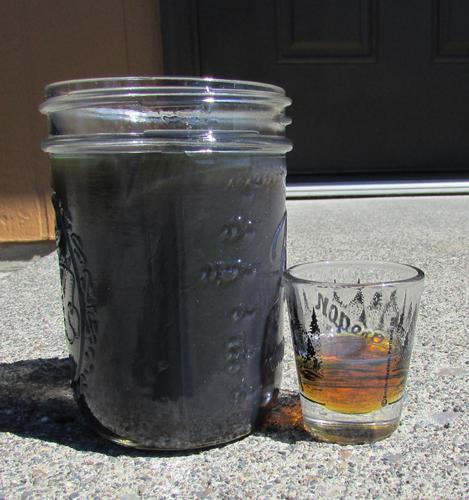
I tried to get a pic that showed the 'metallic look' in the oil but couldn't. Makes me wish I'd waited and installed the magnet before I broke it in.Our house is as Neil left it- an Aladdins cave of 'stuff'.
Kim X
-
06-28-2016, 01:35 AM #3920Matt

- Join Date
- Dec 2015
- Location
- Albany, NY
- Posts
- 971
Thanked: 260
Pinned up the Sperry in some snakewood. Ain't gettin honed for a few weeks though. I'm spending the next few nights packing,then leaving Friday to go live in a tent by a lake in the Adirondacks till i run out of food.

-


 Reply With Quote


