
Results 4,411 to 4,420 of 20600
 91543Likes
Thread: What are you working on?
 LinkBack URL
 About LinkBacks
-
08-27-2016, 04:31 PM #4411Razor Vulture


- Join Date
- Oct 2010
- Location
- Lone Star State
- Posts
- 26,183
Thanked: 8620 All's fair, I suppose. I, for one, cannot wait to see it completed!
 Originally Posted by HARRYWALLY


-
08-27-2016, 05:59 PM #4412Senior Member


- Join Date
- Oct 2015
- Location
- Knoxville,IA
- Posts
- 2,368
Thanked: 762
Sharptonn that is one gorgeous razor I love the silver scales I see posted every now and again. Beautiful Originally Posted by sharptonn
Sent from my SM-G930R4 using Tapatalksharptonn likes this.Nothing is fool proof, to a sufficiently talented fool...
-
The Following User Says Thank You to ejmolitor37 For This Useful Post:
sharptonn (08-27-2016)
-
08-27-2016, 11:40 PM #4413Senior Member

- Join Date
- Feb 2013
- Location
- Haida Gwaii, British Columbia, Canada
- Posts
- 14,457
Thanked: 4830
The basic shape of that brush reminds me of the shape of a crystal.
sharptonn likes this.It's not what you know, it's who you take fishing!
-
08-27-2016, 11:57 PM #4414Senior Member

- Join Date
- Jun 2016
- Location
- NH
- Posts
- 1,924
Thanked: 1363
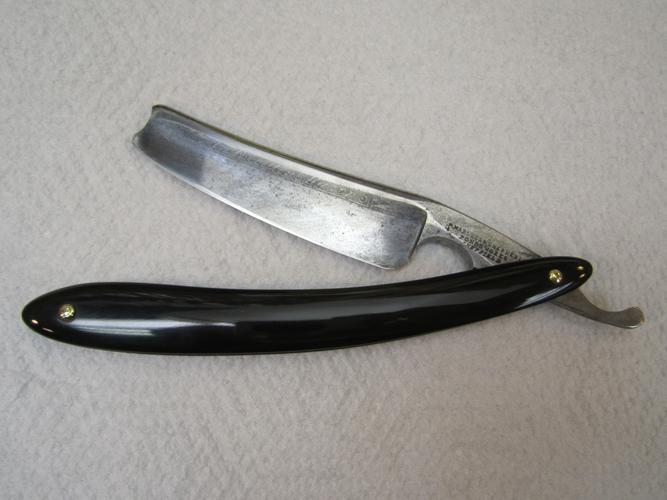
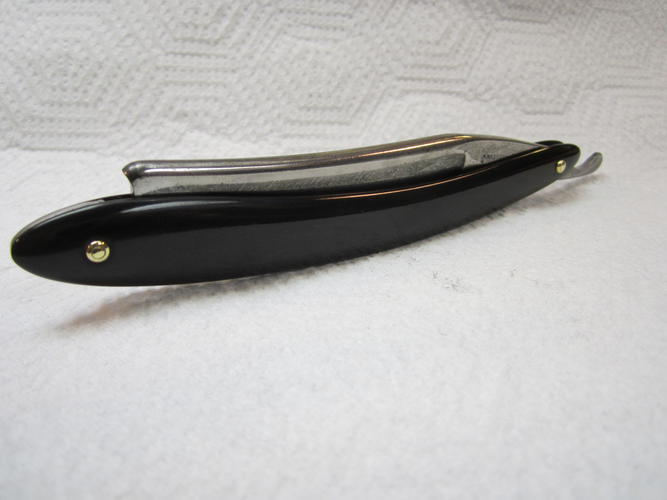
OK, got the Marshes & Shepherd together. Just cleaned and rubbed the blade with Mother's polish and a rag and leaving it at that. I don't want to lose the etch ("An Excellent Razor") and the blade is in pretty good shape anyhow. Made some solid brass domes and used brass pins. Used the original wedge and copied the scales from the one original that was complete.

-
-
08-28-2016, 12:22 AM #4415Historically Inquisitive

- Join Date
- Aug 2011
- Location
- Upstate New York
- Posts
- 5,782
- Blog Entries
- 1
Thanked: 4249
Very nice work, love the patina well done!
xiaotuzi likes this.
-
The Following User Says Thank You to Martin103 For This Useful Post:
xiaotuzi (08-28-2016)
-
08-28-2016, 01:44 AM #4416Razor Vulture
- Join Date
- Oct 2010
- Location
- Lone Star State
- Posts
- 26,183
Thanked: 8620
Boy! That is Nice!
I have a couple with the tapered blades around.... Need to get one going someday soon.
Betcha they shave great! xiaotuzi likes this.
-
The Following User Says Thank You to sharptonn For This Useful Post:
xiaotuzi (08-28-2016)
-
08-28-2016, 02:24 AM #4417Senior Member
- Join Date
- Jun 2016
- Location
- NH
- Posts
- 1,924
Thanked: 1363
Thanks! Yes, it was a great shave! These deep thumb notches take me some getting used to, my left thumb feels at home right in there but my right thumb was not so comfy with it at first... and I'm right handed! Originally Posted by sharptonn
-
08-28-2016, 04:17 PM #4418Senior Member


- Join Date
- Aug 2016
- Location
- Earth
- Posts
- 358
Thanked: 98
I have a few razors I want to work on and have decided make a few things first to enhance the way I make a historical catalog of them.
Here's a pic of the light box I'm setting up. Backdrop will be some green felt I had left over from a poker table I made. Still working on the
lighting, incandescent and LED bulbs wash everything out in brown. I'm currently trying CFL bulbs, better, but still brownish a little bit.
Maybe I should try some different diffusers.

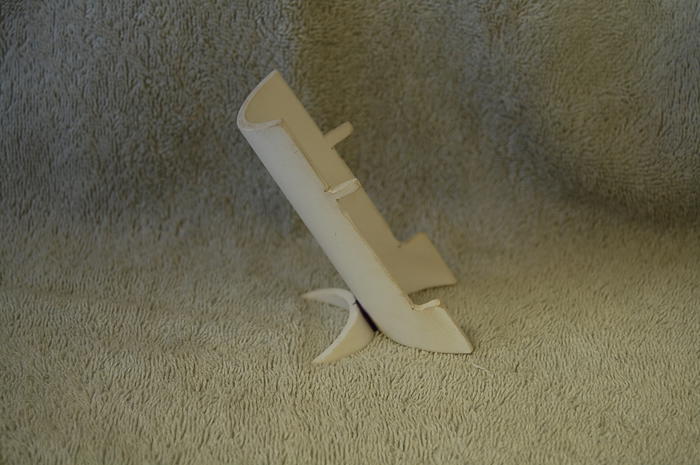
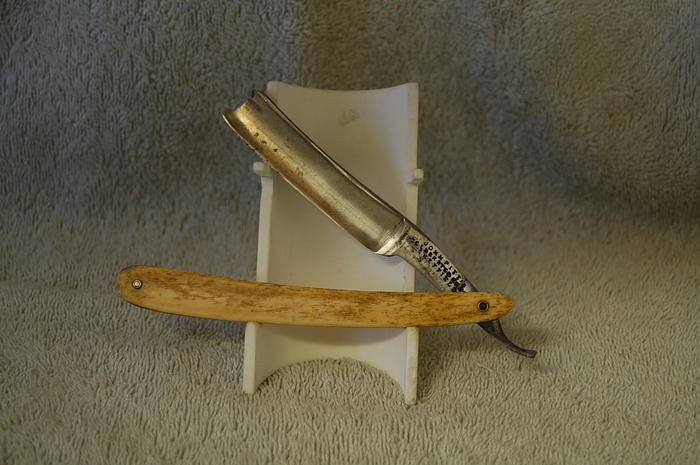
I also wanted a display stand to prop the razors up at a better angle for photographing. I decided on PVC pipe as the material is softer
than steel and shouldn't hurt the edge (before or after restoration). I wanted to design the stand with the "pin" under the tang, but I
couldn't make a "universal" stand for all straight razors due to the differences in the tangs.
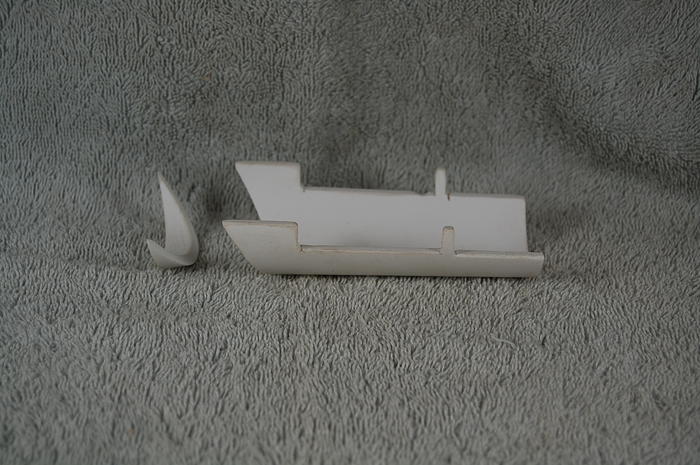
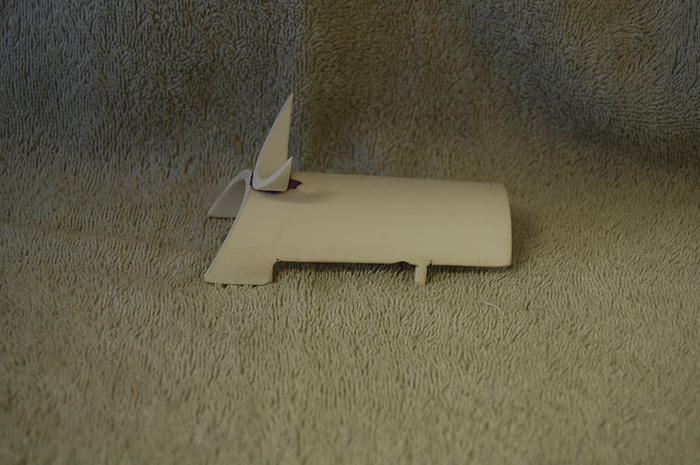
Normal PVC glueing method didn't hold steadfast enough, so I used super glue. (Note to self: open bottle of nail polish remover before opening tube of super glue, lol)
Any comments or suggestions would be greatly appreciated.
Thanks,
Panama
-
08-28-2016, 04:29 PM #4419Senior Member
- Join Date
- Aug 2014
- Location
- East Central Illinois
- Posts
- 782
Thanked: 101 I have to get a dapping block set like that! Originally Posted by outback
Slawman
-
08-28-2016, 05:08 PM #4420Senior Member

- Join Date
- Jan 2012
- Location
- Waukesha, Wisconsin
- Posts
- 1,943
Thanked: 390
Your light problem should fixable by adjusting the settings on your camera. Some have daylight, cloudy etc and can also come with a customvsetting so you can adjust it just right. Usually they have one for incandescent and fluorescent bulbs to account for the warmth of inc and blues of cfl. This can be adjusted with some post processing programs like photoshop or adobe lightroom. When I bought my olympus years ago, a program came with the camera Originally Posted by Panama60
Panama60 likes this.
-
The Following User Says Thank You to dinnermint For This Useful Post:
Panama60 (08-28-2016)


 Reply With Quote

