
Results 531 to 540 of 1773
 6809Likes
Thread: We Have Skills Too !!
 LinkBack URL
 About LinkBacks
-
04-02-2017, 01:20 AM #531Senior Member


- Join Date
- Feb 2016
- Location
- San Antonio, TX
- Posts
- 1,840
Thanked: 428 John, if you have a Leather Factory (Tandy Leather) where you live, they have premium leather on sale right now for the month of April. I got a really nice piece for $29.00. A holster like that would cost around $60 - $75 and it wouldn't be the same quality. Of course, I'll have to spit shine it soon!
 Originally Posted by Hirlau
 Semper Fi !
John
-
04-02-2017, 01:32 AM #532Senior Member


- Join Date
- Dec 2010
- Location
- South Florida
- Posts
- 13,530
Thanked: 3530
Fortunately I have a lot of leather sitting around; I've been too busy with other projects the past 8 months to get to it. But thinks for the tip. I have a Tandy about 15 miles away.
RezDog likes this.
-
04-02-2017, 05:27 AM #533Str8Faced Gent.


- Join Date
- Aug 2013
- Location
- Orangeville, Ontario
- Posts
- 8,456
- Blog Entries
- 1
Thanked: 4207
So I've been working on a new skill set, and a technology that will ultimately aid me in my scale restorations and turning projects.
Built a modest little CNC router and am slowly learning its piloting and control.
Using one of the main projects I had in mind when I started to think down this road as my test project because it will require me to understand and control all 4 axis involved right from the beginning.
Start with a piece of hot tub 2.5" pvc pipe, cause it's cheap, and I make lots of trial type errors, hehe. Then try to engrave a scanned picture onto it, the picture first converted to grayscale and then converted to a rastor image to assign varying depth to the different gray areas of the photo. Then determine the depth in the pvc that will be your picture print radius for your routers tool path zero z reference.
Spent the last week figuring out how to do all that.
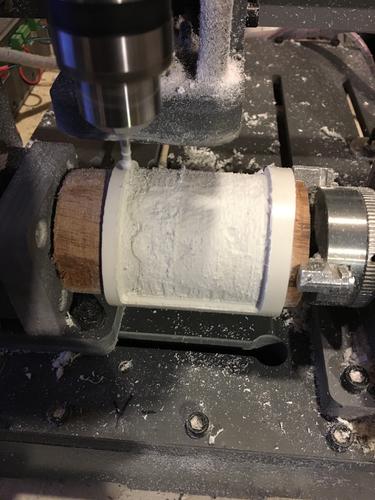
Had to go 4 mm deep to set the image as deeply as I wanted and to get the scale and proportions right, but it still doesn't look like much on pvc piping,,
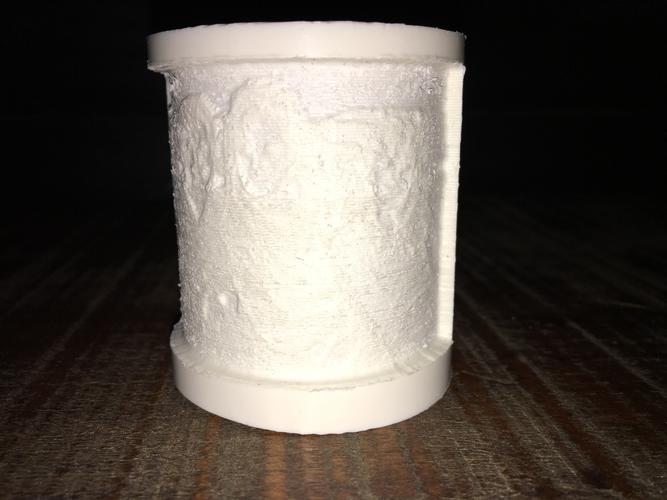
until you plop it over a tea light.
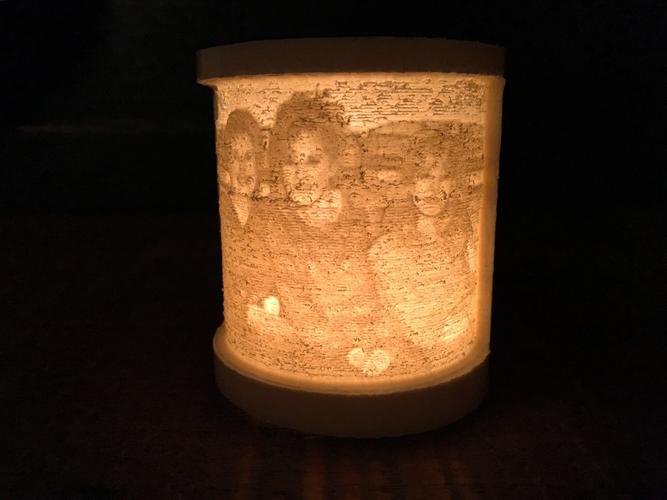
Still need to finish sand/polish the surface, but the effect turned out as I had hoped from a photo copying perspective.
Lithophane's used to be made in the 1800s out of thin porcelain. And the depth and warmth of old pictures rendered this way always attracted me to them at my grandparents house as a kid.
This is only prototype work, but it really has potential and looks better in person. It's a slow process, this 2" high image took over ten hours alone to engrave, but hey, I can do other things while the machine is working so it's not too painful.
My plan is a few of these lithophaned acrylic panels set in a lamp shade and hand made lamp for the misses for her 50th coming up in a month capturing some of her best memories with her parents growing up.
Thanks for looking gents.
Always messin with something up here, and yes it will ultimately come back to razor work in some form or another..

Last edited by MikeB52; 04-02-2017 at 05:32 AM.
"Depression is just anger,, without the enthusiasm."
Steven Wright
https://mobro.co/michaelbolton65?mc=5
-
The Following 11 Users Say Thank You to MikeB52 For This Useful Post:
-
04-02-2017, 08:36 PM #534Senior Member
- Join Date
- Feb 2016
- Location
- San Antonio, TX
- Posts
- 1,840
Thanked: 428
That's incredible!
Semper Fi !
John
-
The Following User Says Thank You to Johntoad57 For This Useful Post:
MikeB52 (04-03-2017)
-
04-03-2017, 12:58 AM #535Senior Member

- Join Date
- Jun 2013
- Location
- archbold ohio
- Posts
- 2,378
Thanked: 546
yes that is neat! i don't understand much about CNC as my knowledge stops at X Y axis but the possibilities are endless with that kind of set up. will be interesting to see what else you come up with.
MikeB52 likes this.
-
04-03-2017, 01:04 AM #536Senior Member

- Join Date
- Feb 2013
- Location
- Haida Gwaii, British Columbia, Canada
- Posts
- 14,450
Thanked: 4829
I think Mike has that one dialed up with the usual x and y but has added two more axis. It does depth and round or curve surfaces too, so there are more than just the usual factors to this one. In theory I guess you could use it to make things like a brush, if it is a complicated as it looks anyway.
It's not what you know, it's who you take fishing!
-
04-03-2017, 01:21 AM #537Str8Faced Gent.
- Join Date
- Aug 2013
- Location
- Orangeville, Ontario
- Posts
- 8,456
- Blog Entries
- 1
Thanked: 4207
Thanks gents.
This one's set up to have four axis of control, but really is a glorified dremel at heart. I will be able to do scroll work, engravings and ideally some banding around brush handles. But the real challenge will be in trying to copy ornate scale designs once I cad figure out all the right shading and texture copying to do it well.
 "Depression is just anger,, without the enthusiasm."
Steven Wright
https://mobro.co/michaelbolton65?mc=5
-
-
04-03-2017, 02:40 AM #538Razor Vulture

- Join Date
- Oct 2010
- Location
- Lone Star State
- Posts
- 26,151
Thanked: 8616
Extremely cool, Mike! Making a fine item like that with PCV will make for an instant heirloom!
Looking forward to seeing the finished product!
-
The Following User Says Thank You to sharptonn For This Useful Post:
MikeB52 (04-03-2017)
-
04-03-2017, 03:27 AM #539'with that said'

- Join Date
- Aug 2010
- Location
- Walla Walla in WA State USA
- Posts
- 11,250
Thanked: 4237
Well this is going to look like an old turd compared to Mike's wonderful work, but it's 'Mine'!
Those that know me and know me well are aware of my love of smoked meats and sausage in particular. Well for years, I've used the store bought hot plates and tore them apart and bypassed their thermostat as they automatically turn themselves off if the surrounding temp gets too hot. I have an external thermostat that I use to control the hot plate and it works well.
The down side is that the hot plates deteriorate and the heat emitted from underneath burned the plywood base and it never failed they quit at the worst times! (right in the middle of smoking something/last time was for some pepperoni sticks)
Years ago I'd made a smoker out of an old '40's refrigerator and had made a base out of aluminum to hold a burner and the chrome ring and it worked well, however it met with a sad ending.
I'd forgotten that I had a spare burner and ring so I decided to see if I could upgrade my smoker.
Here it is so far--I just ran out of steam for the day;
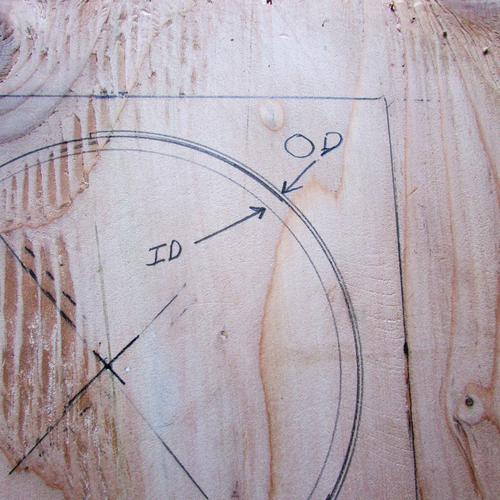
Here's the new base with the outline of where things will be:
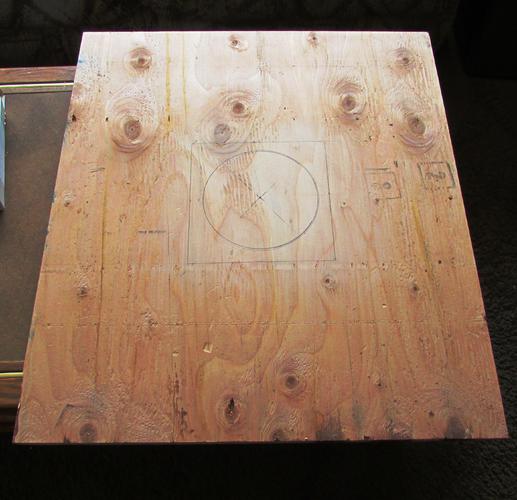
I wanted to try to insulate the burner from the wood so I purchased a 1/4" thick 8" square piece of silicone rated to withstand 450 degs. The hole in the plywood would be about 1/4" wider than the width of the ring. The inner ring would be the size of the ring mounted in the silicone.
Here's the silicone and ring installed. I need to make some adjustments as it's not evenly spaced within the hole in the plywood. With that said, it should be fine as is if I can't get it positioned better as it's not touching the plywood.
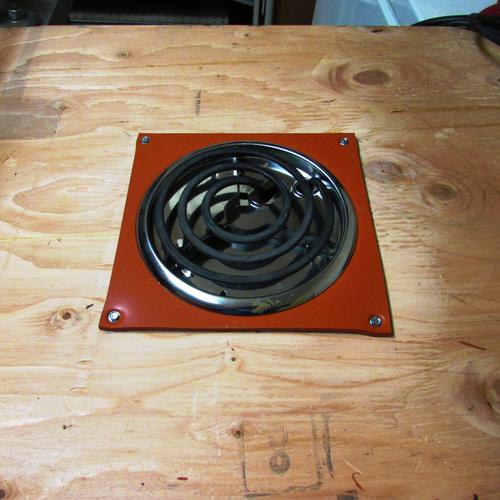
Since not much sticks to silicone I decided to make an 8" cardboard template with the 6 1/4" diameter circle for the silicone and then cut it all out and use a sharpie to draw the circle out on the silicone. After doing so and letting the ink set, it Worked!
I used a new single blade razor blade to gently go around the outside of the sharpie mark and kept going until the center was cut out. Well I'd done a nice job of putting a taper to the inside so I went back and carefully started removing the center from the original cut and it fit like a glove!
This was my hope as there will be nothing but gravity and friction holding the ring with the burner on top.
From past experience I've found that radiating heat is my enemy! So I''m installing a small fan to move air from underneath the plywood. If I'm correct, it should only operate when the burner has power going to it so that it gets hot.
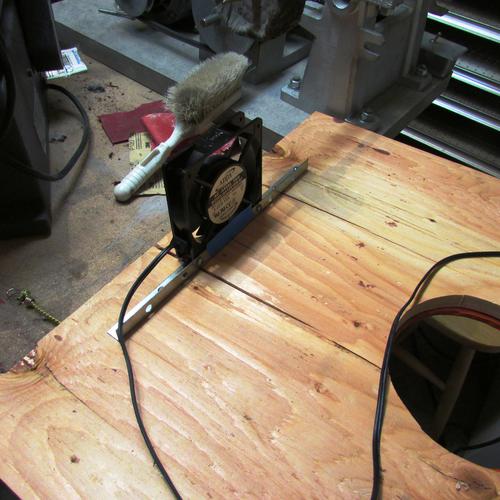
I still need to make some fine tuning for the plywood to fit in the base of the smoker such as round the corners etc. So I'll try to update this tomorrow.
Thanks for looking! :
Our house is as Neil left it- an Aladdins cave of 'stuff'.
:
Our house is as Neil left it- an Aladdins cave of 'stuff'.
Kim X
-
-
04-03-2017, 04:06 AM #540Razor Vulture
- Join Date
- Oct 2010
- Location
- Lone Star State
- Posts
- 26,151
Thanked: 8616
Take it over to the boy's apt, Roy!

That way he can tend to it!
I think some steel around that burner would be good.
A fan blows flames alive really good!
Kidding, Roy! I have faith in you.


 Reply With Quote