Results 111 to 120 of 185
Thread: Learning Jnats with Microscope
-
04-21-2021, 09:00 AM #111

UPDATE:
Yesterday, I made a quick touch up of the E.A.Berg razor, which didn't worked well after last honing session. (see here: https://sharprazorpalace.com/honing/...ml#post1935685 )
As I planned, i lightly jointed the edge and made just another cycle of Asagi Tomo's slurry, followed by some laps water only. That's been enough to "reset" the edge. So, my suspects were right: last time I made some mistake during the Asagi Tomo round.
Today it worked well as expected, delivering an excellent shave & post-shave!
Evidently, being systematic during the honing process, the comparison between images and results in shaving, and Euclid's valuable advice, allowed me to be able to identify (at least a lot more than when I started this thread) some of my mistakes, giving me thus the possibility of correcting them quickly.Last edited by Skorpio58; 04-21-2021 at 11:31 AM.
I know that I don't know (Socrates)
-
04-25-2021, 09:52 AM #112
 Second Comparative Nagura Test - Round Two
Hi to all!
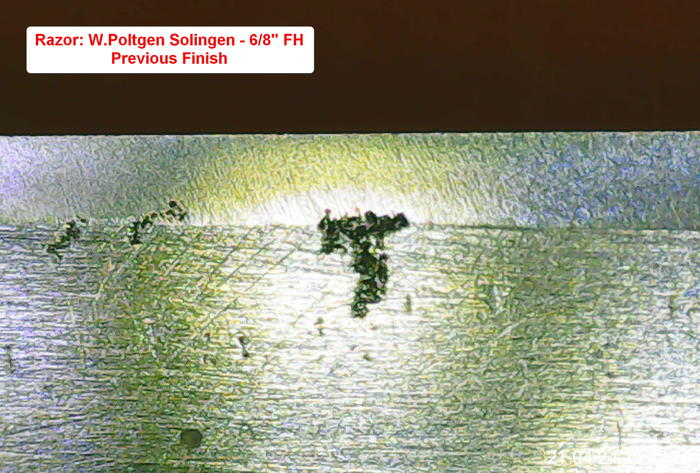
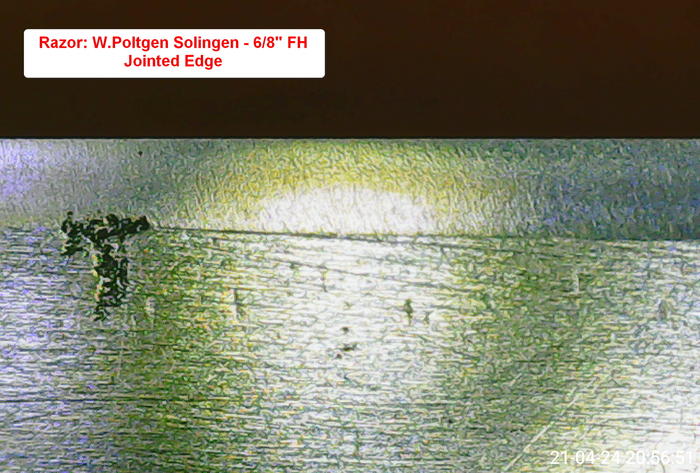
Here we are again with the Nagura Test.
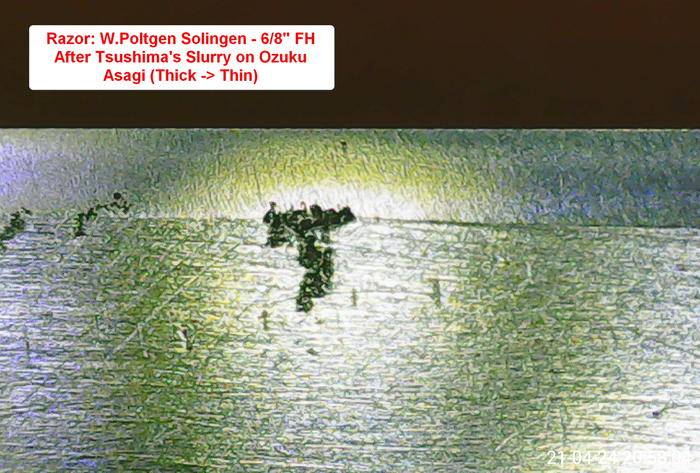
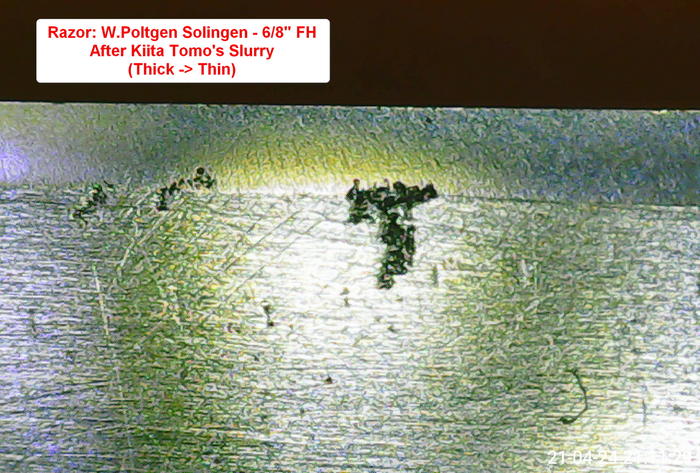
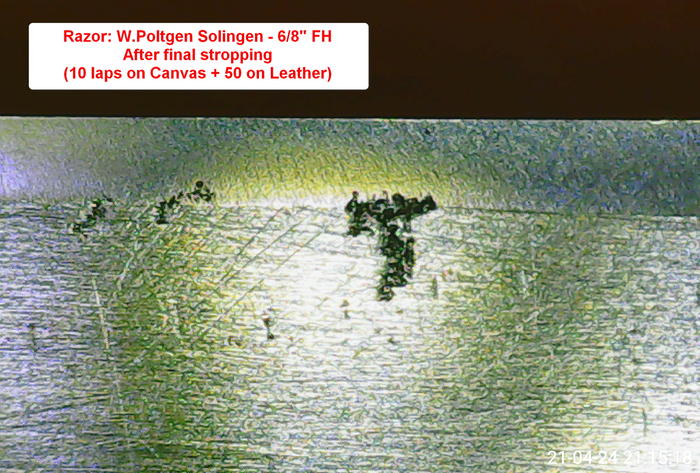
This Time I used the sequence Tsushima -> Kiita on my Ozuku Asagi Koppa.
As usual in these tests, I lightly jointed the edge before starting and then made a round each of slurry (Thick -> Thin) with the two Naguras.
For those who have not read the entire thread, the passage with the Tsushima provides a reliable and constant starting point for evaluating the effect of the last Nagura used in the different tests.
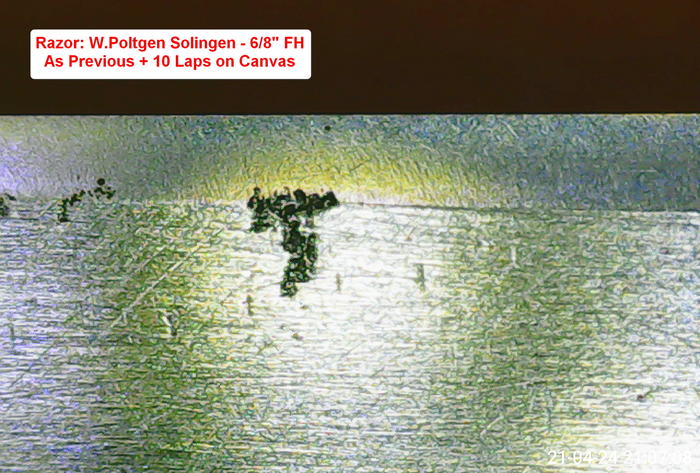
The Kiita Tomo, as in the previous test on Nakayama Kiita doesn't seems to be one of the finest, and this time, the edge too wasn't perfect (but quite corrected by the final stropping). Btw. I didn't made another pass to keep the procedures homogeneous in the different test rounds.
The blade passed the Treetop Test.
Today I shaved with it and got a close & quite smooth feeling, followed by a very good post-shave.
ERRATA CORRIGE: THE RAZOR IS LASSO SOLINGEN AND NOT W.POLTGEN
Last edited by Skorpio58; 04-25-2021 at 09:55 AM.
I know that I don't know (Socrates)
-
04-25-2021, 01:14 PM #113Senior Member


- Join Date
- Apr 2012
- Location
- Diamond Bar, CA
- Posts
- 6,553
Thanked: 3215
The edge looks a bit rough after the Tsushima but straighten up nicely after stropping.
The Kita slurry appears to have chipped the edge, post stropping the damage is enhanced, or at least more visible.
The Kita appears to have degraded the Tsushima edge.
-
The Following User Says Thank You to Euclid440 For This Useful Post:
Skorpio58 (04-25-2021)
-
04-25-2021, 04:24 PM #114

Euclid,
That demonstrates how microscopic evidences are not always related to the real shave.
I wonder what could have caused (both with Tsushima and Kiita) the degradation of the edge? I made more or less the "usual" amounts of slurry and worked it in the usual way, for about the same amount of time. The only thing I can notice is that I used less pressure in the final stages of both steps with the thinned slurry...I know that I don't know (Socrates)
-
04-26-2021, 04:16 PM #115Senior Member


- Join Date
- Apr 2012
- Location
- Diamond Bar, CA
- Posts
- 6,553
Thanked: 3215
It could be the steel, there is a small pit, over the large pittng at the base of the bevel. If you watch that pit you can see how much steel is removed at the edge, as the small pit gets closer to the edge.
As you hone the edge, you are removing steel down into the steel and down from the edge, so imperfections, pits can surface.
Or it could be the base stone, the Asagi, as the slurry thins, more contact is made with the base stone. Check the stone for imperfections, hair-line cracks and edges to ensure they are smooth and chip free.
I suspect the steel, as the edge was a bit jagged to begin with and jointing and stropping improved the Tsushima edge and revealed more damage from the Kita edge, (removed flashing) and what we see is probably chipping.
Try looking straight down on the edge after jointing, if you see black spots that is pitting or chipping. If the whole edge is shiny, reflecting light you are down to good, solid steel. If you hone over a pitted edge, it will just chip or will be a weak edge that can/will fail after stropping.
Also, for perspective lay a hair down next to the edge damage and take a micrograph. That will show you just how small the damage really is.
For those that think you are chasing your tail, that is exactly the point of the exercise. To learn to perfect an edge. You must learn to identify what you see in a micrograph and its causes. It will improve all your honing.
-
The Following User Says Thank You to Euclid440 For This Useful Post:
Skorpio58 (04-26-2021)
-
04-27-2021, 09:31 AM #116
 Second Comparative Nagura Test - Round Three.
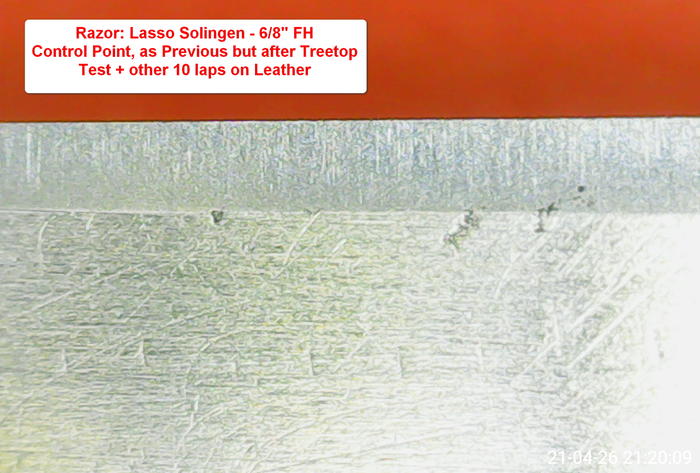
Precisely in relation to what Euclid said above, yesterday morning I too thought about the hypothesis of a defect in the base stone, and I had gone over my Ozuku Asagi flattening it with 400 & 800 G sandpaper, to eliminate any problems caused by surface imperfections. Of course, the other possibility, which is that pitting is the cause of a non-perfect edge, unfortunately remains.
Anyway, the third round of Nagura Test seemed to go better (also if still not perfect), either on the microscopic side, and on the shave test. Today, I really didn't felt the blade on my face (albeit very close) and got a top notch post shave.
I used Tsushima Nagura followed by Red Ohira Nagura. The second showed to be one of the less finer nagura (as in previous test on Nakayama Kiita base stone) but, despite that, confirmed to be one of the best performer while shaving.
Btw. I don't think I'm chasing my tail... I'm just collecting data & experience about Nagura's honing on Jnats.

Love this approach, which drives me to be more and more systematic, to understand my mistakes or limits and to try to overcome them. So far, so good!
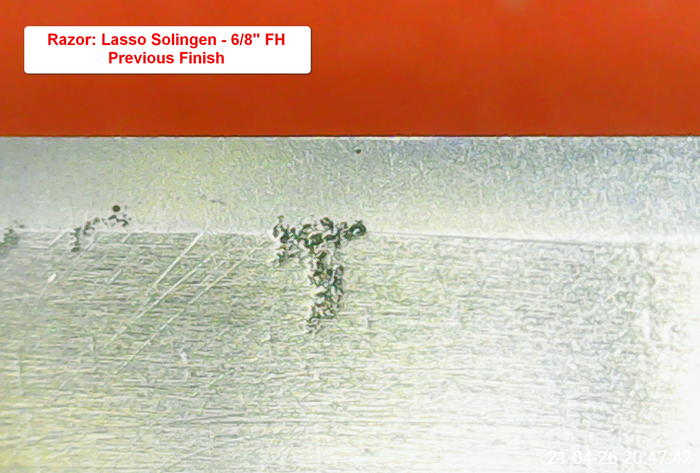
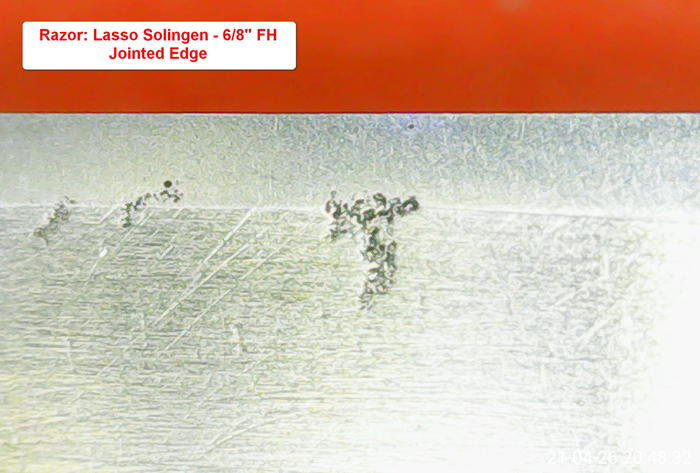
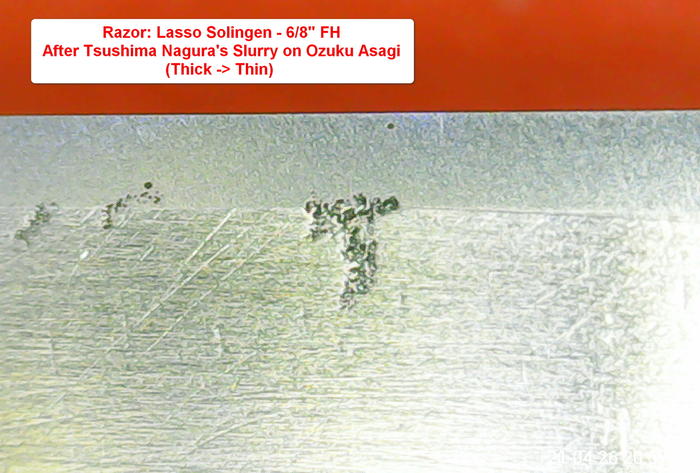
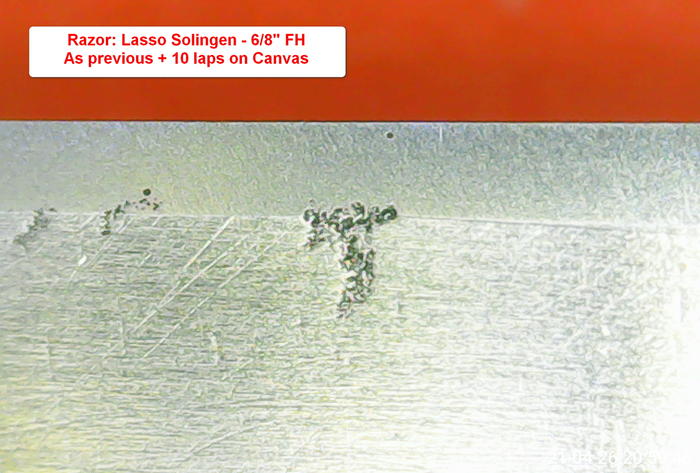
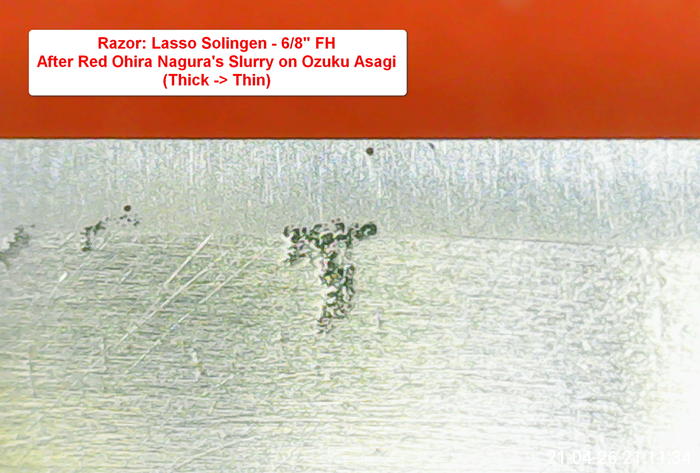
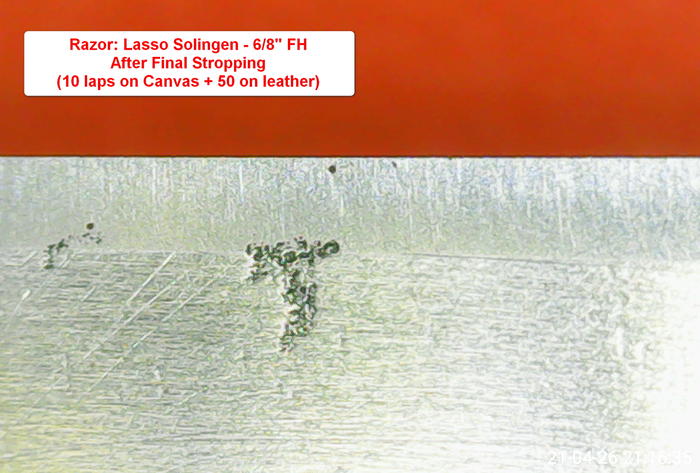
Took also a "control" shot of another part of the bevel
Last edited by Skorpio58; 04-27-2021 at 09:37 AM.
I know that I don't know (Socrates)
-
04-27-2021, 01:12 PM #117Senior Member


- Join Date
- Apr 2012
- Location
- Diamond Bar, CA
- Posts
- 6,553
Thanked: 3215
The edge looks very straight after the Ohira nagura, even though it left some scratches on the bevel.
So, nagura are just one ingredient in the honing mix. And some razors will perform better with a stone, nagura, steel combination than others. It I just the way it is.
Recently I found an Asagi in the back of a drawer, that I do not recall buying or using. It is an unusual size about 4x6. It does have some old school looking, faded stamps on the side so, it may be an old stone. Who knows with stamps anymore? It is a very clean stone, no imperfections.
I finished a couple razors on it, but instead of my favorite hard Asagi nagura I use a Koma that produced a very fine-looking bevel and a great shave.
Now I have used this fairly new to me Koma, a year or so, with other Jnats, some favorite finishers. And while the bevels look good and shaved well, the same razor finished with the hard Asagi nagura on the same stones, shaved better.
It is all in the mix, as these stones are naturals, and a different blend may be just what a particular razor steel needs or likes. And again, it does not need to look pretty to shave well.
-
The Following User Says Thank You to Euclid440 For This Useful Post:
Skorpio58 (04-27-2021)
-
04-27-2021, 03:18 PM #118

That's what I (mainly) learned until now. And understood the importance of achieving the straightest and smoothest edge possible.
For the rest, given a single razor, a single base stone, a specific Nagura sequence and of course, an appropriate technique... through this series of tests, at least I can understand if and when the work is done well or it is done badly and what are the combinations that lead to the best practical result. I know that I don't know (Socrates)
-
05-02-2021, 12:02 PM #119
 Second Comparative Nagura Test - Round Four.
During another cloudy & grey Sunday I went on with my Nagura Comparative Test.
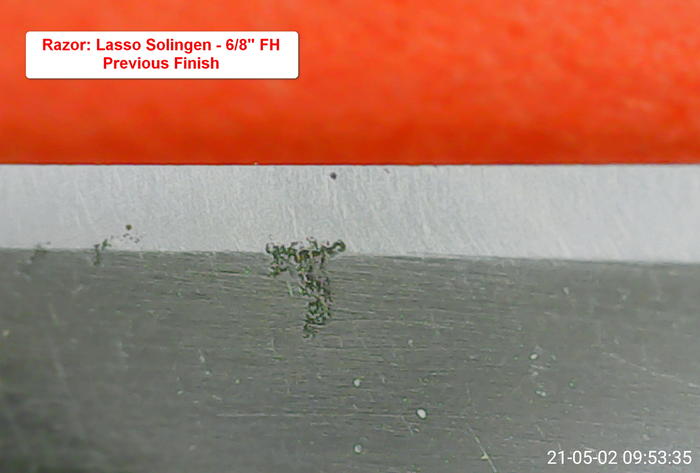
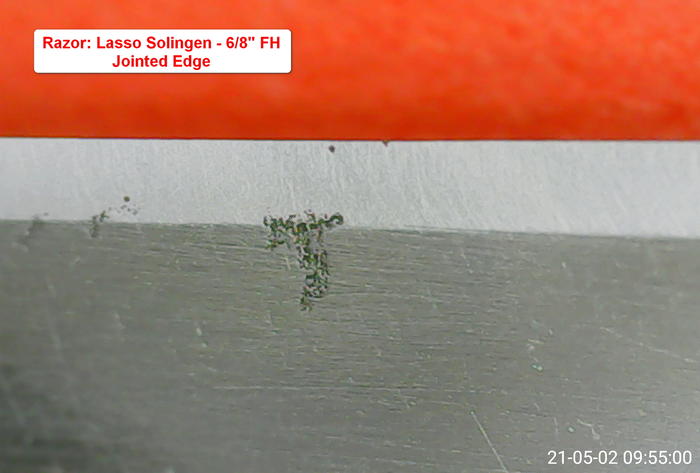
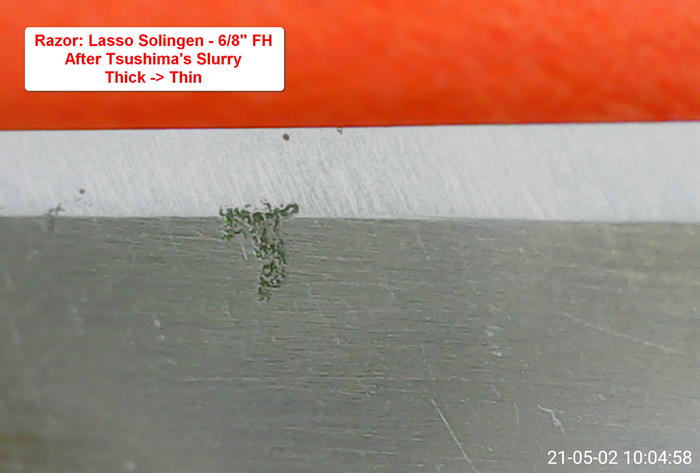
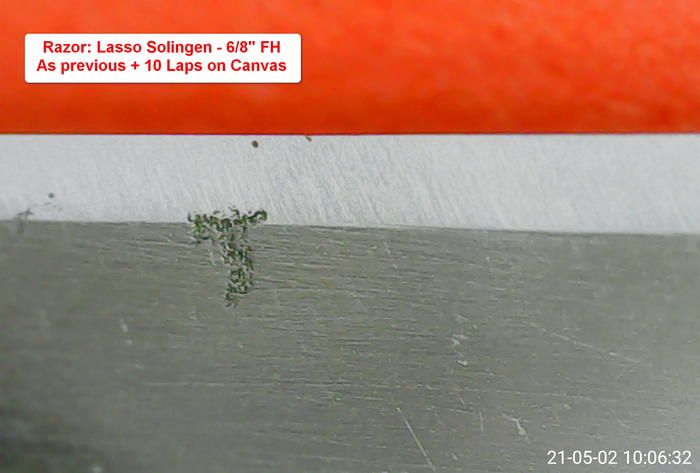
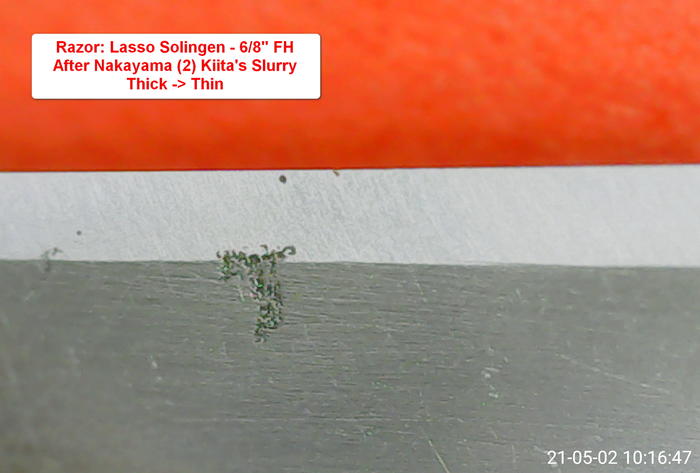
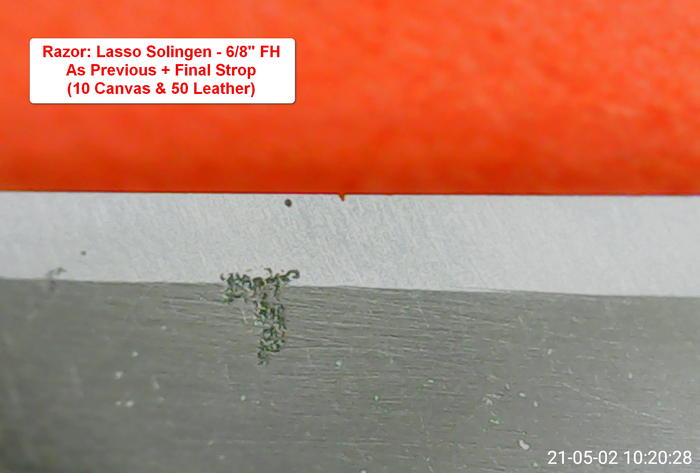
Round Four used (as usual) the Lasso (Solingen) razor, the Ozuku Asagi Koppa as base stone and the Tsushima as first Nagura, this time followed by the Nakayama Kiita (2) Nagura.
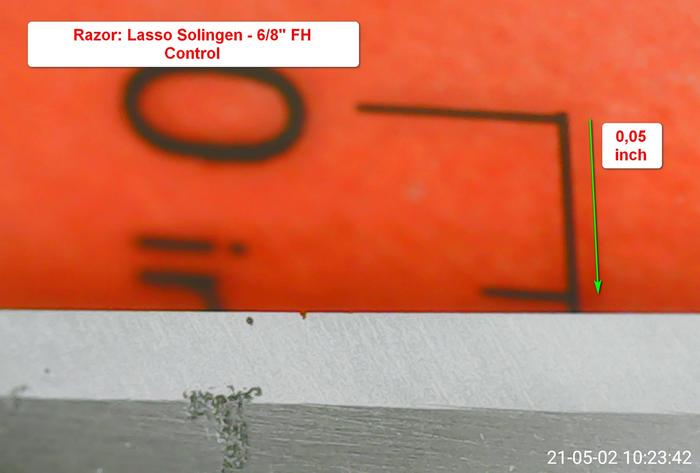
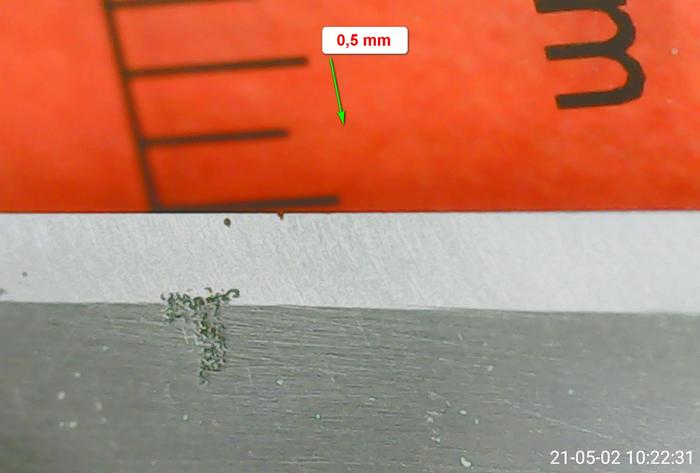
As we can see, the repeated sharpening sequences brought to light (already in round three) a small Pitting spot (not visible at the beginning of this series) which gradually reached the edge of the blade. As you can see, it is very limited in size (and will probably be eliminated by the next round of the test), while the current risk is that the largest Pitting spot, evident from the beginning, will reach the edge soon.
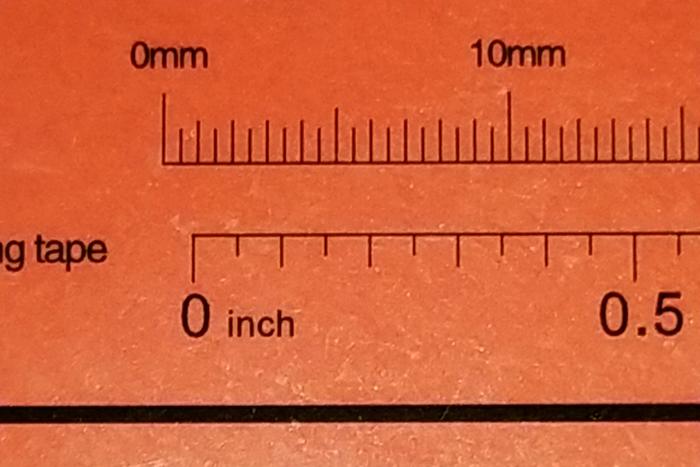
I've included some images with the Microscope's ruler, in order to assess the size of the defects/spots/chips etc. as Euclid suggested.
The Nakayama Kiita's slurry seems to have done a good job (mid-range as finesse in the whole lot of naguras) and the edge is very straight (IMHO), apart for the small chip.
Shave test is scheduled for tomorrow.
 I know that I don't know (Socrates)
-
05-02-2021, 02:04 PM #120Senior Member


- Join Date
- Apr 2012
- Location
- Diamond Bar, CA
- Posts
- 6,553
Thanked: 3215
Yes, as expected the Kita did refine the edge and left a nice stria pattern. The chip is small enough that it should not present a problem during shaving. But it does illustrate that the steel may have some issues.
It would be interesting to strop this edge on linen or cloth for 100 or so laps and look at the edge, then do another hundred and see if the pitting and repeated stropping affects the edge.
If you do experiment with stropping a high number of laps, do it in stages of say 25 with a small break in between. I find that doing a high number of laps 50-100, the tendency is to continually add more pressure or strop faster. This would defeat or alter the test results.
The lighting does appear a bit different. One of the things I did was build a jig to hold the razor and the scope in the same orientation for each photo.
All I did was get a sheet of 12X12, 6mm craft foam and cut a strip of 2mm craft foam about 1x6 inches. Line up the razor and the scope where they usually sit and glue the foam strip to the base foam, so the spine butts up to the foam strip. Then mark the location of the base of the scope mound on the foam base with a sharpie. And try not to move the angle of the scope during set up.
I also open the scales, so they are 90 degree to the spine and allow the scale to hang off the foam matt and rest on the table. This drops the scale 6mm and puts the bevel at a more level angle to the scope lens.
I will take a photo of my simple jig latter today, to make it more understandable.
This reference jig will not give you a repeatable mount so that the orientation of the razor and the scope are in relatively the same position each time and make your micrographs more consistent for comparison.
It is a small thing, but lighting can be deceptive and hide or enhance the appearance of a bevel and imperfections of the steel. At the least a jig makes for a more consistent photo. One could do the same with cardboard if foam is not readily available.


 211Likes
 LinkBack URL
 About LinkBacks


 Reply With Quote
