
Results 18,681 to 18,690 of 20602
 91550Likes
Thread: What are you working on?
 LinkBack URL
 About LinkBacks
-
07-18-2020, 11:00 AM #18681Senior Member


- Join Date
- Mar 2015
- Location
- Akron, Ohio
- Posts
- 12,118
Thanked: 4316
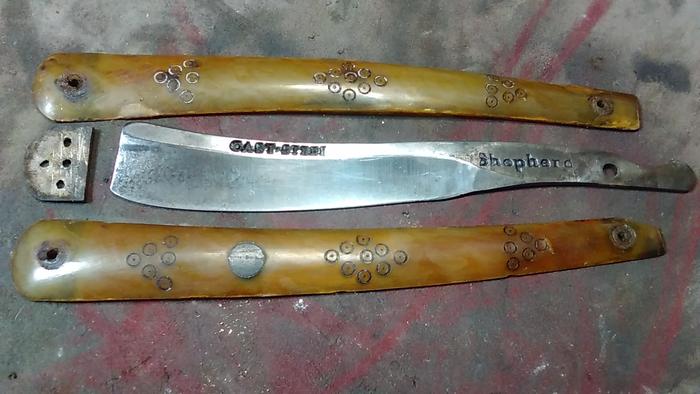
Started a restore on a Shepard, for Steve56.
Blade needs no more than a good rub with 3M, but the scales will need the most attention. Thankfully, most of the damage is to the backside, scale, but there's a piece missing on the show side, pivot end, that needs addressed as well.
Last edited by outback; 07-18-2020 at 11:02 AM.
Mike
-
07-18-2020, 04:46 PM #18682Senior Member

- Join Date
- Dec 2018
- Location
- Gainesville, FL
- Posts
- 6,876
Thanked: 683
Whoa! That thing is totally bada$$! I'm anxious to see what you do with it Mike.
outback likes this.Iron by iron is sharpened, And a man sharpens the face of his friend. PR 27:17
-
07-18-2020, 04:59 PM #18683Senior Member
- Join Date
- Mar 2015
- Location
- Akron, Ohio
- Posts
- 12,118
Thanked: 4316
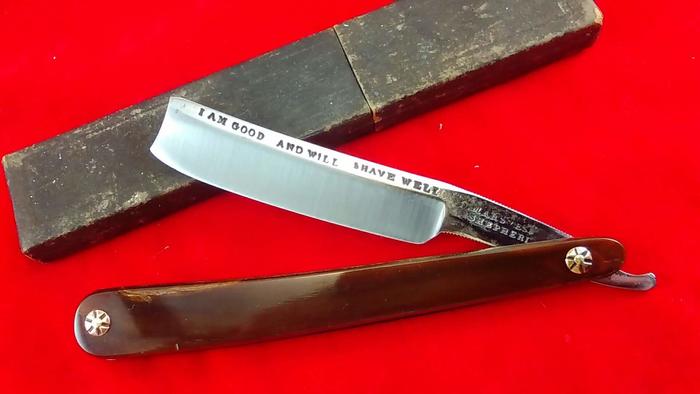
You should get one from this era, Paul. A real treat to shave with .
PaulFLUS likes this.Mike
-
07-18-2020, 05:22 PM #18684Senior Member
- Join Date
- Dec 2018
- Location
- Gainesville, FL
- Posts
- 6,876
Thanked: 683
Still waiting on this one to come in. It will be a project also but looking forward to it.
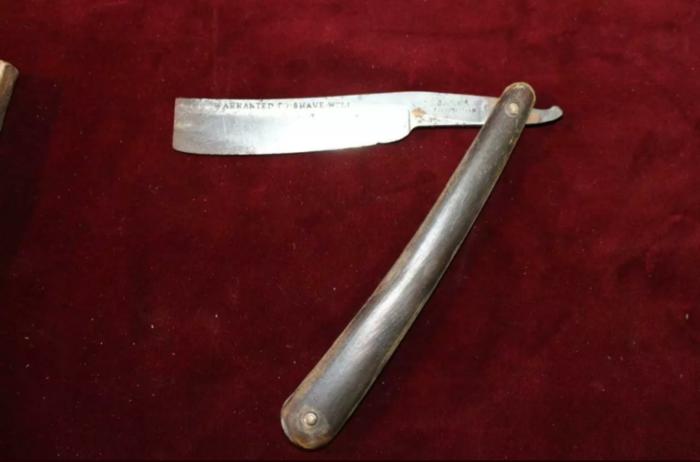
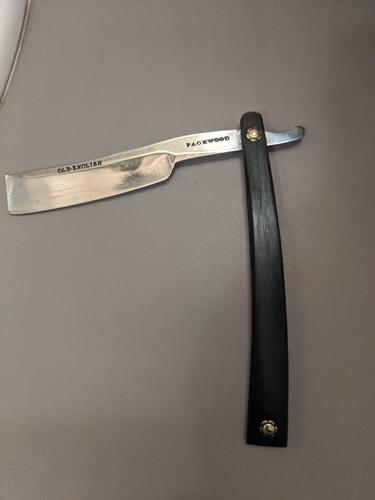
Plus I have the Packwood that I am stalled in the process of blade work. Got distracted by other shiny things
 Iron by iron is sharpened, And a man sharpens the face of his friend. PR 27:17
-
07-18-2020, 06:36 PM #18685Senior Member
- Join Date
- Mar 2015
- Location
- Akron, Ohio
- Posts
- 12,118
Thanked: 4316
Looks very similar.
 Mike
Mike
-
07-19-2020, 01:22 AM #18686Dan (Member)

- Join Date
- Aug 2011
- Location
- Somerset, NJ
- Posts
- 228
Thanked: 30 Resin pressure pot ready to rock n roll!
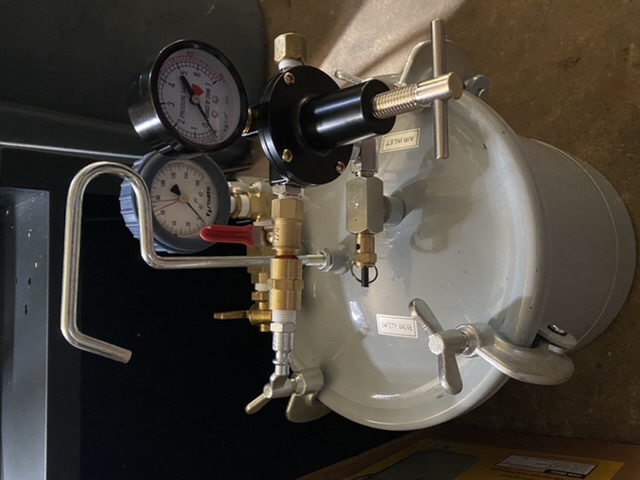
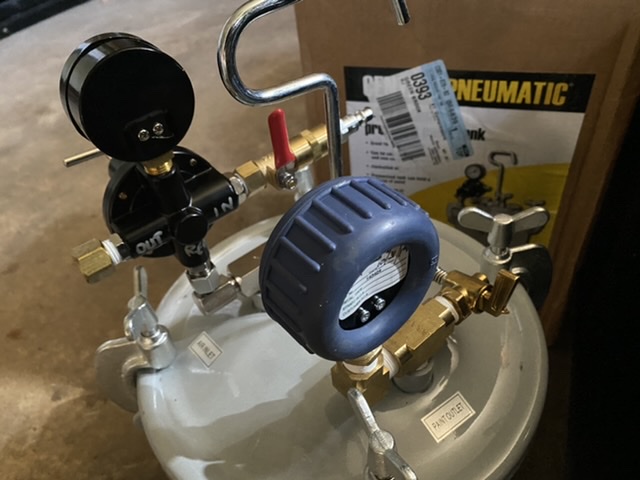
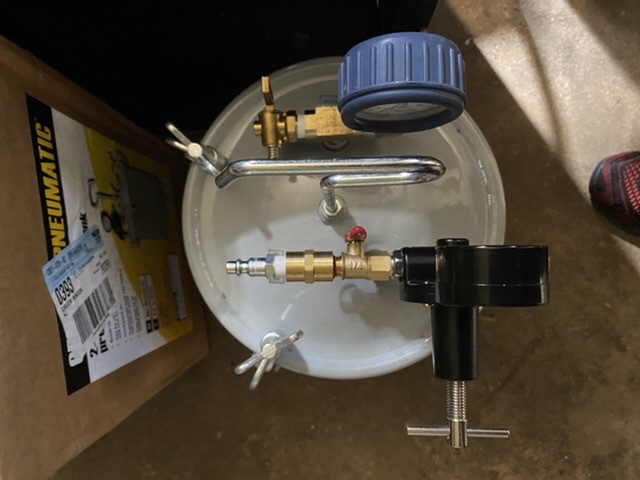
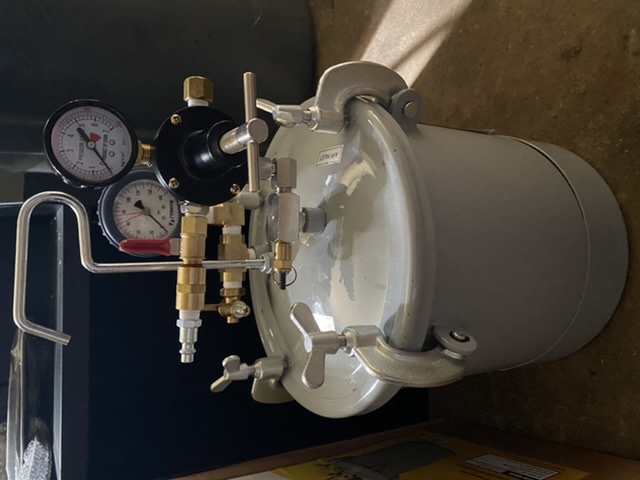
I just finished upgrading this Harbor Freight paint compression can into a pressure pot for casting brush handle Alumilite resin molds. Saved quite a bit of money in doing so, too! Heres the final product. With a coupon, I spent less than $100.
-
07-19-2020, 01:31 AM #18687Hones & Honing


- Join Date
- May 2005
- Location
- Saint Paul, Minnesota, United States
- Posts
- 8,023
- Blog Entries
- 1
Thanked: 2209
.
.
The paint pressure pot will work. Maybe 10 years ago A friend and me used this to stabilize some spalted maple with polyurethane. We would build up the pressure and let it sit for awhile then break the pressure for a bit then go thru that cycle several times. The downside to using poly is a very lengthy drying time. 30 days is nowhere near enough. The dimensions were 1.5" x 1.5" x 4-7 ". These were for hidden tang, forged, hunting knives.
I think you will find that it will not maintain a given pressure for any length of time. You will have to monitor it and pump it back up from time to time.
Just my 2¢
Last edited by randydance062449; 07-19-2020 at 01:33 AM.
Randolph Tuttle, a SRP Mentor for residents of Minnesota & western Wisconsin
-
07-19-2020, 01:37 AM #18688Hones & Honing
- Join Date
- May 2005
- Location
- Saint Paul, Minnesota, United States
- Posts
- 8,023
- Blog Entries
- 1
Thanked: 2209
.
.
A couple of years ago I gave my brother some of the stabilized blocks. He makes split bamboo fly rods so he used the spalted maple and turned them on his lathe into reel seats. Looked fabulous!
Randolph Tuttle, a SRP Mentor for residents of Minnesota & western Wisconsin
-
The Following User Says Thank You to randydance062449 For This Useful Post:
Geezer (07-19-2020)
-
07-19-2020, 01:40 AM #18689
Hi Randy,
In industry we did the same thing but used vacuum and had a view port to know when to break the vacuum before the bubbles overflowed the container.
Both seem to work. Early urethane's and acrylics were very hydrophilic and the entrained H2O molecules would cause a very cloudy casting.
~GeezerBe yourself; everyone else is already taken.
- Oscar Wilde
-
07-19-2020, 01:56 AM #18690Hones & Honing
- Join Date
- May 2005
- Location
- Saint Paul, Minnesota, United States
- Posts
- 8,023
- Blog Entries
- 1
Thanked: 2209
So the rule is to use very dry wood! Originally Posted by Geezer
 Randolph Tuttle, a SRP Mentor for residents of Minnesota & western Wisconsin


 Reply With Quote
