
Results 2,481 to 2,490 of 20573
 91474Likes
Thread: What are you working on?
 LinkBack URL
 About LinkBacks
-
03-15-2016, 02:01 AM #2481Senior Member


- Join Date
- Mar 2015
- Location
- Akron, Ohio
- Posts
- 12,073
Thanked: 4312 The crown is the most magical razor I own. All ya have to do is close your eyes, and run it across your face..... You can actually feel the magic this razor has, running down your face, and on to the floor around your feet.[emoji23] [emoji23] [emoji23]
 Originally Posted by Benz
 Mike
Mike
-
03-15-2016, 02:09 AM #2482
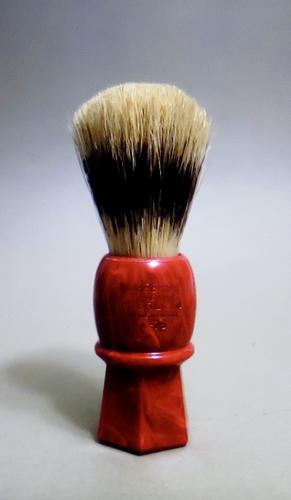
I've been keeping my eyes open for one of those aluminum Rubberset brushes so I can put a nice knot in it! I did win a nice one last night, this nice looking red marbleized badger brush. Originally Posted by jmercer
-
03-15-2016, 02:32 AM #2483Razor Vulture

- Join Date
- Oct 2010
- Location
- Lone Star State
- Posts
- 26,123
Thanked: 8612
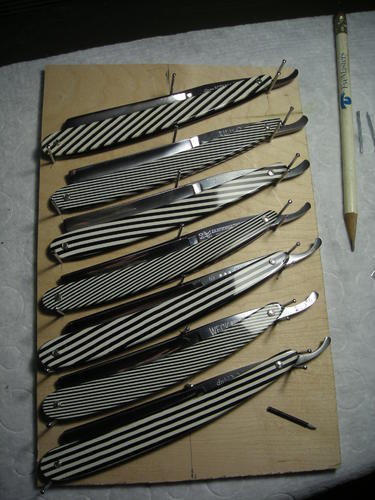
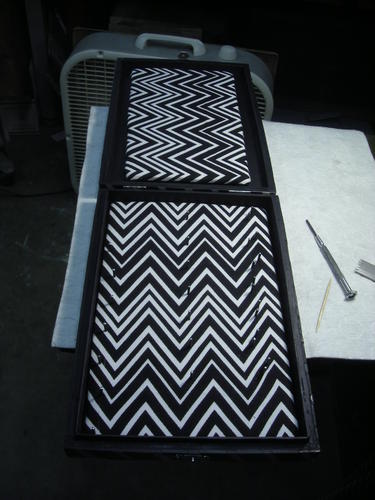
Piddling with the box here. Looks silly now, but I can see the outcome. (I think!)
Plywood drilled with the razors in order for some of Babur's stainless pins which I don't use. Have a reft of them!
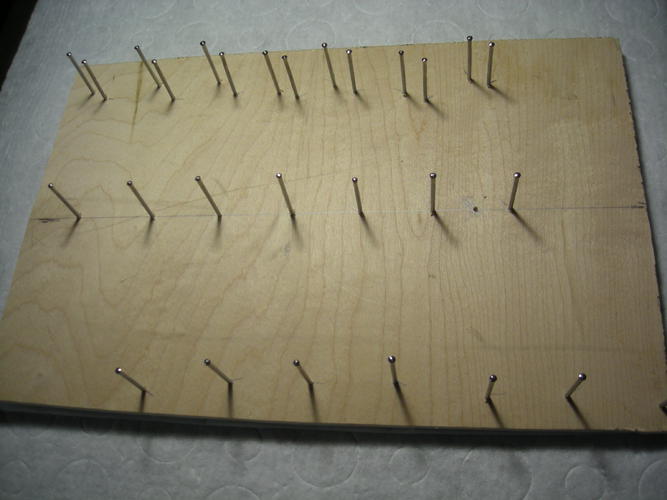
The pins were located with one sporting a covering of teeny black heat shrink tubing (shown below).
They all stay put with a tiny bit of movement without the tubing on the pins. Of course, they will need to stay in order!
The plan is to size the heat shrink so the pins will be tapped thru the plywood, cut off underneath, and the heads will be right at the level of the scales after a thin layer of foam and then fabric is applied. The razor can be retrieved by simply pushing down on the tang to raise it. If it works out, the whole thing will be glued down in the bottom of the box, some padding and fabric in the top to give a very light squeeze. Having a tough time finding some silver hinges and latch, but that's later. If it does not work out, nothing but some time lost!Last edited by sharptonn; 03-15-2016 at 02:52 AM.
"Don't be stubborn. You are missing out."
I rest my case.
-
The Following User Says Thank You to sharptonn For This Useful Post:
engine46 (03-15-2016)
-
03-15-2016, 02:39 AM #2484Senior Member

- Join Date
- Feb 2013
- Location
- Haida Gwaii, British Columbia, Canada
- Posts
- 14,443
Thanked: 4828
Lee Valley is where you need to look Tom. Originally Posted by sharptonn
It's not what you know, it's who you take fishing!
-
-
03-15-2016, 04:03 AM #2485
Good idea Shaun!

-
03-15-2016, 04:39 PM #2486Senior Member

- Join Date
- Jan 2012
- Location
- Waukesha, Wisconsin
- Posts
- 1,943
Thanked: 390
Those scales are still fascinating. Can't wait to see the full trippy set bathed in fine silk
-
The Following User Says Thank You to dinnermint For This Useful Post:
sharptonn (03-16-2016)
-
03-16-2016, 01:08 AM #2487Razor Vulture
- Join Date
- Oct 2010
- Location
- Lone Star State
- Posts
- 26,123
Thanked: 8612
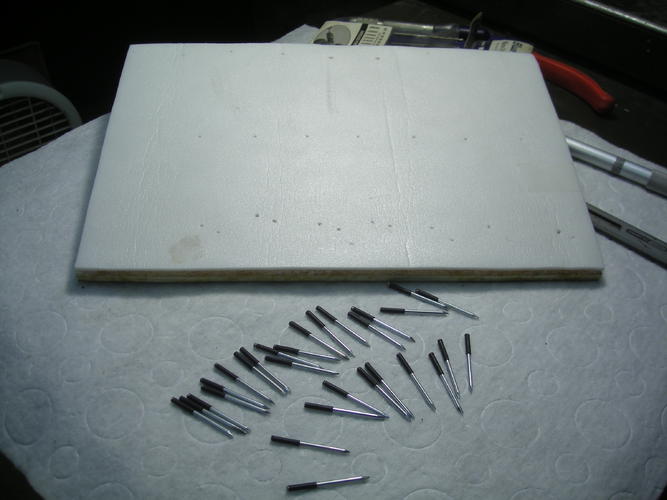
No silk here, just cotton fabric! So I glued a few layers of thin foam to my wood and used a pin-vise and a bit smaller bit to go through the foam from the bottom. Got 29 pins prepped with 3/8" of heat shrink. Used a little hobby glue roller thing and went around the edges of my wood/foam and set it down on the fabric, stretched and adhered it.
I then ran a needle through the fabric from the bottom to find the holes, started the pins from the top, dropped CA into the hole from the back, and pushed/tapped the pin through, cut off the excess.
Did this 28 times! Then, some more of the hobby glue to glue the rest of the fabric down in the back.
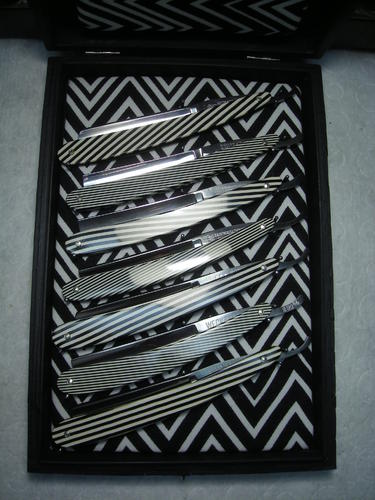
Installed my razors and bent the pins a bit here, there, till all fit perfect and would go in and come out easily.
Some 3M foam double sticky tape on the back and planted it into the box bottom. Made a little pad and covered it in fabric in the same fashion and double-stickied it to the lid. Did not do any crush, but just as things would not move.
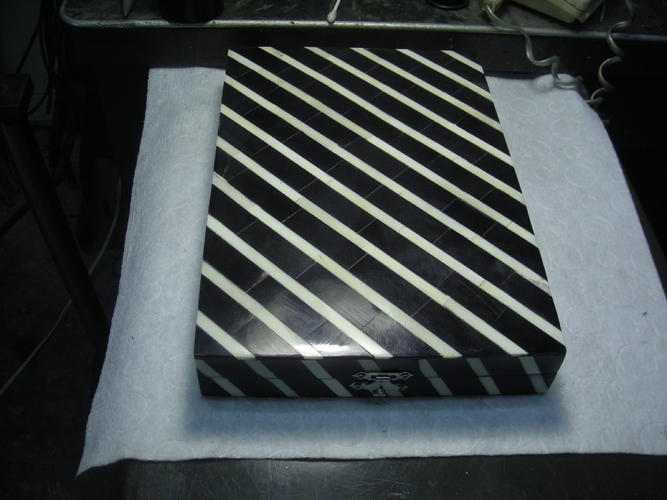
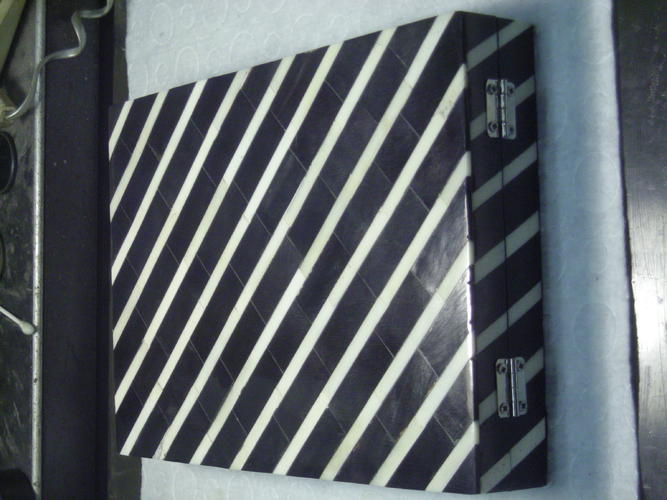

Bought a little wooden box at the hobby store and robbed it of it's hinges and latch (cheap!)
Worked out good!
So if anyone asks for me, tell them I am honing razors!
Last edited by sharptonn; 03-16-2016 at 01:30 AM.
"Don't be stubborn. You are missing out."
I rest my case.
-
03-16-2016, 01:17 AM #2488Senior Member

- Join Date
- Oct 2010
- Location
- 50 miles west of randydance
- Posts
- 9,678
Thanked: 1354
My eyes hurt.....

-
The Following User Says Thank You to 32t For This Useful Post:
sharptonn (03-16-2016)
-
03-16-2016, 01:28 AM #2489'with that said'


- Join Date
- Aug 2010
- Location
- Walla Walla in WA State USA
- Posts
- 11,244
Thanked: 4237
Looks Great My Friend! Originally Posted by sharptonn
However just the other day I was looking up some words in the dictionary and under 'Obsessive Compulsive' I could have sworn that it was your picture there!


Keep up that great work!Our house is as Neil left it- an Aladdins cave of 'stuff'.
Kim X
-
The Following User Says Thank You to cudarunner For This Useful Post:
sharptonn (03-16-2016)
-
03-16-2016, 01:29 AM #2490Matt

- Join Date
- Dec 2015
- Location
- Albany, NY
- Posts
- 971
Thanked: 260
My jaw just dropped.
Amazing work dude.
-
The Following User Says Thank You to MW76 For This Useful Post:
sharptonn (03-16-2016)


 Reply With Quote

