
Results 91 to 100 of 156
 616Likes
 LinkBack URL
 About LinkBacks
-
05-11-2016, 04:07 PM #91Senior Member


- Join Date
- Jan 2012
- Location
- Waukesha, Wisconsin
- Posts
- 1,943
Thanked: 390
I know this is kind of the opposite of the purpose of this thread, but it will probably be helpful.
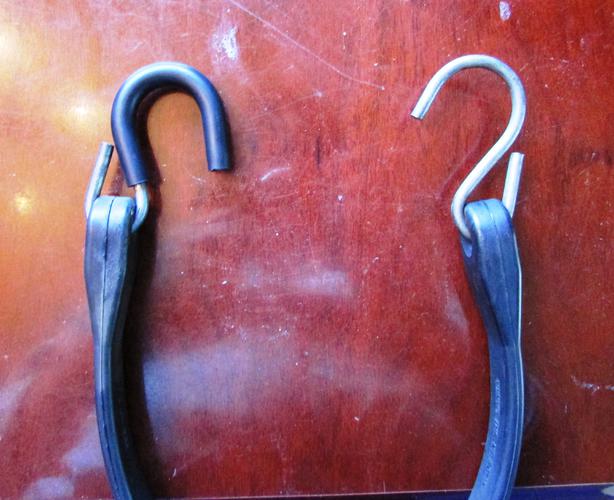
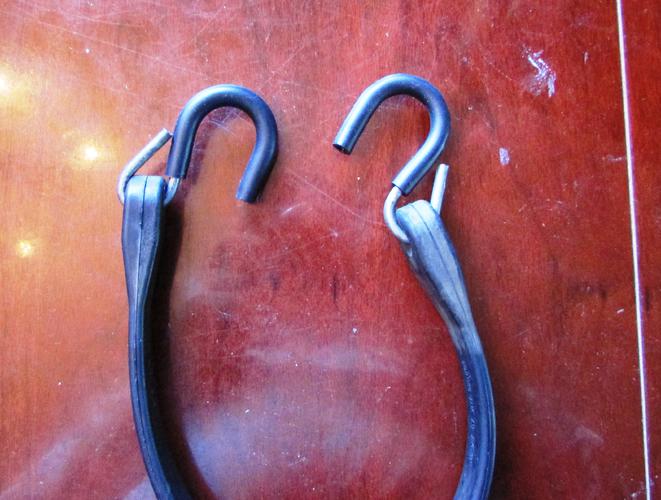
My father and I used to ride our motorcycles constantly. Well, as frequently as weather in WI would allow. We had a system down pat for mounting stuff to our bikes. Which is important, because you don't want to hold your luggage onto your bike with one hand at 80 mph... Not that I'm talking from experience.... ANYWAYS, we would always have a bunch of bungee cords on hand, at all times. Enough so that you could give out a dozen and still pack your gear tightly. These are similar to what we used, rubber coated hooks and never scratched a thing.
http://www.amazon.com/gp/product/B00...pf_rd_i=511390
-
05-15-2016, 01:40 AM #92'with that said'


- Join Date
- Aug 2010
- Location
- Walla Walla in WA State USA
- Posts
- 11,259
Thanked: 4238
Well I actually didn't 'Modify' much I just trimmed the original packaging so that it would fit into a vintage handheld 'file cabinet'.
Anyway I didn't have a decent way of storing my sandpapers so I came up with this:

 Our house is as Neil left it- an Aladdins cave of 'stuff'.
Kim X
-
07-01-2016, 02:30 PM #93Senior Member

- Join Date
- Apr 2012
- Location
- Diamond Bar, CA
- Posts
- 6,553
Thanked: 3215
Gasoline works very well to slip rubber over metal and has the added advantage of once it dries, (a few minutes) the rubber is glued on. Just squirt a bit inside and slip it on, they become very slippery, and you have a few seconds to adjust the fit, if needed. Originally Posted by cudarunner

Years ago, when I worked in a Motorcycle shop, this is how we replaced rubber hand grips. You have to cut them off, once dry.
-
The Following 2 Users Say Thank You to Euclid440 For This Useful Post:
cudarunner (07-01-2016), Hirlau (07-01-2016)
-
07-14-2016, 02:01 AM #94'with that said'
- Join Date
- Aug 2010
- Location
- Walla Walla in WA State USA
- Posts
- 11,259
Thanked: 4238
Well I'll be replacing the rear tire on my motorcycle here in a few days and I thought that I might need a little brute force and ignorance to get the shaft free. I don't own a dead blow hammer only a couple of rubber mallets but I had some brass 'punches' (brass shafts from large valves) that were my dad's so I ground the small end of one so that it will fit nicely into the counter sunk hold from when the shaft was manufactured so as not to damage the threads and make sure the punch didn't wander from the center.
The modified 'tool' is in the middle/you can see from the bottom 'punch' that dad had used it.

Here's a better look at the one I modified. I'll probably only use it for similar tasks.

Yes I polished it up a bit/it'll only be 'NEW' once.Our house is as Neil left it- an Aladdins cave of 'stuff'.
Kim X
-
The Following User Says Thank You to cudarunner For This Useful Post:
32t (07-14-2016)
-
07-14-2016, 02:29 AM #95Senior Member

- Join Date
- Feb 2012
- Location
- Menominee,MI
- Posts
- 1,624
Thanked: 325
Here are a few tools I had to modify for doing wire inlays. Old shaving brush handle with cut down x-acto handle inserted and an x-acto blade ground down and sharpened to cut the slot for the wire and a brass rod filed to a taper to use as a push rod to adjust the wire. Eventually I am going to spend a little more time to make some better tools, but since these work new ones can wait.

-
07-26-2016, 03:10 AM #96Senior Member
- Join Date
- Apr 2012
- Location
- Diamond Bar, CA
- Posts
- 6,553
Thanked: 3215
“Custom” Dremel Bit holder
I had been using a few of the 2X4 inch plastic boxes, (with holes drilled on the top) as Dremel bit holder, for bits I use frequently. Problem was they caught anything that got near them and went tumbling bits across the bench.
One day I was at a garage sale and saw a solid walnut board drilled with a boat load of 1/8 inch holes, a Cribbage board… and the light bulb went on.
It fits perfectly on the side of my wooden tool box, that holds most of my razor hand tools. The holes are 1/8 inch and drilled deep enough to hold the bits securely.
I still keep extra, duplicate bits in plastic compartmented boxes. This board keeps the most used bits readily visible and at hand and I am not even using, half of the holes.
Best of all it was 2 bucks. Now, I see them all the time, at garage sales and thrift stores.


-
The Following 6 Users Say Thank You to Euclid440 For This Useful Post:
cudarunner (07-26-2016), dinnermint (07-26-2016), Geezer (07-26-2016), Hirlau (07-26-2016), MikeB52 (08-06-2016), xiaotuzi (08-06-2016)
-
08-06-2016, 01:05 AM #97Senior Member

- Join Date
- Jun 2016
- Location
- NH
- Posts
- 1,924
Thanked: 1363
I use a length of sisal rope tight between two vises with metal polish rubbed on there to polish inside the barber notch. Just put the notch on the rope and rub back and forth. Low tech but it works, especially if the notch is too small for a dremel wheel.

-
-
08-08-2016, 06:42 PM #98Senior Member

- Join Date
- Aug 2016
- Location
- AK
- Posts
- 214
Thanked: 97
A custom stanley 307B. was a 6 oz. Ebay buy $12 shipped new old stock.

I ground/polished the head, 4.5 oz now and smooth, then shortened the handle to 10".
Also have a hunk of D2 on the way for a pinning anvil I will add to this post later. A small round I will drill for pin stock and polish up, heat treat ect. I saw one similar in a video somewhere.Last edited by AKmik; 08-08-2016 at 06:45 PM.
-
08-08-2016, 09:43 PM #99Senior Member

- Join Date
- Oct 2010
- Location
- 50 miles west of randydance
- Posts
- 9,699
Thanked: 1355
Last week a new OS&Y valve showed up on a pallet at work. Originally Posted by cudarunner
Guess who called Dibbs on the old one.....cudarunner likes this.
-
08-09-2016, 01:51 AM #100Senior Member

- Join Date
- Oct 2013
- Location
- Oakland Tn
- Posts
- 6,588
Thanked: 1894
Hey Roy was I the first one to use that brass drift? It was the perfect tool in my opinion, I,,m going to have to have one of them myself!!!! Tc
cudarunner and 32t like this.“ I,m getting the impression that everyone thinks I have TIME to fix their bikes”


 Reply With Quote

