
Results 1,441 to 1,450 of 4688
 13682Likes
Thread: The Butchered Blade
 LinkBack URL
 About LinkBacks
-
10-04-2015, 12:53 AM #1441

 Originally Posted by outback

Yeah Mike, at least the chip & pit are gone but that's not the way to do it.......................
That sucks!!!
Well, even though under the weather, I refuse to let it make me weaker so I have had a day with Gloria & she's a really fun gal!
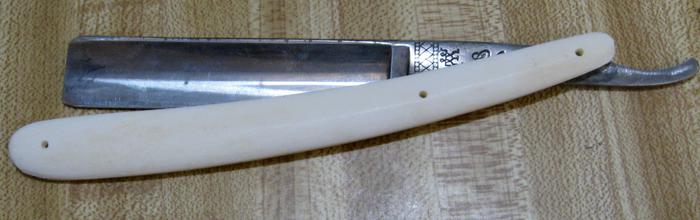
Here's with the scales laying on top of the blade with the pivot holes very close.
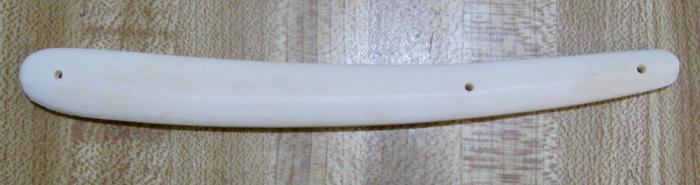
This is the scales still together with carpet tape , off the belt sander but have not touched sandpaper yet.
Here
s a comparison of the original crappy looking scales that were on it. Already sanded to 800 grit.
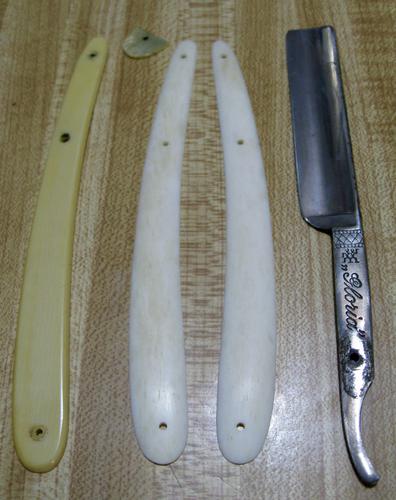
Brass edge
-
The Following User Says Thank You to engine46 For This Useful Post:
sharptonn (10-04-2015)
-
10-04-2015, 01:45 AM #1442Str8Faced Gent.


- Join Date
- Aug 2013
- Location
- Orangeville, Ontario
- Posts
- 8,456
- Blog Entries
- 1
Thanked: 4207
Gloria's gonna be a real looker Steve.
 MikeT likes this."Depression is just anger,, without the enthusiasm."
Steven Wright
https://mobro.co/michaelbolton65?mc=5
-
10-04-2015, 01:53 AM #1443
Originally Posted by MikeB52
Yep she should as long as she goes with the flow..................thanks B52.
-
10-04-2015, 03:07 AM #1444Senior Member


- Join Date
- Mar 2015
- Location
- Akron, Ohio
- Posts
- 12,106
Thanked: 4313
She's a looker already,Steve.
-
10-04-2015, 03:13 AM #1445Senior Member
- Join Date
- Mar 2015
- Location
- Akron, Ohio
- Posts
- 12,106
Thanked: 4313
I new better, should of could of, took out part of stabilizer and shaped the heel, before sanding. Originally Posted by MikeB52
Then i wouldn't have sanded it so thin in the first place.
Lesson learned. [emoji22]
Dammit........sharptonn likes this.Mike
-
10-04-2015, 09:59 AM #1446Senior Member

- Join Date
- Apr 2015
- Location
- Johannesburg
- Posts
- 2,498
Thanked: 410
There should be an "unlike" button. Originally Posted by outback
Hard luck Outback. MikeT likes this.Tony
-
The Following User Says Thank You to Thug For This Useful Post:
outback (10-04-2015)
-
10-04-2015, 10:31 AM #1447Fatty Boom Boom

- Join Date
- Jul 2012
- Location
- Rockville
- Posts
- 3,258
Thanked: 638
Agree about the buttons. I think there should be at least 3: Like---Meh---Blows
"Call me Ishmael"
CUTS LANE WOOL HAIR LIKE A Saus-AGE!
-
-
10-04-2015, 12:07 PM #1448www.edge-dynamics.com

- Join Date
- Feb 2013
- Location
- London
- Posts
- 3,066
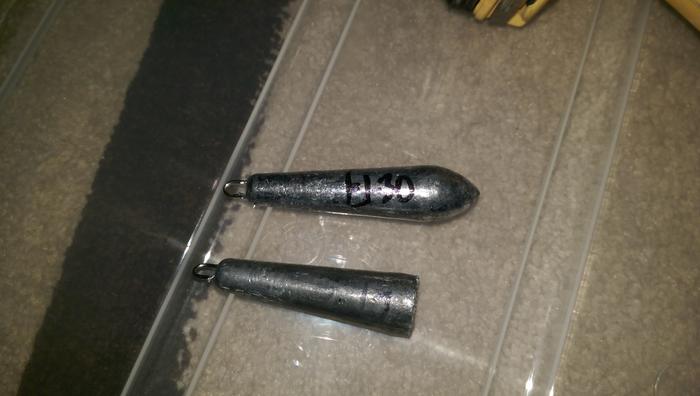
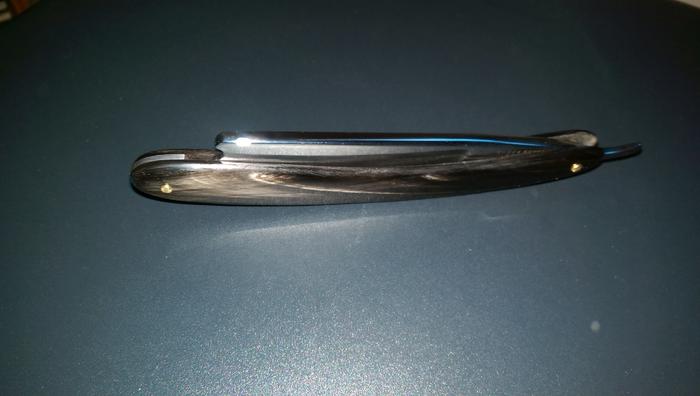
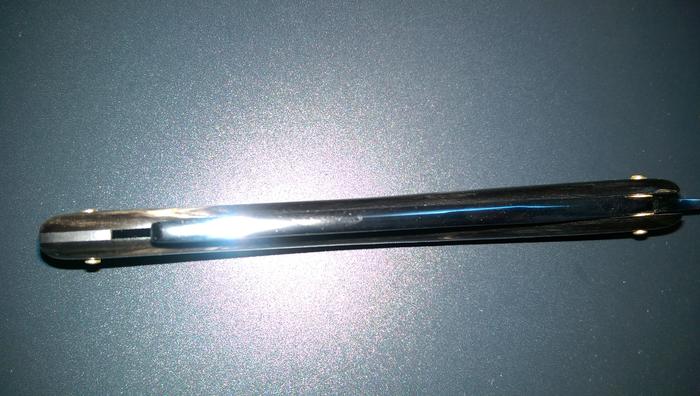
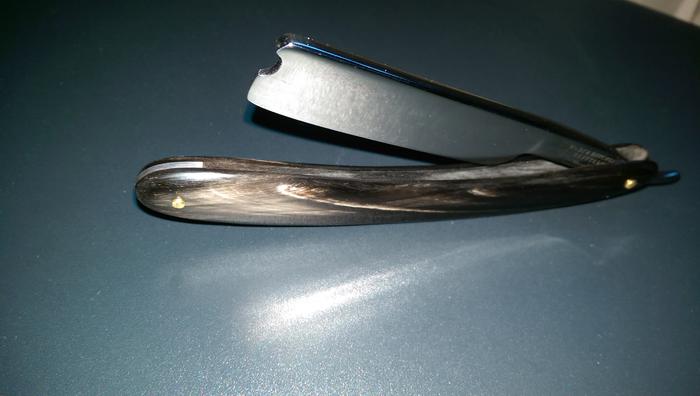
Thanked: 512 First Wedge
Made my first wedge this weekend.
I passed a fishing tackle shop, so I dove in there and purchased some lead weights.
The main thing is that I learnt a lot so next time I will do much better.
First mistake was not gluing the wedge pre pinning, therefore there were gaps rite at the end. I did the old tapping trick to fill in the gaps which in turn left me with more of a spacer than a wedge.
I need to buy some callipers so I can find the proper measurements. This one was just a poor guess which meant that the blade does not sit down as far as I wanted.
I'm about to put an edge on it and there is a lot of hone ware on the spine so I'm curious to see how the honing goes.
-
10-04-2015, 01:41 PM #1449Senior Member

- Join Date
- Jun 2015
- Location
- South Carolina
- Posts
- 1,838
Thanked: 516
Hey that looks great! Gotta give you props for making one from scratch, I've never done that, but I'll bet there are some challenges to doing it right. Originally Posted by JOB15
Do you have little practice pins that you can do a mock-up first? I get those hex head nuts & bolts and always put then together a couple few times first just to see how it fits. Had a wedge that I made a while back that was too skinny, instead of making a new one, I cut out some brass sheeting and put a piece on both sides of wedge then sanded it flush. It was now thicker and the blade sat deeper, problem solved and it looked cool too. This was much easier with the bolts, otherwise i would have said "Auh screw it" and left as it was..
That is looking really good, I would leave it as is too, no need to change it. A beauty! I imagine she will shave great! You must unlearn what you have learned.
Yoda
-
The Following User Says Thank You to MikeT For This Useful Post:
JOB15 (10-04-2015)
-
10-04-2015, 02:08 PM #1450Razor Vulture

- Join Date
- Oct 2010
- Location
- Lone Star State
- Posts
- 26,151
Thanked: 8616
Job, your wedge looks quite nice. The thickness next to the blade is quite adequate, IMO. IF you had it tapering to really thin at the end, it would 'bow' the scales and allow the blade to sit much lower. In this regard, some wedges which are thinner, will actually make MORE room in the scales than thicker ones because they have more taper to them.
You could realize this by removing the wedge, hammer the end of it thinner (which would make it spread out), sanding it tapered, reinstall it, file around it till almost there, tap it in at that point, and sand flush. Don't worry about a lead wedge being too 'perfect' as making it. Just get the taper right and make it oversized. The beauty of the lead is it can be cosmetically tuned after being pinned tightly at the bottom with the scales splayed, pinned at the top. filing, tapping in, sanding come in as the razor is finished.
Having the top splayed is key to pinning the bottom. I use a half-clothespin shoved down in between with scotch tape around the scales or microfasteners at the top with spacers in between to spread the top while pinning the bottom.
Another point to consider is when using a tapered wedge, SOME flexibility in the scales is necessary. That is why thin scales are/were used by production makers. Scales of wood will not allow for the slight bending necessary, esp as too thick.Last edited by sharptonn; 10-04-2015 at 02:12 PM.
"Don't be stubborn. You are missing out."
I rest my case.
-


 Reply With Quote