
Results 1,941 to 1,950 of 4688
 13682Likes
Thread: The Butchered Blade
 LinkBack URL
 About LinkBacks
-
10-19-2015, 03:32 PM #1941Senior Member


- Join Date
- Jun 2015
- Location
- South Carolina
- Posts
- 1,838
Thanked: 516
Ugh, I just realized that I wrote that wrong. On number one, I've found that I'm able to keep from removing as much spine thickness that way. It still happens but not to the extent.
On older blades I think also that the spine is of softer metal and so easier to remove material. Also easier to round off and keep that line sharp. Easy movements with the sand paper back and forth instead of getting it perfectly to that lip and making smaller movements accurately.
Ofcourse the line will be brought up towards the spine some too as the face is worked, but only until it done. But without the need or intent of removing hone wear, more so simply focusing on the uniform finish of the face.
At that point moving to the spine.
But yeah, if there is serious hone wear, the face would need more work bringing that line up.. IMOLast edited by MikeT; 10-19-2015 at 03:37 PM.
You must unlearn what you have learned.
Yoda
-
10-19-2015, 03:40 PM #1942Razor Vulture


- Join Date
- Oct 2010
- Location
- Lone Star State
- Posts
- 26,151
Thanked: 8616
Bill, simichrome and Maas seem pretty close to me. Blue magic seems much lighter. Best to brighten gold wash, etc.
"Don't be stubborn. You are missing out."
I rest my case.
-
-
10-19-2015, 03:52 PM #1943Senior Member


- Join Date
- Oct 2014
- Location
- Clarksville, TN
- Posts
- 907
Thanked: 167
I was wondering if you could use greaseless with a Dremel. Just using polish leaves shiny pits... Originally Posted by outback
 engine46 likes this.Smarter than I look or, not as dumb as I look. Whichever you prefer.
-
10-19-2015, 03:59 PM #1944Senior Member

- Join Date
- Apr 2014
- Location
- Goiânia, Brasil
- Posts
- 530
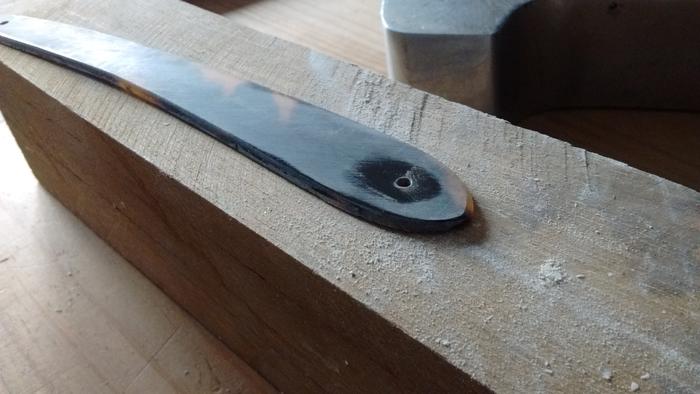
Thanked: 159 Some photos of the preliminar work on the J. Rodgers turtle frenchy
And so... it arrived as this: assembled, but with poorly glued backside scale.
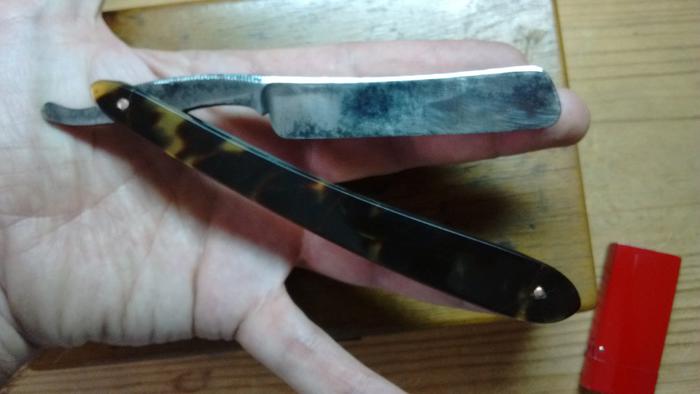
Reppined, of course. I never found until this date a factory pinned razor with copper pins.
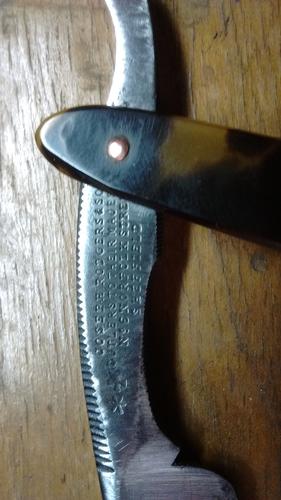
Unpinned and initial cleaning/sanding:

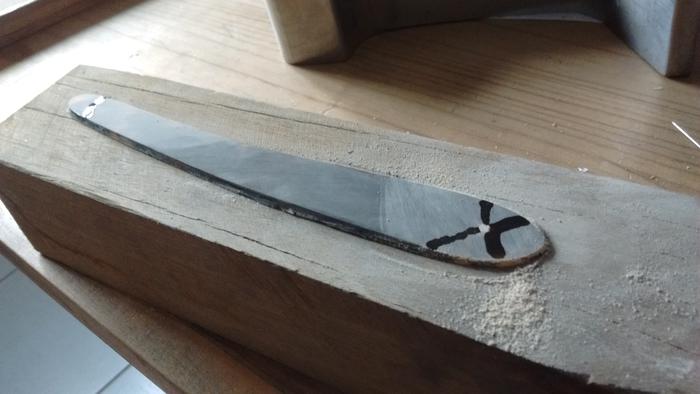
Boiling the backside scale pieces to bond together:
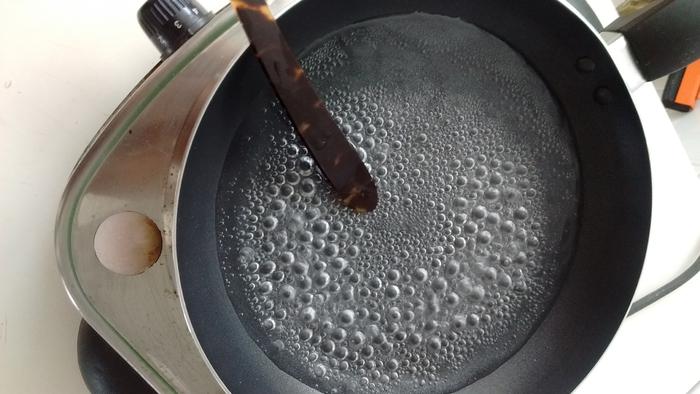
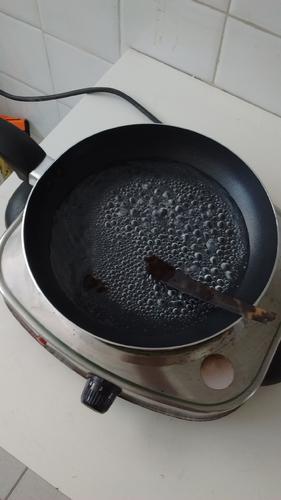
The bonded pieces were pressed together between hot moist wood planks, under the bed's foot. (Kind of Klugdy press).
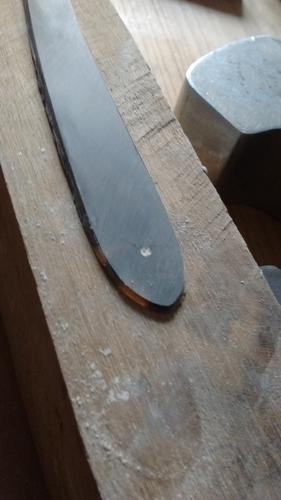
Sanding (note the depression caused by the previous pinning. A lot of pressure was applied on this scales. This pressure caused its breakage. Turtle is not a weak material, is way stronger than celluloid and an amazing strong material even when compared with modern plastics.
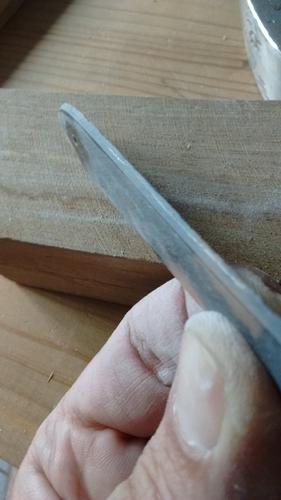
Further sanding and saving the turtle powder. Powder mixed with slow-curing flex-coat resin and used to fill remaining gaps:
Note the bonding lines between the turtle plates bonded to make the scales:
Final sanding: no bonding marks
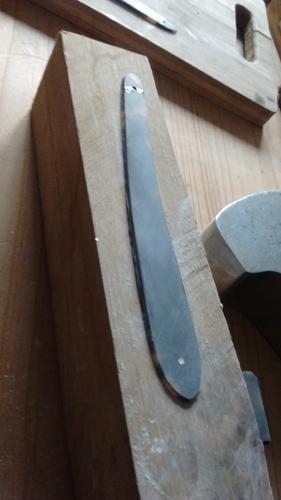
The resin is slow-curing type, and life is not only razor-related things. Milady must be obeyed and cared for, so it's all for now, dudes.
The next step is to attach the polycarbonate sheets on the medial face of scales.
-
-
10-19-2015, 03:59 PM #1945Senior Member


- Join Date
- Mar 2015
- Location
- Akron, Ohio
- Posts
- 12,106
Thanked: 4313
It would have never happened if it wasn't for you guys
-
10-19-2015, 05:11 PM #1946Razor Vulture
- Join Date
- Oct 2010
- Location
- Lone Star State
- Posts
- 26,151
Thanked: 8616
Awesome job, Matheus!
 MikeT likes this."Don't be stubborn. You are missing out."
I rest my case.
-
10-19-2015, 05:32 PM #1947Senior Member
- Join Date
- Mar 2015
- Location
- Akron, Ohio
- Posts
- 12,106
Thanked: 4313
You say flex coat.... Originally Posted by Matheus
Is it the same stuff used on fishing rod building.?Mike
-
The Following User Says Thank You to outback For This Useful Post:
engine46 (10-19-2015)
-
10-19-2015, 05:37 PM #1948
Dave I always used Maas but now I will be trying some greaseless since I have some plus I will also be trying simply some crop & see how well that works. It makes common sense. It would work so I really want to try some. Tom is the one to give credit to for that one. He first brought it up & I might have thought about it at one point in time but when would be a question there. Originally Posted by ChopperDave
Last edited by engine46; 10-19-2015 at 05:53 PM.
-
10-19-2015, 05:43 PM #1949Senior Member
- Join Date
- Apr 2014
- Location
- Goiânia, Brasil
- Posts
- 530
Thanked: 159
Yes, same thing. Vinylic resin, I believe. Have not the original packaging, a friend of mine who repairs and builds fishing rods gave me a little. Originally Posted by outback
-
The Following User Says Thank You to Matheus For This Useful Post:
MikeT (10-19-2015)
-
10-19-2015, 05:55 PM #1950
Cool! I think outback mentioned it in a longer post in this thread quite a ways back but that opens a new world for me fixing some scales like that! Originally Posted by Matheus
MikeT likes this.


 Reply With Quote
