
Results 4,391 to 4,400 of 4688
 13682Likes
Thread: The Butchered Blade
 LinkBack URL
 About LinkBacks
-
08-18-2016, 01:20 AM #4391Razor Vulture


- Join Date
- Oct 2010
- Location
- Lone Star State
- Posts
- 25,897
Thanked: 8591
Good approach to the oldies, outback! Fast and easy to do the back-slash on the bottom stabilizer and be done with it!
Brilliant!
Saves steel too, I expect!

-
The Following User Says Thank You to sharptonn For This Useful Post:
outback (08-18-2016)
-
08-18-2016, 01:26 AM #4392Senior Member


- Join Date
- Mar 2015
- Location
- Akron, Ohio
- Posts
- 11,995
Thanked: 4306
Just looks like you need to grind the top of the spine back some more, then it will match the bottom's shape. Originally Posted by dinnermint

They should be even, in radius.

Or at least as close possible.Mike
-
08-18-2016, 01:32 AM #4393Senior Member

- Join Date
- Jan 2012
- Location
- Waukesha, Wisconsin
- Posts
- 1,943
Thanked: 390
Did you reduce the width of the blade, to maintain the geometry of the bevel angle? Originally Posted by outback
I'm probably going to do just that and make the toe a more gentle curve
-
08-18-2016, 01:33 AM #4394Senior Member

- Join Date
- Jun 2016
- Location
- NH
- Posts
- 1,924
Thanked: 1363
Really like the way these turned out, nice work. The Hess is calling me! You must have reshaped the toe a little because it blends nicely, looks natural. Good on the stabilizer too. I'm beginning to see broken blades in a different light - some can be shorties one direction, some can be shorties the other way! Originally Posted by outback
-
The Following User Says Thank You to xiaotuzi For This Useful Post:
outback (08-18-2016)
-
08-18-2016, 01:47 AM #4395Senior Member
- Join Date
- Mar 2015
- Location
- Akron, Ohio
- Posts
- 11,995
Thanked: 4306
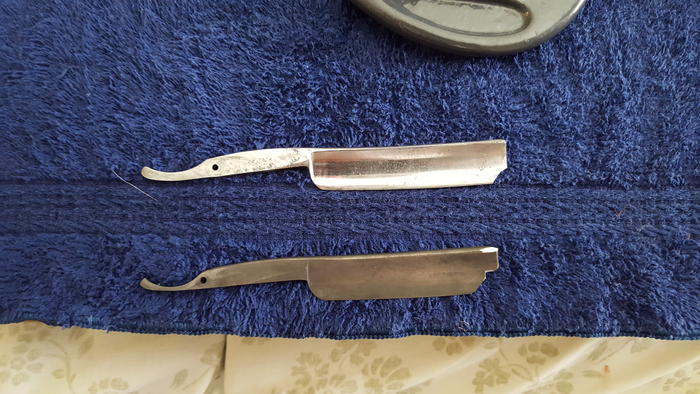
Yes I reshaped the toe. Or it would have looked like a meat cleaver of some sort.
But only from mid toe to edge.
 Mike
Mike
-
-
08-18-2016, 08:21 AM #4396
Nice job Mike. I have something to send ya with the nickel rod & collars.
 outback likes this.
-
The Following User Says Thank You to engine46 For This Useful Post:
outback (08-18-2016)
-
08-19-2016, 03:54 AM #4397Senior Member
- Join Date
- Mar 2015
- Location
- Akron, Ohio
- Posts
- 11,995
Thanked: 4306
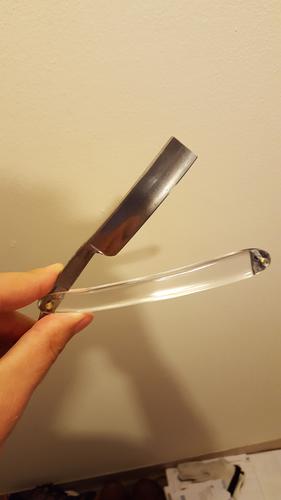
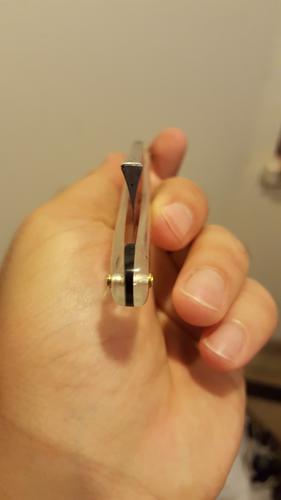
Finished up cleaning the Boker.
Did some hand sanding w/600&1000, removing most of the pits & patina, then gave the blade a satin finish to help hide some of the uglies, and highlight the etch.


No buffing for this one boys...as is, it is.Mike
-
08-19-2016, 12:04 PM #4398Senior Member


- Join Date
- Oct 2011
- Location
- Standish, Maine
- Posts
- 816
Thanked: 952
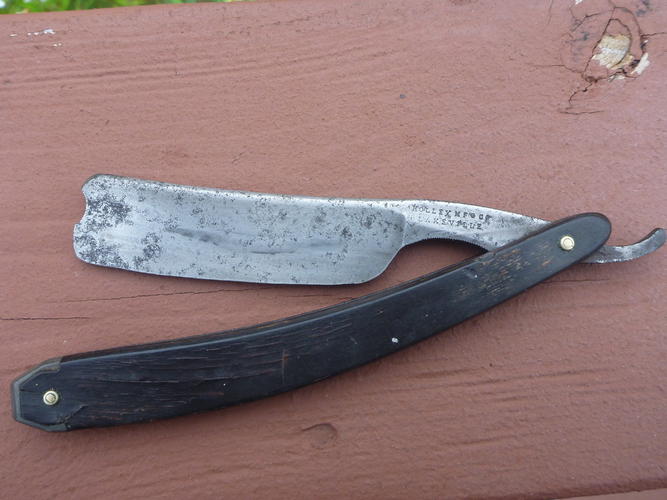
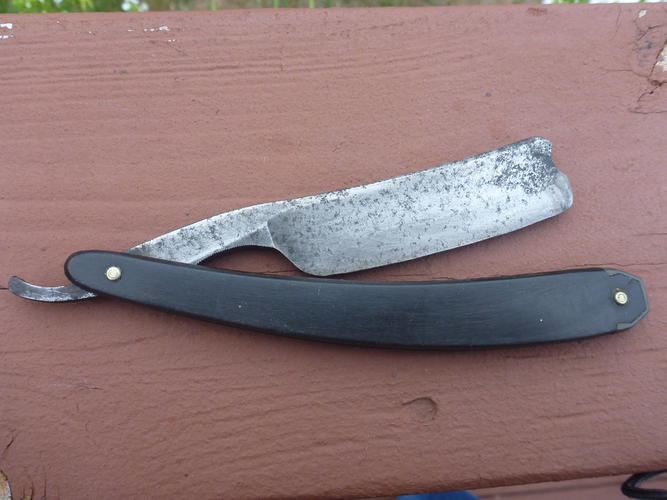
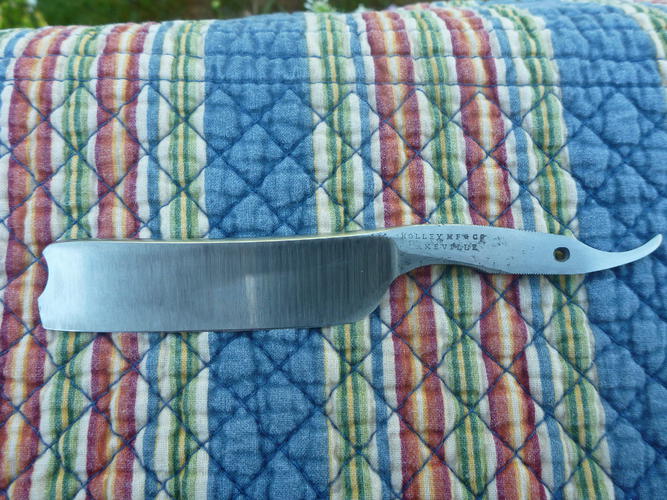
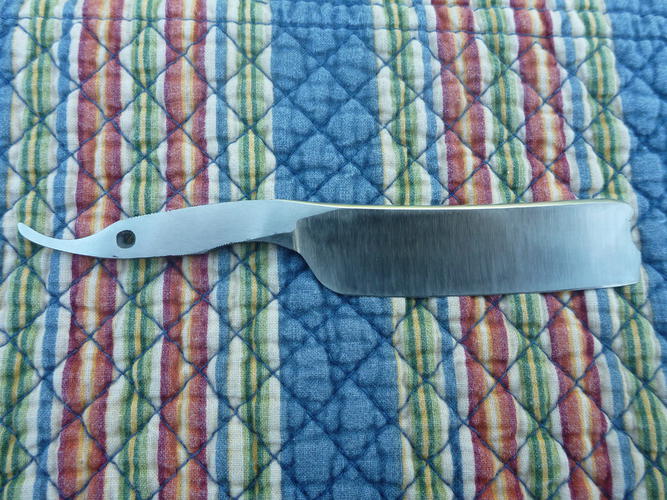
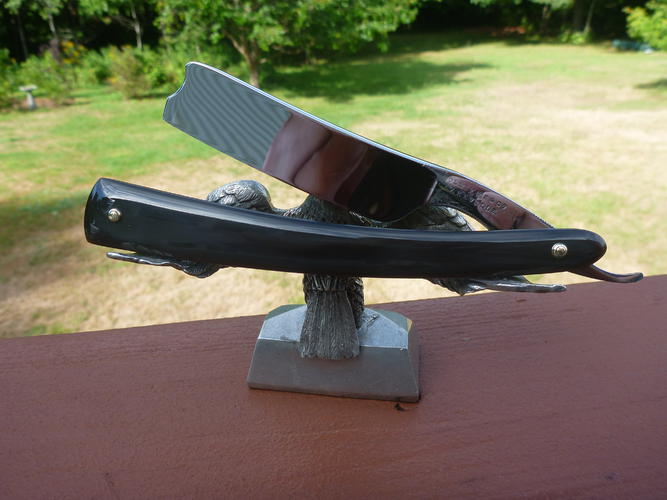
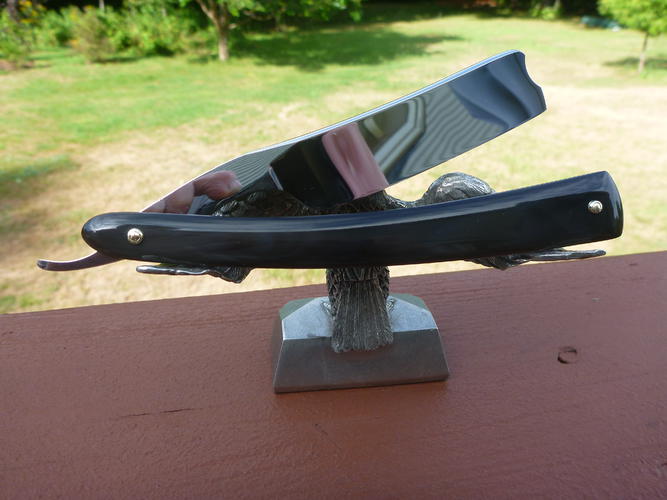
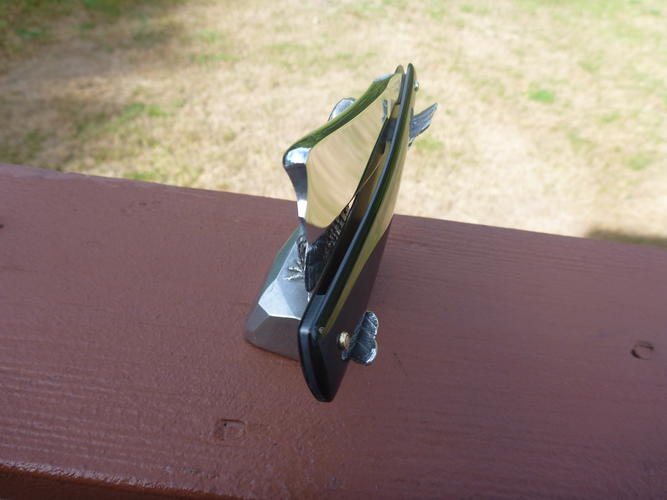
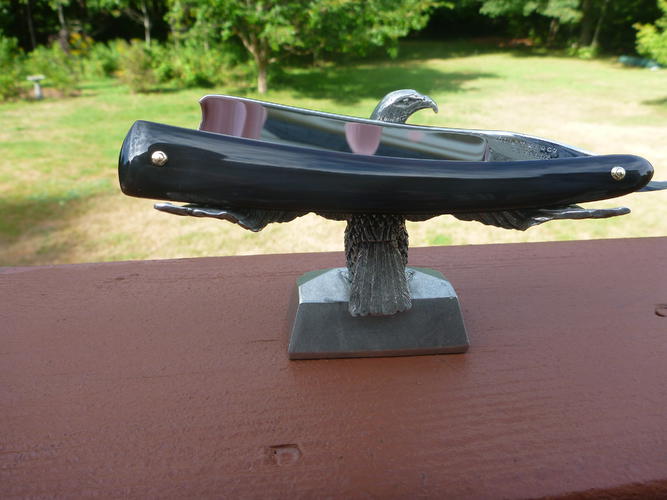
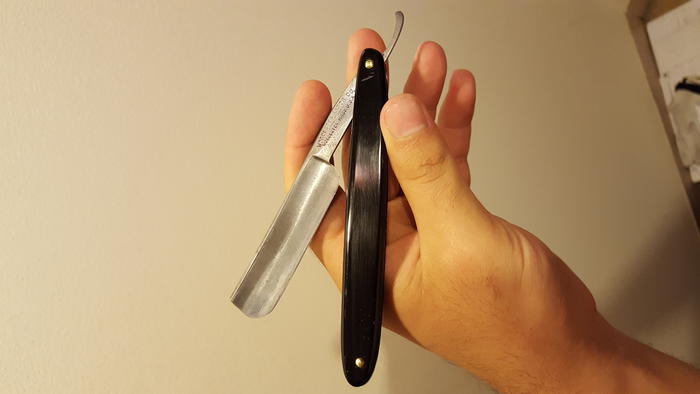
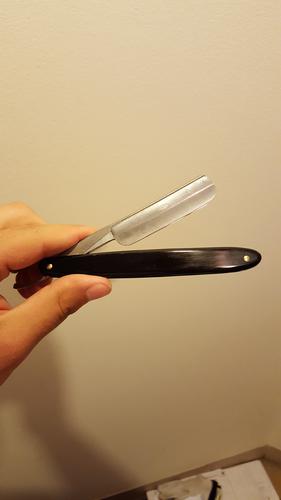
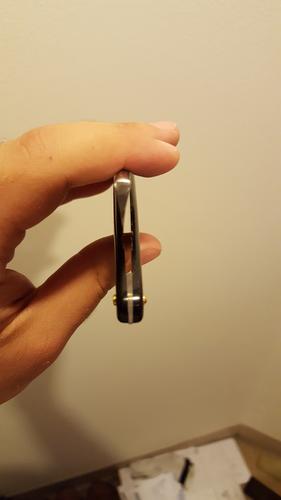
I'm not sure if this qualifies as a butchered blade but it was the worst pitted blade in my restore box. Started as a 7/8 and ended at .850. The pitting along the bevel was terrible. There was even a small frown near the toe that may have been the result of corrosion. Seemed an odd place for a frown. I wanted to see just what I could clean up on my grinder. The makers stamp was a bit light and uneven so I was forced to leave some pitting. The bevel came out small and even. I'm progressing along the learning curve with the grinder. Some before pictures, a couple after 600 grit and the finished blade in black horn. I have a few Holley razors but this is the first coffin I have found.

-
-
08-19-2016, 12:07 PM #4399Senior Member
- Join Date
- Mar 2015
- Location
- Akron, Ohio
- Posts
- 11,995
Thanked: 4306
Lookin good Karl, haven't got into grinding yet, still all by hand...phew!
karlej likes this.Mike
-
08-19-2016, 01:19 PM #4400Str8Faced Gent.


- Join Date
- Aug 2013
- Location
- Orangeville, Ontario
- Posts
- 8,396
- Blog Entries
- 1
Thanked: 4200
Nice work Karl! that blade only qualifies due to the before picture. There's nothing butchered about that result sir. Very fine grinding evenness achieved.
Well done! "Depression is just anger,, without the enthusiasm."
Steven Wright
https://mobro.co/michaelbolton65?mc=5


 Reply With Quote

