
Results 51 to 60 of 66
 143Likes
Thread: W&B 8/8 FBU shorty project
 LinkBack URL
 About LinkBacks
-
10-05-2019, 05:16 PM #51Senior Member


- Join Date
- Feb 2013
- Location
- Haida Gwaii, British Columbia, Canada
- Posts
- 14,457
Thanked: 4830
Satin finish on those scales should make them quite lovely. Progress is looking good.
It's not what you know, it's who you take fishing!
-
10-05-2019, 05:57 PM #52Razor Vulture

- Join Date
- Oct 2010
- Location
- Lone Star State
- Posts
- 26,208
Thanked: 8626
JJ, consider shortening and re-profiling the scales at the top to fit your shortened blade.
Not hard to do. Microfastener the halves together at the bottom and tape them securely together.
Grind, sand and drill both together.
-
10-05-2019, 06:36 PM #53Senior Member

- Join Date
- Feb 2019
- Location
- Salida, CA
- Posts
- 600
Thanked: 94
I shortened them before the epoxy repair. Didn't make sense to repair what I was going to remove. The tip of the blade sits at about the same spot as it did before I cut the blade.
Are you thinking I need to take more off the pivot end? It's really close to the original pivot hole now, I was a little worried about strength. With the epoxy fill, it might be fine? I'll bolt them up when they come out of the oil and see what you think.O'Toole's commentary on Murphy's Law: Murphy was an optimist.
-
10-05-2019, 08:24 PM #54Razor Vulture
- Join Date
- Oct 2010
- Location
- Lone Star State
- Posts
- 26,208
Thanked: 8626
OH, I did not see where you had done that.
That is what I did above. Sawed them off at the top pivot hole. IIRC, I took some more off before it was over
-
10-05-2019, 09:12 PM #55Senior Member
- Join Date
- Feb 2019
- Location
- Salida, CA
- Posts
- 600
Thanked: 94
Sorry, should have mentioned it and done a before/after. My brain just lumped it in with reshaping/repairing and I didn't think of it. I'll probably get it bolted up tomorrow and post a pic.
Today I'm going to finish cleaning up the mess I made on the collars and make a wedge sanding thing-a-ma-bob.outback likes this.O'Toole's commentary on Murphy's Law: Murphy was an optimist.
-
10-06-2019, 06:29 PM #56Senior Member
- Join Date
- Feb 2019
- Location
- Salida, CA
- Posts
- 600
Thanked: 94
Good weekend for the shorty!
Got my mess cleaned off the collars. They have a bit of a rough look I kinda like. I may hit them with a tiny bit of polish at the end, I'll decide when I get there.
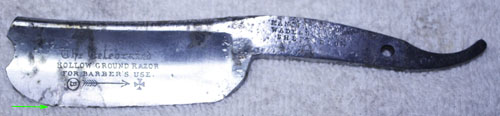
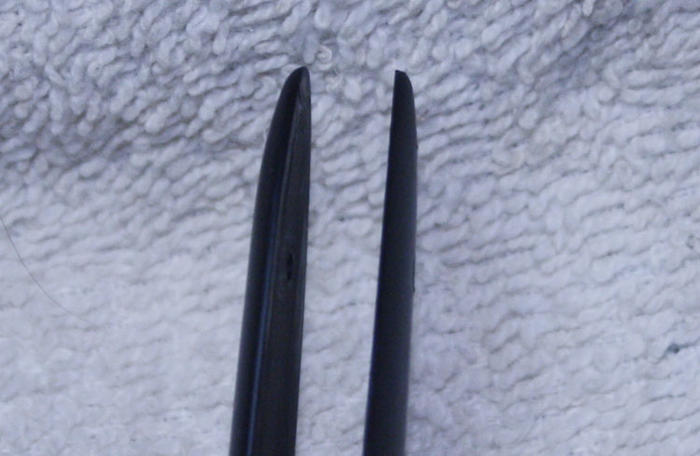
Tried the rust conversion thing with boiling water. I left the blade suspended in simmering water for around 40 minutes or so. It didn't blue the blade, but did seem to clean some of the black out of some pits. I would probably do this again, just because I feel like rust down in those pits is less likely to continue eating metal. I could of course be totally wrong . I learned something else while doing this...boiling water will melt epoxy. I had the pivot hole epoxied and drilled, when I pulled it out the epoxy was gone. I think that's what caused some of the streaking on the blade faces. It cleaned up with some 600 grit and steel wool, so no harm. I did manage to damage the edge in a couple of spots while messing with getting the blade into the water (green arrow). I took it back to the 1K for a bunch of strokes and was really nervous about getting into that pit near the edge
 . Good news! The pit wasn't as deep as I thought and it started disappearing as I worked the damage out
  . I feel much better about this taking an edge.
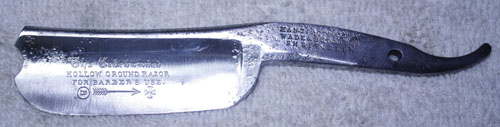
Just out of the water
After some clean up
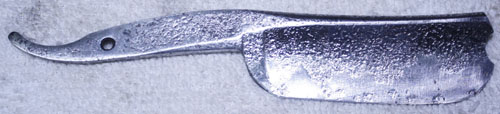
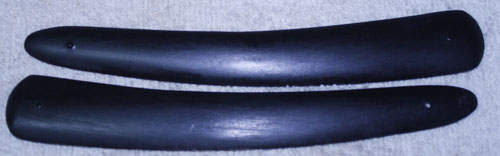
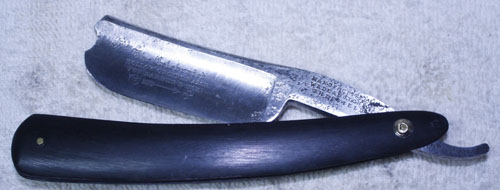
I also took the scales out of the oil and did an initial bolt up with one of the collars setting on the bolt head. That oil does some wondrous things to horn. I like the satin glow they have and will leave them as is. I think the proportions of the scales came out well, but I'd like to hear some more experienced opinions.
Fresh out of the oil
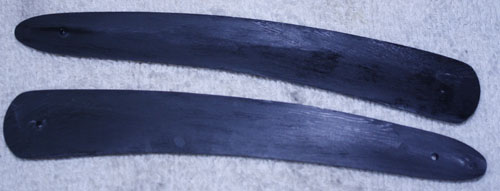
First bolt up
Now to conquer my wedge making demons... O'Toole's commentary on Murphy's Law: Murphy was an optimist.
-
10-06-2019, 08:48 PM #57Senior Member


- Join Date
- Mar 2015
- Location
- Akron, Ohio
- Posts
- 12,118
Thanked: 4316
Scales look awesome, nothing I could add to that.
JellyJar likes this.Mike
-
The Following User Says Thank You to outback For This Useful Post:
JellyJar (10-06-2019)
-
10-12-2019, 07:03 PM #58Senior Member
- Join Date
- Feb 2019
- Location
- Salida, CA
- Posts
- 600
Thanked: 94
Been working on the wedge and have some progress and a couple of questions.
The first wedge got a little thin and had the blade sitting higher than I liked so this is attempt #2. I think the blade is in a good place.

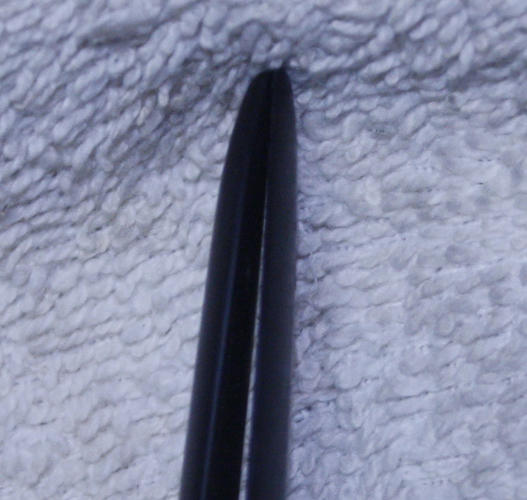
I made a little sanding gizmo and it has made working on the wedge much easier. I noticed the pins in the gizmo are leaving marks on the flat end of the wedge and the pin hole is slightly enlarging. I'm not overly concerned about either since the marks will be difficult to see once assembled and the hole size shouldn't affect the performance. Is this type of thing normal with these sanding gizmos? Is there an adjustment/redesign to eliminate this or should I start the flat end with some extra lead and sand the marks off at the end?
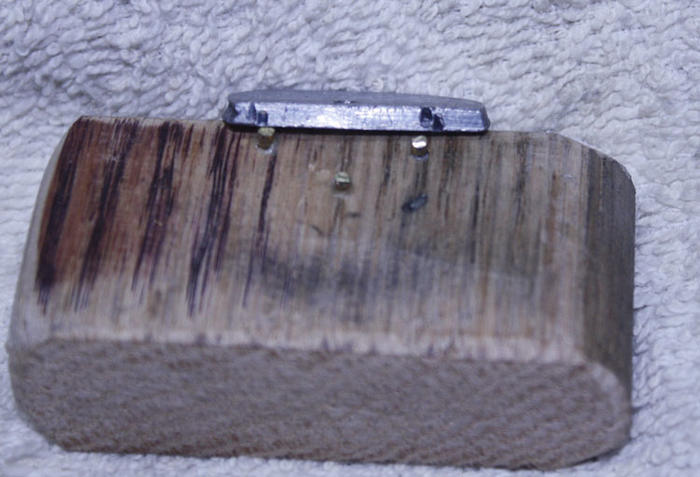
Right now on the taper I get good separation of the scales at the pivot end when I pinch the back, but they close up when I tighten the bolt down. I'm thinking this is because the wedge is still flat near the pin hole or is my logic faulty?
Thanks in advance for any advice.O'Toole's commentary on Murphy's Law: Murphy was an optimist.
-
10-13-2019, 12:36 AM #59Senior Member
- Join Date
- Apr 2012
- Location
- Diamond Bar, CA
- Posts
- 6,553
Thanked: 3215
“I get good separation of the scales at the pivot end when I pinch the back, but they close up when I tighten the bolt down. I'm thinking this is because the wedge is still flat near the pin hole.”
Are you saying, the wedge is not tapered at the pin holes?
What it is the ratio of taper of the wedge, from the front to the back of the wedge? Make sure the wedge sides are flat on both sides, and that the scales are flat on the inside, at the wedge.
File the wedge taper on a large file, (wider than the wedge) laid flat on the bench, to ensure both sides are flat. Measure the wedge thickness with a pair of calipers. The top and bottom should be the same, the front should be double the thickness of the back side. If you sand on sandpaper, your wedge tapers may not be flat. You only need to taper one side.
I do not use a Gizmo but make the wedge slightly over size and trim to fit the scale. Grind or file the wedge to the scale after the wedge is pinned tight. Remove a hair of the scale on the end so you get a tight fit where the scale and wedge meet. You should get the same tight fit when bolted up tight. If not your wedge or inside of the scales are not flat or you do not have enough taper on the wedge. You should have about ¾ of an inch separation, at the pin side when the wedge is bolted tight.
Your photo looks like one scale is longer than the other. “Glue” the scales together with scotch double sided tape, make sure the pin holes line up exactly, and the scales are the same length. A couple long pieces of rod, (4-6 inches) run through the pin holes will act like winding sticks and the long pins will exaggerate pin holes that are not drilled straight.
Re-drill if necessary, and drill a bit oversized, to allow for some centering alignment adjustment when pinning
It can be more difficult to re-fit a set of scales than make a new set, where the scales are flat, and the holes are drilled straight (drilled when the scales were flat).
If the scales are not flat on the inside, the holes not perfectly in alignment and drilled straight and the wedge sides flat and hole larger than the pin, the razor will fight you all the way.
Take a few minutes to make sure everything is flat, and holes are straight, it is worth the effort and any extra time re-finishing the scales if needed.
-
The Following 2 Users Say Thank You to Euclid440 For This Useful Post:
JellyJar (10-13-2019), ScoutHikerDad (10-13-2019)
-
10-13-2019, 01:30 AM #60Senior Member
- Join Date
- Feb 2019
- Location
- Salida, CA
- Posts
- 600
Thanked: 94
Thanks for the advice. I'll put some more time in and post the results. I'm getting to the part where I'm anxious to see it finished. Just need to force myself to slow down and finish it to the best of my ability. Originally Posted by Euclid440
 O'Toole's commentary on Murphy's Law: Murphy was an optimist.


 Reply With Quote