
Results 831 to 840 of 2504
 8857Likes
Thread: 51 MG restoration.
 LinkBack URL
 About LinkBacks
-
05-03-2021, 03:00 AM #831'with that said'


- Join Date
- Aug 2010
- Location
- Walla Walla in WA State USA
- Posts
- 11,249
Thanked: 4237
Always remember what my college auto body instructor said many times "You can't fill a high spot"--I'm sure you understand what he was talking about.
Lead is great if a bit hard to apply properly and it is heavy. About 'Bondo' the plastic fillers of years gone by aren't even in the same class of today's fillers. With that said, even back in the 70's the standard for 'quality' application was no more than an 1/8th of an inch. I always tried for no more than a 1/16th of an inch sort of a 'shim' coat.
I was taught that a thin coat of filler was better than really coats of primer/filler as the primer wasn't designed to be applied that thick.
After graduation and at my first autobody repairman job the other repairmen laughed their asses off when I removed my first dent by hammer off dolly then finished up with peck and filling and didn't use any filler, just sanded the paint into a bevel and then applied a coat of primer/filler. At $13 an hour labor rate with the shop getting 60% of the $13's I still think I was making money as I didn't have to wait for the filler to dry, just the primer. Who knows? MikeB52 likes this.Our house is as Neil left it- an Aladdins cave of 'stuff'.
Kim X
-
05-05-2021, 02:13 AM #832Str8Faced Gent.


- Join Date
- Aug 2013
- Location
- Orangeville, Ontario
- Posts
- 8,456
- Blog Entries
- 1
Thanked: 4207
Cant remember if Ive ever been excited about getting nails before.
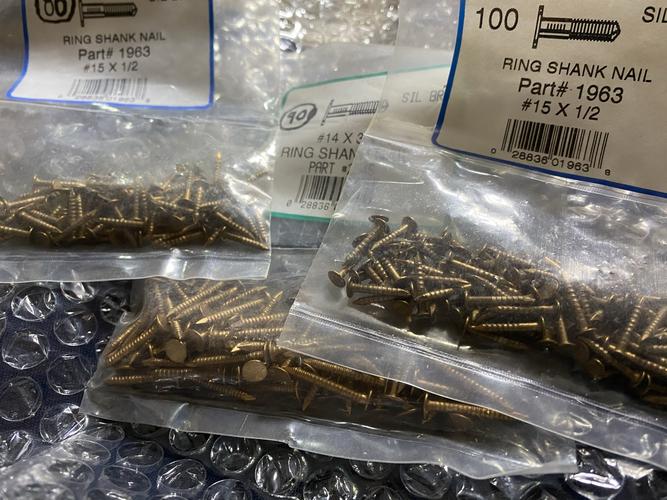
But special, silicon bronze ring nails aint something Ive ever went lookin for before either.
Supposedly the bees knees when it comes to holding the panels tight on wood for a really long time..
 "Depression is just anger,, without the enthusiasm."
Steven Wright
https://mobro.co/michaelbolton65?mc=5
-
05-05-2021, 02:38 AM #833'with that said'
- Join Date
- Aug 2010
- Location
- Walla Walla in WA State USA
- Posts
- 11,249
Thanked: 4237
Damn it! So much for getting you a bunch of 'em for Christmas! Originally Posted by MikeB52

 MikeB52 likes this.Our house is as Neil left it- an Aladdins cave of 'stuff'.
Kim X
-
05-05-2021, 03:14 AM #834Skeptical Member

- Join Date
- Nov 2016
- Location
- Colorado Springs
- Posts
- 10,548
Thanked: 2194
I used drywall screws for most all wood to Anything. But I guess not in this situation.
cudarunner and MikeB52 like this.It's just Sharpening, right?
Jerry...
-
05-05-2021, 03:43 AM #835'with that said'
- Join Date
- Aug 2010
- Location
- Walla Walla in WA State USA
- Posts
- 11,249
Thanked: 4237
Ring shank nails are often used in the construction of wooden pallets----try pulling one sometime. Usually the wood breaks or the heads pull of or crack before the shanks let go. Originally Posted by Gasman
Gasman likes this.Our house is as Neil left it- an Aladdins cave of 'stuff'.
Kim X
-
05-06-2021, 03:15 AM #836Senior Member


- Join Date
- Aug 2009
- Location
- New Hampshire
- Posts
- 3,955
Thanked: 581
No such thing as High Build Epoxy Primer. Epoxy primer does not sand well. After you apply 2 coats of epoxy...let it go 24 hours...them hit it with a maroon scuff pad...wash the panel...then apply some 2k high build primer surfacer. That stuff will block out nice. If you go through...re-coat bare metal areas with epoxy. Ive been doing this every day of every year since 1976 ...and will be doing it tomorrow...lol Originally Posted by MikeB52
PaulFLUS likes this.
-
The Following User Says Thank You to nessmuck For This Useful Post:
MikeB52 (05-06-2021)
-
05-06-2021, 03:21 AM #837Senior Member
- Join Date
- Aug 2009
- Location
- New Hampshire
- Posts
- 3,955
Thanked: 581
Also....SEM makes a product called “Rust Trap “ which blows POR 15 away. It’s more user friendly and it sticks to clean bare metal...where POR 15 has to be metal washed and then rinsed with water to stick on clean bare metal. And paint and body filler sticks to neither products...been there...done that.
-
The Following User Says Thank You to nessmuck For This Useful Post:
MikeB52 (05-06-2021)
-
05-06-2021, 04:11 AM #838Str8Faced Gent.
- Join Date
- Aug 2013
- Location
- Orangeville, Ontario
- Posts
- 8,456
- Blog Entries
- 1
Thanked: 4207
Thanks. I’ll look for rust trap up here. Will spray through a 1.5 tip ok? My por 15 is getting old and I need to buy more anyway. Appreciate the tip.
Figure I go 2 coats epoxy off frame, then use the high build after I nail the panels on?
I was planning on doing the lead on frame, get everything as close and aligned as I can, then take everything off for the prime.. presuming lead bends a bit it should handle going off and on once? Can’t get Eastwood stuff up here so was going to try rosin core solder as my tinner."Depression is just anger,, without the enthusiasm."
Steven Wright
https://mobro.co/michaelbolton65?mc=5
-
05-06-2021, 04:41 AM #839Senior Member
- Join Date
- Aug 2009
- Location
- New Hampshire
- Posts
- 3,955
Thanked: 581
I’ve never sprayed it before....I just use a brush for bad rusty areas. It flows out smooth and look good. Yup...mock up every panel and get it all fit...gaps and clearance ...so no panels are scraping when opening doors ...trunk lid ...hood.. Then remove for priming ,like you said. Different epoxies ...have different “Windows” . Some have a 3 day window...other have a 7 day window. So plan on getting your epoxy down...wait 24 hours..then top coat with 2k primer. If all hell breaks loose...and you miss that window....just scuff panels...and lay down 1 coat of epoxy ...wait 24 hours...then apply 2k primer surfacer.
-
The Following User Says Thank You to nessmuck For This Useful Post:
MikeB52 (05-06-2021)
-
05-06-2021, 04:43 AM #840Senior Member
- Join Date
- Aug 2009
- Location
- New Hampshire
- Posts
- 3,955
Thanked: 581
Also some epoxy have an induction period ,after you mix it. So read the tech sheet on your choice of epoxy.
-
The Following User Says Thank You to nessmuck For This Useful Post:
MikeB52 (05-06-2021)


 Reply With Quote