
Results 821 to 830 of 2504
 8857Likes
Thread: 51 MG restoration.
 LinkBack URL
 About LinkBacks
-
04-28-2021, 02:58 AM #821'with that said'


- Join Date
- Aug 2010
- Location
- Walla Walla in WA State USA
- Posts
- 11,250
Thanked: 4237 I"m a huge fan of 'Fixeez' channel on YouTube and he uses them. The first project I saw him using them I thought to myself "Self, these would be a great tool for Mike and his MG project so I emailed him with links galore.
 Originally Posted by MikeB52

As usual I was a few decades late and way more than a dollar short. Our house is as Neil left it- an Aladdins cave of 'stuff'.
Kim X
-
04-28-2021, 03:27 AM #822Str8Faced Gent.


- Join Date
- Aug 2013
- Location
- Orangeville, Ontario
- Posts
- 8,456
- Blog Entries
- 1
Thanked: 4207
The links, and the consideration was greatly appreciated buddy.
 cudarunner likes this."Depression is just anger,, without the enthusiasm."
Steven Wright
https://mobro.co/michaelbolton65?mc=5
-
The Following User Says Thank You to MikeB52 For This Useful Post:
cudarunner (04-28-2021)
-
05-01-2021, 02:48 AM #823Str8Faced Gent.
- Join Date
- Aug 2013
- Location
- Orangeville, Ontario
- Posts
- 8,456
- Blog Entries
- 1
Thanked: 4207
This weekend tackling the rear tubs, last part of the main car body restoration!
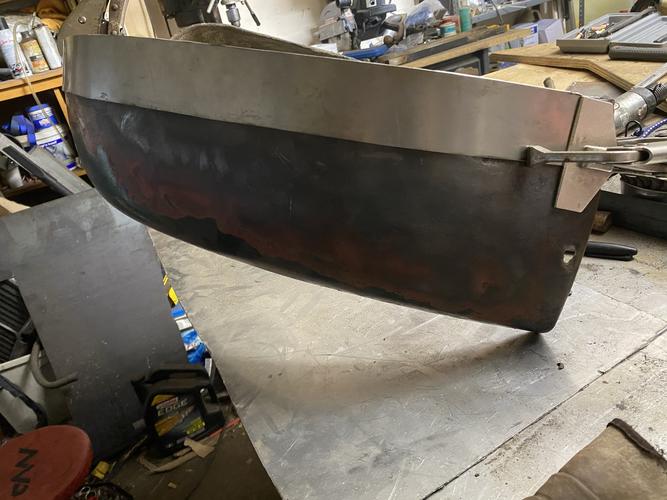
Same as like the other repairs, lay some 18 gage to shape over the target area and tack in place.
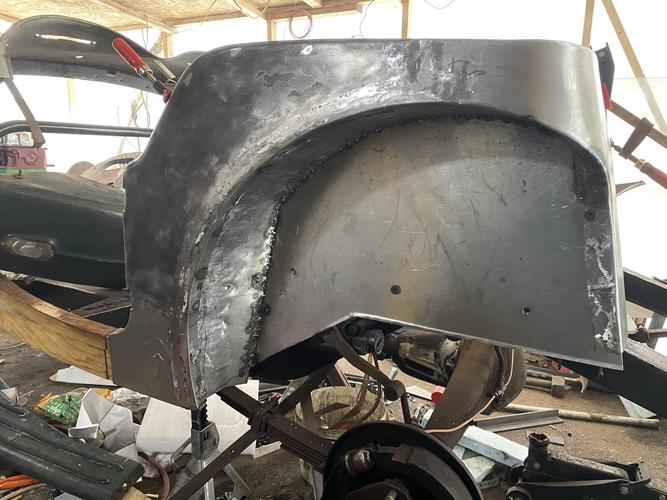
Flip it over and tack from the inside, a little more thoroughly.
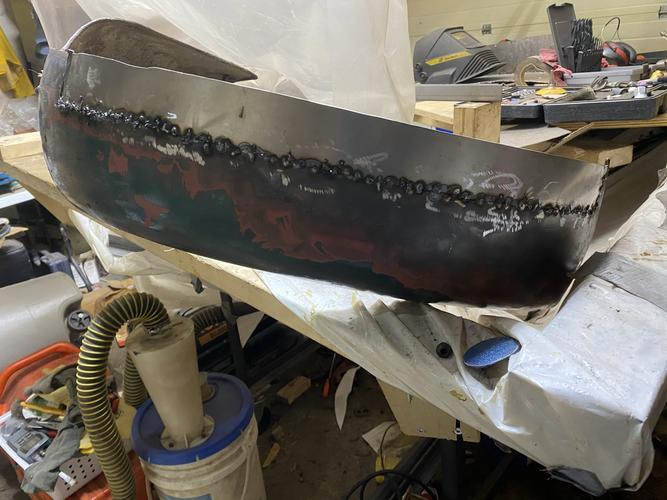
Grind it flush, look for gaps, redo, repeat, done..
Then I can test fit everything back on the car with the clecos and start tack welding in place, itll all fit up after final removal for off frame priming for sure that way..
"Depression is just anger,, without the enthusiasm."
Steven Wright
https://mobro.co/michaelbolton65?mc=5
-
05-01-2021, 02:54 AM #824'with that said'
- Join Date
- Aug 2010
- Location
- Walla Walla in WA State USA
- Posts
- 11,250
Thanked: 4237
I think that once you get this put back together, painted and back on the road I'll send Fitzee's a link to your project. I 'Think' that he'd be proud. Well he might give you a minor ding for using a stretcher/shrinker as he doesn't use one-----------actually he doesn't own one! Originally Posted by MikeB52
 MikeB52 likes this.Our house is as Neil left it- an Aladdins cave of 'stuff'.
Kim X
-
05-01-2021, 03:14 AM #825Str8Faced Gent.
- Join Date
- Aug 2013
- Location
- Orangeville, Ontario
- Posts
- 8,456
- Blog Entries
- 1
Thanked: 4207
He’d probably get a kick out of a main landers project. I’ve certainly used some of his techniques and suggestions along the way on this project so I would love to buy him a drink too.
Cangooner likes this."Depression is just anger,, without the enthusiasm."
Steven Wright
https://mobro.co/michaelbolton65?mc=5
-
05-01-2021, 03:18 AM #826'with that said'
- Join Date
- Aug 2010
- Location
- Walla Walla in WA State USA
- Posts
- 11,250
Thanked: 4237
Originally Posted by MikeB52

 Our house is as Neil left it- an Aladdins cave of 'stuff'.
Kim X
-
05-02-2021, 03:18 PM #827Str8Faced Gent.
- Join Date
- Aug 2013
- Location
- Orangeville, Ontario
- Posts
- 8,456
- Blog Entries
- 1
Thanked: 4207
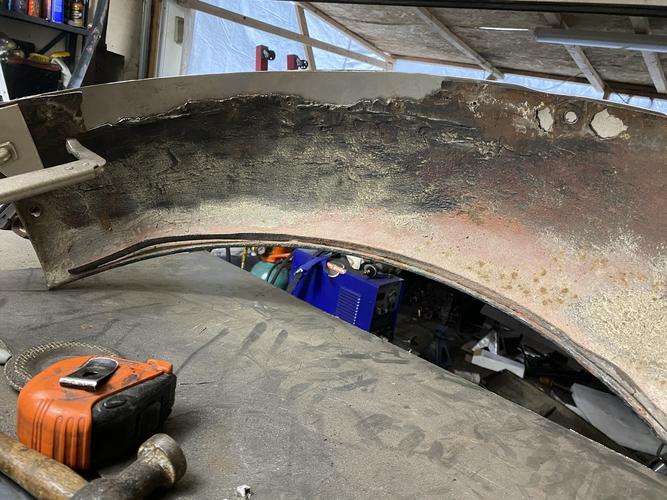
Checking fit today before beating the tubs for the required inner lip curves.
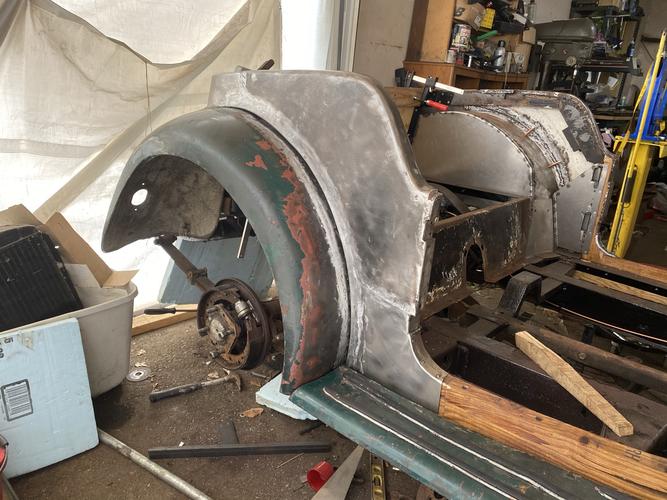
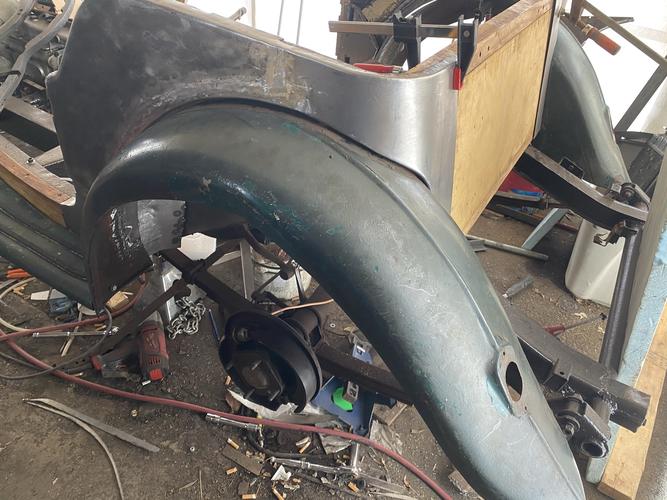
Nothing bolted yet, so the bit of sag and gap everywhere is ok, for now. What matters is consistency of gap and that the running board meets the new and old steel smoothly. Which they appear to well enough.
"Depression is just anger,, without the enthusiasm."
Steven Wright
https://mobro.co/michaelbolton65?mc=5
-
05-03-2021, 02:26 AM #828Str8Faced Gent.
- Join Date
- Aug 2013
- Location
- Orangeville, Ontario
- Posts
- 8,456
- Blog Entries
- 1
Thanked: 4207
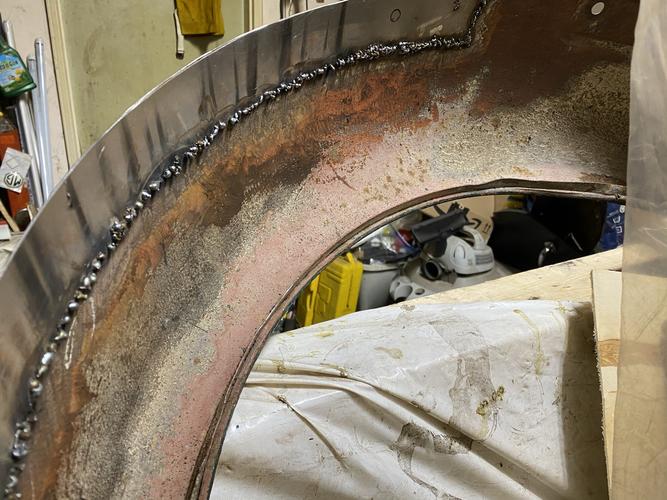
And the rear panels are as one, once more. Well matched ones really, or something like that.
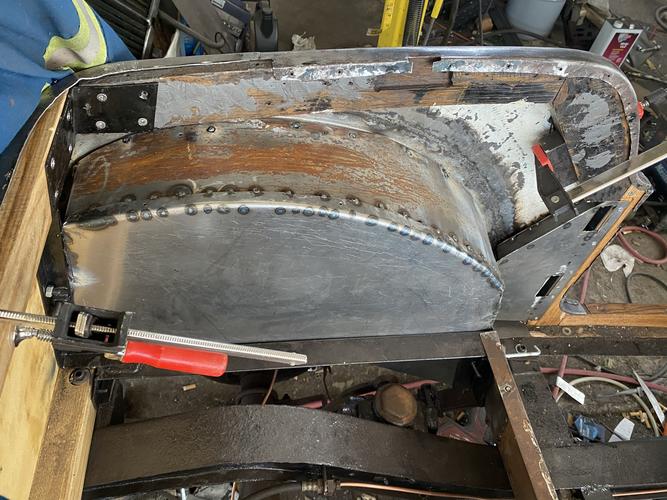
Spot welds from the inside of the car side, and a few more tacks around the lip.
As far as tying in the rear of the curves where it met the back of the wheel well, was able to pull the metal together well.
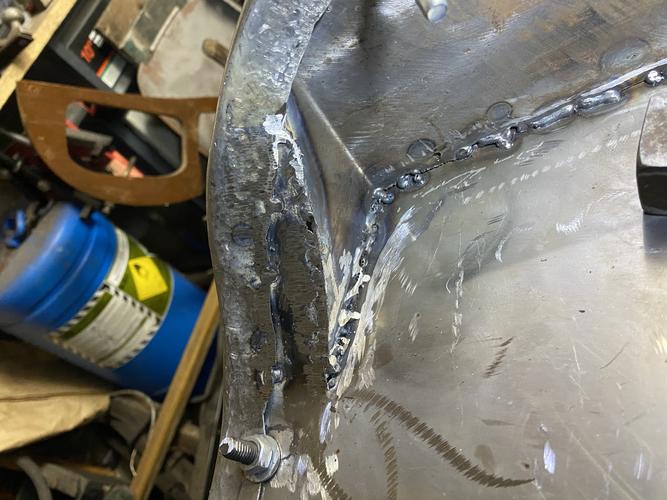
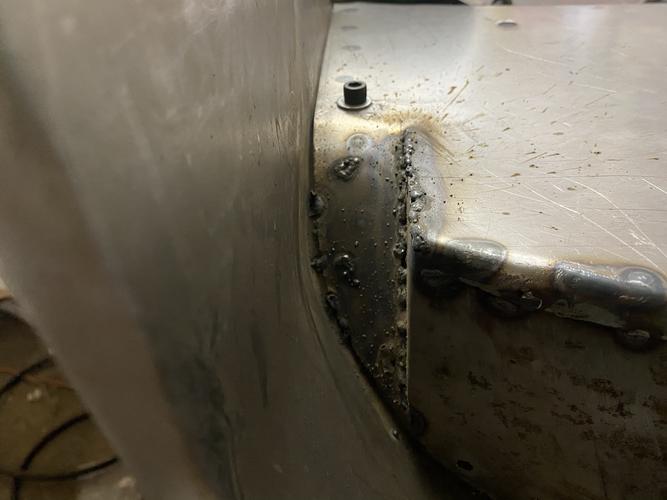
Won’t have to worry about leaks, but this will be the one area area hard to prime. But also invisible once the interior is completed.
Was a productive weekend!
 "Depression is just anger,, without the enthusiasm."
Steven Wright
https://mobro.co/michaelbolton65?mc=5
-
05-03-2021, 02:34 AM #829'with that said'
- Join Date
- Aug 2010
- Location
- Walla Walla in WA State USA
- Posts
- 11,250
Thanked: 4237
Looking Good!
Perhaps a bit too late at this point in time, but could you apply the primer before assembly and then just grind where you need to weld? Just wondering Our house is as Neil left it- an Aladdins cave of 'stuff'.
Kim X
-
05-03-2021, 02:48 AM #830Str8Faced Gent.
- Join Date
- Aug 2013
- Location
- Orangeville, Ontario
- Posts
- 8,456
- Blog Entries
- 1
Thanked: 4207
I’ll be priming everything off car once to allow me to get to all angles. After the lead soldering step. Which is coming up soon. The lead, and when I’d be applying it, meant I couldn’t try to prime stuff first.
Going to use por15 when the time comes, as on the main frame itself, then one coat of epoxy primer. Then nail everything onto the wood for the final build.
Use a few more coats of high build epoxy primer, sanding off most of it each time, then base, then clear.
If I detect any flaws after the second epoxy prime, I can always use a bit of filler,, although I hope not to..
"Depression is just anger,, without the enthusiasm."
Steven Wright
https://mobro.co/michaelbolton65?mc=5
-
The Following User Says Thank You to MikeB52 For This Useful Post:
cudarunner (05-03-2021)


 Reply With Quote