
Results 41 to 50 of 155
 47Likes
Thread: Is this microchipping...
 LinkBack URL
 About LinkBacks
-
01-01-2016, 01:39 AM #41Senior Member


- Join Date
- Dec 2014
- Location
- Southern NH
- Posts
- 562
Thanked: 41
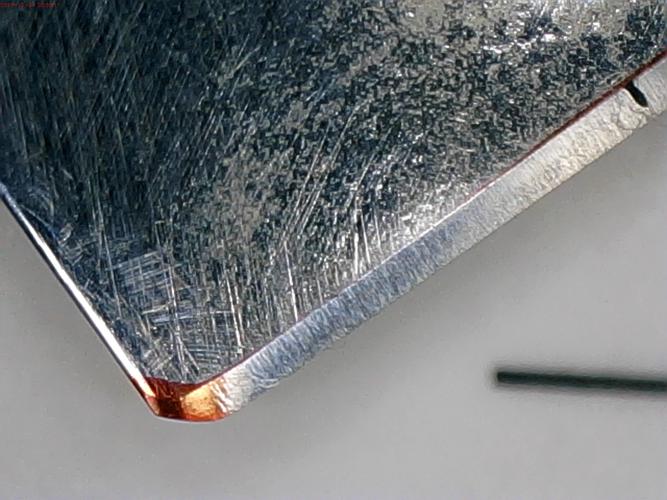
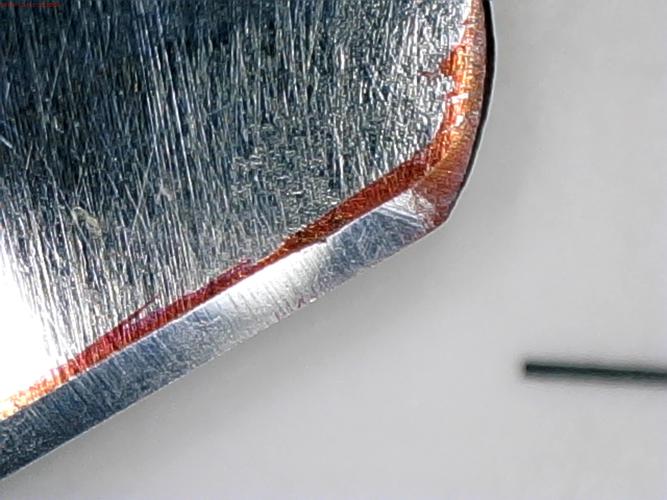
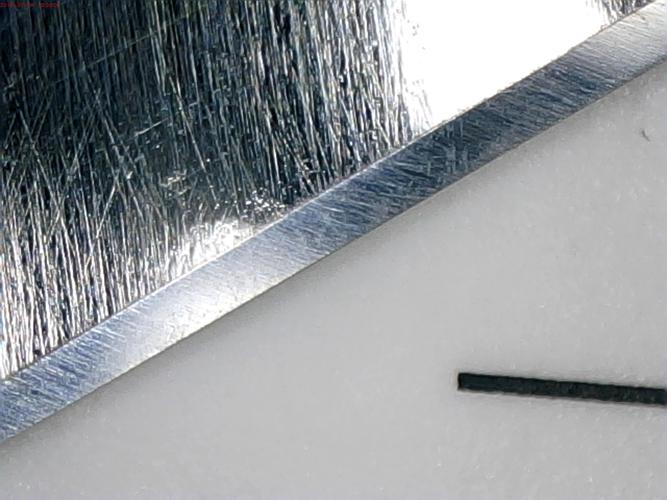
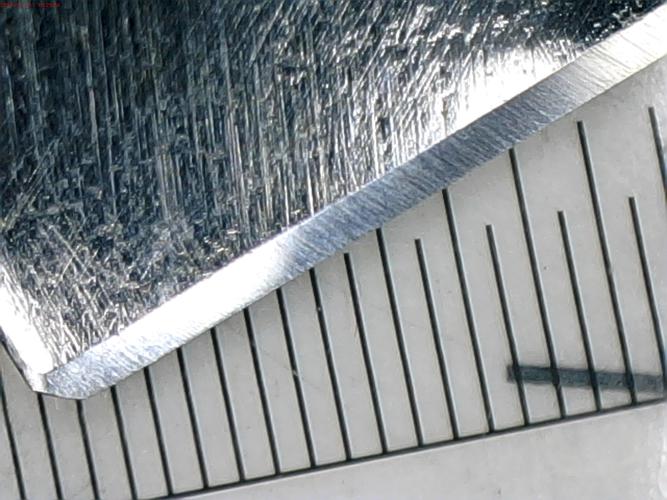
OK, I inked with red Sharpie, and did one stroke on each side, with the blade perpendicular to the stone, one layer of tape, and some pressure at heel and toe. I took a cloth and blotted it a bit, to get off the water. These are heel and toe on each side (scales to the left) at lower magnification:
 Regards,
PCM
-
01-01-2016, 06:18 AM #42Senior Member


- Join Date
- Apr 2012
- Location
- Diamond Bar, CA
- Posts
- 6,553
Thanked: 3215
Pretty much if I was shaping that heel, I would just follow the red ink arc and continue to the edge with the curve. Remove all the red at the corner. Some guys remove even more in very sweeping curve to the blade, kind of like a Nike swoosh, instead of a circle. A diamond plate or better yet a diamond file make quick work of it, with the spine on the counter and edge straight up.
Either way if you make any re-shaping corrections, do that first, then blend and hone the edge. Doing it later will just cause you to re-hone the razor.
Here is a good depiction of the rolling X, except that I try to keep the heel on the stone at least half way then drop it off the edge and swing the toe around and swoop to the opposite corner. If you follow the link to Glen’s other thread there is a good photo of what can happen to an uncorrected heel.
Here
Just ink the bevel and go slow, watching the bevel until you are consistently removing ink along the whole bevel. The key is to not do an exaggerated stroke, it is just a slight pressure shift from heel to toe.Last edited by Euclid440; 01-01-2016 at 06:22 AM.
-
The Following User Says Thank You to Euclid440 For This Useful Post:
pcm (01-01-2016)
-
01-01-2016, 01:22 PM #43Senior Member
- Join Date
- Dec 2014
- Location
- Southern NH
- Posts
- 562
Thanked: 41
So do I actually raise the spine off the stone, raise the edge and spine off the stone, or just transfer weight, as I move from heel to toe.
It seems like Lynn, in his video, seems to raise the spine?
Regards,
PCM
-
01-01-2016, 02:55 PM #44Senior Member
- Join Date
- Apr 2012
- Location
- Diamond Bar, CA
- Posts
- 6,553
Thanked: 3215
The spine is always in contact with the stone, you do raise the heel a bit but only a bit, to shift the pressure from the heel to the toe, but the spine and the edge are always in contact with the stone.
It is a very subtle pressure shift, not an exaggerated lift. A Smiling razor or one with a warp, will need more of a shift, than a straight edged razor that just needs some extra pressure at the heel and toe, but even then it is not that much. It may help if you visualize a ball bearing on the edge of the razor and you want it too slowly and smoothly, roll it from heel to toe as the razor moves across the stone.
You also want to very slightly torque the razor towards the edge, but make sure the spine and the edge are always on the stone at all times. Going slowly is the key.
Ink will tell you if you are making full contact, eventually you will be able to feel solid contact and the water displacement, ripple in front of the edge on the stone, will show you when you have fully honed the bevel. Looking at the bevel, verifies your work.
Here is an excellent
, shot from the front, so you can see the edge clearly. Notice how slowly and evenly he is moving across the stone, and how very subtle the pressure shift is. He is honing an aggressively smiling razor, you will not need that much English. Also note how long the heel stays on the stone and falls off at the final quarter of travel. Many make the mistake, of having the heel fall off in the first quarter of travel, in an exaggerated X stroke, the heel then, does not get enough time on the stone.
There is another longer video of the same X stroke with a different razor, queued up after the first one.Marshal and Fruiteater like this.
-
The Following User Says Thank You to Euclid440 For This Useful Post:
pcm (01-01-2016)
-
01-01-2016, 03:15 PM #45Senior Member


- Join Date
- Jan 2013
- Location
- Communist State of California
- Posts
- 1,461
Thanked: 463
From you last pictures it looks like whatever you're doing is working.
-
01-01-2016, 04:42 PM #46illegitimum non carborundum

- Join Date
- Jan 2008
- Location
- Rochester, MN
- Posts
- 11,552
- Blog Entries
- 1
Thanked: 3795
He could take a half inch off the heel and the point and it won't make any difference if he is honing wrong. Altering the design of the blade ain't going to make him a better honer or make the blade a better shaver. There is no stabilizer on that blade and if he hones correctly then no hook will form. Originally Posted by Euclid440

Neil Miller
"as far as I know, hooks form at the heel just in front of the stabiliser, usually from not taking the time to re-shape the heel and avoiding it becuse the thicker metal there needs more work expended on it."
mjsorkin
"I think the "hook" is when you hone the edge up past the stabilizer and develop a point on the heel where the stabilizer sticks out. This prevents proper honing and needs to be ground down."
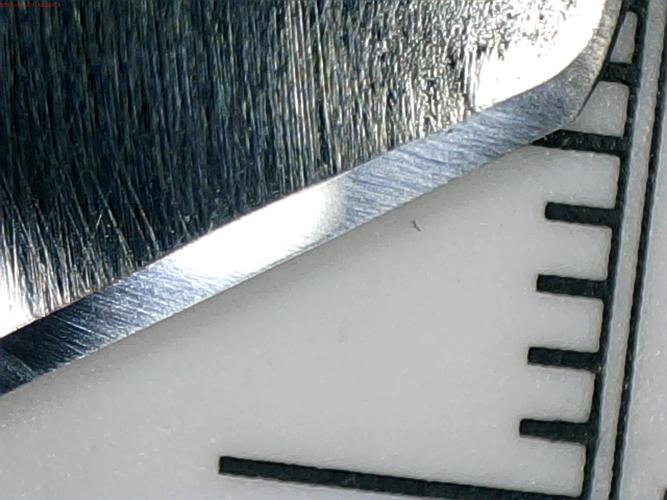
Tylerbrycen's photo of a heel hook from THIS thread.
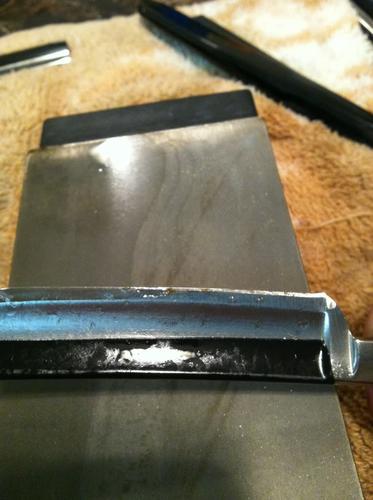
The hook forms when the blade has been honed down so far that the stabilizer is making contact with the hone, preventing the edge near from being uniform with the rest of the blade due to the increased thickness of the stabilizer. The Union Cutlery Spike has no stabilizer on the blade and so with proper honing will not form a hook. If you want to dull the corner of the heel and point at the very far ends of the blade, this can be accomplished with a single dulling stroke on the side of your hone. This is the same concept as jointing a blade's edge on the rim of a glass and it requires no re-shaping of the blade.JimmyHAD likes this.
-
The Following User Says Thank You to Utopian For This Useful Post:
pcm (01-01-2016)
-
01-01-2016, 05:54 PM #47Senior Member
- Join Date
- Apr 2012
- Location
- Diamond Bar, CA
- Posts
- 6,553
Thanked: 3215
Gee, and I thought he was making good progress…
I really fail to see where your rant is helpful…
Have a Happy New Year.
-
01-01-2016, 11:46 PM #48Senior Member
- Join Date
- Dec 2014
- Location
- Southern NH
- Posts
- 562
Thanked: 41
Ok. Here's what I think I'm going to do...
1) try to do the rolling X stroke, with heel forward (maybe the 1/4 circles Lynn showed in a video) to see if I can hone heel to toe in this blade.
2) take a wait and see approach to the heel reshaping. If I start to see a hook forming, I'll reshape the heel.
3) ink frequently to see how the contact is made with the edge.
Will try this with the 2k Naniwa SS.
Thanks for all the printers and viewpoints. I'm listening to all the views and trying to form a plan...Regards,
PCM
-
01-02-2016, 12:41 AM #49Senior Member
- Join Date
- Dec 2014
- Location
- Southern NH
- Posts
- 562
Thanked: 41
Here's tonight's attempt...
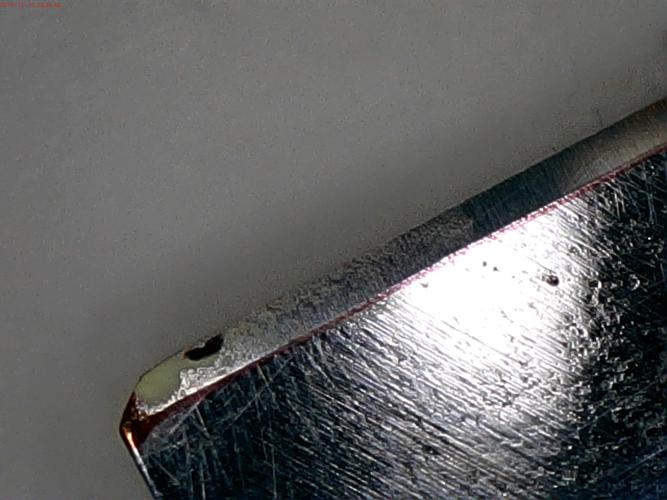
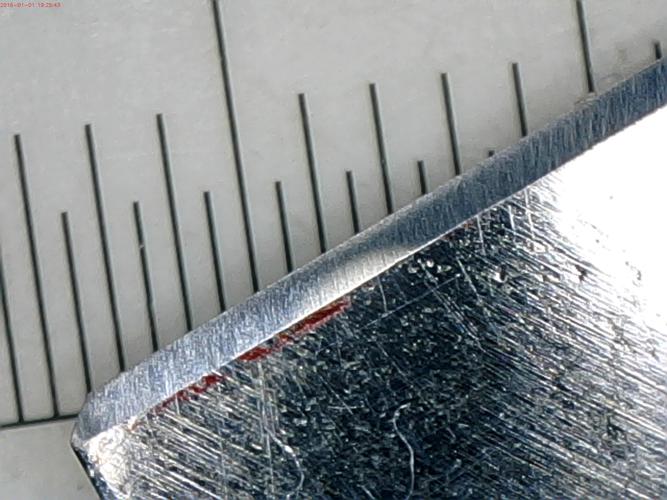
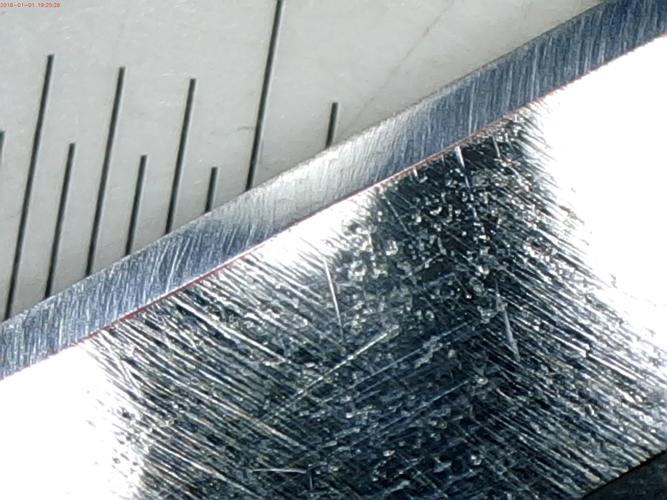
I used the 2K Naniwa, one layer of tape, and tried the rolling X stroke. I inked a few times and AFAICT, it is reaching the entire edge, end to end. Whoo hoo! The stria looks really good to me too. That's the positives.
There were a few times, when I think I torqued a bit too much, and the spine rose a bit. I think I clarified that later on, but I'm wondering about the edge on the left side (as you look at the edge), in the middle of the edge (next to last shot). Is there a second bevel there or rounding, or is it my imagination? I looked along the edge, and is seems like it is meeting pretty good, so maybe it is just lighting?
Here are the shots...
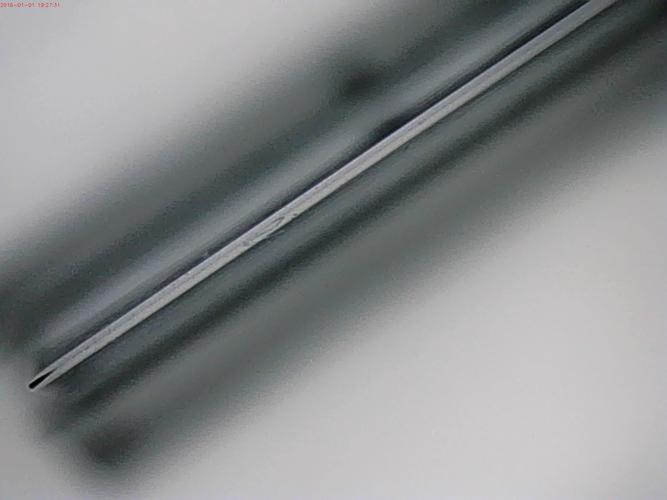
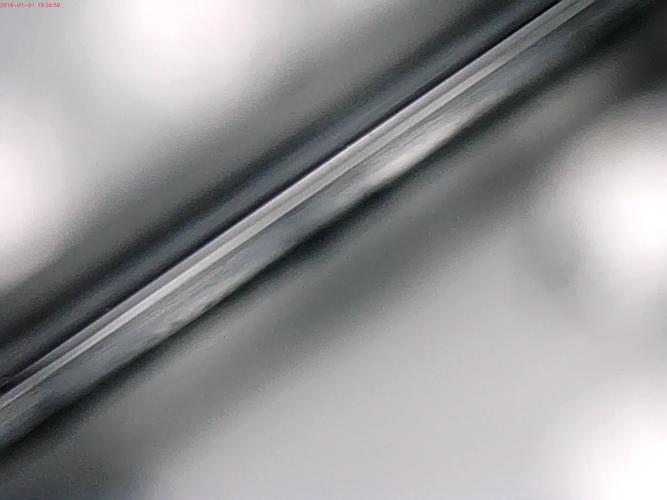
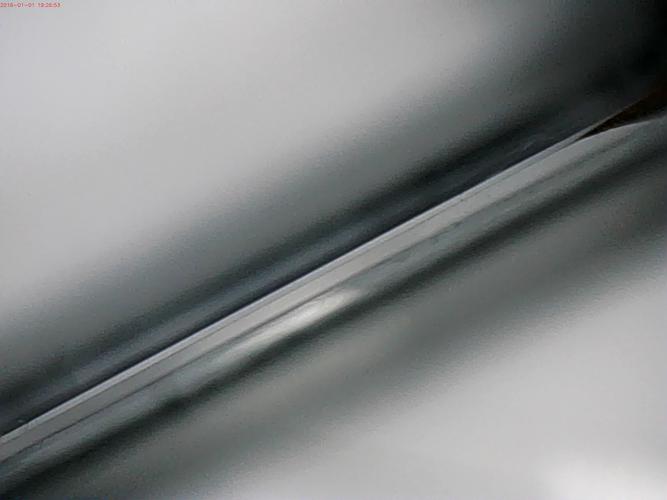
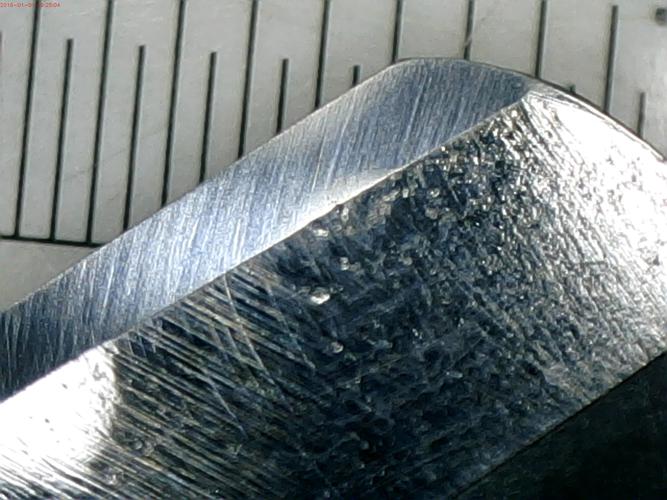
Thoughts?Regards,
PCM
-
01-02-2016, 02:06 AM #50Senior Member
- Join Date
- Apr 2012
- Location
- Diamond Bar, CA
- Posts
- 6,553
Thanked: 3215
Looks good, the 4k will clean that up.
Do the final strokes straight so you can easily see the 2k stria if there is any.
-
The Following User Says Thank You to Euclid440 For This Useful Post:
pcm (01-02-2016)


 Reply With Quote