
Results 81 to 90 of 155
 47Likes
Thread: Is this microchipping...
 LinkBack URL
 About LinkBacks
-
01-12-2016, 04:00 PM #81Senior Member


- Join Date
- Apr 2012
- Location
- Diamond Bar, CA
- Posts
- 6,553
Thanked: 3215
You must remember that we are looking at chipping at high magnification and while the chipping looks bad it is a small percentage of the bevel, so very small chipping, very hard to see without magnification.
Jointing is often misunderstood and maligned. If you want to straighten a chipped edge, you can hone an edge until, you grind away all the material on a low grit stone, to the bottom of the largest chip, or you can lightly drag the edge on a corner of the stone and cut away a thin layer of steel until you reach the bottom of the deepest micro-chip. Much like you would joint the edge of a board.
Either way, the same amount of material is removed, probably less by jointing, because you can see how much you are removing by jointing one stroke at a time.
This is not bread-knifing where you saw the edge on the flat stone face, the corner of the stone focuses the pressure and allows you much more control. One or two jointing strokes usually removes enough metal to straighten an edge.
So joint the edge lightly on the stone, then look at the edge to ensure you have removed the chip and have a straight edge of good steel. Then bring the bevels back to meeting, it should only take 20-30 laps to get the bevels to meet.
Yes you can just start all over, but… The way I look at it is. So, you motor is missing, you could rip the motor out and replace it and then it will run fine, maybe... But you will lean nothing, about how to fix the miss or why it was missing. The choice is yours.
Yes, you are experiencing edge failure from bad steel, how deep you need to go, to get to good steel is the question. Removing small amounts of steel and checking the edge is the least aggressive method and if you want to learn to hone problematic razors…
If a hammer is your only tool, all your problems look like nails… get some new tools…
-
The Following User Says Thank You to Euclid440 For This Useful Post:
pcm (01-12-2016)
-
01-12-2016, 11:48 PM #82Senior Member

- Join Date
- Dec 2014
- Location
- Southern NH
- Posts
- 562
Thanked: 41
My next chance to work on it will be Thursday night. I'm not sure which way to go yet, 4K or 8k, but I do know I did a lot of strokes on the 8k and the edges aren't meeting yet.
Tending to think it may be useful to drop down, but will ponder a bit more and will decide Thursday.
Thanks for all the advice folks!Regards,
PCM
-
01-14-2016, 04:08 PM #83illegitimum non carborundum

- Join Date
- Jan 2008
- Location
- Rochester, MN
- Posts
- 11,552
- Blog Entries
- 1
Thanked: 3795
Eventually you have to end up with a "V" shaped edge. That's really all there is to it. You'll get there.
-
01-15-2016, 01:31 AM #84Senior Member
- Join Date
- Dec 2014
- Location
- Southern NH
- Posts
- 562
Thanked: 41
Did more work on the Spike tonight. First, I very lightly jointed and then with 1 layer tape, honed on the 4K with rolling X. I did that, until the flat spots on the edge were gone. Then, I did straight strokes (fresh tape, lighter touch) to see if all the angled stria was gone. I'd say most was gone, just a few here and there.
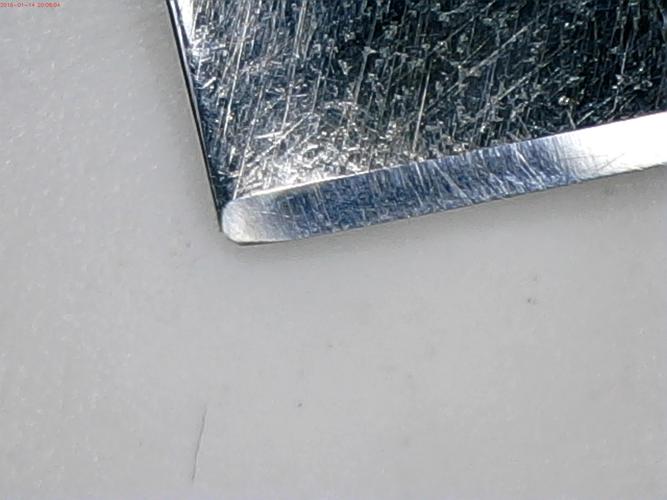
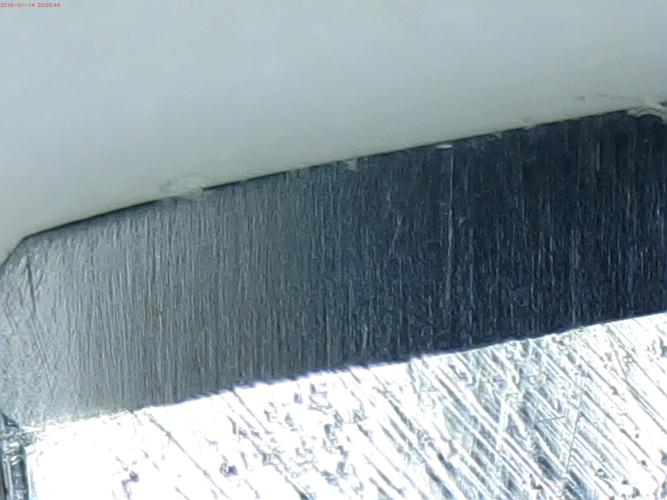
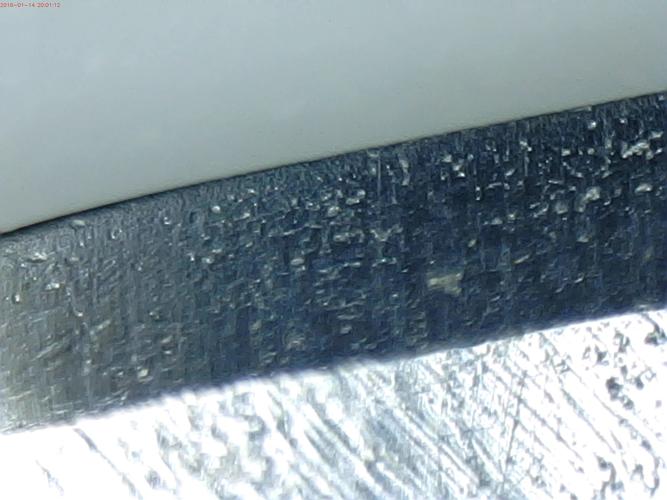
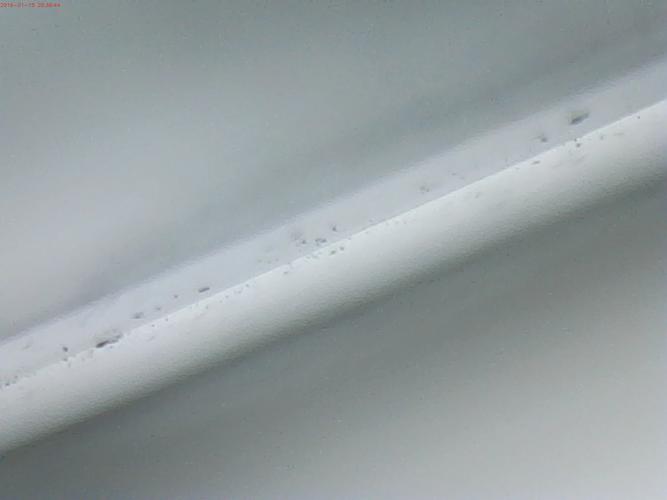
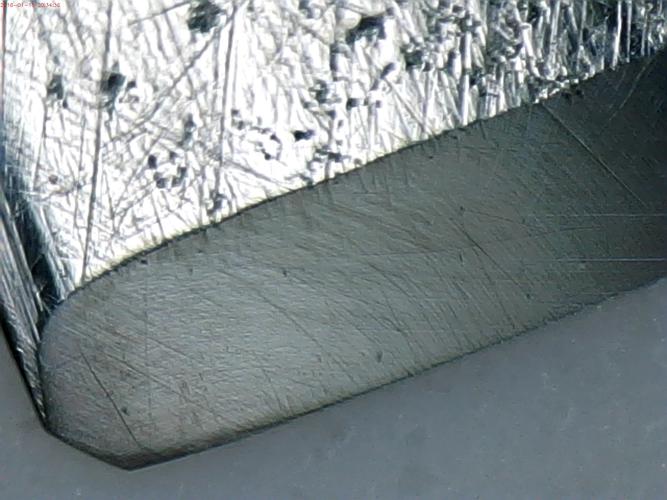
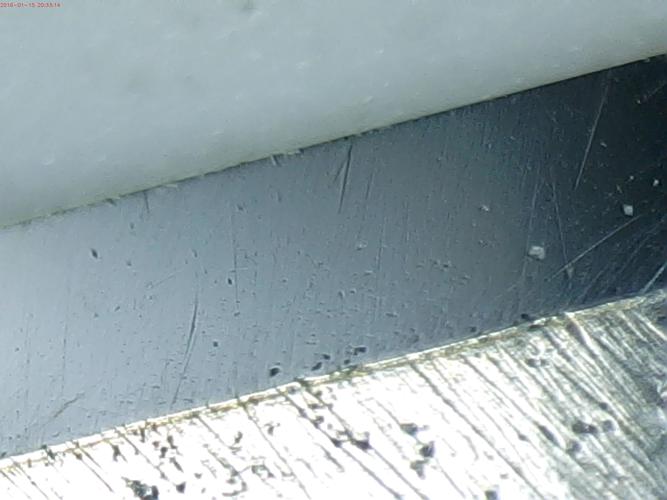
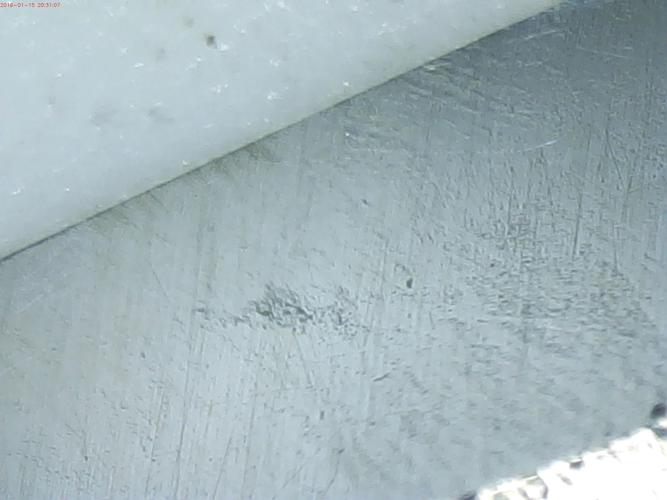
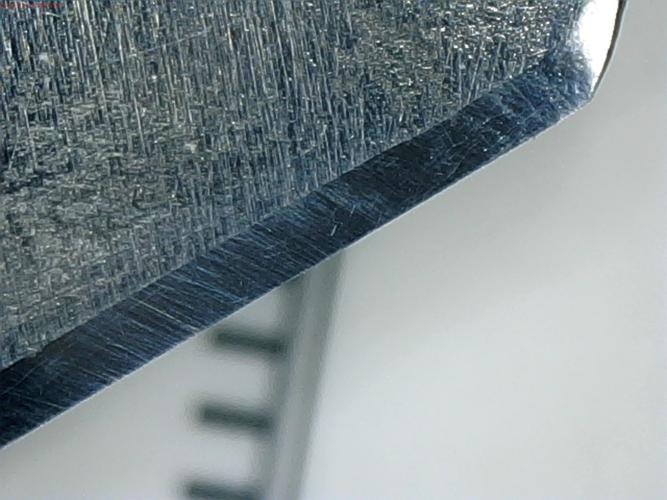
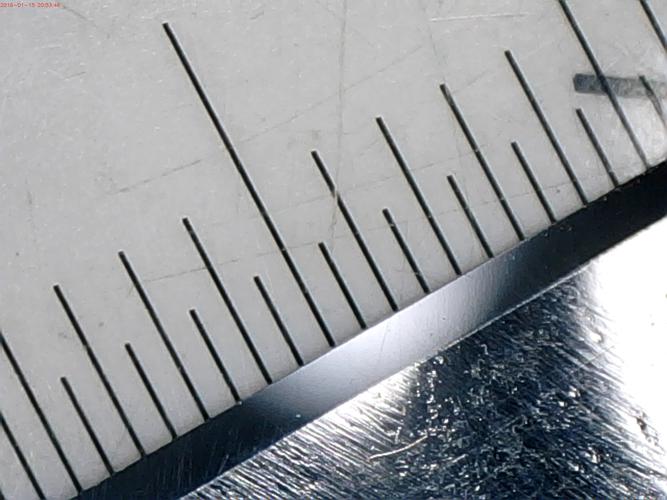
Next, I swapped tape and did rolling X strokes on the 8K. Again, I did straight strokes to see how the stria looked. Below are low and high magnification shots on both sides. On the positive, a large portion of the blade seems to have a pretty good stria pattern, and the edge seems pretty straight. Looking down on the edge, it is meeting well, AFAICT.
On the negative, I'm seeing some things that are of some concern, and would like to hear thoughts on this and suggestions. One, is that near the toe on the left side the edge looks rough for a good 1/2cm or more. Two, there are stria, some at really odd angles. I don't recall seeing those before, but I wasn't always using higher magnification, and there is often reflection from the lighting, and sometime fibers from when I wipe it dry. You'll see some things in shots and then, they're not there in other shots or at higher magnification (or are less severe). These were all taken at the same time. I didn't take shots at the intermediate steps.
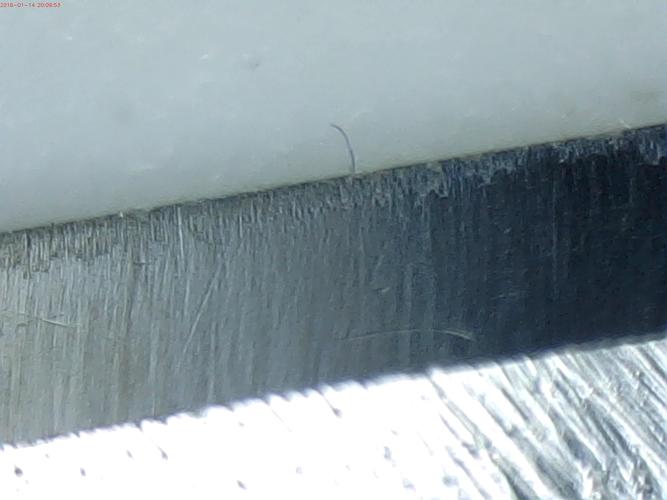
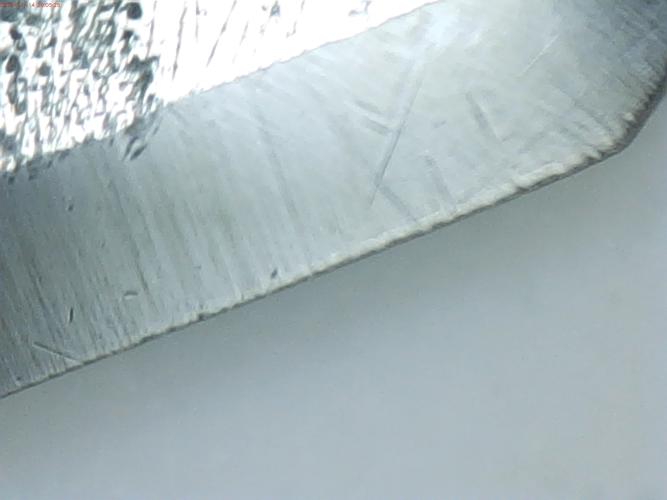
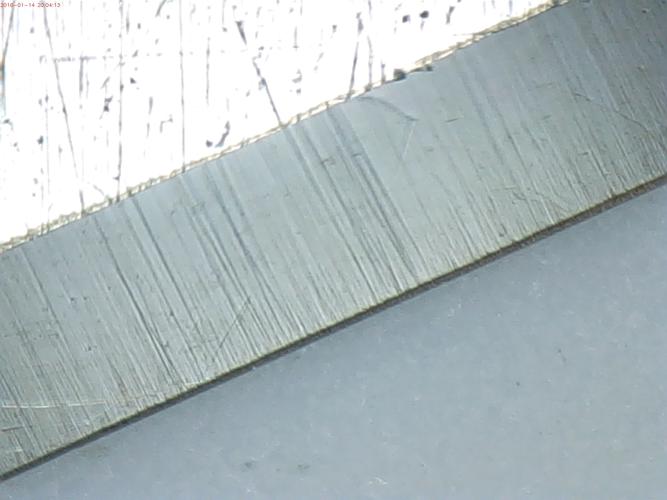
I'm not really sure what to do at this point. Whether I should forge ahead with 12K, drop down to 4k and try to address the stria, hone more on the 8K to try to get rid of that rough edge near the toe, or try a test shave with this 8K honed edge. Suggestions?Regards,
PCM
-
01-15-2016, 01:43 AM #85Senior Member
- Join Date
- Dec 2014
- Location
- Southern NH
- Posts
- 562
Thanked: 41
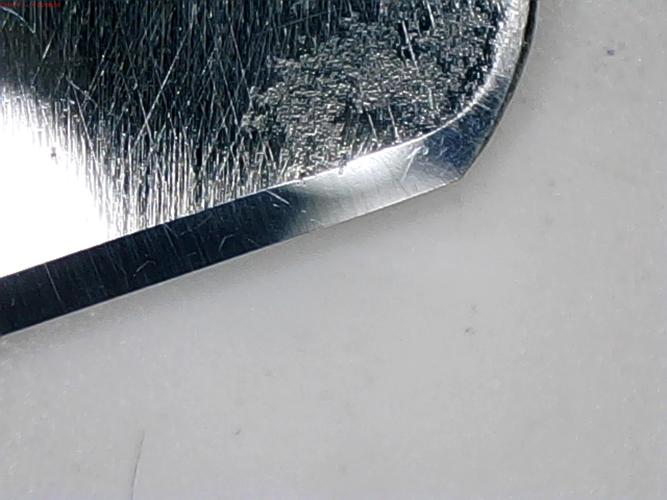
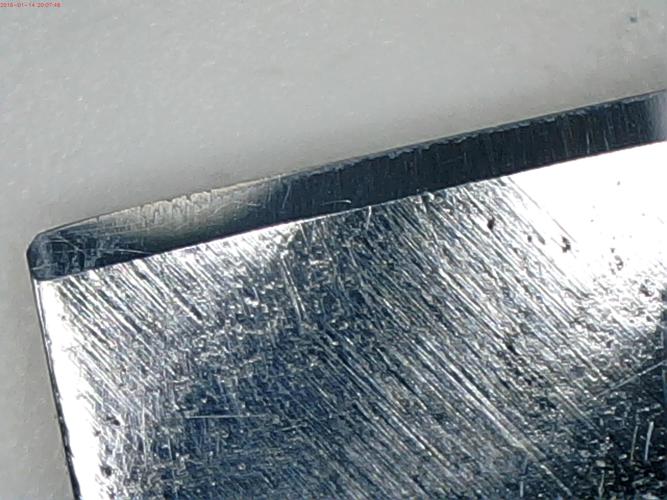
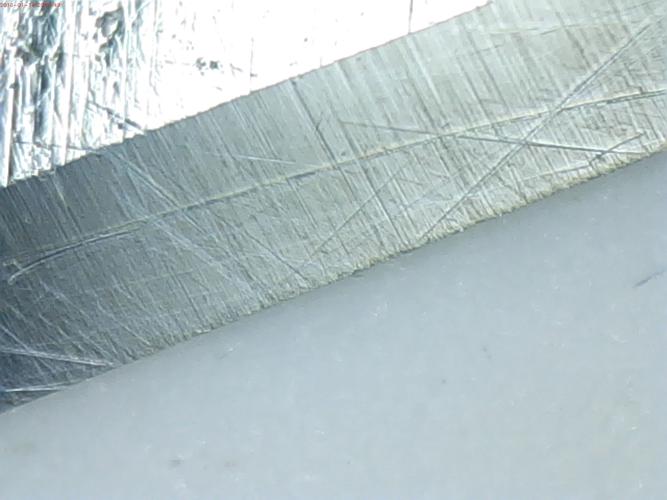
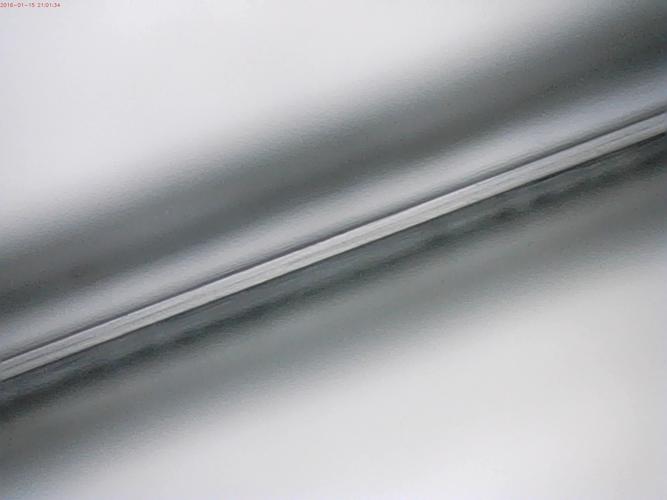
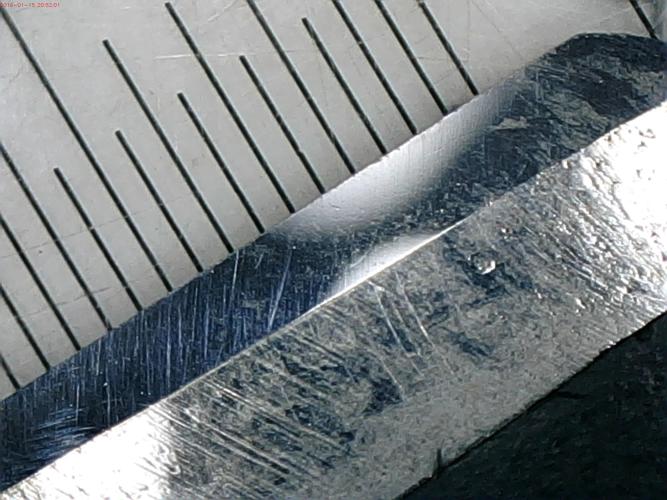
For example, the sixth shot above looks like a chip, but here is the same spot, after wiping the blade again, and repositioning:
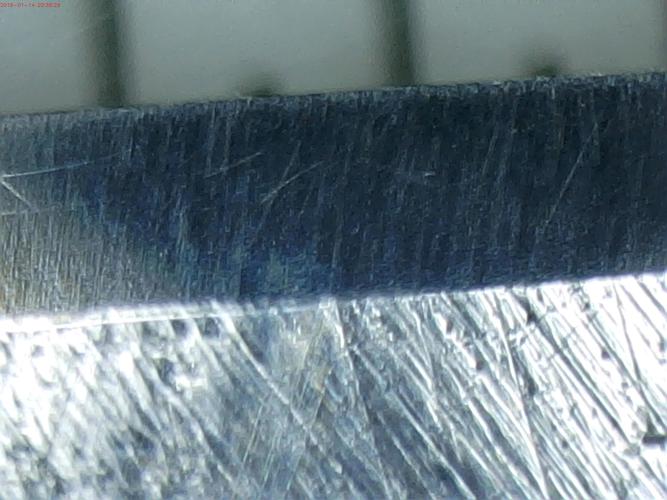
It's very small, and only looks like one. Now the rough edge that is on the right of this area, is there in every shot. like the first and sixth shot.
Note in the shots, the bevel is around 1mm wide.Last edited by pcm; 01-15-2016 at 01:51 AM.
Regards,
PCM
-
01-15-2016, 02:15 AM #86KN4HJP

- Join Date
- Feb 2015
- Location
- Chesapeake, Virginia
- Posts
- 932
Thanked: 261
Several of the shots, notably the first in your previous post, have what may be a double bevel in them - like the finer hone isn't reaching all the way to the edge. Also, the stria at the edge appear to be deeper. Did you possibly lift the spine while doing rolling x-strokes and create a microbevel? That's an awfully straight edge to be needing a rolling x-stroke on. I should think that a 45 degree edge-forward stroke should handle any irregularities in an edge like that without resorting to a rather extreme stroke that requires some practice to master.
If it were my razor, I'd go back to the 1k and use 45 degree edge-forward strokes to get a clean bevel across all of the edge. I would then follow that up with the exact same strokes on a 4k (apply fresh tape as needed, plus when changing grits) using just enough strokes to remove the 1k stria and ensuring that the 4k stria are uniform and all the way to the edge. Then, and only then, change tape and repeat with the 8k - same stroke, just enough to remove the 4k stria and ensuring you are honing all the way to the edge.
I would not proceed to the 12k until the 8k is perfect - it is a capital error to advance to a finer grit when there are still issues remaining under the mistaken belief that you can work them out with the finer stone. Likewise, if you should lift the spine or catch the edge, drop right back to the previous grit stone and fix it - it will be quicker and easier in the long run.
-
The Following User Says Thank You to sqzbxr For This Useful Post:
pcm (01-15-2016)
-
01-15-2016, 04:33 AM #87Senior Member
- Join Date
- Apr 2012
- Location
- Diamond Bar, CA
- Posts
- 6,553
Thanked: 3215
You are not honing to the edge, Rolling X
Remove all the deep 4k stria. Ink…
-
The Following User Says Thank You to Euclid440 For This Useful Post:
pcm (01-15-2016)
-
01-15-2016, 12:34 PM #88Senior Member
- Join Date
- Dec 2014
- Location
- Southern NH
- Posts
- 562
Thanked: 41
Earlier on in this thread I was doing a heel forward stroke, but was finding that the toe and heel were not getting honed at all. So I've been working on a rolling X stroke, which I clearly need to work on to master better. Originally Posted by sqzbxr
 Regards,
PCM
-
01-16-2016, 02:04 AM #89Senior Member
- Join Date
- Dec 2014
- Location
- Southern NH
- Posts
- 562
Thanked: 41
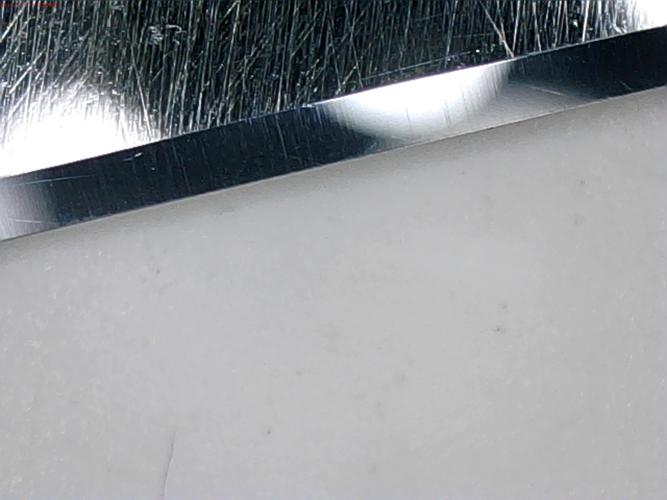
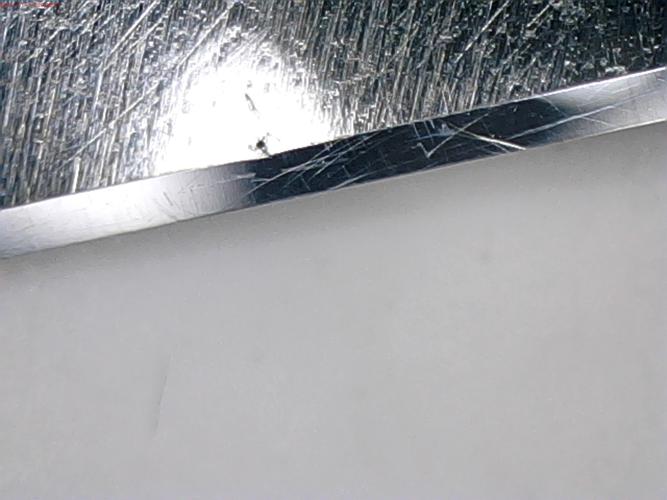
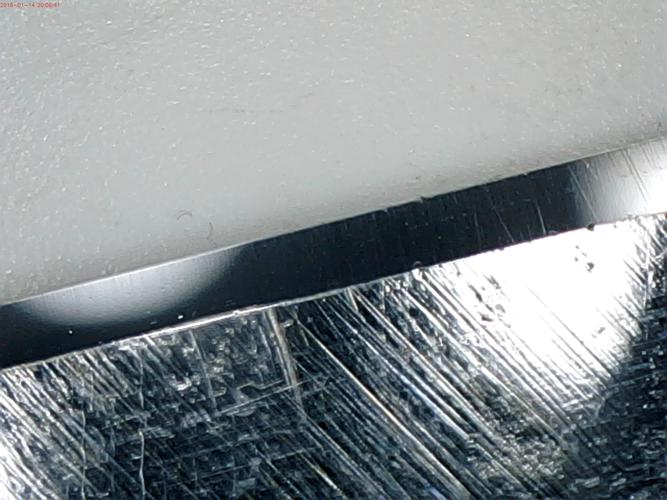
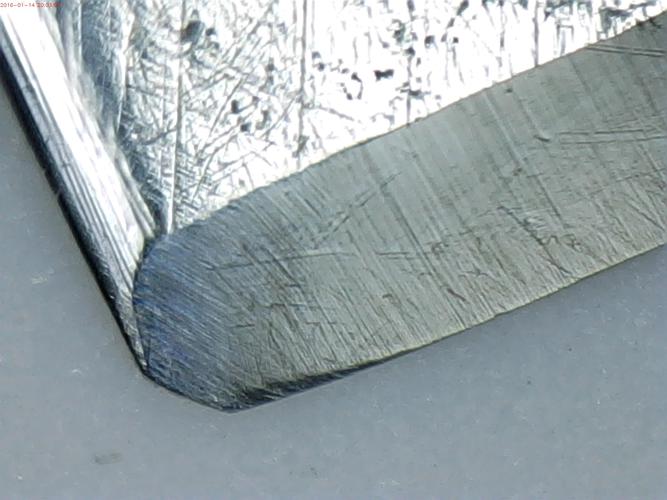
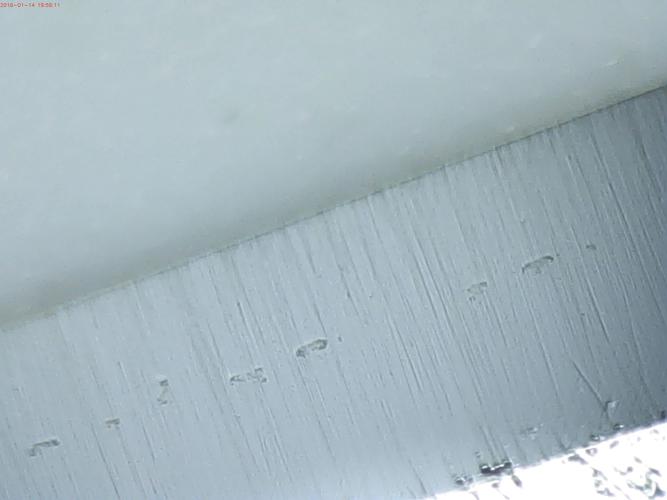
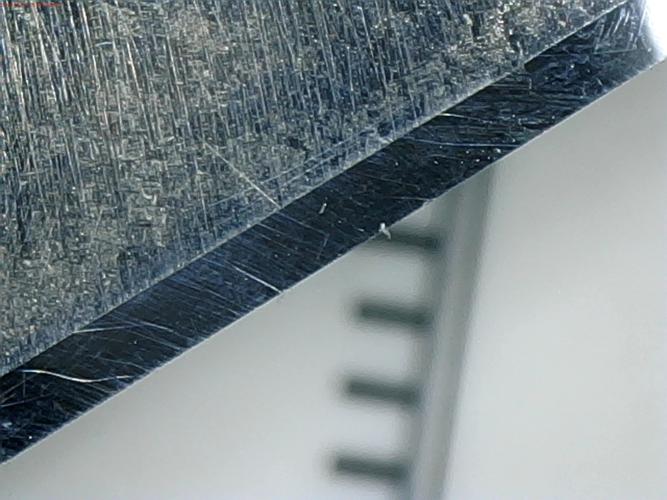
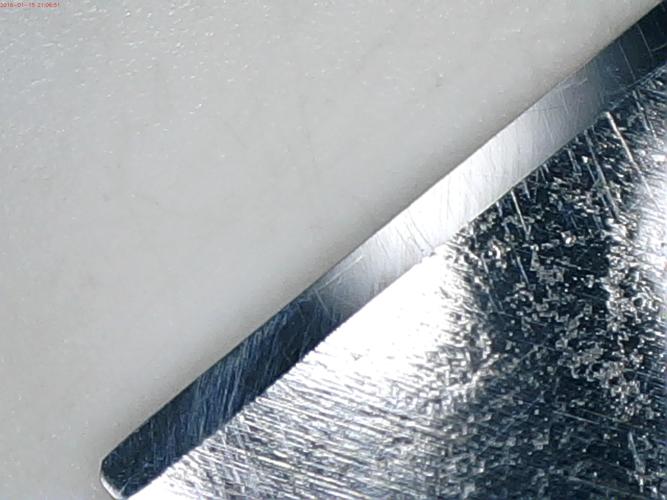
Spent about 2 hours on the 8K tonight. First doing rolling X's with moderate pressure, then perpendicular stroke to check the stria, and then back to rolling X strokes. I inked the edge, and using one hand checked the coverage, it was missing a tiny bit at the toe and quite a bit at the heel. I did that again, with a finger on the heel and toe during the rolling X stroke and the coverage was fine.
I replaced tape, and did rolling Xs with very light pressure. Probably 200+ strokes in total.
I checked the edge, head on, and it is well met, on the whole length (see sample pic below - other that a bit on cloth on the edge from wiping the blade). In checking the bevel under high magnification, and I didn't see any chipping. There are some deeper stria, but not that much (about 4-5 on each side). In the pictures below, I tried to show the toe and heel, and highlight some of the places where there was deeper stria.
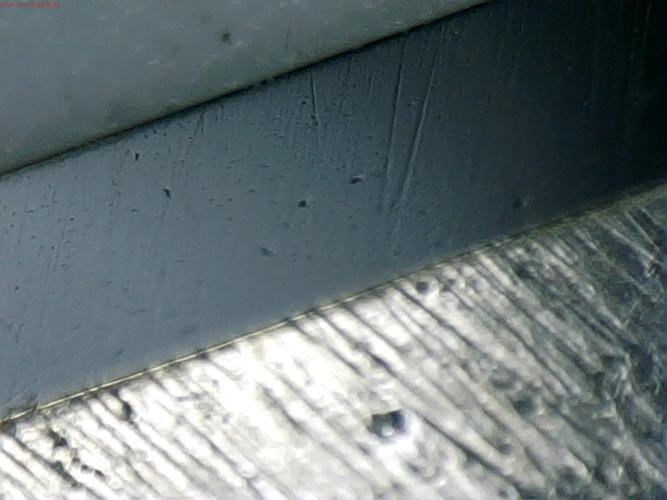

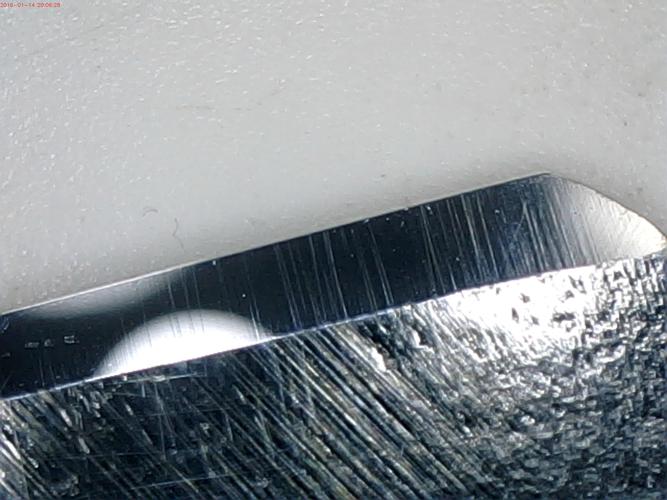
Some at a lower resolution. It clearly isn't as smooth at the toe end, with me placing more pressure there (should I be doing lighter pressure?):

It looks much better. Looking forward to your comments/suggestions...Regards,
PCM
-
01-16-2016, 02:07 AM #90Senior Member
- Join Date
- Dec 2014
- Location
- Southern NH
- Posts
- 562
Thanked: 41
Missed uploading one...
 Regards,
PCM


 Reply With Quote