
Results 91 to 100 of 155
 47Likes
Thread: Is this microchipping...
 LinkBack URL
 About LinkBacks
-
01-16-2016, 03:22 PM #91Senior Member


- Join Date
- Apr 2012
- Location
- Diamond Bar, CA
- Posts
- 6,553
Thanked: 3215
Looks better but, still some chipping, you might try adding another layer of tape to increase the angle at the edge, you will end up with a double bevel but it will straighten the edge.
And or move up to the 12K and see what happens to the edge, you can always add tape at the 12k and make a micro bevel. If that does not work you will have to remove more to get to good solid steel, either Jointing or lite breadknifing.
I have had good luck with lapping film with chippy edges. Film will make a much finer and uniform stria pattern and straighter edge.
But, really think it is bad steel and pitting that is causing the edge to chip.
-
The Following User Says Thank You to Euclid440 For This Useful Post:
pcm (01-16-2016)
-
01-16-2016, 06:14 PM #92Senior Member

- Join Date
- Dec 2014
- Location
- Southern NH
- Posts
- 562
Thanked: 41
Thanks! I did give a quick test shave on my cheek to see how it felt. Not irritating, but was pulling quite a bit. Originally Posted by Euclid440

I'll try a second layer of tape, maybe with the 8k for starters, and see how the edge looks...Euclid440 likes this.Regards,
PCM
-
01-16-2016, 06:28 PM #93Senior Member
- Join Date
- Apr 2012
- Location
- Diamond Bar, CA
- Posts
- 6,553
Thanked: 3215
Yea, this is one of those razors that Glen talks about, where you should, first try to set a bevel, before you spend a lot of time in restoration.
On this razor, you would have seen the pitting on the bevel and possible crumbling of the edge. Then, at the very least, you would be aware of the potential problems and do exactly as you are doing and see if you can fully set a bevel, then do a full restore if the edge will hold.
It is, for you a great exercise in honing and you will learn a lot about honing and squeaking out an edge from a problematic razor. It will make honing razors with good steel and straight spines, that much easier.
-
01-16-2016, 10:30 PM #94Senior Member
- Join Date
- Dec 2014
- Location
- Southern NH
- Posts
- 562
Thanked: 41
This one, unlike the Henckels (which was an attempt to restore a blade I bought at an antique shop), I got from the classifieds and shaved with it until it started getting a little uncomfortable, and decided to post here and see what to do, as the edge seemed rough. When I got it, I could see pitting on the blade, so knew that it probably had some issues. So, I wasn't restoring it, just trying to sharpen it up. Originally Posted by Euclid440
Indeed, I'm learning a lot on this, with different honing strokes, trying to interpret the magnified edge I see (really hard), dealing with a tough toe/heel, and now with some steel issues. It's a good.
BTW, here is a comparison of the Henckels that I honed (really restored) and have been shaving with currently (5 times so far), and the Spike that I'm working on. This highlights the edge difference (using the same magnification - the Spike has a larger bevel):
The first is the Spike, the second the JA Henckels.Regards,
PCM
-
01-17-2016, 06:36 PM #95Senior Member
- Join Date
- Dec 2014
- Location
- Southern NH
- Posts
- 562
Thanked: 41
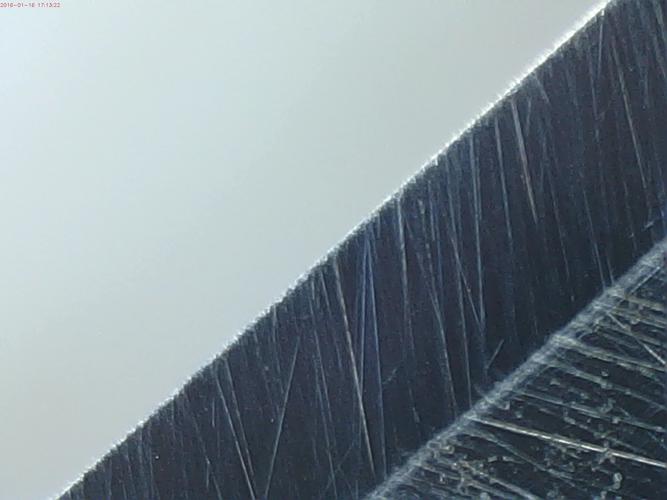
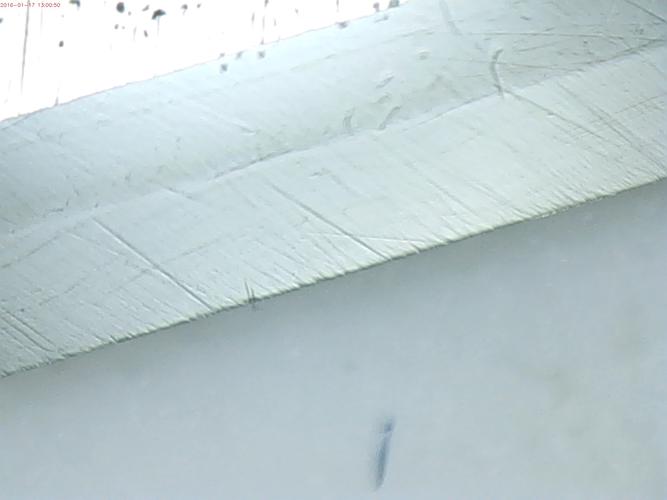
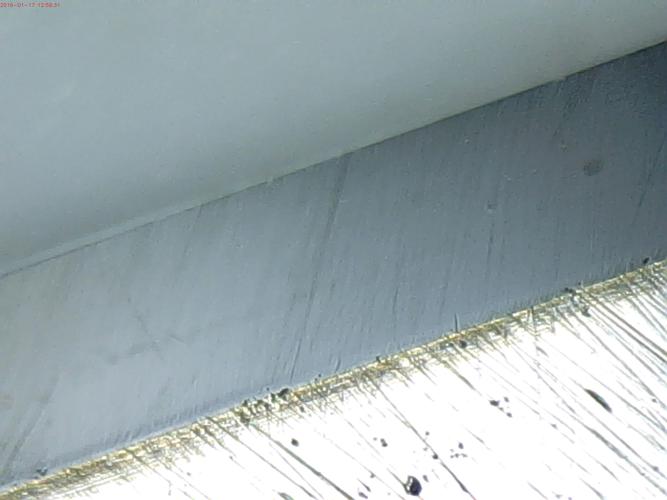
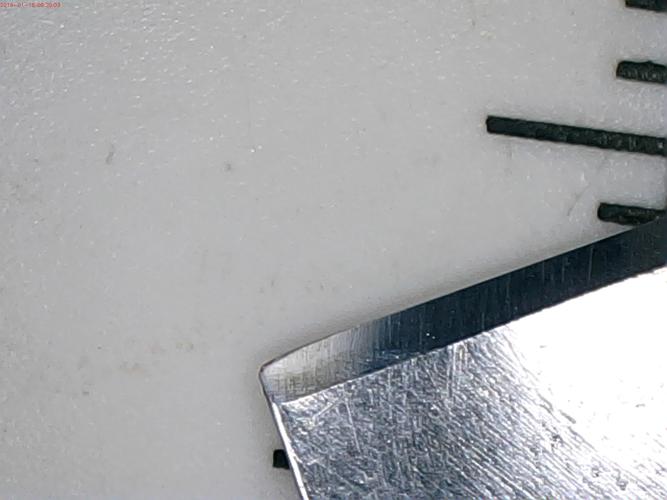
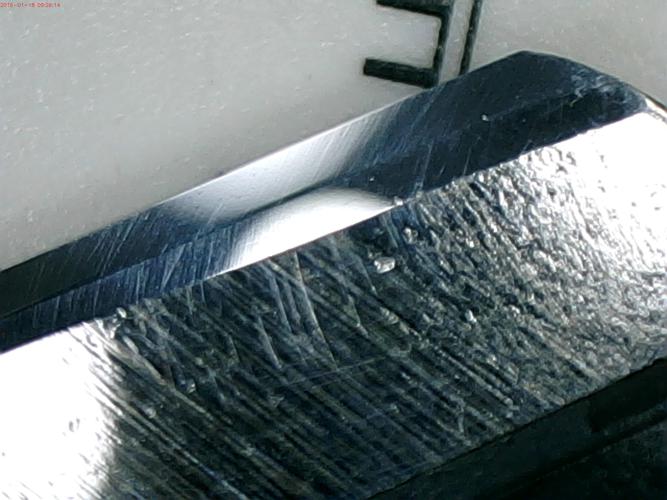
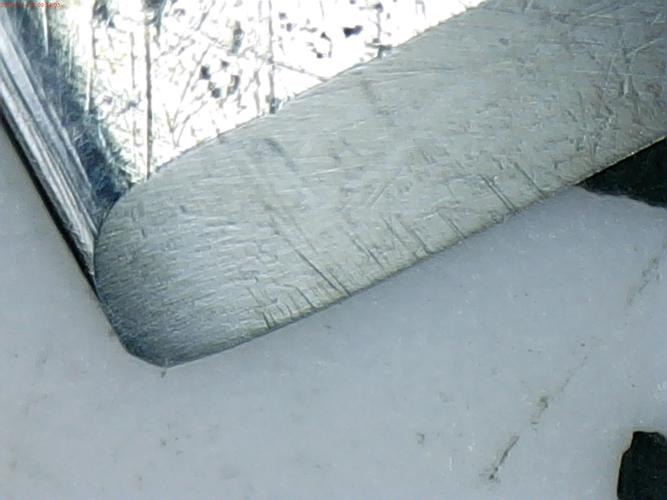
Today, I decided to stick with the 8k, but apply a second layer. I did rolling X strokes and checked the edge. Below are low magnification shots and the next post will have high magnification. Even with the rolling X, I'm hot getting as much coverage on the heel, as with the toe (where the whole bevel is to the new angle). There may be a tiny bit at the toe, that is not touched, but the rest is hit. The metal on the edge looks better, and it seem sharper on a TPT.
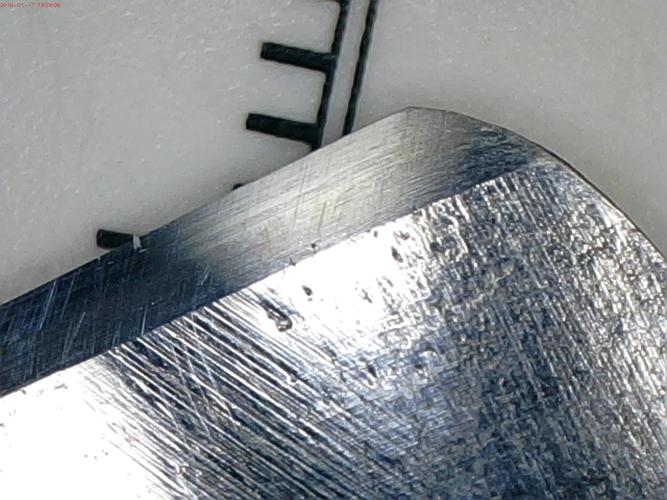
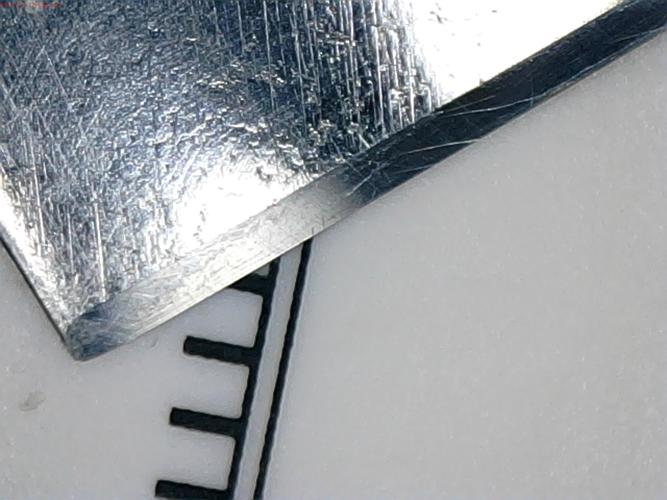
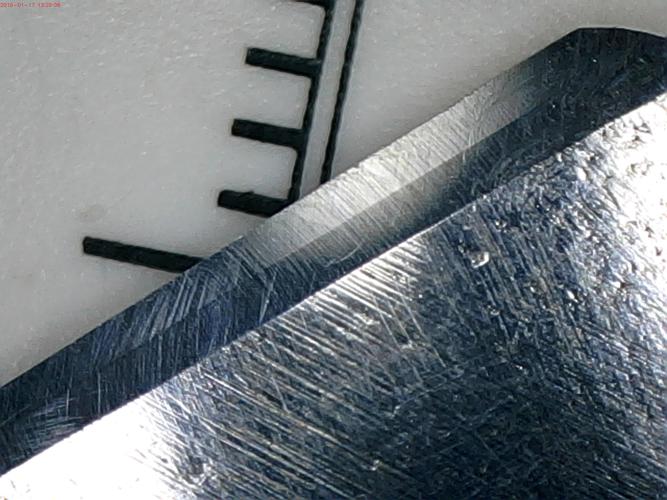
Let me know your thoughts...Regards,
PCM
-
01-17-2016, 06:40 PM #96Senior Member
- Join Date
- Dec 2014
- Location
- Southern NH
- Posts
- 562
Thanked: 41
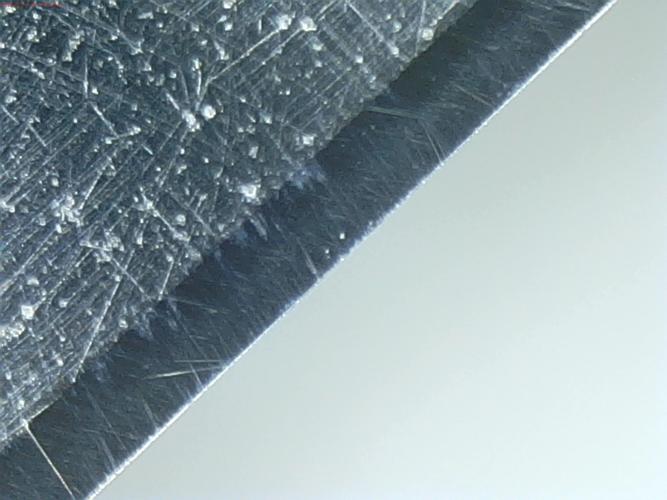
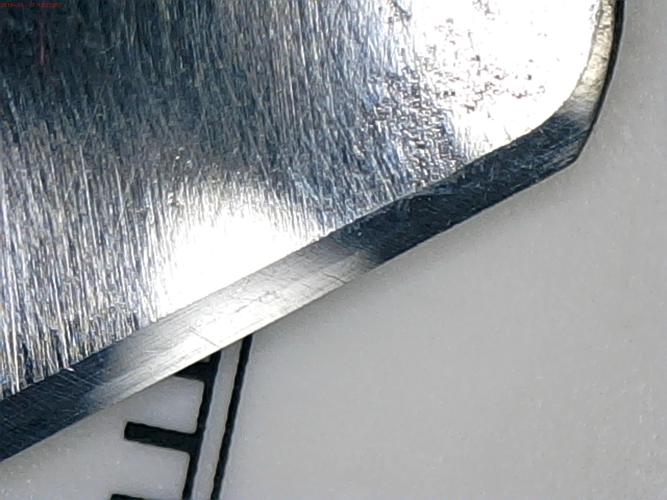
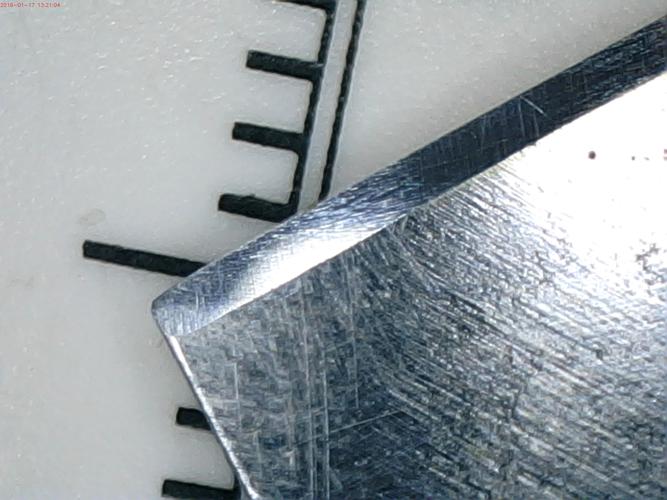
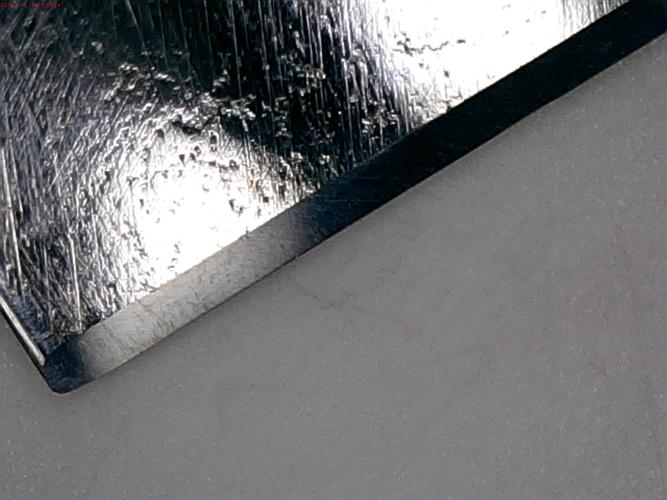
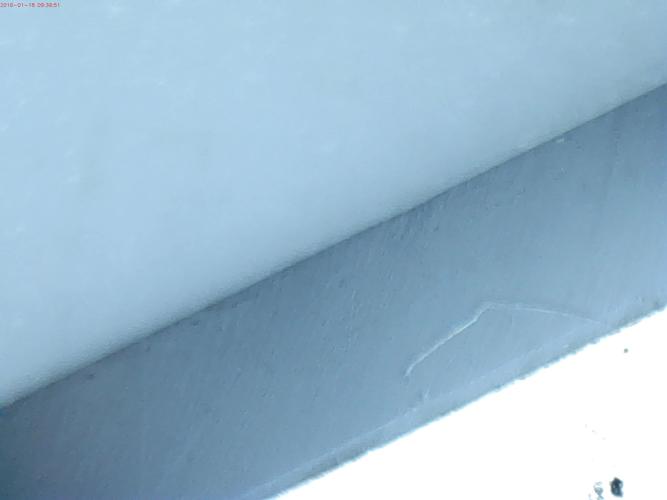
Here are closer shots (hopefully reflections are not too bad):
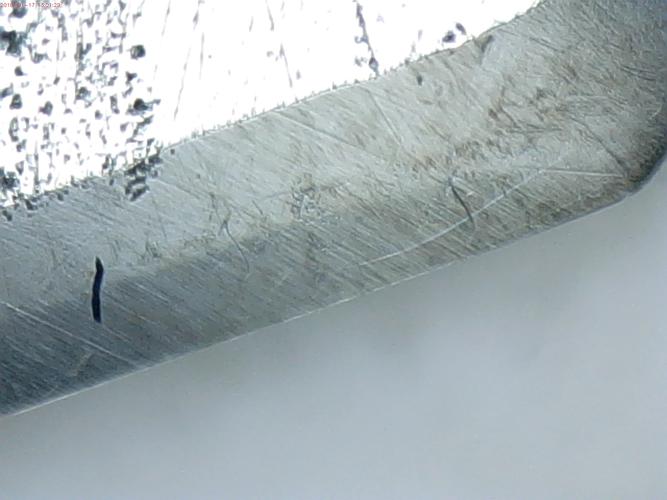
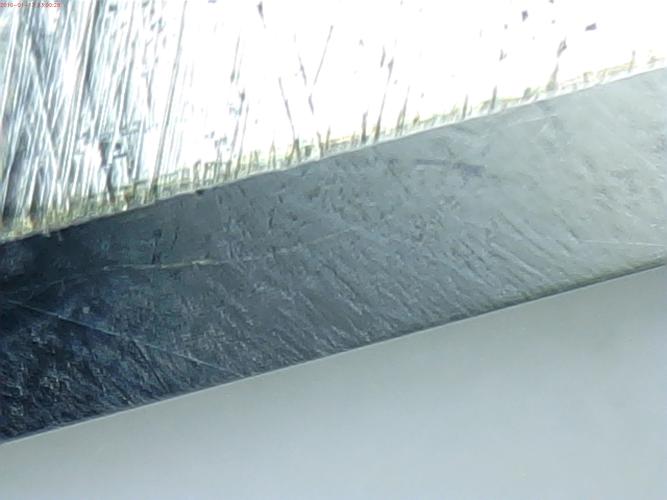
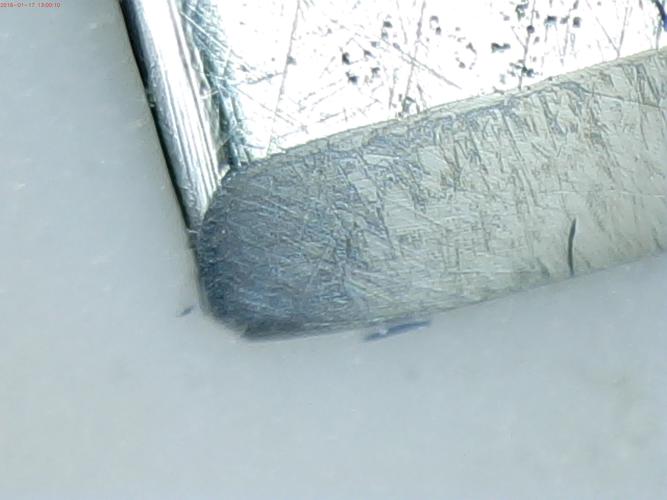
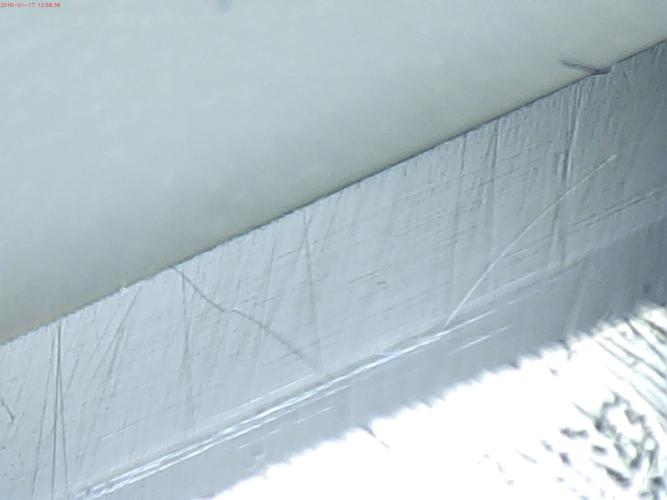
You can see that, at the heel, the new bevel is 1/2 way up the old bevel. By the toe, it is 100%. Any suggestions on stroke adjustment? Suggestions on next steps?
The edge seems to slowly be looking better (w.r.t. metal).Regards,
PCM
-
01-17-2016, 07:13 PM #97Senior Member
- Join Date
- Apr 2012
- Location
- Diamond Bar, CA
- Posts
- 6,553
Thanked: 3215
It does look better, but as you say, still not hitting the edge in some spots.
You can lightly draw a sharpie on the edge from heel to toe and that will ink the edge and down from the edge a few thousands on both sides. Then do a couple laps and you will easily see where it is not hitting.
Now you can add pressure at those spots, and have a visual reference. You still have some 4k stria on the bevel, so you may not be using enough pressure. Try adding a bit more pressure and stay on the 8K until you remove all the deep stria and are honing to the edge.
You may still get a chippy edge, but then you will know it is the steel and not your technique.
-
The Following User Says Thank You to Euclid440 For This Useful Post:
pcm (01-18-2016)
-
01-18-2016, 02:43 PM #98Senior Member
- Join Date
- Dec 2014
- Location
- Southern NH
- Posts
- 562
Thanked: 41
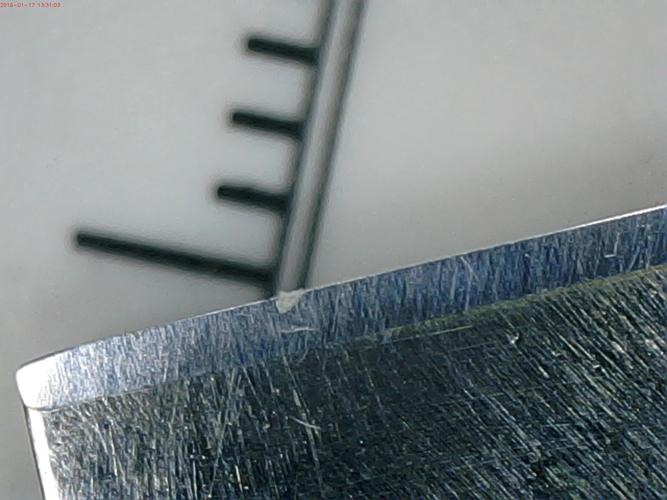
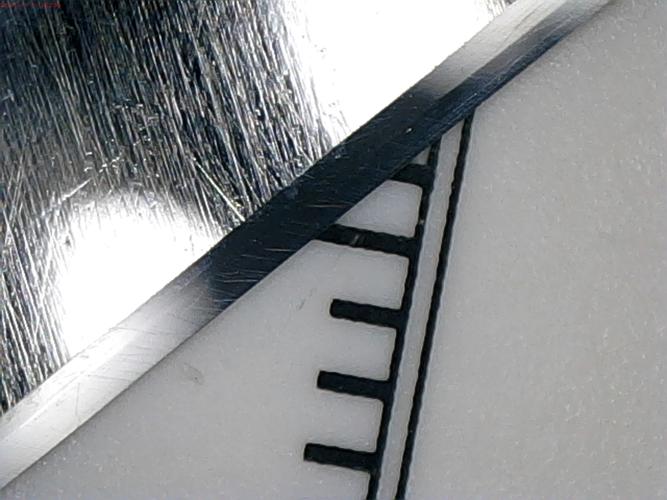
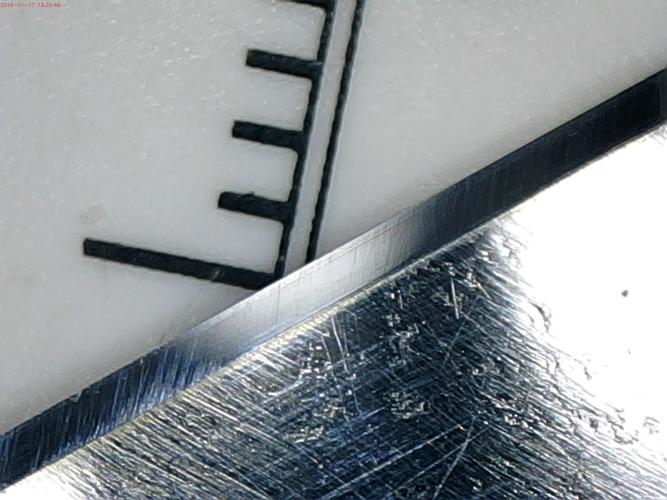
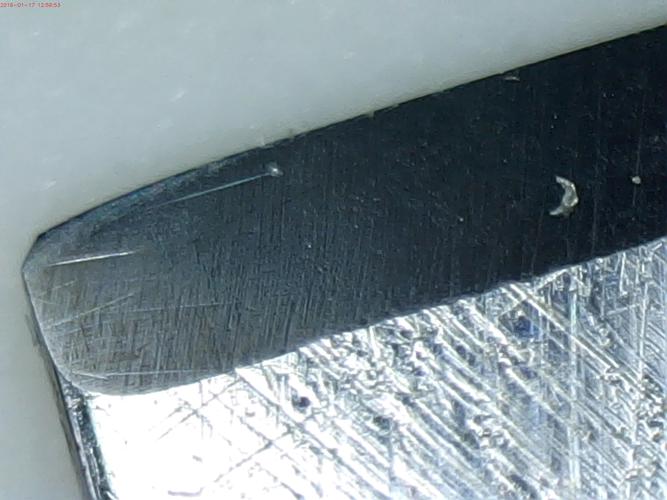
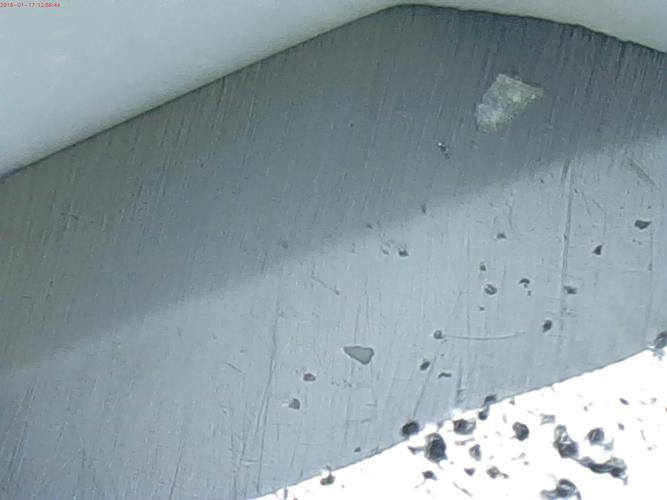
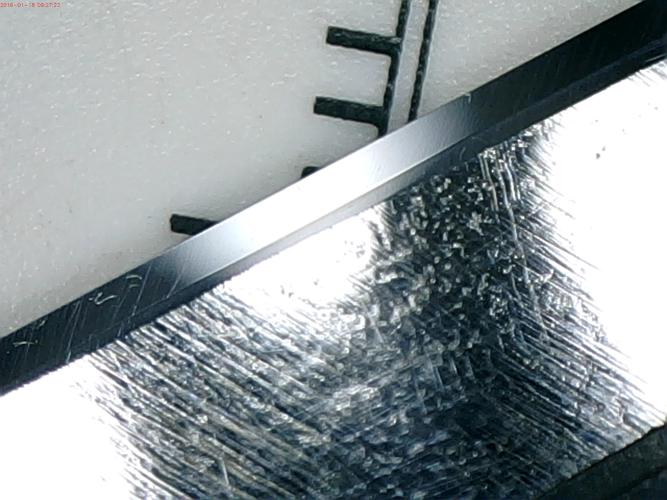
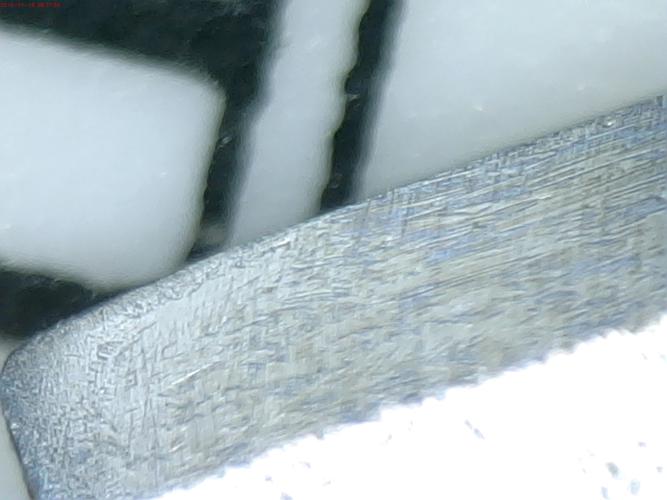
Inked just the edge and a tiny bit up the side. Did one stroke and these are the only spots not getting hit:

If I do multiple strokes it is fine.Regards,
PCM
-
01-18-2016, 02:47 PM #99Senior Member
- Join Date
- Dec 2014
- Location
- Southern NH
- Posts
- 562
Thanked: 41
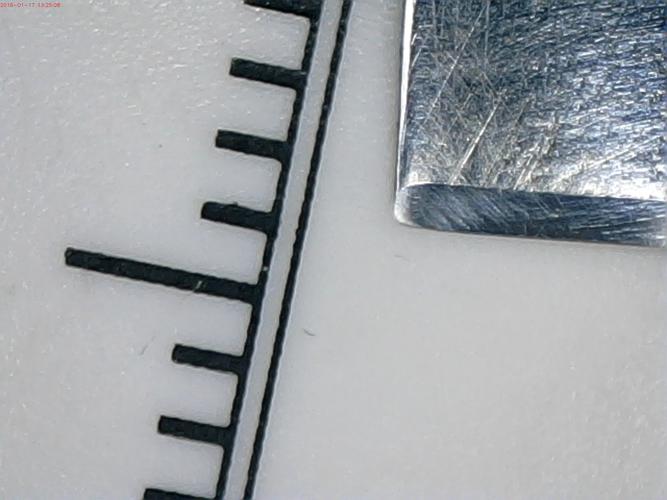
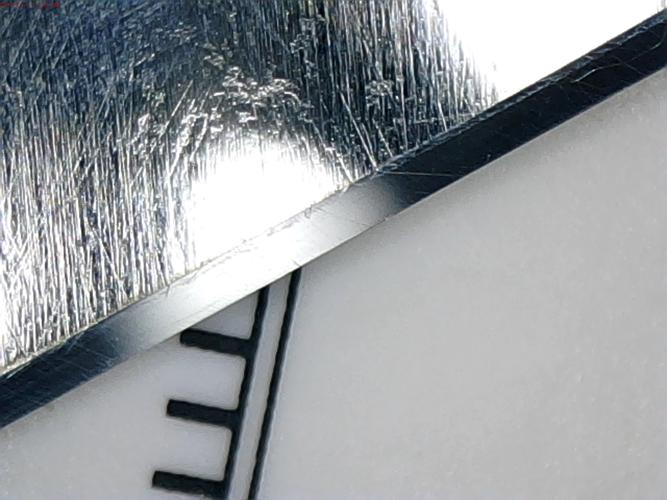
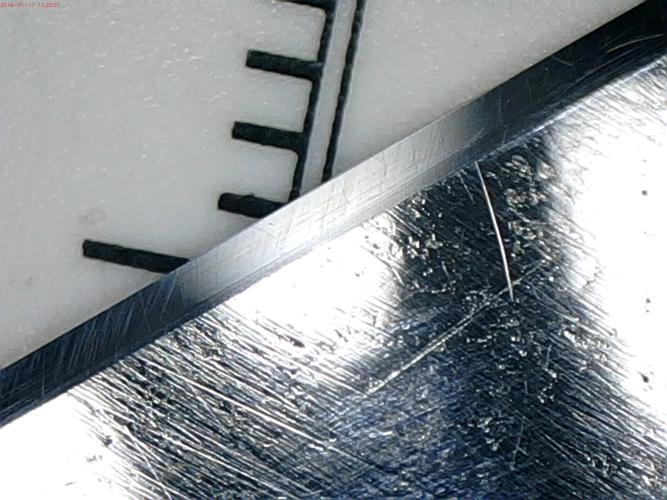
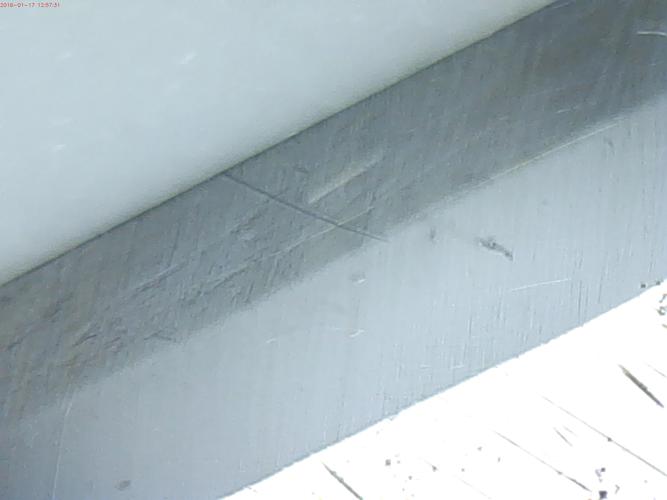
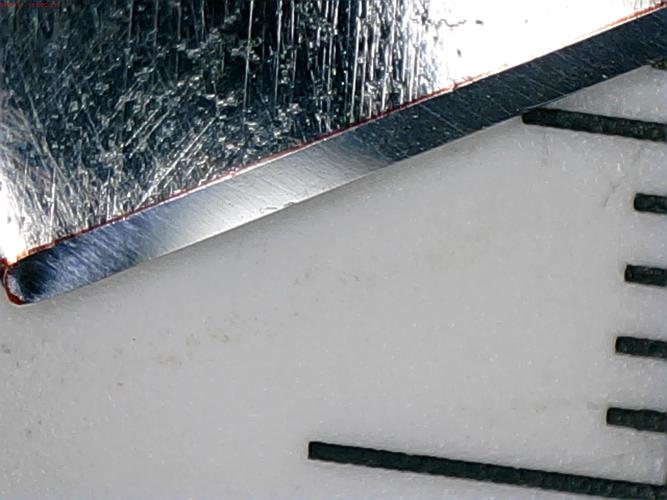
I did more rolling X strokes and here are the low magnification shots:


and here are the higher magnification shots of specific spots (bare with the focus and reflections):


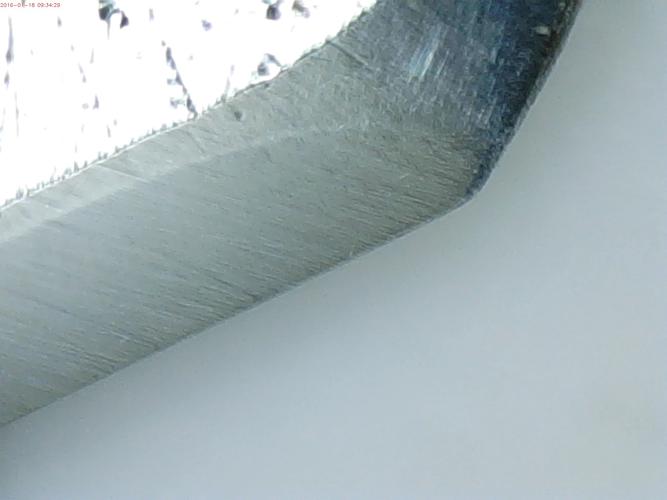
(two end pictures can be ignored - duplicates of others - can't seem to remove)Last edited by pcm; 01-18-2016 at 02:50 PM.
Regards,
PCM
-
01-18-2016, 02:48 PM #100Who's that guy think he is...

- Join Date
- Jun 2011
- Location
- The North Coast, Ohio
- Posts
- 2,455
Thanked: 146
That is a Great Tip! Originally Posted by Euclid440
Luck is a matter of preparation meeting opportunity. ~Lucius Annaeus Seneca
-
The Following User Says Thank You to JoeSomebody For This Useful Post:
Euclid440 (01-18-2016)


 Reply With Quote