
Results 17,101 to 17,110 of 20573
 91473Likes
Thread: What are you working on?
 LinkBack URL
 About LinkBacks
-
09-14-2019, 12:17 AM #17101Senior Member

- Join Date
- Sep 2009
- Location
- Plymouth, UK
- Posts
- 313
Thanked: 19 It sure can! The last one stayed very true, so I was a bit surprised at this one. I think next time with this razor I would just leave a bit of pitting on the toe. Sanding is a LOT of work, and I think only for extreme situations.
 Originally Posted by sharptonn

-
09-14-2019, 12:32 AM #17102Senior Member


- Join Date
- Dec 2018
- Location
- Gainesville, FL
- Posts
- 6,612
Thanked: 670
I suppose that is a concern. I would think a lot of that depends on how drastic the angle of the bevel is. Too thin and it probably would be brittle Originally Posted by 32t
Iron by iron is sharpened, And a man sharpens the face of his friend. PR 27:17
-
09-15-2019, 02:18 AM #17103Senior Member


- Join Date
- Mar 2015
- Location
- Akron, Ohio
- Posts
- 12,095
Thanked: 4312
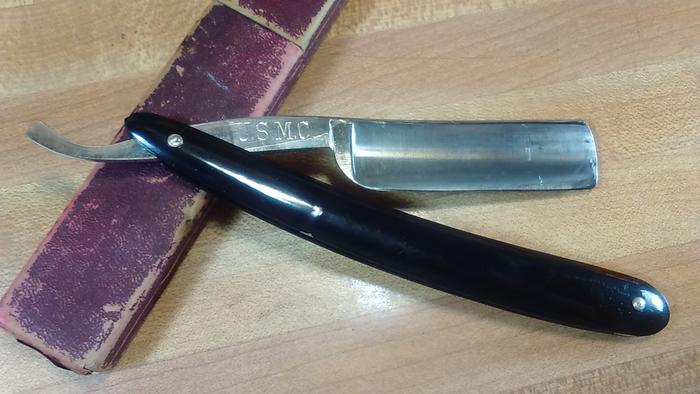
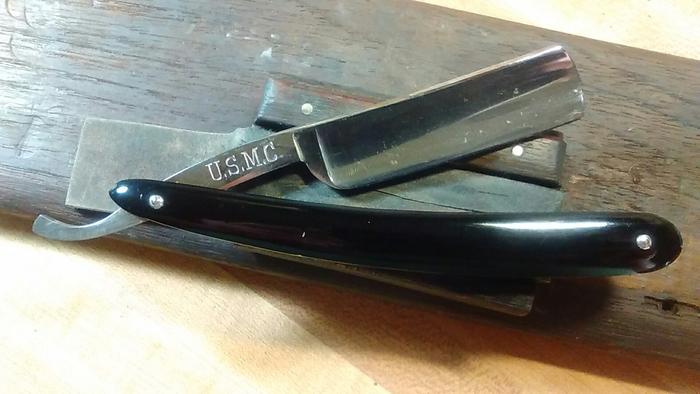
Haven't been at the bench for awhile, but I stumbled on to a quicky at the local antique shop.
Just a bit of 3M on a rag to clean it up.
 Mike
Mike
-
09-15-2019, 02:20 AM #17104Skeptical Member


- Join Date
- Nov 2016
- Location
- Colorado Springs
- Posts
- 10,548
Thanked: 2194
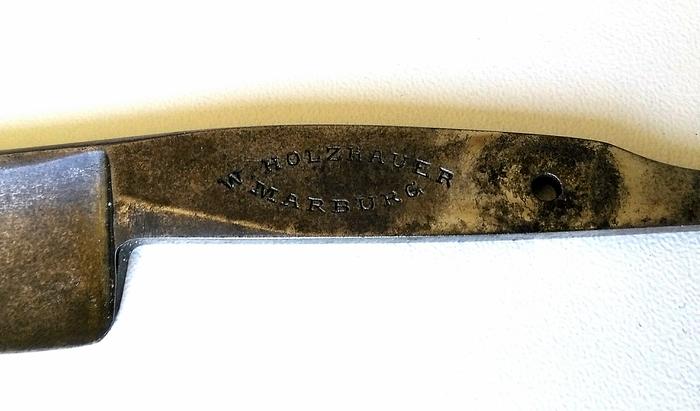
My kind of find. Nice one Mike. Id call it special with those markings.
outback likes this.It's just Sharpening, right?
Jerry...
-
The Following User Says Thank You to Gasman For This Useful Post:
outback (09-15-2019)
-
09-15-2019, 03:06 AM #17105Senior Member

- Join Date
- Feb 2013
- Location
- Haida Gwaii, British Columbia, Canada
- Posts
- 14,448
Thanked: 4829
I do envy your ability to find nice blades in the wild. It cleaned up well and I bet shaves a treat.
It's not what you know, it's who you take fishing!
-
The Following User Says Thank You to RezDog For This Useful Post:
outback (09-15-2019)
-
09-15-2019, 12:17 PM #17106Senior Member
- Join Date
- Sep 2009
- Location
- Plymouth, UK
- Posts
- 313
Thanked: 19 Sunday Challenge
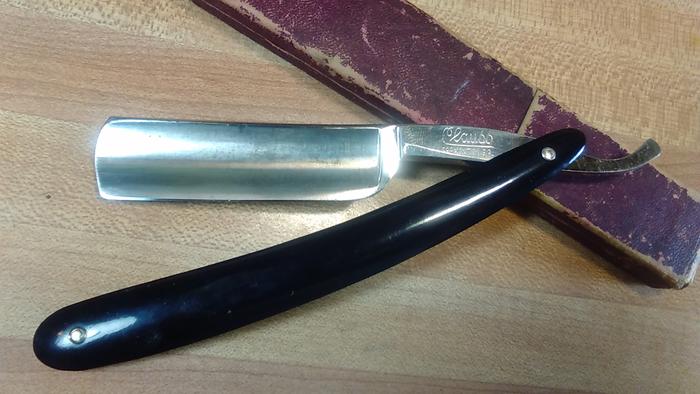
Does anyone have any advice on how to proceed with this? I want to re-scale this microtome / section cutter type blade.
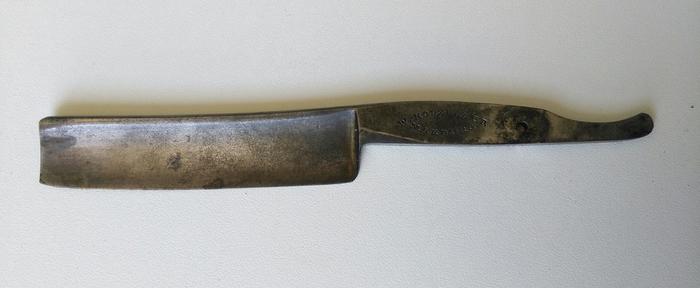
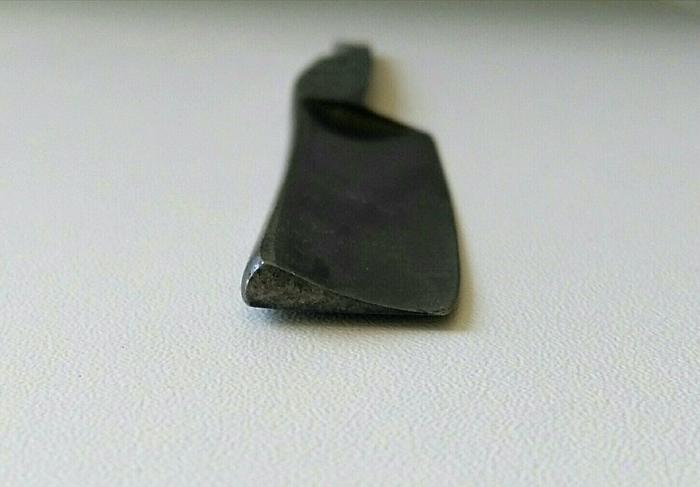
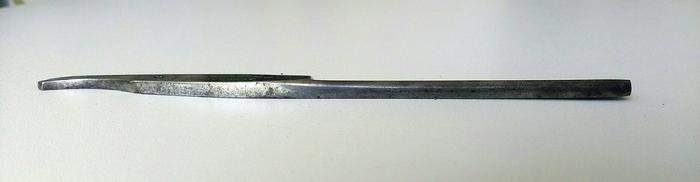
I have cut a set of plastic scales, the problem is how to fit them. As the pictures show, on the reverse side of the blade, the tang, blade and edge are almost all in the same plane, so any curvature of the scale at all will foul the blade. I did do a rough mock-up, and even with 0.6mm of wear washers on the reverse side of the pivot, the blade was catching, and anyway not at all an elegant solution.
Has anyone got any suggestions on how to proceed? I don't want to shave with this blade, I'm doing it partly for the fun of it, and when successful I'll probably pass it on.
Many thanks!Last edited by Montgomery; 09-15-2019 at 12:40 PM.
PaulFLUS likes this.
-
09-16-2019, 12:22 AM #17107Senior Member

- Join Date
- Feb 2016
- Location
- San Antonio, TX
- Posts
- 1,839
Thanked: 428
Now that's what I would call outstanding! I hope that one day I will find one just like it! Damn that's nice! Originally Posted by outback
Semper Fi !
John
-
The Following User Says Thank You to Johntoad57 For This Useful Post:
outback (09-16-2019)
-
09-16-2019, 12:54 AM #17108Senior Member
- Join Date
- Mar 2015
- Location
- Akron, Ohio
- Posts
- 12,095
Thanked: 4312
Had a feeling you'd gravitate towards that one, John. Originally Posted by Johntoad57
I was thinkin about ya, when I picked it up at the shop.Johntoad57 likes this.Mike
-
09-16-2019, 01:17 AM #17109Senior Member
- Join Date
- Dec 2018
- Location
- Gainesville, FL
- Posts
- 6,612
Thanked: 670
I wish I did Monty. At least I wish I did well enough to tell you how. I have made scales without something to copy but couldn't relate how to do it. Hopefully someone with more experience than I will chime in. It takes vision to see what needs to be made and then actually make it out of what might be limited resources. One thing that occurs to me though is you will need to have enough curve at the pivot end to clear the tang (since you don't have much grind there on the bottom of it) and bring it back up to meet the blade right under the spine. You can't really give it more grind without taking out part of the maker's mark. This is where the microbolts are handy so you can assemble it without the commitment of pinning. At least then you could play with bevel on the inside of the scale or various curves to the material. Maybe try playing around with some throw away wood or plastic to see what works? Possibly Masonite or some pine plank. At least that way you could use it as a pattern. That probably didn't help much maybe I've just been lucky for the few times I've done it blindly or maybe mine were.just easier to fit. Good luck with it. Originally Posted by Montgomery
ScoutHikerDad likes this.Iron by iron is sharpened, And a man sharpens the face of his friend. PR 27:17
-
09-16-2019, 10:38 AM #17110Senior Member
- Join Date
- Sep 2009
- Location
- Plymouth, UK
- Posts
- 313
Thanked: 19
Thanks! I have already fabricated some scales, which would work fine for a normal blade, but this blade is obviously different, the edge is not in the centre of the blade, the reverse tang, spine and edge are all in the same plane, so there is no way the edge will not foul on traditional scales with the standard curve. I note your suggestion of bevelling the inside of the scales, but if I understand your suggestion correctly, that would just mean that the reverse edge of the blade would contact the scale inside the scales rather than on entry, which is also not acceptable. Originally Posted by PaulFLUS
I do not have so-called 'micro bolts', but do have a semi-satisfactory workaround which is ok for now. Also, I'm not going to grind anything. Not only does this blade have a nice patina, grinding a blade to put it in scales is putting the cart before the horse IMHO.
My current thinking on how to configure the scales is to set the scales up so that the reverse scale is dead straight, and the front scale has a curve in it. It might look a bit funny, but I cannot imagine any other way around the issue.
But before I go too far down that road, I am wondering how this was originally done with this type of blade. I understand that blades used in a medical context were often scaled in stainless steel scales, to enable them to be sterilised in an autoclave, and the scales on the two steel-scaled razors I own are very stiff, with no curvature and a wedge which has only the slightest angle in it. That rigidity would be very useful here.
Anyway, let's see what the assembled expertise on the board comes up with.


 Reply With Quote