
Results 1,741 to 1,750 of 20574
 91475Likes
Thread: What are you working on?
 LinkBack URL
 About LinkBacks
-
01-30-2016, 11:38 PM #1741Str8Faced Gent.


- Join Date
- Aug 2013
- Location
- Orangeville, Ontario
- Posts
- 8,463
- Blog Entries
- 1
Thanked: 4207
Neat idea Richard. Great pinning surface.
sharptonn likes this."Depression is just anger,, without the enthusiasm."
Steven Wright
https://mobro.co/michaelbolton65?mc=5
-
01-31-2016, 01:52 AM #1742I love Burls....... and Acrylic

- Join Date
- Mar 2012
- Location
- Baden, Ontario
- Posts
- 5,475
Thanked: 2284
Ok, next time I'm at the antique stroe guess what I'm looking for! Great Idea Richard, I see these old irons all the time. I'm still using an old 28oz California framing hammer as my anvil. It actually works quite well, but I'd like to take the hammer back it to work for the odd time we set trusses on our new homes.
Burls, Girls, and all things that Swirl....
-
01-31-2016, 02:58 AM #1743Senior Member


- Join Date
- Oct 2015
- Location
- Knoxville,IA
- Posts
- 2,368
Thanked: 762
I have just made the decision that I am going to build my own 2x72 belt grinder. I wont get started for a little while have to gather parts and what not but it is going to happen. I have been bit by the build bug and its time for more cowbell! Have a good one gents

-
01-31-2016, 03:12 AM #1744Senior Member
- Join Date
- Dec 2014
- Location
- Virginia, USA
- Posts
- 2,224
Thanked: 481
Step right up and place your bets boys! Shave of the day, or cut of the day, which will be the next thread I post in? Odds are 3 to one in favor of cut of the day! Either way, the work station is set up, and it's going to be a mighty showdown! First up: Morley & Sons clover touch up on a Welsh Thuringian:
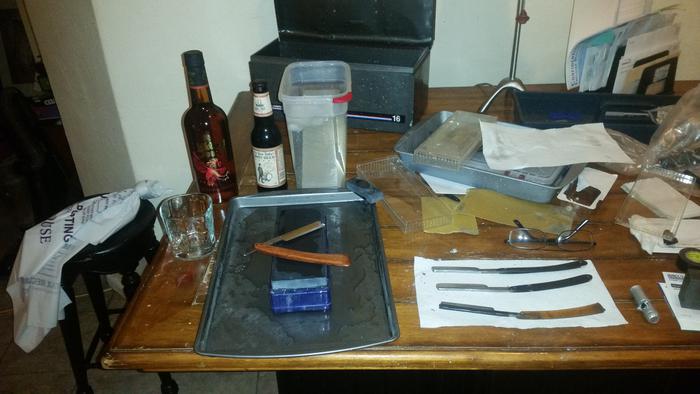
Ok, to be fair I touched this up before I imbibed. Second in line (took a little nip or 5 while working on this) - the Torrey:
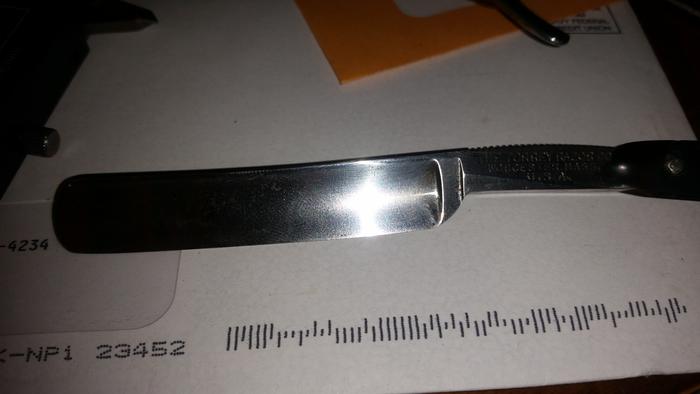
Probably hard to tell, but I checked the width of the spine with a digital caliper and it was within .002" down the length. Good enough for me. Then I set about ensuring the edge would be approximately within the same tolerance from the spine. Also reshaped the toe and heel ever so slightly so it doesn't look like a total hack job. I like the results.
Next on the list was the wedge. The way the bevel was shaping up I was expecting to find a thin spine at the toe and a bit fat between the bevel and spine around the mid section. What I actually found was a thick spine at the toe (almost .010" too meuch!) And a fat heel bevel to spine (.010 also! What the h3!! !?) So I thinned out the spine from the mid point to the toe, and the same thing for the breadth of the blade near the heel.
It goes without saying this isn't worth taking a picture of. But now it's .003" or less "within spec" so to speak. We'll see if that sucker doesn't come together a little better now!
Freshly lapped Norton 1k hone, and let the bevel setting begin!Last edited by Marshal; 01-31-2016 at 03:14 AM.
-
01-31-2016, 03:40 AM #1745
 Originally Posted by MikeB52
 Yeah B52, that was when I was doing some reading & research on itching & I came across that idea I think on intructables.com where people were making etchings from old scanners so I think even an old cd burner can do it also but a scanner could copy the image you want & I think it was a certain diode used to do the cutting but it was for paper only. I imagine a stronger diode or something might do a deeper etch or possibly etch more than just paper but i need to start researching it again. I have a couple old printers with scanners on them & I have a couple of scanners that work also. I probably saved a link to that. I'll have to look & see. Originally Posted by MikeB52
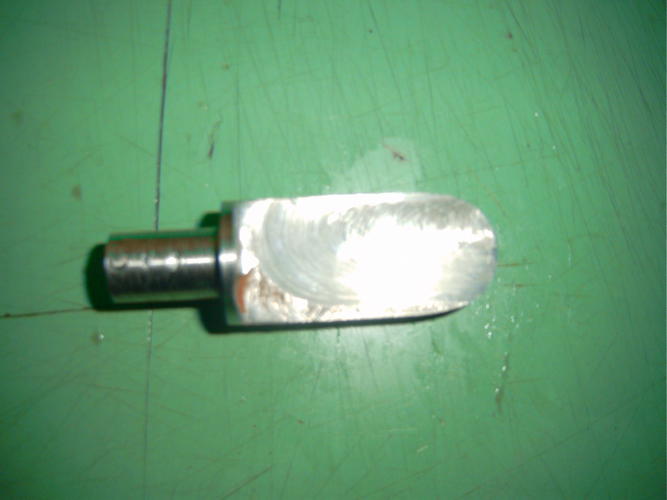
Richard, that is really cool. I have a piece of 1" key stock I use with larger holes drilled in it for the old pins to fall into. Originally Posted by Geezer
NewellVW likes this.
-
01-31-2016, 03:47 AM #1746Senior Member

- Join Date
- Mar 2015
- Location
- Akron, Ohio
- Posts
- 12,112
Thanked: 4314
My bet is...
The bottle blurrs your vision to the point, you cant see the bevel to get it set.[emoji38]Mike
-
01-31-2016, 03:50 AM #1747Senior Member
- Join Date
- Dec 2014
- Location
- Virginia, USA
- Posts
- 2,224
Thanked: 481
 Challenge accepted! Originally Posted by outback
-
01-31-2016, 04:01 AM #1748Senior Member
- Join Date
- Mar 2015
- Location
- Akron, Ohio
- Posts
- 12,112
Thanked: 4314
Keeeep sipping [emoji482] [emoji38] Originally Posted by Marshal
Mike
-
01-31-2016, 04:11 AM #1749Senior Member
- Join Date
- Dec 2014
- Location
- Virginia, USA
- Posts
- 2,224
Thanked: 481
For anybody wondering, Not your father's Root beer is a better whiskey chaser than Henry's hard ginger ale. But either route gets you to your destination, so it's all good.

Also, the bevel on the Germania Cutlery Works is coming along nicely. Time to take a break from bevel setting though. Gonna try out the Morley and see how it came out. I've got a good feeling about it.outback likes this.
-
01-31-2016, 12:28 PM #1750Senior Member
- Join Date
- Sep 2014
- Location
- Bulgaria
- Posts
- 840
Thanked: 168
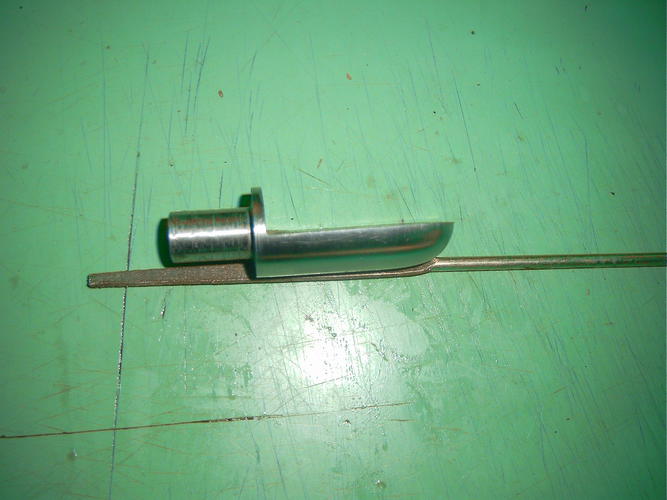
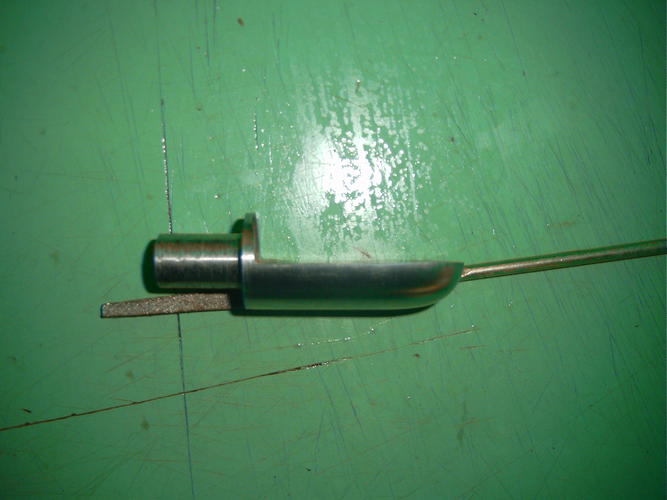
I work on few pipes and i made some spoon bits for drilling pipe chambers
I get a roung bar of X 12 MF tool steel witch is equivalent of the Rusian D-2 nd it is HHS ramminiscent tool steel
i Made ithis on my lathe and i mill it under cooling flow
When i finish the hole batch i will send them for heat treatment and hardening in a profetional knifemaking factory
Those are pretty expensive on the shops so i decide to make my self snd spend some money
-
The Following User Says Thank You to RusenBG For This Useful Post:
sharptonn (02-03-2016)


 Reply With Quote

