
Results 1,841 to 1,850 of 20602
 91550Likes
Thread: What are you working on?
 LinkBack URL
 About LinkBacks
-
02-11-2016, 03:29 AM #1841Razor Vulture


- Join Date
- Oct 2010
- Location
- Lone Star State
- Posts
- 26,208
Thanked: 8626 I did not know if you were going to actually iron with it or not!
 Originally Posted by cudarunner

 "Don't be stubborn. You are missing out."
I rest my case.
-
02-11-2016, 03:35 AM #1842'with that said'


- Join Date
- Aug 2010
- Location
- Walla Walla in WA State USA
- Posts
- 11,260
Thanked: 4238
With it being destined to being in a museum, it should represent how it was originally going to be used. Originally Posted by sharptonn
With that said, a replication of a wooden knob would probably be acceptable. However I'm sure that folks would understand how it worked just as it is. Again if a new piece that could be turned and pinned to look like it was original that would be acceptable.
I never meant to open up a can of worms here. :
:  Geezer likes this.Our house is as Neil left it- an Aladdins cave of 'stuff'.
Kim X
-
02-11-2016, 11:20 AM #1843Junior Member
- Join Date
- Jan 2015
- Location
- Australia
- Posts
- 9
Thanked: 0
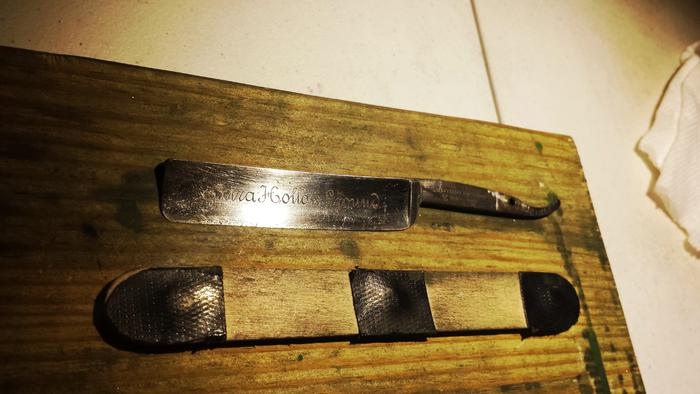
Hey guys, I finished my first full restore over the weekend. I picked this razor and one other up from a bloke for $20 whilst I was buying a concrete mixer off him about this time last year. My intention was to use them both as "practice razors", you know, something to get my honing technique down on and work out a few restoration methods. Long story short, the kids have kept me busier than expected and I only got to this thing in the last couple of months.
I can't find the "as found" photos unfortunately, but what I had was a rusty looking old thing with pretty heavy wear in the middle of the spine and a visible frown. Not as bad as some that I've seen you guys bring back to life but still looking like heavy going for a novice like me. The scales on the other razor were the original "Bengall" stamped ones but this razor had these nasty, thin scales that didn't math and looked wrong. I wanted to have a go at breadknifing it and the edge came good pretty easily. I followed the recommended bevel setting of 220-1000 grit and it looked OK so I stopped there.
So I got cracking with the polishing wheel and cutting abrasive which took the rust off quicker than I expected. I noticed that the tang and pivot looked crook on both razors so tried to get the pins out and surprise surprise, I broke the scales. I must be missing something because I'm yet to get a pin out without killing scales.
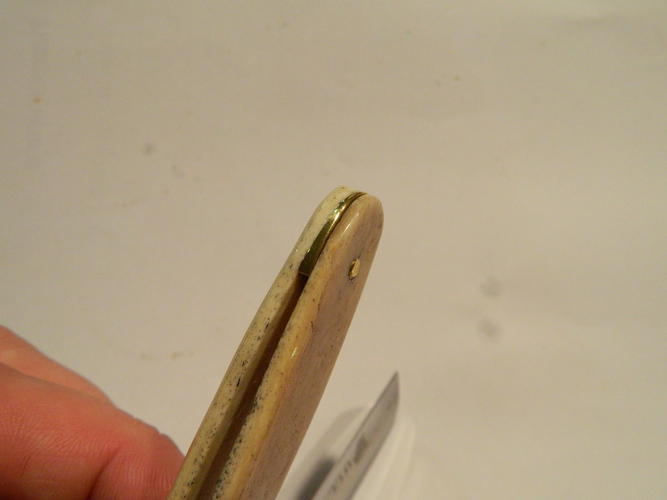
At this point, I walked off in a huff and left it alone for a while until I found a horses' jaw bone laying on the ground at work (it was very old and weathered, no squishy bits) and got keen again. So I made a practice set of scales which were rubbish BUT I put my thinking cap on for the second set and made them as a matched pair (obvious I know). Found a bit of brass plate in my workshop for the wedge and some 2.5mm brass rod for the pins. The previous owner had drilled the razor out for a bigger pin and my brass rod just happened to fit nicely.
The result is below:
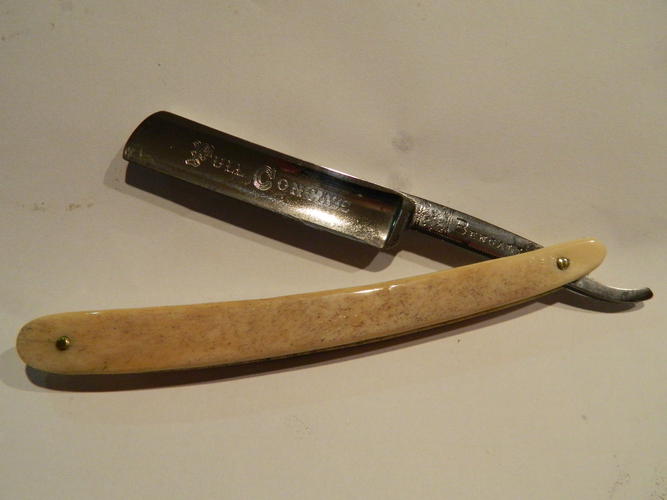

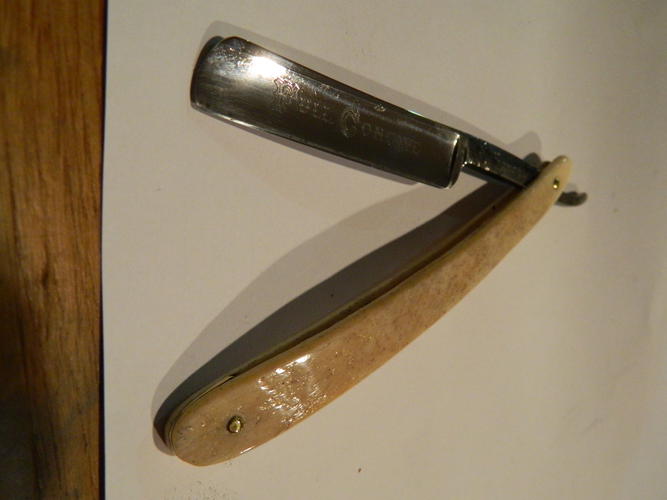
This was only meant to be a practice razor and things got a little out of hand. I was happy with the look so I decided to give it a full hone and see how it shaved. It came up beautifully! In terms of smoothness, second only to my trusty Boker. All in all, a good result from a $10 chance score.Last edited by Richardb; 02-11-2016 at 11:23 AM.
-
02-11-2016, 11:50 PM #1844Matt

- Join Date
- Dec 2015
- Location
- Albany, NY
- Posts
- 971
Thanked: 260 Decent W&B Blade
I paid not a lot of money for this blade on the Baybay. Scales were cracked, chipped and generally not good.
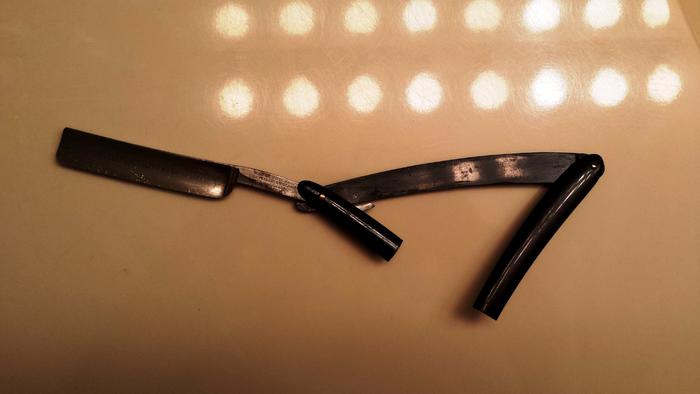
Blade was very scratched up from what looked like a prior attempt to 'clean' it.
I think i hit 800 grit and that was as low as id go. That etching man..
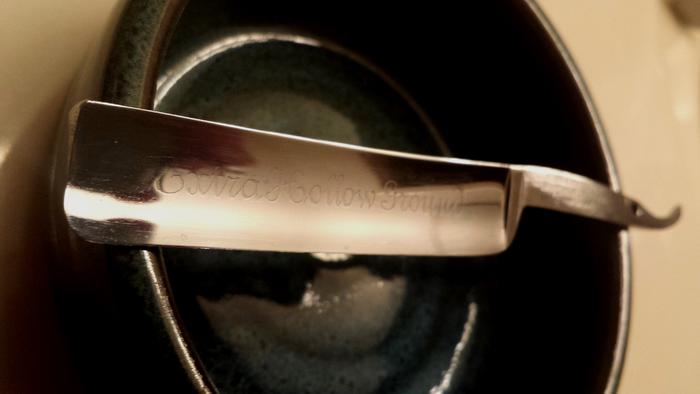
You can see the scratches over the mark on the tang. I refuse to sand it.
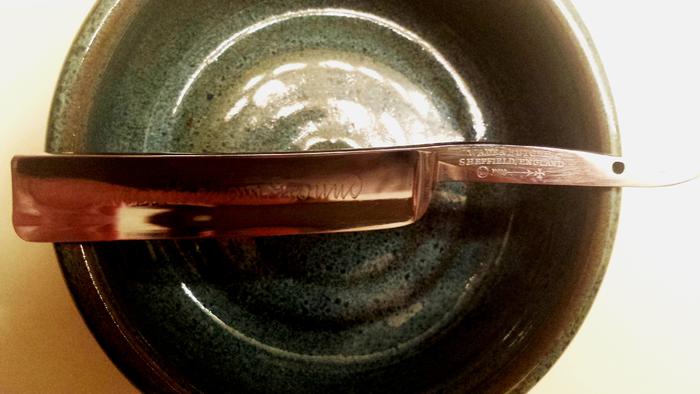
Sorry the pics are a little fuzzy.
-
02-12-2016, 12:10 AM #1845'with that said'
- Join Date
- Aug 2010
- Location
- Walla Walla in WA State USA
- Posts
- 11,260
Thanked: 4238
I thought that I was done but I guess that I'm going to be Anal about this project that was posted earlier;
http://straightrazorpalace.com/works...ml#post1600618
I decided to go ahead and give all of the steel and cast iron a good spay of WD 40 then let it soak for an hour or so then wipe it all very dry and then slowly allow the oil to 'cure' in a small toaster type oven. First at 150 for 30 minutes then allowed to cool to room temp then at 200 for 30 minutes and then again allowed to cool to room temp and finally at 250 etc.
I then repeated the above and the metal seems to be looking really nice! I'm hopeful that the rust demons will leave it alone for many years to come!
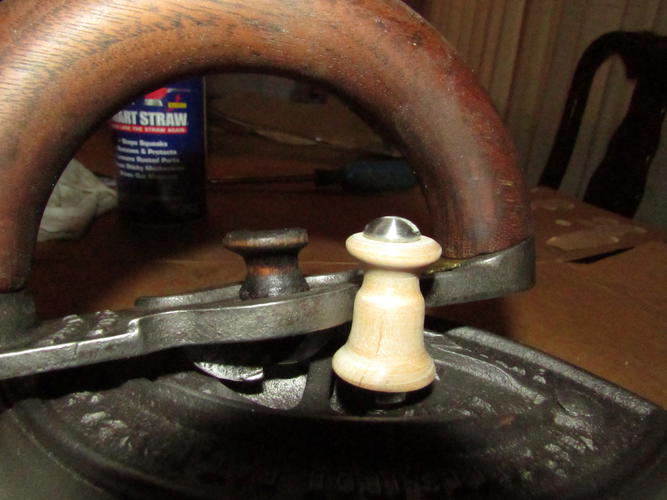
However that broken wooden knob has just been bugging the crap out of me!!
My friend Mike B52 had offered to be of service in making a replacement and other friends have offered help also but shipping would kill me so I was stuck doing it myself
However I don't have any kind of lathe and besides; I haven't turned anything on a wood lathe since 1971.
BUT I do have a cheapie Harbor Freight bench top drill press and some 1/2 round and rat tail files.
I also had an old wooden spool that held thread. In fact there was thread still on it but it was 'pink' and plus it was well over 35 years old so it was probably due to be tossed anyway.

Well as Hank Jr sang; A Country Boy Can Survive!
So here we go!
The Very Rare Wood mounted on an Extremely Expensive Custom Made Mandrel.

Yup! That's a 1/4" carriage bolt with a wing nut.
Here's on the 'lathe':
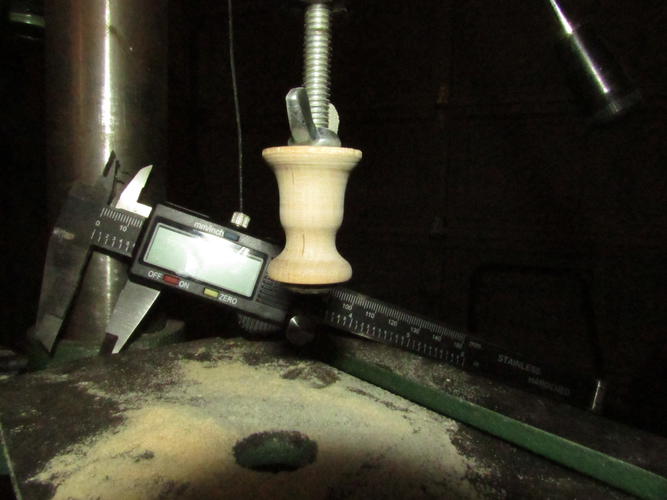
Here it is on kind of a 'side by side';
I tried to keep the dimensions as close as i could however I didn't dismantle the piece since I figured the whole thing would come apart when I went to turn the thread spool. However by holding the 'New' top on top of the old piece it's right on!!! And as best as I can measure the bottom of the old wooden piece measures .607 and my piece measures .578.
I do hope that no one notices.
Now to stress myself out on how to remove the old piece and reattach the new knob. OH! I also have to figure out how to make the new knob look like it was always there!
"So much time so little to do/Reverse that" Willie Wonka
Last edited by cudarunner; 02-12-2016 at 12:13 AM.
Our house is as Neil left it- an Aladdins cave of 'stuff'.
Kim X
-
02-12-2016, 12:21 AM #1846Moderator


- Join Date
- Jul 2013
- Location
- Forest Grove, Oregon
- Posts
- 5,163
Thanked: 1229
Roy, you doth complain too much. You know in your heart that you can do just about anything you want to do. Look at the perseverance you had to last all those years with the store to never be mentioned again. Plus you won't show anything that isn't at the 'perfect' level.
Waiting to see the finished product.
As the older goat to the younger goat, "Baaa!""The sharpening stones from time to time provide officers with gasoline."
-
The Following User Says Thank You to Razorfeld For This Useful Post:
sharptonn (02-12-2016)
-
02-12-2016, 12:42 AM #1847Razor Vulture
- Join Date
- Oct 2010
- Location
- Lone Star State
- Posts
- 26,208
Thanked: 8626
I am assuming you will epoxy the inner threaded nut from the original knob in? Looks great!
Apples to apples considered!
"Don't be stubborn. You are missing out."
I rest my case.
-
02-12-2016, 12:56 AM #1848Historically Inquisitive

- Join Date
- Aug 2011
- Location
- Upstate New York
- Posts
- 5,782
- Blog Entries
- 1
Thanked: 4249
Looks really good Roy, at one point in time this will be a finished project.
Geezer and cudarunner like this.
-
02-12-2016, 01:10 AM #1849'with that said'
- Join Date
- Aug 2010
- Location
- Walla Walla in WA State USA
- Posts
- 11,260
Thanked: 4238
Originally Posted by Razorfeld
 I rarely 'complain' I just tell the truth. And the truth was that I didn't have a lathe so I simply did what any good old redneck country boy would do and that is to 'improvise' just like Hank Said "A Country Boy Can Survive"
I would digress about showing only something that was 'at the perfect level'. I only show what I can and more times than not it's not 'Perfect'.
Tom, there is no threaded nut. The wooden knob is attached by what looks like a steel rod with a copper washer under the peening. The knob also has a recess at the top. I doubt that I can get a decent pic but my thought is to try to break the old wood away then gently remove the old peening by filing on the sides and then try to carefully sand the base of the new knob down until there is 'just enough' to peen the original copper washer to hold all in place. Originally Posted by sharptonn
I've also given thought to trying to anneal the top of the steel post so as to make it easier to peen.
As always I'm open to any thoughts ideas or suggestions.
I hope that the finished project will be up to not only my standards but others including the two of you my friends.
My Thanks to the both of you!:
Our house is as Neil left it- an Aladdins cave of 'stuff'.
Kim X
-
02-12-2016, 01:10 AM #1850Razor Vulture
- Join Date
- Oct 2010
- Location
- Lone Star State
- Posts
- 26,208
Thanked: 8626
I think it is screaming for the old tar and kerosene (Diesel) hand-rubbed finish. Mexican patina!
Sorry, Roy! Takes me a bit to understand. Not versed in sadirons.
So the knob is slid! Not screwed (like me!)
You could use an old non-galvanized carriage bolt. Grind it to spec. peen the end using your original copper washer. Drop some vinegar on them after to induce patina.Last edited by sharptonn; 02-12-2016 at 01:25 AM.
cudarunner likes this."Don't be stubborn. You are missing out."
I rest my case.
-
The Following User Says Thank You to sharptonn For This Useful Post:
cudarunner (02-12-2016)


 Reply With Quote