
Results 18,441 to 18,450 of 20573
 91473Likes
Thread: What are you working on?
 LinkBack URL
 About LinkBacks
-
05-05-2020, 04:45 AM #18441Senior Member


- Join Date
- Apr 2012
- Location
- Diamond Bar, CA
- Posts
- 6,553
Thanked: 3215
Not sure what you mean.
About a ¼ inch from where the edge begins to curve into the heel and away from the stabilizer. It does not need to be exactly a ¼ inch, just far enough away from the stabilizer, so that you do not hit it when honing.
You can just ink the stabilizer and hone away, if you see that you are removing ink from the stabilizer, move it a bit more.
If you will be doing a lot of edge profiling, e.g. a largeish chip removal, you may want to take a bit more, as you hone and remove metal at the edge, the corner will move closer to the stabilizer.
I just make it part of honing, and adjust the heel as needed before it becomes an issue.
-
05-06-2020, 12:07 AM #18442Senior Member

- Join Date
- Feb 2019
- Location
- Salida, CA
- Posts
- 600
Thanked: 94
 Originally Posted by Euclid440

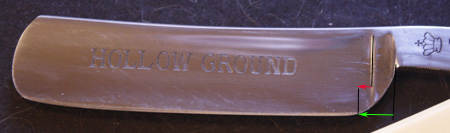
Sorry if I didn't make my question clear. Is the 1/4" measured like the red arrow or the green arrow? If I do the measurement like the read arrow it is currently just under 1/8". Measured like the green arrow it is just under 1/4".
When I measure out 1/4" like the red arrow, it looks much to forward.O'Toole's commentary on Murphy's Law: Murphy was an optimist.
-
05-06-2020, 02:36 PM #18443Senior Member


- Join Date
- Mar 2015
- Location
- Akron, Ohio
- Posts
- 12,095
Thanked: 4312
Personally, I'd go by the red arrow.
It looks perfect as is, to me. I don't actually measure, just make them clear of the stabilizer when honing. If it gets too close while honing, I'll round it off some more. Better to remove what's needed, than to remove too much at first. Ya can't put it back, once removed.!Last edited by outback; 05-06-2020 at 02:42 PM.
Mike
-
The Following User Says Thank You to outback For This Useful Post:
PaulFLUS (05-06-2020)
-
05-06-2020, 02:45 PM #18444Senior Member

- Join Date
- Jan 2012
- Location
- Waukesha, Wisconsin
- Posts
- 1,943
Thanked: 390
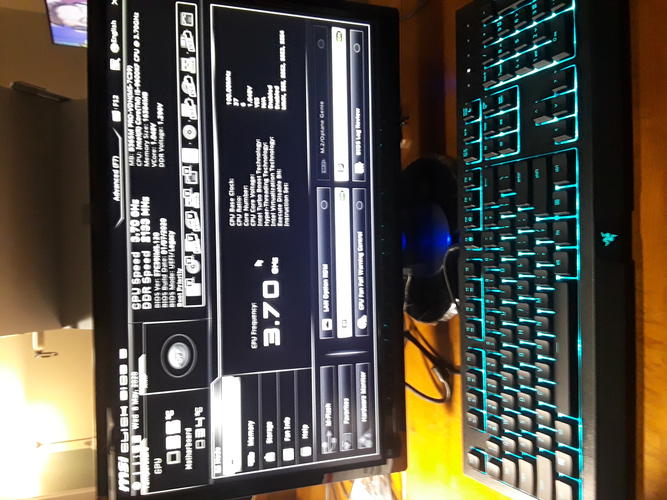
I've wanted to build a gaming pc for a few years now and with the stay at home order forcibly cutting my spending, I had some extra disposible income. I am pretty dang happy that it booted up on the first, being my first time doing this.
Had a bit of a wrinkle here and there. The youtube video I watched skipped harddrive installation completely and threw me for a loop, but that was a fairly simple thing to figure out. The worst problem, not too big of a deal just a delay, was that i bought windows 10 on a dvd and my case has no room for an optical drive. Downloaded to a thumbdrive off the interwebs, but that took forever....
-
05-06-2020, 02:58 PM #18445Senior Member
- Join Date
- Apr 2012
- Location
- Diamond Bar, CA
- Posts
- 6,553
Thanked: 3215
Personally, I'd go by the red arrow.
Yea, it is the front shoulder that you are trying to avoid. So, measure from that shoulder forward.
If you re-profile the arc, using a circular object, coin, large washer, or bottle cap, you can preview the cut. Using a black sharpie will give you a good idea of what it will look like.
The goal is to be able to hone the heel corner without touching the stabilizer.


-
The Following User Says Thank You to Euclid440 For This Useful Post:
JellyJar (05-07-2020)
-
05-06-2020, 05:31 PM #18446Senior Member

- Join Date
- Jan 2019
- Posts
- 113
Thanked: 2
Hi guys, it's been a while since my last post. I want to start working on this razor:
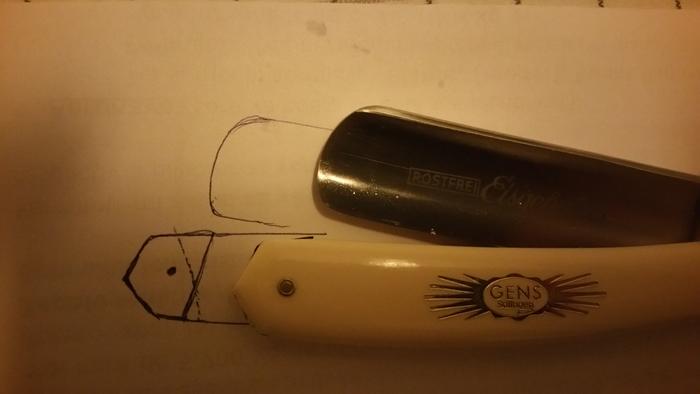
The wedge is upside down and I would like to flip it around. Is there anything I should know before removing the pin? It will be my first repin.
Thanks!
-
05-06-2020, 06:36 PM #18447Senior Member

- Join Date
- Feb 2013
- Location
- Haida Gwaii, British Columbia, Canada
- Posts
- 14,448
Thanked: 4829
There are a few videos you should watch. Both Glen aka Gssixgun and Charlie Lewis have good videos on their you tube pages. My advice is to keep the pin length quite short. It is super easy to make them too long. If it doesn’t tighten up easily, it is too long and you can file it down and peen some more. It’s easy to bend a pin. Also a light hammer and very light taps.
It's not what you know, it's who you take fishing!
-
The Following User Says Thank You to RezDog For This Useful Post:
Geezer (05-06-2020)
-
05-06-2020, 07:49 PM #18448Senior Member
- Join Date
- Apr 2012
- Location
- Diamond Bar, CA
- Posts
- 6,553
Thanked: 3215
It looks like a factory pin, are you only unpinning just to clear the wedge?
If so, you may not need to, just file the wedge with a needle file. You can grind the flats safe, tape them with duct tape or a piece of aluminum can folded around 3 sides. Or tape some thin plastic over the inside of the scales, plastic water bottle to protect the scales.
Sometimes a fine-tooth hacksaw blade works, you may need to remove a bit of set with a hammer to keep the blade from cutting into the scale. You generally do not need to remove much material to get them to close.
The wedge should be straight, but the scale may have shrunk and past owners have modified the wedge, an early indicator of Cell Rot. If they have shrunk keep an eye on it. Old Faux Ivory is susceptible to Cell Rot.
If you do have to unpin and re-pin, un-pinning is the hardest to do and save the scales. If you do not like the pinning, just unpin and redo it. Lots of video and post on un-pinning. Go slow, file a flat, center punch, use a Center Drill and a sharp bit.
On that type of Escutcheon Pin, one end is factory made, the other side is peened, (looks like a Nail and the pin and collar may be one piece) cut the peened side. This looks like the factory side, it may be a bit harder than the other side.
-
05-06-2020, 09:32 PM #18449Senior Member
- Join Date
- Jan 2019
- Posts
- 113
Thanked: 2
The wedge is exactly like in my drawing - rather sure that is the wrong way around.
It is slightly lose and I can rotate it a little bit. I could rotate it and then file it. I do not have a file thin enough to fit between the scales.
It is the factory pinning - the razor is NOS.
So far I think I have watched all videos regarding pinning
Thanks for your answers! They really helped!
-
05-06-2020, 09:42 PM #18450Senior Member

- Join Date
- Oct 2010
- Location
- 50 miles west of randydance
- Posts
- 9,683
Thanked: 1354
If the razor truly is NOS it might be worth more with the error.
Do you think it might have been pinned on a Monday after a long weekend and then QC looked at it the next Monday?
-
The Following User Says Thank You to 32t For This Useful Post:
Geezer (05-06-2020)


 Reply With Quote