
Results 18,541 to 18,550 of 20574
 91475Likes
Thread: What are you working on?
 LinkBack URL
 About LinkBacks
-
06-06-2020, 08:02 PM #18541Senior Member


- Join Date
- May 2010
- Location
- Upstate South Carolina
- Posts
- 3,308
Thanked: 987
So I finally got the two Dubl Duck Satin Edge blades and scales out of my to-do bin. It's probably been close to a year since Sharptonn Tom sent me two sets of vintage Satin Edge scales. They were in great shape save for the usual scratches and haze that acrylic/plastic seems to develop even sitting in a drawer. Most of it polished out. I may pin them up this afternoon while my smoked beef ribs are resting in foil. Thanks again, Tom!
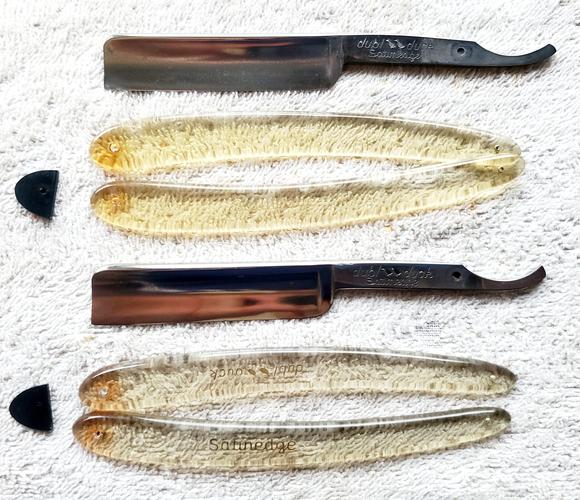
Y'all know how much I love wood, but I love me some clear scales too!There are many roads to sharp.
-
06-06-2020, 11:19 PM #18542Senior Member


- Join Date
- Feb 2013
- Location
- Haida Gwaii, British Columbia, Canada
- Posts
- 14,455
Thanked: 4830
Looking good!
ScoutHikerDad likes this.It's not what you know, it's who you take fishing!
-
06-07-2020, 01:20 PM #18543Senior Member
- Join Date
- Sep 2009
- Location
- Plymouth, UK
- Posts
- 313
Thanked: 19
Many thanks for the advice. I appreciate that it will be a challenge due to the blade width, grind, and the relative width of the tang; my concern is precisely that the bevel will be very wide at the heel and it will always look like a razor which has been through the mill. Originally Posted by RezDog

I note what you say about honing the whole blade with emphasis on the heel. If I understand correctly, that is more or less my middle way approach, and would give a balance between retaining the width at the widest part of the blade which is used most, keeping the heel useable, and also retaining some balance and aesthetic quality.
On the one hand, I have little to lose by having a shot at it, and it will indeed be an interesting challenge; on the other hand, if it will always look like a razor which has undergone some serious salvage work, perhaps a more graceful destination would be the box of razors I have which I feel are probably beyond redemption with my current state of knowledge, but which are old, interesting or attractive enough to retain for information and aesthetic purposes.
-
06-07-2020, 01:58 PM #18544Senior Member
- Join Date
- Sep 2009
- Location
- Plymouth, UK
- Posts
- 313
Thanked: 19
The damage does indeed look deep. Many thanks for the advice and suggestions.
My main area of uncertainty, both before asking the question and still now, is how to approach the issue of the final profile of the blade.
Originally Posted by Euclid440
I have a few razors where the profile is to some extent a smiling profile, and the toe is noticeably wider than the heel:
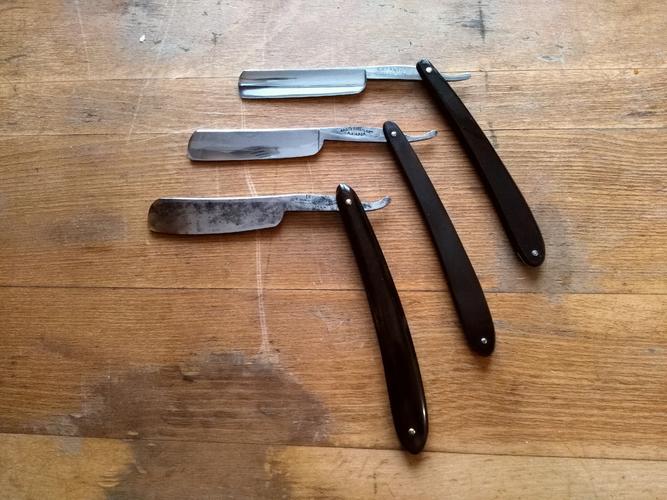
From top to bottom, the difference between toe and heel is in the order of very roughly 1mm, 2mm, and 3mm, and the widest section of the blade is about 1/6 to 1/4 of the total length back from the toe. My take is that the last of the three, the John Heiffor, was designed this way, I am not sure about the other two. I think they all look fine, and they all shave fine as well.
My thoughts were to go for this type of profile; I see that you suggest aiming for a more symmetrical toe and heel.
So looking at this suggestion,
I was originally thinking of an approach which began with something like this at the heel, but left the toe more or less as it is, adjusting the toe last of all, to the minimum extent necessary to give a balanced look. This could give a profile which is to some extent asymmetric, but not entirely without precedent. Am I more or less on the same page as you with this approach? Originally Posted by Euclid440
-
06-07-2020, 03:11 PM #18545Senior Member
- Join Date
- Apr 2012
- Location
- Diamond Bar, CA
- Posts
- 6,553
Thanked: 3215
How much you will need to remove to get to the bottom of the chip and good steel will determine the final shape.
You need to remove the chip first. Removing the chip is a misnomer, because you do not remove the chip, you remove all the steel in that plane to the bottom of the chip.
Once you do, you work with what is left. No matter how you remove the steel you will need to remove the same amount of steel.
Bread-knifing, high angle honing, or using a diamond file to remove all the surrounding steel will remove less steel, because you have more control.
Honing will tell you when you have reached solid steel. It will look like a repaired razor, because it is, and you do not have a lot of steel to work with.
Look at it as saving a razor from becoming a drawer or wall queen.
Don’t worry about the size of the bevel, you have no control over the width of the bevel it is controlled by the geometry of the width of the blade, does it shave well, is the question?Montgomery and rolodave like this.
-
The Following User Says Thank You to Euclid440 For This Useful Post:
Montgomery (06-07-2020)
-
06-07-2020, 03:16 PM #18546Senior Member
- Join Date
- Sep 2009
- Location
- Plymouth, UK
- Posts
- 313
Thanked: 19
Yes, let's just go for it and see what happens! Originally Posted by Euclid440
-
06-07-2020, 06:41 PM #18547Senior Member
- Join Date
- Sep 2009
- Location
- Plymouth, UK
- Posts
- 313
Thanked: 19
With the advice in mind, I had a go on the diamond plate. With the idea that less is more, and thinking I can always adjust again later, I stopped as soon as the damage seemed to have disappeared. Originally Posted by Montgomery
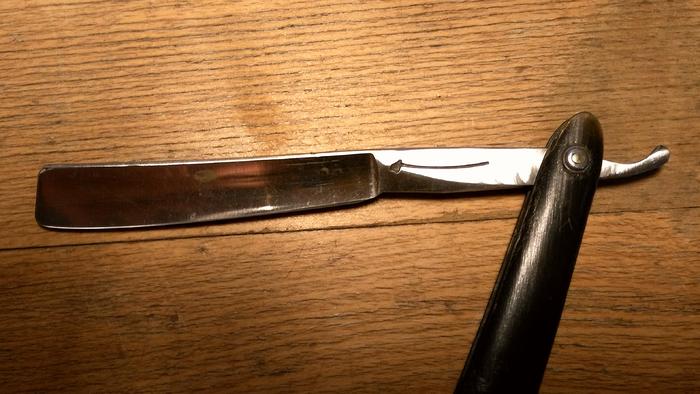
I then set the bevel, perhaps not as a final bevel, but to see where we are up to and what we are working with. Though I went past where the visible cracks were with the diamond plate, after some honing a chip dropped out of the edge at the site of the damage. After breadknifing again, the edge now seems to be clean, and I hope that is the end of the matter. Honing with three layers of tape, it doesn't look as bad as I thought, though the bevel at the heel is about 0.75mm wide.
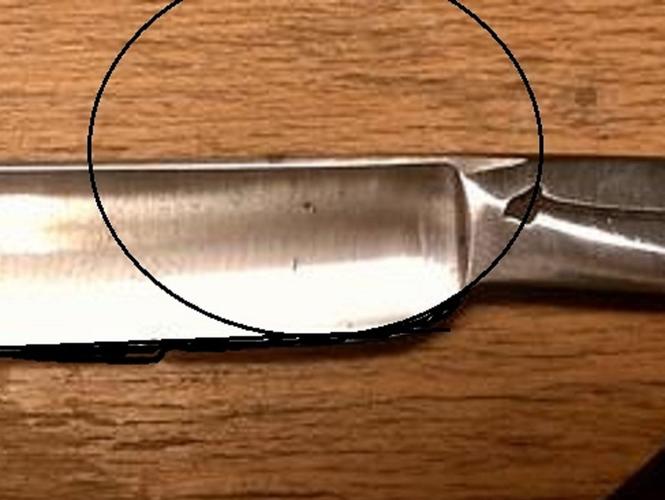
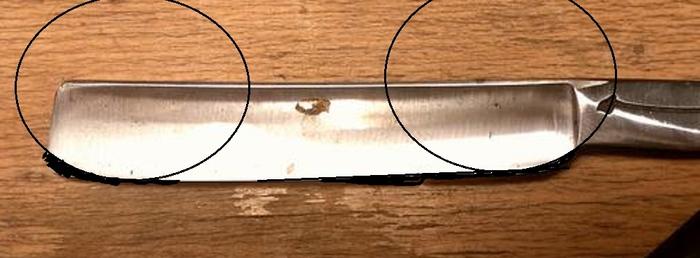
All in all, not as bad as I feared. The heel still looks rough, I'm wondering what to do about that. I notice that the tang has been ground in the past, probably when the razor was manufactured, but the thought occurred to me that it could probably be ground a bit more, to restore the balance of the razor, maybe as marked in black here:
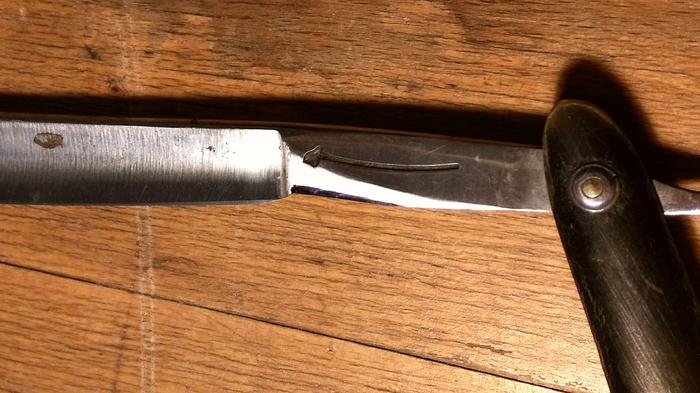
Has anyone ever ground down a tang for this reason?
-
06-07-2020, 10:24 PM #18548Senior Member
- Join Date
- Apr 2012
- Location
- Diamond Bar, CA
- Posts
- 6,553
Thanked: 3215
You do not need to grind the tang, you need to reprofile the heel.
Had you profiled the heel as shown in the proposed photo, the second and last one, would have moved the heel corner well forward of the tang and taken it out of play.
Most likely the heel half of the razor has been ground down trying to get the heel bevels to meet but were hitting the tang, preventing the bevel at the heel from making full contact with the stone.
A lot of that razor has been ground away because the heel needed reprofiling, note the spine wear and grind marks on the tang over the heel. It all could have been prevented.
Reprofile the heel and it will hone up just fine.Montgomery likes this.
-
The Following User Says Thank You to Euclid440 For This Useful Post:
Montgomery (06-08-2020)
-
06-08-2020, 10:18 AM #18549Senior Member
- Join Date
- Sep 2009
- Location
- Plymouth, UK
- Posts
- 313
Thanked: 19
@Euclid440, many thanks for the feedback!
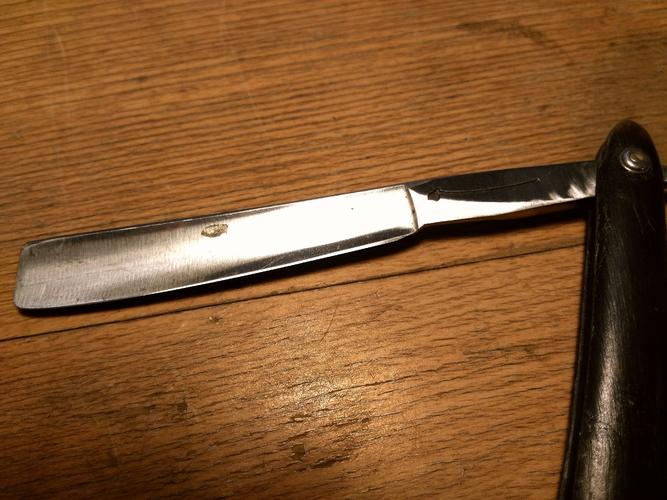
Maybe I'm missing something here! Because of the amount removed to remove the chip, if you project the edge over the tang, there is about 2mm between the projection and the point where the tang intersects with the stabiliser - I've marked this in yellow: Originally Posted by Euclid440
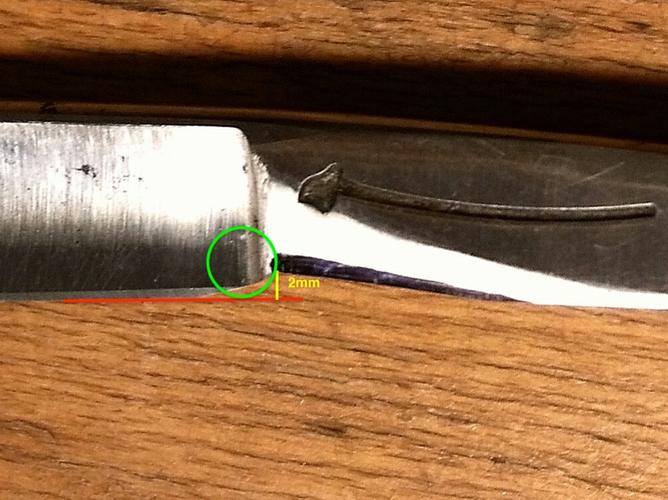
I know it doesn't look great as it is, but I'm not sure where to go from here. A nice radius, as shown in green, would have been nice, but the edge would have been much much closer to the stabiliser. At what point did I take the wrong turn?rolodave likes this.
-
06-08-2020, 12:35 PM #18550Senior Member
- Join Date
- Apr 2012
- Location
- Diamond Bar, CA
- Posts
- 6,553
Thanked: 3215
I should have advised you to reprofile the heel first, so you would have had more control over the edge removal as in photo 1.
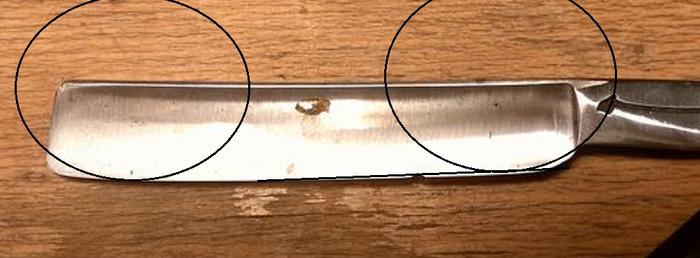
But now you can still reprofile what is left of the heel. It will not be much of a radius and probably more like a 45-degree cut, but it will move the corner of the edge away from the stabilizer and tang. Photo 2
As it is now, the only way to hone the heel is to place the corner of the stone right up against the stabilizer and carefully hone it. If the radius on the stone corner is too great, it will not reach the corner of the heel.
So, cutting the heel at an angle will move the corner, (Yellow Arrow) away from the stabilizer about a ¼ inch more, the (blue arrow).
The green arrow is where it has ridden on the tang. This is the cause of all your issues.
 Montgomery likes this.
-
The Following User Says Thank You to Euclid440 For This Useful Post:
Montgomery (06-08-2020)


 Reply With Quote