
Results 18,551 to 18,560 of 20573
 91473Likes
Thread: What are you working on?
 LinkBack URL
 About LinkBacks
-
06-08-2020, 04:32 PM #18551Senior Member

- Join Date
- Sep 2009
- Location
- Plymouth, UK
- Posts
- 313
Thanked: 19 Many thanks!
 Originally Posted by Euclid440

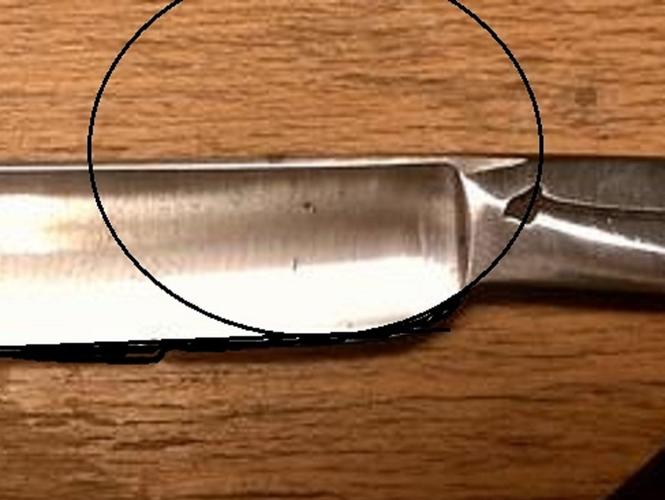
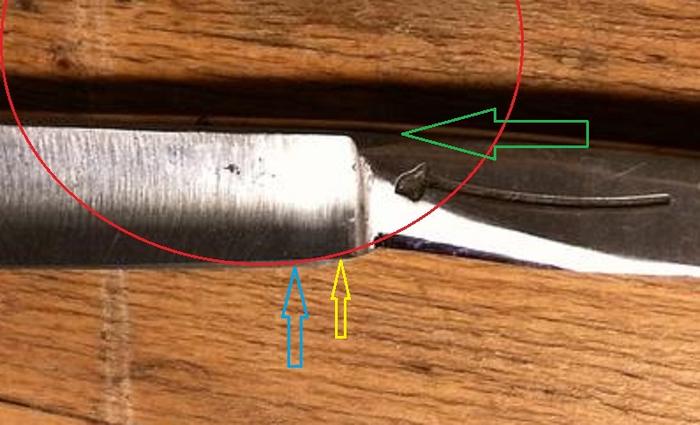
I am aware that heel work is an area where I need to refine my skills. As a general principle, would you say that the heel profile should be settled first, before re-profiling the blade? I have generally approached it the other way, thinking that the heel profile can only be settled once the final profile of the blade is apparent. It seems there is something missing from my methodology, because I do not find it easy to deal with this type of issue.
I do see that the tang had ridden onto the hone at some point in this razor's past, in what way does this cause problems?
In any case, I am reasonably clear on how to proceed. Despite the inelegant appearance of the heel, the bevel set was easy enough, with a bit of care when honing close to the stabiliser. I do not anticipate any great issues completing the honing. Famous last words perhaps!
-
06-08-2020, 05:08 PM #18552Senior Member


- Join Date
- Apr 2012
- Location
- Diamond Bar, CA
- Posts
- 6,553
Thanked: 3215
Yes, the heel should be reprofiled to give you access to the heel corner, where the straight edge ends and the curve begins. Other wise when you hone the heel will be off the stone.
In your case it is a double whammy because the corner is so far back, and the width has been reduced so much you have very little heel.
Had the heel been reprofiled first you may not have had to remove so much of the blade, hard to say.
Even once you reprofile a heel, regular honing will reduce blade width and move the heel corner back towards the stabilizer. So, it may need to be touched up again. Especially when removing a chip or any edge correction where more steel is removed from the edge.
Most of the razors I see, are in need of some heel correction. If you make heel correction part of regular honing, it is just a few swipes on a 1k diamond plate or stone.Montgomery likes this.
-
The Following User Says Thank You to Euclid440 For This Useful Post:
Montgomery (06-08-2020)
-
06-08-2020, 06:51 PM #18553Senior Member


- Join Date
- Feb 2016
- Location
- San Antonio, TX
- Posts
- 1,840
Thanked: 428
That pipe razor is looking pretty good! Get it to where you want it, not where we want you to get it! You'll be just fine!
Montgomery likes this.Semper Fi !
John
-
The Following User Says Thank You to Johntoad57 For This Useful Post:
Montgomery (06-09-2020)
-
06-08-2020, 09:14 PM #18554King of the Shorties


- Join Date
- Aug 2014
- Location
- Columbia, Maryland
- Posts
- 547
Thanked: 64
Still experimenting with JNats and the King Pelican. This time, an Ozuku...

And sealed this Nakayama with some spar urethane since I couldn't source any cashew lacquer...
 Recovered Razor Addict
(Just kidding, I have one incoming...)
-
06-09-2020, 03:08 PM #18555Senior Member
- Join Date
- Apr 2012
- Location
- Diamond Bar, CA
- Posts
- 6,553
Thanked: 3215
Craft Acrylic clear sealers, are inexpensive, easy to find and apply. They dry quickly so multiple coats can be applied in a day. It can also be tinted if you want the Cashew look.
Brushing on applies thicker coats and offers more protection.Aldwyn likes this.
-
06-09-2020, 03:44 PM #18556King of the Shorties
- Join Date
- Aug 2014
- Location
- Columbia, Maryland
- Posts
- 547
Thanked: 64
Exactly! Three coats in one day, and Bob's your uncle! I think it looks pretty good, though I am not sure I like the glossy I used... maybe a semi-gloss would be better next time. Originally Posted by Euclid440
Recovered Razor Addict
(Just kidding, I have one incoming...)
-
06-09-2020, 05:50 PM #18557Senior Member

- Join Date
- Feb 2013
- Location
- Haida Gwaii, British Columbia, Canada
- Posts
- 14,450
Thanked: 4829
Gloss is way harder than satin, but if you like the satin look just top coat it with satin and you will have the best of both worlds, although in this case I’m not sure it matters much,
It's not what you know, it's who you take fishing!
-
06-13-2020, 11:47 PM #18558Senior Member

- Join Date
- Feb 2015
- Location
- Duluth, GA - Atlanta OTP North
- Posts
- 2,546
- Blog Entries
- 1
Thanked: 315
When I think, "I can work on this for a few minutes while my daughter is preoccupied."
 - Joshua
-
06-15-2020, 08:22 PM #18559Senior Member


- Join Date
- May 2010
- Location
- Upstate South Carolina
- Posts
- 3,308
Thanked: 987
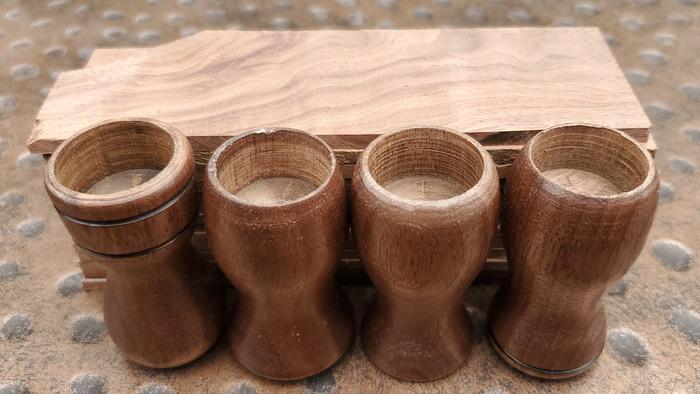
So I got another haul of wood and materials here. My local woodworker friend who made my walnut hone base for that huge Arkie made all of this from the walnut cut-offs, and threw in a bunch of other ones while he was at it.
Some walnut blanks and brush handles he turned for me:
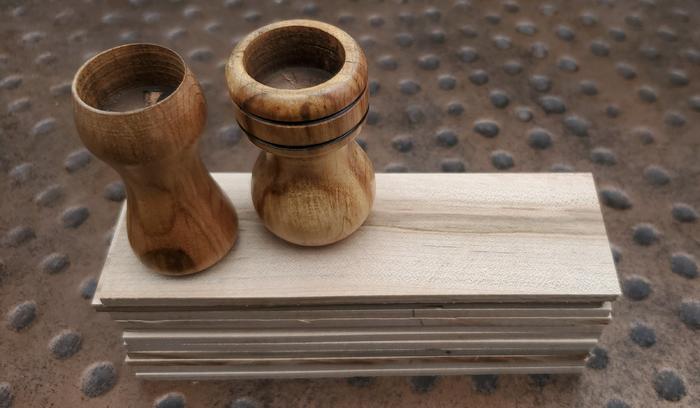
He had some ambrosia maple to work with too:
Finally, he had some cutoffs from his cutting boards and pepper mills, which he does a lot of in laminate:
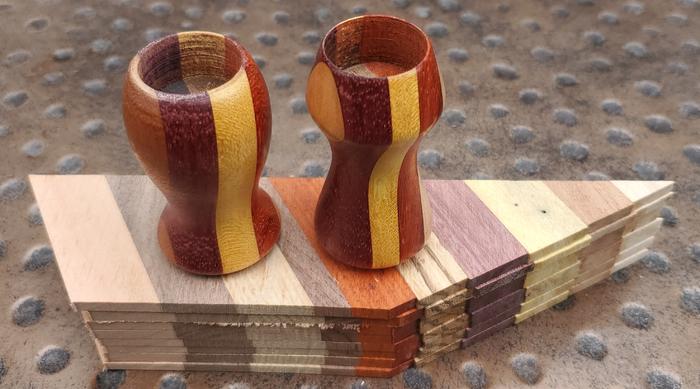
He wouldn't take a dime from me for all of this; he just wants a matching straight and brush in the laminate, which is one of his signature styles as in the webpage here: https://www.ballewwood.com/mills. Consider it done! (I'm pretty sure I'll need to epoxy that laminate to a G10 liner for stability).
Any of you who like to make wooden scales should befriend a local woodworker-Woodworkers always have cutoffs! (It probably helps that we've bought a good half-dozen of his cutting boards for wedding and Christmas presents. Anyways, now I'm stocked up on wood blanks again!There are many roads to sharp.
-
06-15-2020, 08:46 PM #18560Senior Member

- Join Date
- Dec 2018
- Location
- Gainesville, FL
- Posts
- 6,621
Thanked: 670
Righteous!
 ScoutHikerDad likes this.Iron by iron is sharpened, And a man sharpens the face of his friend. PR 27:17


 Reply With Quote