
Results 19,471 to 19,480 of 20573
 91473Likes
Thread: What are you working on?
 LinkBack URL
 About LinkBacks
-
06-23-2021, 01:30 PM #19471Senior Member


- Join Date
- Feb 2013
- Location
- Haida Gwaii, British Columbia, Canada
- Posts
- 14,448
Thanked: 4829
The razor is looking good for sure. The scales and wedge look nicely fitted.
The shredded interior getting apart and together in the same day is also pretty impressive.
That paint job on that Camaro looks great, it is going to be a spectacular car.
I appreciate the wide spectrum of skills in this thread.It's not what you know, it's who you take fishing!
-
06-23-2021, 03:21 PM #19472Razor Vulture

- Join Date
- Oct 2010
- Location
- Lone Star State
- Posts
- 26,144
Thanked: 8616
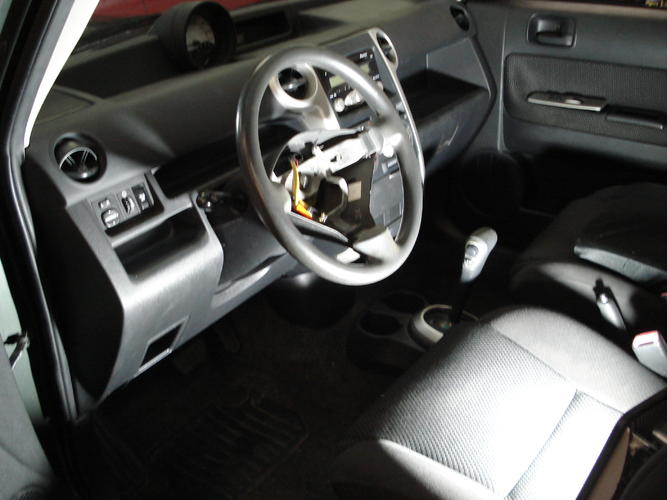
Got it back together last night after receiving the wrong evaporator and doing some stepping to find the correct one.
Some fan belts, oil change, evacuate and charge with a little drive to be certain I centered the steering wheel, I will tighten the wheel and install the airbag. Done.
I don't mind doing these, but I wish I could get 4 back to back while I have the zipper figured out.
All ofem are so different.
-
06-24-2021, 10:41 PM #19473Senior Member

- Join Date
- Dec 2018
- Location
- Gainesville, FL
- Posts
- 6,612
Thanked: 670
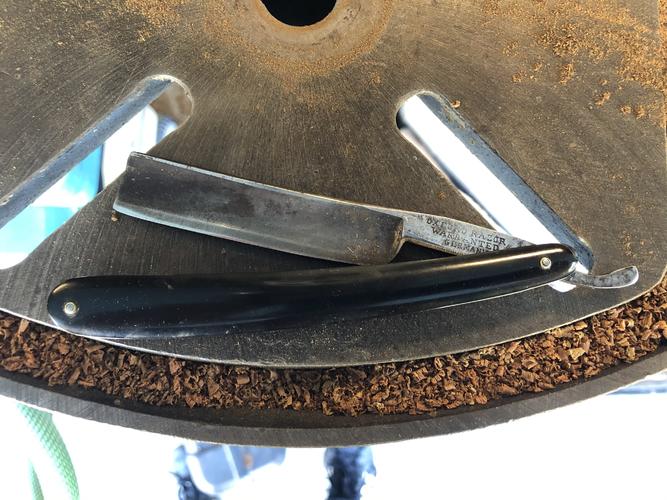
Boy I wish I had gotten some good before pics of this one but I think this re-regrind/regrind repair has come out pretty well especially considering how wrecked it was before and also since I have done it all freehand.
The guide plate on my belt grinder (2X72) is down on the flat and no way to put it.on the 4inch wheel so I have been just freehand holding it on the wheel. I'm not done yet but I think it will come out alright.
I think I am going to replace the scales on this one since they have so much delamination.Gipson likes this.Iron by iron is sharpened, And a man sharpens the face of his friend. PR 27:17
-
06-24-2021, 11:34 PM #19474Senior Member

- Join Date
- Jan 2015
- Location
- Pinole, ca
- Posts
- 1,526
Thanked: 339
Paul, I find it helpful to run the blade with no tape on a hone to show you how high you can grind the top of the hollow and to the edge. Make sure the bevel is set, not perfect just toe to heel. Theyll be your grinding guides. Dont go past the lines. When you get the edge really close to zero bevel use a scooping motion from spine to edge. You will eventually grind through at the edge. If youve kept your grinding even it will correct the geometry as well as give you the smallest possible bevel. Ill hit Bruno up and see if he can expound on it at all. He linked a video not so long ago showing the technique. The way I used to do it was all the same except I didnt grind to zero, just until the bevel was tiny and even. I wouldnt use anything less than 220 grit when you get close to a zero grind. It will look like you destroyed the blade when the edge starts to tear away. You want it feathered all the way across the edge. Take it to a diamond plate 300-600 grit and in about 5-10 laps you should have a really clean and even bevel. After that run through your grits and make sure to get out all the way to the edge with the hollow grinding.
Make sure the belt is new or near new when you do the initial zero grind, youll make your life easier.Last edited by jfk742; 06-24-2021 at 11:36 PM.
PaulFLUS likes this.
-
The Following User Says Thank You to jfk742 For This Useful Post:
PaulFLUS (06-25-2021)
-
06-25-2021, 12:46 AM #19475Senior Member
- Join Date
- Dec 2018
- Location
- Gainesville, FL
- Posts
- 6,612
Thanked: 670
That's kind of what I have been doing all the way up to grinding all the way to the edge. I haven't been going all the way to the edge. I've stopped just before it. I would really like to see that video. If you're not able to post a link it I'll search it.
You should have seen the mess they made of it before I got it. Even after all of the grinding that I've done I still haven't gotten to the bottom of a deep gouge they put 3/4 of the way to the heel on the one sideIron by iron is sharpened, And a man sharpens the face of his friend. PR 27:17
-
06-25-2021, 04:45 AM #19476Senior Member
- Join Date
- Jan 2015
- Location
- Pinole, ca
- Posts
- 1,526
Thanked: 339
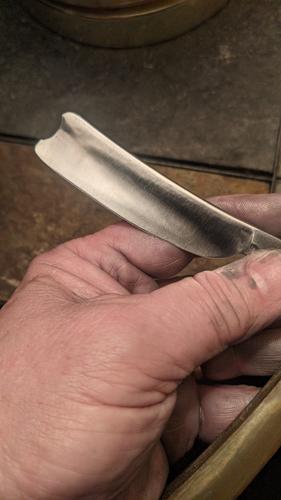
I messed around with this bellied hollow. Took some progression shots but no video. I went to the edge as well. It was too likely for me to make a mistake to try and go to zero.
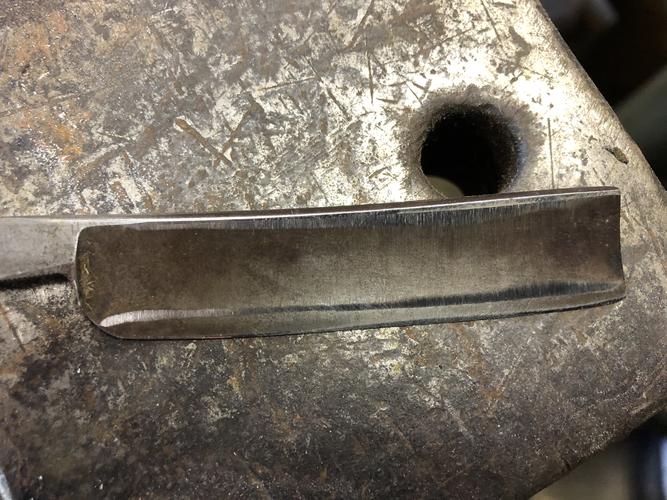
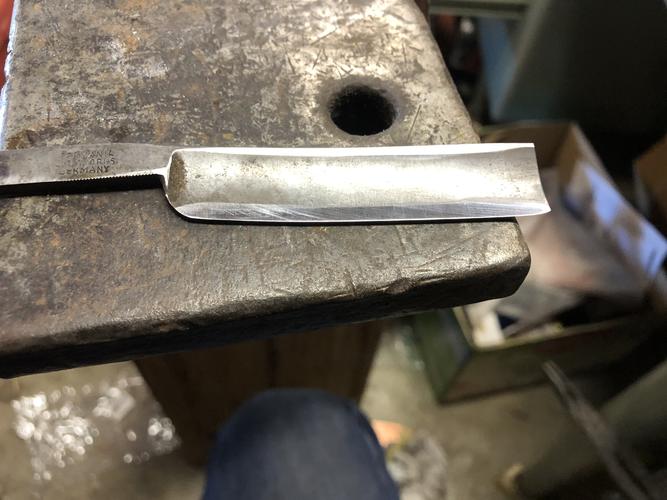
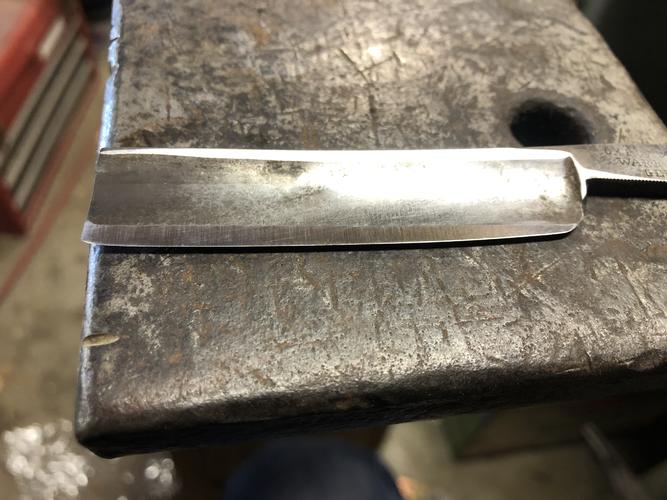
I started with a 3”, turned out it was a little too big. You should be able to see the grinding in the 3rd and 4th photos. It helped define what the original grind was doing.
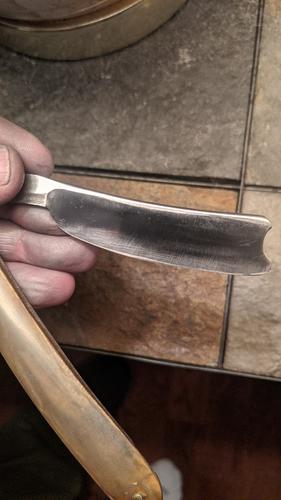
5th and 6th are when I switched to a 6” wheel and did a few passes to see what that was looking like. All looked good to me so I continued for awhile until the original bevel was gone. I then used a worn 325 dmt, no tape. I set the bevel well enough that most the blade was grabbing my thumbnail.
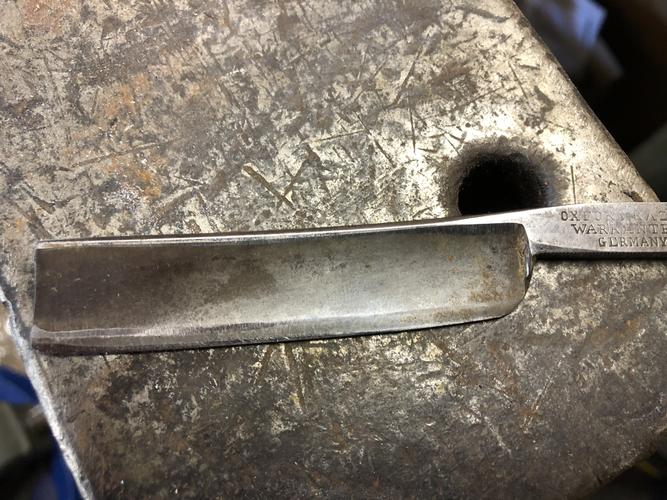
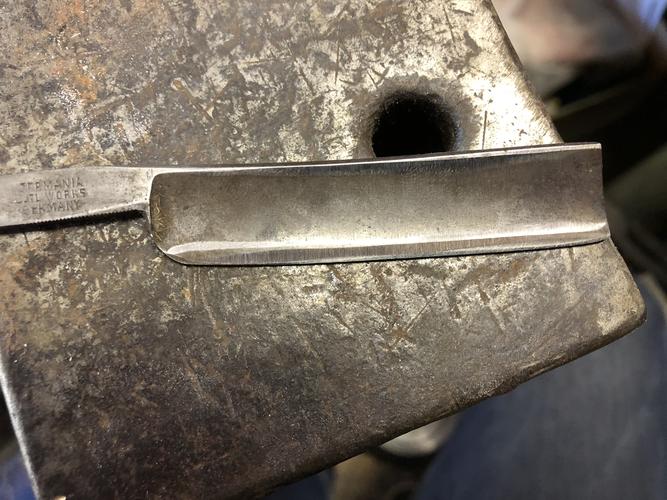
Photos 7 and 8 is after I ran over the new bevels that I cut with the 6” wheel. I cut the edge off the razor then set a new bevel to see how even it was. Looks pretty good to my eye. This is the first full hollow I’ve reground. Most full hollows can’t take a regrind. This was a razor I would t have been sad to lose to a science experiment.
Unfortunately it won’t do much to help you with that particular razor. Hopefully it demonstrates what you can achieve in bevel height and evenness. Despite how the spine currently looks I didn’t lose any width at the spine hone contact area. Once I get an axle back into my 2” wheel I’ll clean up the secondary hollow.
What you want to do with your razor is different from how I had to grind the full hollow. I traverse the blade across the wheel. You’ll need to do the same to get yourself an even starting point at the spine. If there is no more hone wear visible from your regrinding just give it a rub on a flat coarse hone. Now that you can see what the junction from the spine to hone wear on the spine connect. Grind that back as far as you need to to get the hollow you’re creating to be a nice straight line parallel to the top of the spine.
One thing to avoid that I’ve killed a couple of razors with is trying to keep the line parallel to the spine all the way back to the shoulder. Razors are always ground with a tapered tang. That taper almost always extends to at least the heal. There will be a taper there where the hollow will appear shorter than the rest of the blade, it’s not it’s just a function of the geometry. This may be old news to you but i didn’t realize it until I blew a hole through a full hollow I was making. On a wedge it won’t be an issue but the reflection off the finished hollow will have a big warp in it and it looks bush league.
Ok, now that the hollow at the spine is even start the scooping motion. You’re just trying to remove enough metal to get the pits to an acceptable level for you. I don’t have an opinion on that, it’s your razor. Now keep working your way across the blade. Keep a close eye you don’t run over your original line at the spine. If you left a little line there you should have some room for a few mistakes. Either way not the end of the world. Just work your way back and forth rolling the razor from the spine to the edge. If you blow through your bevel that you cut as an indicator it doesn’t really matter but you do want to try and make that line straight and small. This will help you get the muscle memory for when you actually roll the edge into the wheel. Once that bevel is teeny tiny and even slow the grinder down a little more. Clean the spine side up a little if it’s wonky, then go back to the scooping/rolling motion. You want to get closer and closer to rolling the razor enough that you just touch the edge on the belt. Listen for a pitch change while you’re grinding. The edge will ring when you get to it, it will make another noise if you go too far. It’s obvious when it happens. I would do this part with a sharp 400 grit or there abouts. 220 works for Bruno but for me it’s too aggressive for when I make an error grinding. Now just keep going until the edge starts to crumble or feather. Once you get to this point make sure to do a pass maybe two then switch back to the other side. You don’t want to ruin all the time you took keeping the grind even all the way down the razor hollows. Once that edge is feather all the way take it to a hone and lightly stroke it until all the burr comes off. You should have really nice little bevel as well as geometry correct razor. After that you can do any clean up of lines you may have blown. Again since you set the bevel again you should have a nice new line of hone wear. Now grind that to whatever width you like for where the spine will contact the hone. If you hone with tape I would leave a little flat there then blend it in during hand sanding, this helps not burning through the tape.
I’ll keep looking for that video. I think he has done two of them. They’re a little impromptu but all the info is there, plus you can here the pitch change as he hits the edge.
-
The Following User Says Thank You to jfk742 For This Useful Post:
PaulFLUS (06-25-2021)
-
06-25-2021, 11:34 AM #19477Senior Member
- Join Date
- Dec 2018
- Location
- Gainesville, FL
- Posts
- 6,612
Thanked: 670
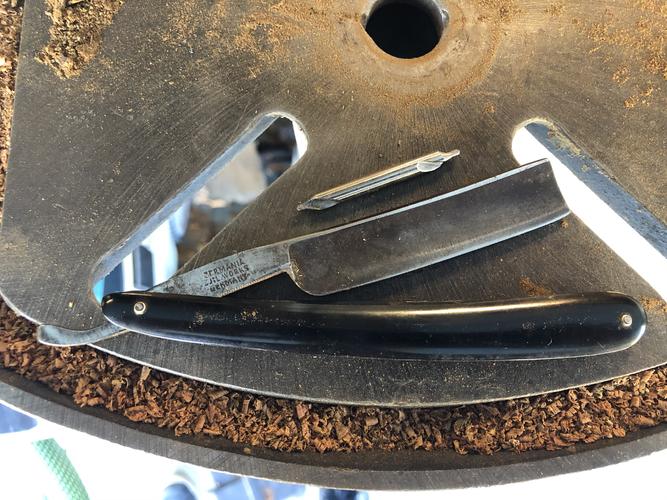
Wow! Thanks for all that. Great tutorial. This razor and maybe my aims are a little different than the one you showed but that shouldn't change the method. Mainly I was trying to salvage what the previous grinder did...or started to do. You know how looking at something tells a story?
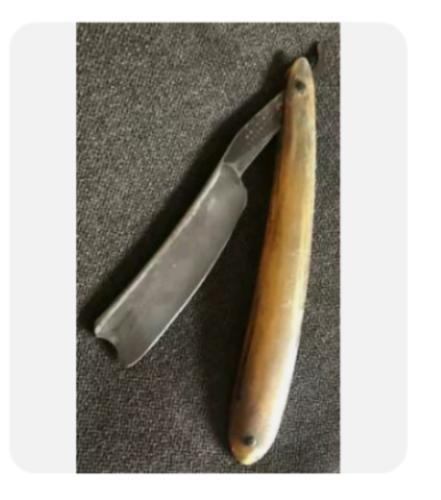
Even though this pic is low res and not very good you can see near the heal how they went too far in. It was the same on both sides but on the opposite side they went really off the rails in the same spot. I think they were using a grinder instead of a belt sander, my guess is it caught and put a deep gouge then that's where they stopped. There was over an inch where the bevel didn't even touch the stone. You could stick the tip of a small screwdriver between it and the stone it was so spent. That's when I think the gut check came. It's obvious that they didn't finish.
Unfortunately I don't have a very versatile belt sander. Mine is a Bellsaw one my dad got in a sharpening business he bought in the 70s. I need to either buy or build one that is. I have seen some plans for one. I think it was Charlie who did a video of one he built. Even so I should still be able to do what you described. I just don't have the luxury of a rest plate at my wheel, only on the long downward stretch with the support behind it so I will have to freehand it. I'll update as I go. Again thanks for that.
 Iron by iron is sharpened, And a man sharpens the face of his friend. PR 27:17
-
06-25-2021, 03:52 PM #19478Senior Member
- Join Date
- Jan 2015
- Location
- Pinole, ca
- Posts
- 1,526
Thanked: 339
I do everything freehand except for profiling, I use a tool rest to lay the razor flat.
I think of hollow grinding like setting a bevel. You can feel when the razor is where it should be on the wheel. This is a big reason why I like to match the wheel as close to the grind radius as possible when regrinding. With a 4” wheel I get a little lost on the wheel as I’m grinding a wedge or 1/4 hollow. Meaning I can’t feel where I’m grinding. Watching the sparks is good practice too. The sparks tell you where the grinding is taking place, it is also tactile. Pay attention to your fingers and what they sense for a given action. There is a ton of feedback that I think is overlooked because we rely so much on our eyes to interpret the world and forget about our other senses as being equally important. Get a feel for how much material is ground away, this will cut down on the grind and look, grind and look cycle that slows down the process. That causes more chance that you end up with grinder mistakes. Every time you put the razor back on the wheel there’s a chance you don’t present it flat and have a little catch or create a low spot in your grind. This is extremely frustrating as you get close to finished on the grinder.
I bought a bunch of trashed looking razors to practice these techniques before just going for it. If you need practice blades I can send you a few. Just on if you’re interested.
Sorry for blowing up the thread guys. I sent messages to Bruno and Randy, though Randy is extremely busy right now, I know he knows how to find that video. I believe he was the one who recorded it.
-
The Following User Says Thank You to jfk742 For This Useful Post:
PaulFLUS (06-25-2021)
-
06-25-2021, 08:04 PM #19479Senior Member
- Join Date
- Jan 2015
- Location
- Pinole, ca
- Posts
- 1,526
Thanked: 339
Paul, Bruno was kind enough to supply the link to the video I had in mind.
FYI: I grind edge leading throughout the process. There is a definite possibility of catching. My body mechanics dont allow me to grind the way you see Bruno doing. The foil has a different look to it and generally tears away. Mind you at this point Im using 320-400 grit and the grinder is running slow. Listen closely to the video and you can hear the pitch start to change as he gets close to the edge, then a definite change as he reaches the edge. That for me is the best indicator of where I am on the wheel and blade face. The sparks show you where you are grinding. If I have a high spot I locate it visually then put a finger on the opposite side of the blade to make sure Im grinding exactly what is high and not creating a low spot somewhere else.
With the edge leading grinding I go to zero then remove the foil/burr with a diamond plate, verify that the bevel is consistent from heel to toe. For any issues with the new bevel I use the method above to concentrate on those areas until they come into line and the edge and top of bevel are parallel. Is set the bevel one more time usually just make double sure its good then run the edge a time or two on the hone so I dont filet myself later.
http://www.youtube.com/watch?v=lMZ3StuX35MLast edited by jfk742; 06-25-2021 at 08:35 PM.


 Reply With Quote
06-25-2021, 11:34 PM
#19480
- Join Date
- Dec 2018
- Location
- Gainesville, FL
- Posts
- 6,612
Thanked: 670
Awesome! Thanks again for doing all of that and finding the video. I'll study that intently.
Concerning your comment earlier about whether this was old news, I have made a couple of attempts to make a razor out of an old file which have failed but I've never really tried regrinding beyond some pretty minor spot repairs. This one was basically a paperweight otherwise. As to your offer for junk razors, I feel certain I have at least one or two. Lord knows I have a slew of them that need to become wind chimes that came with lots I bought specifically for one or two razors in the bunch. I will definitely keep that offer in mind though and I certainly appreciate your generosity.
I didn't really start this with the intention of learning to regrind, just to try to salvage this one but I've been having a lot of fun with it. It is strangely satisfying to watch it take shape as you work on it, getting a little closer every time you stop to look. It makes me think of one of those kids archeology toys where they get a big chunk of stuck together sand and they chip it away and find a dinosaur inside.
I think I may have discovered a new affliction: BSAD, belt sander acquisition disorder. This may also be my opportunity to make that hexe machine I've been threatening to build.
Once again my sincerest gratitude for your kind offer of razors and for all of the helpful instruction sensei.

jfk742 likes this.
Iron by iron is sharpened, And a man sharpens the face of his friend. PR 27:17
The Following User Says Thank You to PaulFLUS For This Useful Post:
jfk742 (06-26-2021)
